How Do You Use A Mitre Box
Hey there, DIY enthusiasts and aspiring woodworkers! So, you've got a project on your hands, maybe a little picture frame you're crafting, or perhaps you're bravely tackling some baseboards. And you've heard whispers, maybe even seen a glint of metal and plastic, about something called a "mitre box." Don't let the fancy name scare you off! Think of it as your new best buddy for making those perfectly angled cuts that make your projects look like they came straight out of a fancy furniture catalog. No more wonky corners that make you want to hide your work from your mother-in-law. We're talking clean, crisp, professional-looking cuts, and guess what? It's actually super easy!
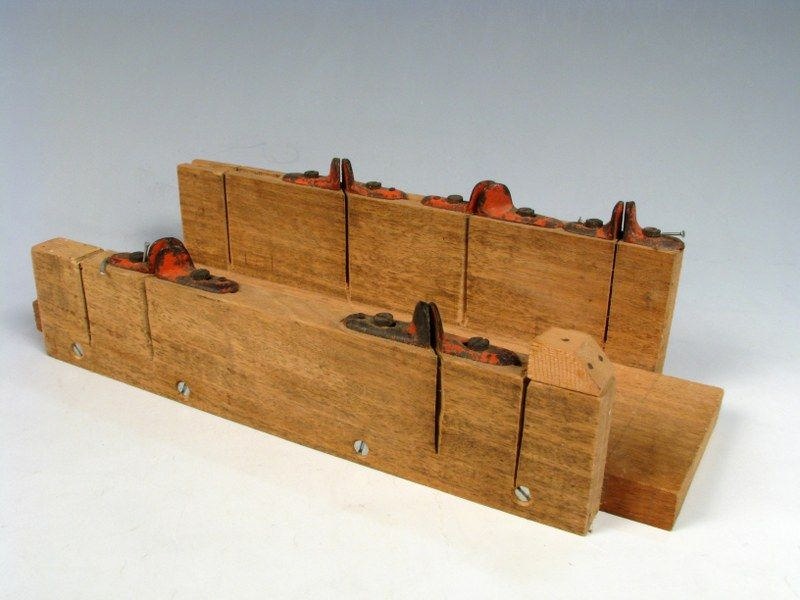
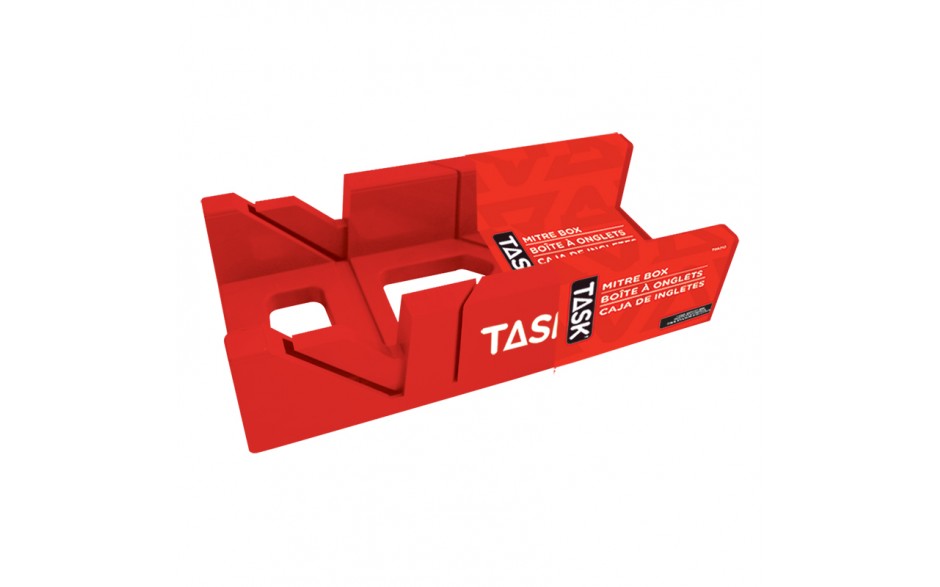
Let's dive in. What exactly is this magical mitre box? Imagine a sturdy little contraption, usually made of wood or plastic, with slots cut into its sides. These slots are your secret weapons. They're precisely angled, typically at 45 and 90 degrees, and they guide your saw, ensuring that your cut goes exactly where you want it. It's like having a tiny, incredibly precise carpenter holding your saw for you. Pretty neat, right?
Now, before we get our hands dirty, let's chat about what you'll need. Besides your trusty mitre box, you'll definitely need a saw. For most beginner projects and typical mitre boxes, a hand saw is your go-to. You don't need anything super fancy, just a decent saw with a fine blade. Think of it like picking the right paintbrush for a painting; the right saw makes all the difference. You'll also need the piece of material you want to cut – let's call it your "woodling" for fun – and something to mark your cut line, like a pencil or a marking knife. Safety first, always! So, a pair of safety glasses is a non-negotiable. And maybe some ear protection if you're going to be sawing for a while. Nobody likes sawdust in their ears. Trust me.
Must Read
Getting Started: Setting Up Your Mitre Box
Alright, let's get this show on the road! First things first, you need to find a stable surface. A workbench is ideal, but a sturdy table will do in a pinch. You want something solid so your mitre box doesn't wobble around like a jelly on a trampoline. Once you've found your spot, place your mitre box on it. Most mitre boxes have a base, and some even have little rubber feet to keep them from sliding. If yours doesn't, you might want to put a damp cloth underneath or some non-slip matting. We're aiming for rock-solid stability, folks.
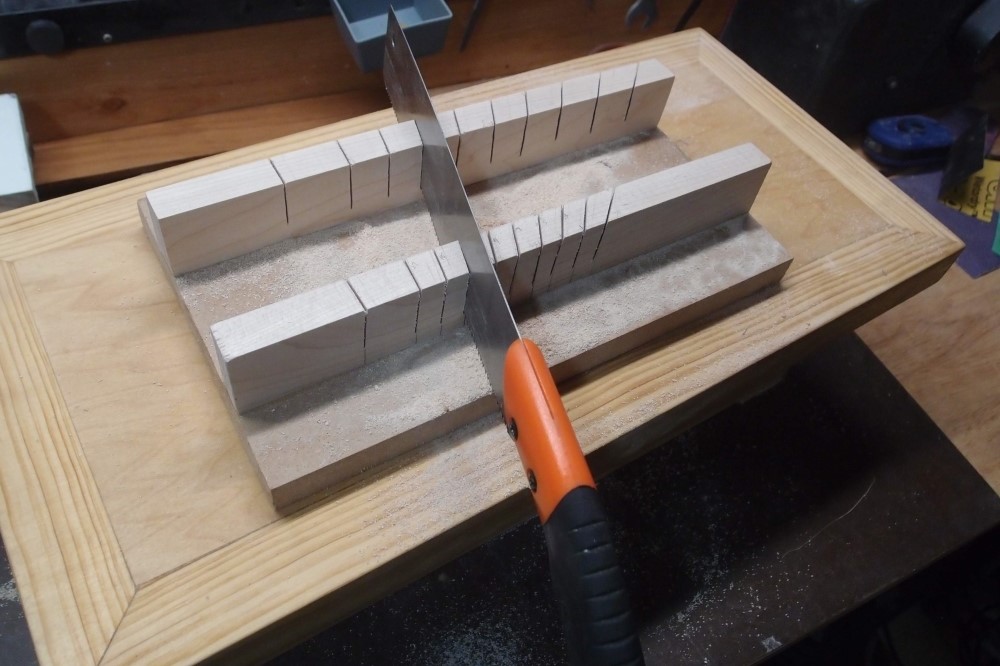
Now, take your woodling and place it inside the mitre box. The key here is to get it snug. You want it to be pressed firmly against the back and the side of the mitre box. This ensures that your cut is not only at the correct angle but also straight and true. Imagine you're tucking your woodling into bed – nice and cozy and perfectly positioned. If you're cutting a wider piece, make sure it fits comfortably within the box. If it's too wide, you might need a larger mitre box or consider a different cutting method (but for now, let's assume your woodling is a good fit!).
Next up, you need to decide which angle you need. For most simple projects like picture frames, you'll be aiming for 45-degree angles. These are the ones that join together to make a neat 90-degree corner. If you're building a box or something with a more complex shape, you might need different angles, but 45 and 90 are your bread and butter for now. Look at the slots in your mitre box. You'll see clear markings for the angles. Pick the slot that corresponds to the angle you need.
Making the Cut: The Sawing Symphony
This is where the magic happens! Grab your saw. For hand sawing, you'll want to hold the saw with a comfortable grip. Imagine you're about to carve a masterpiece, but you know, a lot less pressure. The mitre box is doing most of the hard work for you in terms of guidance.
Position the saw blade within the chosen slot. Make sure the blade is sitting nicely in the groove. Now, here's a crucial tip: start with a gentle sawing motion. You don't want to just jam the saw down and yank it. Think of it as coaxing the wood, not wrestling with it. A few light strokes to create a small groove, or "kerf," are perfect. This little groove will help guide the rest of your cut.
Once you've got that initial groove, you can start applying a bit more pressure. Keep the saw straight up and down, perpendicular to the base of the mitre box. The sides of the slot are your guides here. Let the saw do the work. You'll find that a steady, consistent rhythm is key. Don't rush it! Trying to speed through a cut will often result in a ragged edge, and nobody wants a raggedy edge. Patience, my friends, is a virtue, especially when wielding a saw.
As you get towards the end of the cut, ease up on the pressure a little. You don't want to accidentally snag the woodling on the way out and splinter the end. A nice, smooth finish is what we're after. And then, voilà! You've made a perfectly angled cut. Take a moment to admire your handiwork. You just conquered a mitre cut like a pro!
Tips and Tricks for Mitre Box Mastery
So, you've made a cut. Awesome! But what if it's not quite perfect? Don't fret! There are a few little tricks up our sleeves to make your mitre box experience even smoother.
First off, practice makes perfect. Seriously. Grab some scrap wood (the kind you don't mind messing up) and just go at it. Make a few 45-degree cuts, then a few more. The more you do it, the more natural it will feel, and the better your cuts will become. It's like learning to ride a bike – a few wobbles at first, then you're cruising!
Secondly, check your saw blade. Is it sharp? A dull blade will make sawing a chore and lead to rough cuts. If your saw is feeling sluggish, it might be time for a new blade. They're not that expensive, and they make a world of difference. Think of it as giving your saw a nice, sharp new pair of scissors.
Thirdly, consider your wood. Different types of wood behave differently. Softwoods like pine are generally easier to cut. Hardwoods can be a bit more stubborn. If you're working with a particularly tricky piece of wood, go extra slow and steady. Sometimes, a little bit of wax applied to the saw blade can help it glide through tougher materials.
Fourth, don't force it. I know I've said it a few times, but it bears repeating. If the saw is binding or feels like it's getting stuck, stop. Check if your woodling is still snug, make sure the saw is in the slot properly, and then resume with a gentler touch. Forcing the saw will only lead to frustration and potentially a broken blade or a splintered piece of wood.
Fifth, use both sides of the mitre box. Most mitre boxes have slots on both sides for angled cuts. This is super handy because it means you can make left-hand and right-hand mitre cuts without having to flip your workpiece or the box. Just select the appropriate slot on the other side of the box.
Sixth, keep it clean. Sawdust can accumulate in your mitre box, making it harder to get a good fit for your wood. Give it a quick brush out after each use. A clean tool is a happy tool, and a happy tool makes for happy projects!

When to Use Which Angle
This is where you get to be the architect of your project. Let's break down the common angles and what they're good for:
The 90-Degree Cut: The Square Deal
Ah, the humble 90-degree cut. This is your straight-up, no-nonsense cut. You'll use this when you need a piece of wood to be perfectly square, like when you're cutting a shelf to length or trimming a piece to fit flush against a wall. In your mitre box, you'll find slots that are perfectly vertical. They're usually the widest and most obvious ones. Just align your woodling and saw straight down.
Think of it like this: if you're building a basic box, all the sides will need to be cut at 90 degrees so they can fit together neatly. It's the foundation of so many woodworking endeavors. Don't underestimate the power of a good, solid square cut!
The 45-Degree Cut: The Corner Connoisseur
Now, this is where the "mitre" in mitre box really shines! The 45-degree cuts are your ticket to creating those beautiful, seamless corners. When you put two 45-degree cuts together, they form a perfect 90-degree angle. This is why they're essential for picture frames, molding, and any project where you need to join two pieces at a corner.
Imagine you're making a rectangular picture frame. You'll need four pieces of wood. Two will have 45-degree cuts on one end, and the other two will have 45-degree cuts on the other end. When you butt these together, you get those lovely, sharp corners. It's a little bit of geometry magic!
You'll notice your mitre box will have slots angled at 45 degrees, usually on both the left and right sides. This is so you can easily create both the "pointy" end and the "outward angle" end of your frame pieces. Just remember to measure carefully where you want your cut to start on your woodling, and then use the mitre box slot as your guide.
Other Angles: For the Adventurous Soul
Some mitre boxes will offer more angles, like 22.5 degrees or even custom angle settings. These are fantastic for more complex projects, like creating octagonal shapes or intricate trim work. If you find yourself needing these, don't be afraid to experiment! Just make sure your woodling is securely clamped and you're using the appropriate slot with confidence.
For example, if you're building a gazebo or a decorative ceiling feature, you might encounter angles that aren't your standard 45 or 90. These specialized angles allow for more elaborate designs and a truly unique finish. But for 90% of your DIY projects, the 45 and 90-degree cuts will be your best friends.
The beauty of the mitre box is its simplicity. It takes the guesswork out of precise angled cuts, making it accessible to everyone. You don't need years of training to get a clean, professional-looking result. Just a little bit of patience, a steady hand, and the right tool.
So, there you have it! Using a mitre box is really that straightforward. It’s not some arcane woodworking secret. It’s a simple, effective tool that democratizes precise cuts. You've got this! Go forth and cut with confidence. Each perfectly angled piece you create is a testament to your growing skills and your willingness to tackle new challenges. You're not just cutting wood; you're building confidence, one clean, crisp cut at a time. And that, my friend, is a project worth smiling about. Happy building!

