How To Use The Tower Air Fryer

Hey there, my kitchen ninja friend! So, you’ve snagged yourself one of those awesome Tower air fryers, huh? High five! You’re about to embark on a culinary adventure that’s going to revolutionize your weeknights and make your taste buds sing. Forget those greasy, oven-baked monstrosities of the past. We’re talking crispy, golden, and ridiculously delicious food, made with way less oil and in a fraction of the time. It’s like magic, but with a fan and a heating element. Pretty neat, right?
Now, I know that shiny new appliance might look a little intimidating at first. All those buttons and knobs can feel like you’re trying to decipher an alien spaceship control panel. But trust me, using your Tower air fryer is actually a total breeze. We’re going to break it down, step-by-step, so you can go from unboxing to air-fried perfection in no time. Get ready to say goodbye to soggy fries and hello to crispy dreams!
Getting to Know Your New Best Friend
First things first, let’s have a little chat with your air fryer. Think of it as getting to know a new pet – you want to understand its quirks and how to make it happy. Most Tower air fryers come with a handy manual, and while it might not be the most thrilling bedtime read, it's your secret weapon. Give it a quick skim, especially the safety instructions. Nobody wants a kitchen meltdown, right? Plus, it’ll tell you the specific names of all the cool bits and bobs your model has.
Must Read
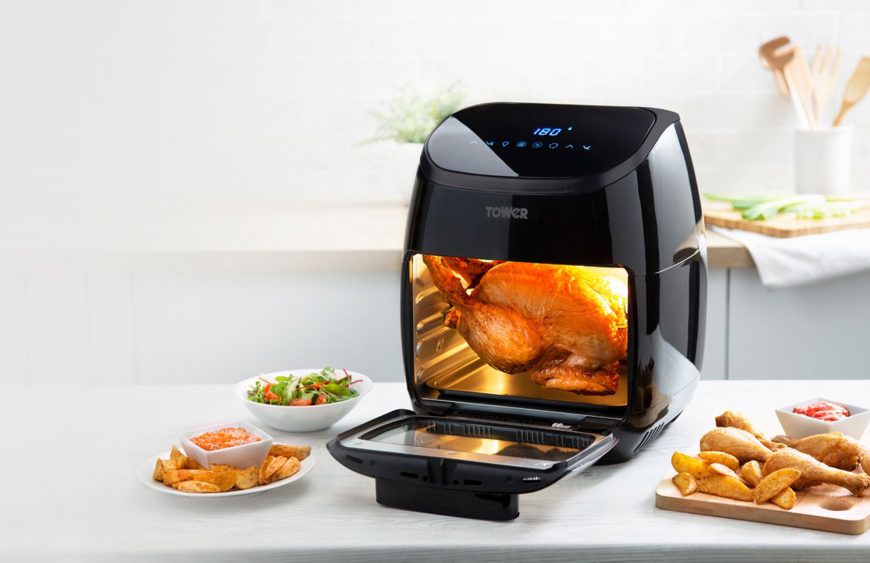
You’ll usually find a basket or a tray where all the deliciousness happens. This is the star of the show! It’s typically non-stick, which is a lifesaver for cleanup (more on that later!). Some models might have different racks or accessories, so take a peek and see what goodies you’ve got.
The Big Unboxing and First Use
When you first unbox your air fryer, it’s a good idea to give it a quick wipe down with a damp cloth. Just to get rid of any manufacturing dust or packaging residue. Then, before you cook anything, most manufacturers recommend running it empty for about 10-15 minutes at a medium-high temperature (around 200°C or 400°F). This helps burn off any residual manufacturing oils. It might smell a little funny the first time, but that’s totally normal. Think of it as a spa treatment for your new appliance before it gets down to business.
Once that initial run is done, let it cool completely. And voila! Your air fryer is officially ready for its close-up. No more excuses, it’s time to cook!
The Absolute Basics: How to Actually Cook Something
Okay, let’s dive into the fun part – cooking! It’s surprisingly simple, I promise. Think of it like a mini convection oven that circulates hot air super efficiently.
Step 1: Prep Your Food
This is where the magic begins. For most things, you’ll want to toss your food with a tiny bit of oil. We’re not talking about drowning your ingredients here – just a light coating is usually enough to get that crispy texture. A tablespoon or two is often all you need for a whole batch of fries or chicken wings. You can use olive oil, vegetable oil, avocado oil – whatever floats your boat! Some recipes might even call for a little spray oil, which is super handy for even distribution.

Now, don’t be afraid to get creative with seasonings! Salt, pepper, paprika, garlic powder, onion powder, dried herbs… the world is your oyster (or your chicken nugget!). Toss your food in a bowl with your oil and seasonings, making sure everything is nicely coated. This is the part where your inner chef can really shine!
Step 2: Load Up the Basket
This is a crucial step for getting that perfect crispy result. You want to avoid overcrowding the air fryer basket. Think of it like giving your food space to breathe (and crisp up!). If you stuff too much in there, the hot air can’t circulate properly, and you’ll end up with sad, soggy bits. It’s better to cook in batches if you’re making a large quantity. Your air fryer will thank you, and your stomach will too.
Make sure to arrange your food in a single layer as much as possible. If you’re cooking things like fries or chicken tenders, give them a little shake to ensure they aren’t all clumped together. This helps achieve that glorious, uniform crispiness we’re all aiming for.
Step 3: Set the Temperature and Time
This is where you’ll look at your recipe (or your best guess!) and punch in the numbers. Most air fryers have a temperature dial or digital controls, and a timer. For many beginner-friendly recipes, you’ll be looking at temperatures between 180°C and 200°C (360°F and 400°F).
The cooking time will vary wildly depending on what you’re making and how much. For example, frozen fries might take 15-20 minutes, while chicken wings could be around 20-25 minutes. Don’t be afraid to start with the lower end of the recommended time and then check your food. You can always add a few more minutes if needed. It’s much easier to cook something a little longer than to un-cook it!
Step 4: The Mid-Cook Shake!
This is your secret weapon for even cooking. About halfway through the cooking time, you’ll want to pull out the basket and give it a good shake. This helps to flip and redistribute the food, ensuring all sides get that lovely crispy treatment. If you’re cooking things like chicken pieces or fish fillets, you might want to use tongs to flip them over manually. It’s a small step, but it makes a HUGE difference!

Step 5: Check for Doneness
Once the timer goes off, it’s time for the moment of truth! Carefully pull out the basket and inspect your culinary creation. Is it golden brown? Is it crispy to your liking? If it needs a little more time, just pop it back in for a few extra minutes. You know your food best, so trust your instincts!
If everything looks and smells amazing, then congratulations! You’ve just air-fried something delicious. Serve it up immediately and bask in the glory of your newfound kitchen prowess.
Beyond the Basics: What Else Can You Cook?
Seriously, the possibilities are almost endless! Your Tower air fryer isn't just for fries. Think of it as your versatile kitchen sidekick. Here are a few ideas to get your taste buds tingling:
Chicken Galore!
Chicken wings, drumsticks, tenders, even boneless breasts – all come out incredibly juicy and crispy in the air fryer. Marinate them, season them, go wild! You can even cook a whole small chicken if your air fryer is big enough.
Veggie Vibes
Roasted vegetables get a whole new level of deliciousness. Broccoli, cauliflower, Brussels sprouts, bell peppers, sweet potato wedges – they all roast up beautifully with a lovely char and tender interior. Toss them with oil, salt, pepper, and maybe some garlic powder. Easy peasy!
Fishy Business
Salmon fillets, cod, tilapia – air frying is a fantastic way to get perfectly cooked fish that’s flaky and moist on the inside and slightly crispy on the outside. Just a little oil and your favorite seasonings are all you need.

Snack Attack!
Mozzarella sticks, onion rings, spring rolls, dumplings – if it’s something you’d normally deep-fry, there’s a good chance you can air fry it to golden perfection. These are great for parties or just satisfying those snack cravings.
Reheating Reimagined
Leftovers? Forget the soggy microwave! Your air fryer is amazing at reviving yesterday’s pizza or fried chicken. It brings back that delightful crispiness that’s often lost in other reheating methods.
Baking Adventures (Yes, Baking!)
Some air fryers are even capable of baking! You can make small cakes, muffins, cookies, or even a mini quiche. Just be sure to use oven-safe ramekins or small baking tins that fit inside your air fryer basket.
Tips and Tricks for Air Fryer Nirvana
You’re already a pro, but here are a few extra nuggets of wisdom to make your air frying experience even smoother:
- Don't Be Afraid to Experiment: Recipes are great starting points, but don’t be afraid to deviate. Adjust cooking times and temperatures based on your preferences and your specific air fryer model.
- Use Parchment Paper or Liners (Carefully!): Perforated parchment paper liners specifically designed for air fryers are a game-changer for easy cleanup. Just make sure they don’t cover the entire bottom surface, as this can block airflow. Some people also use silicone liners.
- Preheating is Often Your Friend: Just like with a regular oven, preheating your air fryer for a few minutes can help your food cook more evenly and get that initial crisp.
- Shake, Shake, Shake: I’m saying it again because it’s that important! Don’t skip the mid-cook shake!
- Cleanliness is Key: After each use, once the air fryer has cooled down, wash the basket and tray. Most are dishwasher safe, but a quick hand wash is usually just as easy and keeps them looking pristine. Wipe down the interior and exterior with a damp cloth. A clean air fryer performs better and lasts longer.
- Listen to Your Appliance: Get to know the sounds your air fryer makes. It’ll give you clues about how it’s working.
- Invest in a Good Thermometer: For meats, especially, an instant-read thermometer is your best friend to ensure perfect doneness and food safety.
Troubleshooting Common Air Fryer Woes
Even the most seasoned air fryer enthusiasts encounter the occasional hiccup. Here are a few common issues and how to fix them:
Food is Soggy
The culprit: Overcrowding the basket, not enough oil, or not shaking/flipping. The fix: Cook in smaller batches, ensure a light coating of oil, and definitely shake or flip halfway through. You might also need to increase the temperature slightly for the last few minutes of cooking.

Food is Burning on the Outside and Raw on the Inside
The culprit: Temperature is too high, or food is too thick and dense. The fix: Lower the temperature, cut thicker items into smaller pieces, or ensure they’re not too close together in the basket. Make sure to check for doneness earlier than expected.
Uneven Cooking
The culprit: Poor airflow due to overcrowding or not shaking. The fix: You know the drill – single layer, give it space, and shake vigorously!
Smoke Coming from the Air Fryer
The culprit: Too much oil, fatty foods dripping onto the heating element, or food residue. The fix: Use less oil. For fatty foods, try lining the bottom of the basket with foil (making sure to poke holes for airflow) or using a drip tray. Ensure your air fryer is clean.
Don’t get discouraged if your first few attempts aren't absolutely perfect. Every air fryer is a little different, and every kitchen is too! It’s all part of the learning process, and soon you’ll be an air fryer whisperer.
And Now, for the Uplifting Conclusion!
So there you have it! Your Tower air fryer is ready to become your trusty sidekick in the kitchen. You’ve got the know-how, you’ve got the enthusiasm, and soon you’ll have a fridge full of delicious, crispy creations. Think of all the amazing meals you’re about to whip up – the weeknight dinners that will suddenly feel gourmet, the snacks that will be devoured with glee, and the compliments you’ll receive from family and friends. You’re not just cooking; you’re creating moments of joy, one crispy bite at a time.
Embrace the experimentation, have fun with it, and don’t be afraid to get a little messy (that’s where the best flavors are often found!). Your Tower air fryer is here to make your life easier, tastier, and a whole lot more exciting. So go forth, my culinary adventurer, and air fry your way to happiness! You’ve got this, and I can’t wait to hear about all your delicious triumphs. Happy air frying!