How To Use Sports Tape On Knee
Hey there! So, your knee’s been acting up, huh? Been there, done that. You know, the kind of ache that makes you eye the stairs like they’re Mount Everest? Yeah, that one. And you're thinking, “Can I just tape this thing up and pretend it’s all good?” Well, you’re in luck, my friend! Because today, we’re gonna dive into the magical world of sports tape for your knee. Think of me as your slightly overenthusiastic, coffee-fueled guru of knee support. Let’s get this tape party started!
First things first, why even bother with this sticky stuff? Isn't that what braces are for? Sometimes, yes! But tape, oh tape, it’s a different beast. It’s like a superhero’s utility belt, but for your joint. It can help with pain, give you a little extra stability, and, let’s be honest, make you feel like you’re ready to conquer the world. Or at least, you know, walk without wincing. It’s not a magic cure-all, mind you, but it’s a pretty darn good sidekick. Think of it as giving your knee a little hug, a firm, supportive hug. You know the good ones.
Now, before we get all Bob the Builder on your knee, let’s chat about the type of tape. This isn’t your grandma’s Band-Aid, okay? We’re talking about athletic tape. Usually, it’s this white, slightly stretchy, super-strong stuff. Or, you might see the colorful, kinesiology tape, which is a whole other kettle of fish with its own set of mystical powers (we’ll touch on that later, maybe!). For now, let’s focus on the classic white athletic tape. It’s the workhorse, the reliable friend. The one that actually holds things in place when you need it most. Because nobody wants their tape to bail on them mid-squat, right?
Must Read
And speaking of supplies, you'll need a few things. Besides the tape, obviously. A good pair of sharp scissors are a must. Trying to tear athletic tape with your teeth is a one-way ticket to a frustrated tantrum and uneven strips. Trust me on this. Also, having some underwrap or an old t-shirt sleeve can be super helpful. It’s like a little buffer zone between your hairy leg (no judgment!) and the super-sticky tape. Prevents those moments of ripping off your tape and realizing you’ve accidentally waxed yourself. Ouch!
Okay, deep breaths. You’ve got your tape, your scissors, and maybe even your underwrap. Now, let’s find a comfy spot. A chair, a bed, the floor – wherever you can sit down and actually reach your knee without doing a pretzel impression. Because, let's face it, if you can't reach it, you can’t tape it. Pretty simple logic, right? So, sit back, relax, and prepare for some DIY joint support.
The first thing you really gotta do is clean your skin. Seriously. We’re talking soap and water. No lotion, no oils, no weird sweaty residue from your last epic workout. The tape needs a nice, clean canvas to stick to. Think of it like preparing a delicious cake – you wouldn’t frost a greasy pan, would you? Nope. So, give that knee a good scrub. And make sure it’s completely dry. Damp skin is the enemy of good tape adhesion. It's like trying to stick a sticker on a wet surface. It just slides around, doesn't it?
Now, if you’re using that underwrap stuff, this is your moment! Cut a piece long enough to go around your thigh and calf, leaving a bit of overlap. This creates a smooth surface for the tape to adhere to. It’s like putting on a comfy liner before your fancy jacket. Much more pleasant, especially when it’s time to take it all off. Consider it your knee’s personal spa treatment before the main event.
The Basic Knee Support (Because Sometimes Simple is Best!)
Alright, let’s get down to business. We’re gonna start with a pretty standard, straightforward taping technique. This is your go-to for general knee pain, a bit of instability, or just that feeling of “I need my knee to behave.” We’re not trying to reinvent the wheel here, just give it a little extra grip and support. You got this!
First up, we need some anchor strips. These are like the foundation of your tape masterpiece. Tear off two strips of tape, each about 8-10 inches long. You want them to be long enough to go all the way around your leg, with a little overlap. Don’t get too stingy with the tape; it’s better to have a bit too much than not enough, right? Especially when your knee’s feeling a bit dodgy.

Now, with your knee slightly bent (think about a comfortable, relaxed bend, not a full yoga pose!), stick the first anchor strip around your thigh, just above your kneecap. Make sure it’s nice and snug, but not cutting off circulation. We’re going for supportive, not tourniquet-like. Smooth it down really well, making sure there are no wrinkles. Wrinkles are the enemy of good tape! They create weak spots. And who wants weak spots on their knee?
Then, do the same thing with the second anchor strip, but this time, go around your calf, just below your kneecap. Again, snug but not too tight. Smooth it out like you’re frosting a cake. This creates your top and bottom boundaries. Everything we do next will be sandwiched between these two!
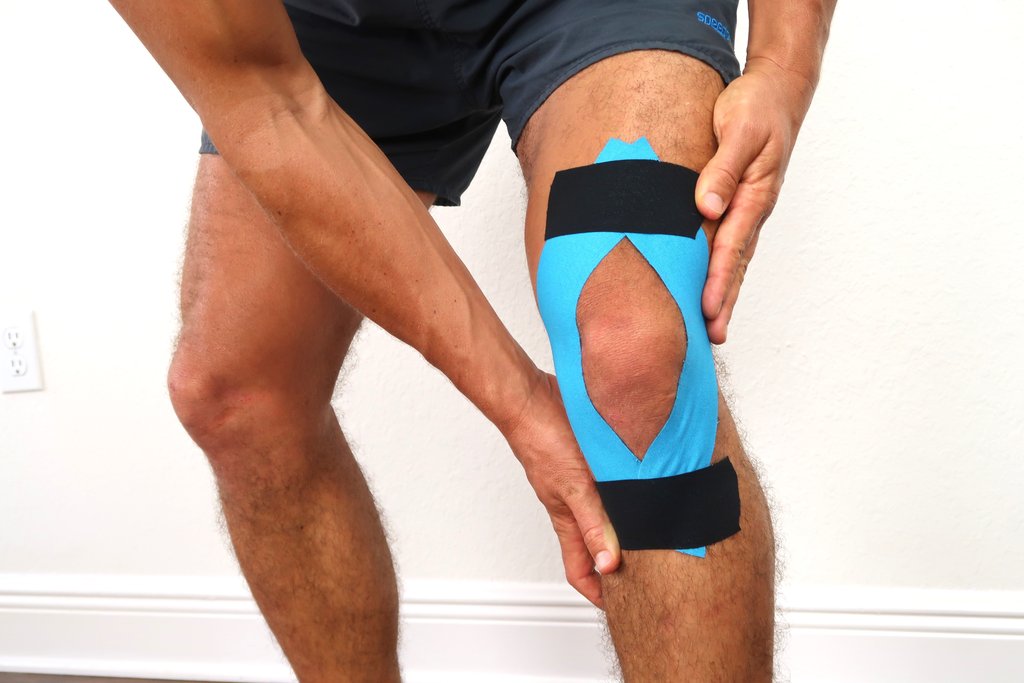
Now for the fun part: the criss-cross! This is where the magic really happens. Grab a strip of tape, maybe 12-15 inches long. You're gonna place one end of this strip on the side of your thigh anchor, right about in line with the middle of your kneecap. Then, you're gonna bring it down and across the front of your knee, going under your kneecap, and then up the other side of your thigh, ending on your thigh anchor strip. See? It’s like a little supportive ‘X’ right over the front of your knee. Feels good already, doesn't it?
You want to apply a bit of tension as you lay it down. Not so much that it pulls your skin and feels uncomfortable, but enough to give it some grip. Think of it as giving your kneecap a gentle nudge in the right direction. And again, smooth it down. No mercy for wrinkles! They’re like little saboteurs trying to mess with your tape job.
Now, let’s do another one of those criss-cross strips. This time, you’ll start on the other side of your thigh anchor, bring it down and across the front, under the kneecap, and up the other side to your thigh anchor. So, now you have two criss-crossing strips, forming a nice big ‘X’ right over your kneecap. It’s like a little protective shield. And if you look closely, you'll see that your kneecap is now snuggly nestled within these tape strips. Pretty neat, huh?
You can add a third criss-cross strip if you feel like you need even more support. Just repeat the process, perhaps slightly offset from the others, so you're not layering tape directly on top of itself too much. This just reinforces that central support system. More tape, more love for your knee, right?

Finally, we’ll put some more anchor strips on top to secure everything. Take a couple more strips and wrap them around your thigh, just over the ends of your criss-cross strips. These really lock everything in place. Make sure they overlap with the original thigh anchor strip. And then, you guessed it, do the same on your calf, wrapping around just over the ends of your criss-cross strips and overlapping with your calf anchor strip. Smooth them down like your life depends on it. Because, well, your knee’s comfort might!
And there you have it! A basic, but effective, knee tape job. You should feel a bit more stability, and hopefully, a noticeable reduction in that nagging pain. Give your knee a little bend and see how it feels. You’re like a DIY physical therapist now. Pretty cool, huh?
A Little Something Extra: The “J” Strip for Patella Support
Okay, so that basic tape job is great, but what if your kneecap (the patella, for those in the know) feels like it’s a bit… wobbly? Or maybe it tends to drift off to the side? That’s where this little trick comes in. We’re gonna add what’s sometimes called a “J” strip, or a patellar stabilizing strip. It’s like giving your kneecap a little leash to keep it in line. Super handy!
First, do all the anchor strips as we did before: one around your thigh, one around your calf. These are still your foundation. Don’t skip these steps, my friend! They are crucial. A good foundation makes all the difference, whether you’re building a house or taping a knee. You know that.
Now, grab a strip of tape that’s about 10-12 inches long. You’re gonna apply this one starting on the outside of your thigh anchor. So, put one end of the tape on the side of your thigh anchor strip, roughly in line with the outside edge of your kneecap.
Then, you’re going to bring that tape strip down and around the outside of your kneecap. As you bring it across the front, you want to create a slight curve, almost like a gentle ‘J’ shape (hence the name!). You're guiding your kneecap inwards, towards the center. This is the key part!
Now, continue that strip upwards, going along the inside of your kneecap, and ending on your thigh anchor strip on the inner side of your thigh. So, it goes from the outside anchor, curves around the outside of the kneecap, and then goes up the inside to the inside anchor. Does that make sense? It’s like you’re gently nudging and guiding your kneecap into its happy place.
Apply some tension as you lay it down, especially on that curved part. You want to feel like you’re gently pulling your kneecap towards the center. But again, be mindful of your skin. We’re supporting, not strangling! Smooth it down like it’s the most important job in the world. Because for your knee right now, it kind of is.
You can add a second J-strip on the other side if you feel like you need it, or if your kneecap tends to drift outwards. In that case, you’d start on the inside of your thigh anchor, bring it down and around the inside of your kneecap, and then up the outside to your thigh anchor. This creates a sort of ‘C’ or ‘U’ shape around your kneecap, depending on how you do it. It’s all about guiding that little bone!
Once your J-strips are in place, secure everything with your top anchor strips, just like before. Wrap those around your thigh and calf to lock everything down. Make sure they overlap with your J-strips and your original anchor strips. This is the grand finale, folks! The tape grand finale!
Now, with your J-strip action, you should feel a definite difference in how your kneecap feels. It should feel more centered, more stable. Less likely to go rogue. This is especially good for things like runner’s knee or if you have a tendency for your kneecaps to feel a bit unstable. It’s like putting a little railing on the side of a slippery slope. Much safer!
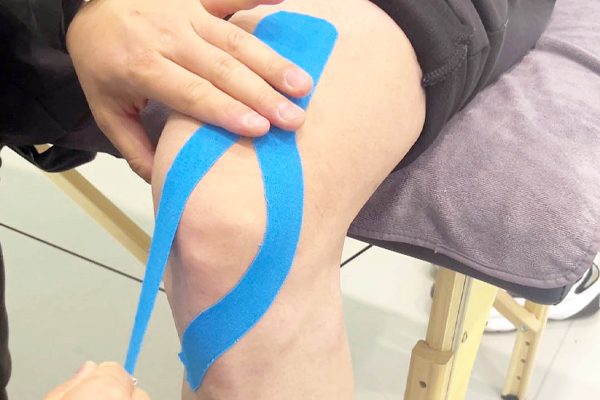
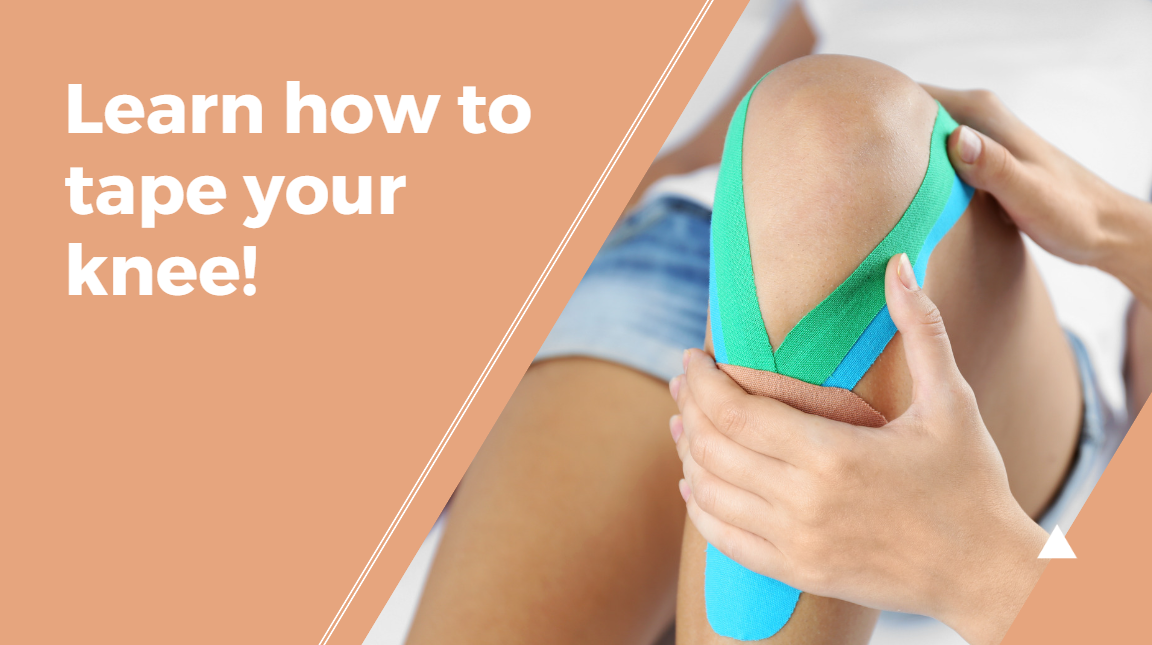
A Quick Word on Kinesiology Tape
So, what about that colorful tape you see everywhere? That’s kinesiology tape, or k-tape. It’s a bit different from athletic tape. It’s more stretchy, and it’s designed to work with your body, not just restrict it. It’s supposed to help with lymphatic drainage, pain relief, and muscle support through movement. Think of it as a gentle nudge, not a firm grip.

Taping with k-tape is a whole different ballgame, and there are a million different techniques out there depending on what you’re trying to achieve. You can find tons of videos online if you’re curious! It’s less about rigid support and more about assisting your muscles and joints through their natural range of motion. It’s like giving your body a little extra pep in its step. It’s pretty cool stuff, and many people swear by it. Just make sure you follow specific instructions for your particular knee issue if you decide to go that route!
Tips and Tricks to Not Mess This Up (Mostly!)
Alright, so you’ve taped your knee. High fives all around! But there are a few little things to keep in mind. For starters, don’t leave the tape on for too long. Usually, a day or two is plenty. Sleeping in it is generally fine, but after that, it’s time to give your skin a break. And when you take it off… oh boy, the removal. Go slowly!
To take it off without causing yourself undue pain, you can either soak it in warm water, or use a bit of baby oil or olive oil around the edges. Let it soak in for a few minutes. Then, gently peel it back, in the direction of hair growth. This is crucial for minimizing discomfort and avoiding accidental waxing. Pull the skin taut behind the tape as you peel. It's a delicate art form, really. Think of it like peeling a very stubborn sticker off a delicate surface. Patience, grasshopper.
Also, pay attention to your skin. If you get any redness, itching, or blistering, it’s probably time to take the tape off and give your skin a break. Some people can be sensitive to the adhesive. It’s not a race! If it’s causing more problems than it’s solving, ease up.
And remember, tape is not a substitute for professional medical advice. If your knee pain is severe, persistent, or you’re unsure what’s going on, you really should see a doctor or a physical therapist. They can give you a proper diagnosis and a personalized treatment plan. Tape is a helpful tool, but it’s not a replacement for expert care. Don’t be a hero, okay?
So, there you have it! A little adventure into the world of knee taping. You’ve learned the basics, tackled some extra support, and even touched on the colorful stuff. Hopefully, your knee is feeling a bit happier now. Go forth and… well, maybe not run a marathon immediately, but at least walk without wincing. You’ve earned it!