How To Set Page Breaks In Excel

Ever found yourself staring at a spreadsheet that just… keeps… going? You’ve got your beautiful data neatly organized, but when it’s time to print, it sprawls across pages like a runaway vine. This is where the seemingly small, yet incredibly powerful, art of setting page breaks in Excel comes in. It might sound a little technical, but trust me, mastering this is like finding the perfect way to fold a map – it just makes everything infinitely more manageable and presentable.
So, what exactly are page breaks and why should you care? Think of them as your friendly neighborhood dividers for printing. When Excel decides where one page ends and the next begins, it does so automatically. Sometimes, this works out perfectly. Other times? Not so much. Setting page breaks yourself gives you precise control over how your data is split into printable sections. This means no more awkward half-tables on one page and the rest on the next, and no more missing that crucial header information because it’s buried on a new page.
The benefits are pretty straightforward, but oh-so-satisfying. First and foremost, it’s about clarity and professionalism. Imagine handing in a report for school or a budget summary for work. If it’s clean, well-formatted, and easy to follow, you’re already making a great impression. Page breaks ensure that each printed page tells a complete story, with all the relevant information grouped together. It’s like arranging your thoughts into neat paragraphs instead of one long, rambling sentence.
Must Read
Let’s think about some everyday scenarios. In education, a teacher might use page breaks to ensure that each student's assignment printout includes their name and all their answers on a single, contiguous section. Or perhaps a student creating a bibliography for a research paper needs to ensure each citation group starts on a new page. For personal use, imagine planning a big family reunion. You might have a spreadsheet with guest lists, meal plans, and contact information. Setting page breaks could ensure that the RSVP list prints perfectly on one page, followed by the menu on the next, keeping everything organized for easy distribution or reference.

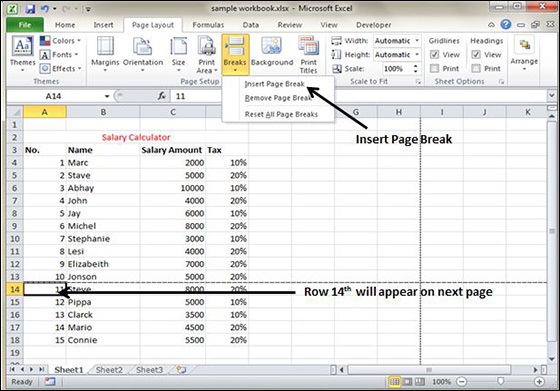
Exploring page breaks in Excel is surprisingly simple and can be quite fun once you get the hang of it. The easiest way to start is by navigating to the “Page Layout” tab on the ribbon. You’ll find a section called “Page Setup,” and within that, a button labeled “Breaks.” Clicking this will reveal options like “Insert Page Break,” “Remove Page Break,” and “Reset All Page Breaks.”
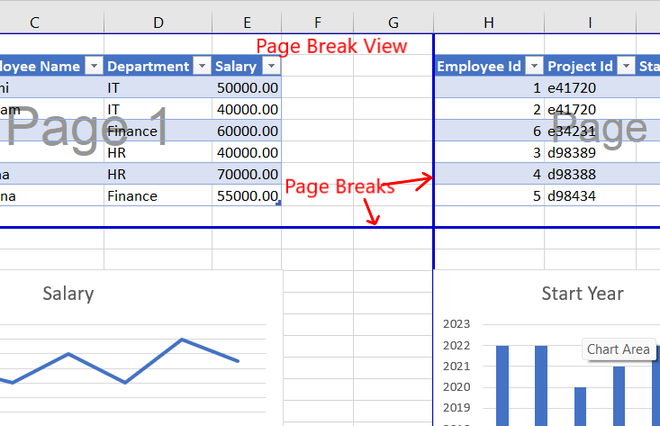
A fantastic way to get a feel for it is to simply try it out on some sample data. Select a cell where you want a page break to occur, go to “Insert Page Break,” and then switch to “Page Break Preview” mode (also found in the “Page Layout” tab, usually as an icon resembling dashed lines). This view shows you exactly how your spreadsheet will look when printed, with clear lines indicating your manual page breaks. You can then drag these lines to adjust their position or remove them entirely. It’s a wonderfully visual way to understand the impact of your choices and ensures you’re always in control of your printed output. So go ahead, give it a whirl – you might be surprised at how much of a difference a few strategic breaks can make!