How To Insert Google Tag Manager In Wordpress

Hey there, digital adventurer! Feeling like your WordPress website is a super cool party, but you're not quite sure who's showing up or what they're doing? Well, get ready to throw on your party hat, because we're about to make your website a whole lot smarter and a whole lot more fun to understand. Today, we’re diving into the wonderful world of Google Tag Manager and how to seamlessly slide it into your WordPress site. Don't worry, it's not as technical as it sounds – think of it like adding a super-powered guest list and activity tracker to your awesome online bash!
So, what exactly is Google Tag Manager, you ask? Imagine you’re running a bustling shop. You’ve got people browsing, people buying, people maybe just peeking in and leaving. Google Tag Manager is like your incredibly efficient store manager. Instead of you running around trying to count every single person and their every move, you install one central system (that’s Tag Manager!), and then you can easily tell it, “Hey, when someone buys something, make a note of it!” or “If someone spends more than 5 minutes looking at the fancy widgets, jot that down!” All these little "notes" are what we call tags, and Tag Manager lets you manage them all from one easy-peasy dashboard. Pretty neat, right?
Why would you even bother with this digital wizardry? Oh, my friend, the reasons are as plentiful as sprinkles on a cupcake! For starters, it makes your website understandable. You get to see what’s working, what’s not, and where your amazing visitors are coming from. This isn't just for the tech gurus; it’s for anyone who wants their website to achieve its goals, whether that’s selling products, gathering leads, or just sharing your brilliant ideas with the world. It’s about making informed decisions, and that, my friend, is empowering.
Must Read
Think about it: are people actually clicking that big, beautiful "Buy Now" button? Is that blog post you poured your heart into being read? Are visitors from your latest social media campaign sticking around? Without Tag Manager, answering these questions can feel like trying to catch fireflies in a jar with holes in it. But with it? Bam! Clear, actionable insights. This helps you refine your content, improve your user experience, and ultimately, make your website the best darn version of itself it can be.
Plus, and this is a big plus, it makes your life so much simpler. Remember the days of digging through code every time you wanted to add a new tracking feature? Ugh. Tag Manager lets you add, edit, and remove all sorts of tracking tags (think Google Analytics, Facebook Pixel, even custom event tracking) without ever touching your website's code directly. This means less stress, fewer potential errors, and more time for you to focus on what you do best – creating amazing content or running your business!
So, how do we actually get this magical tool onto your WordPress site? Let’s break it down. The process is surprisingly straightforward, and I promise, you’ve got this.
Step 1: Get Your Google Tag Manager Container
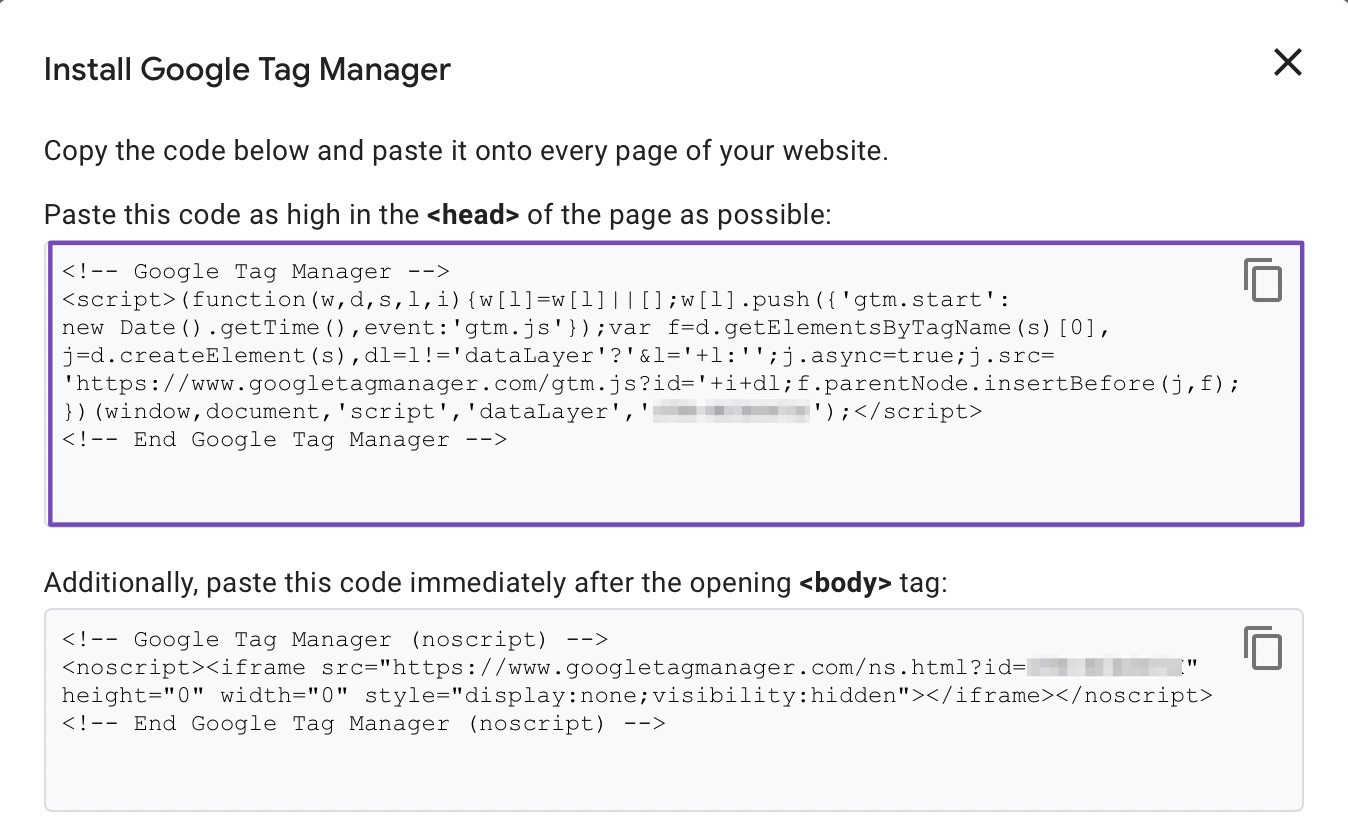
First things first, you need to set up a Google Tag Manager account. Head over to the Google Tag Manager website. It’s free, so don’t be shy! You’ll need a Google account (like your Gmail). Once you’re in, click "Create Account." You’ll be asked for your account name (something simple like your business name works great) and your country. Then, you'll set up a "Container." Think of the container as the main toolbox for your website. Give it a name (again, your website’s domain name is a good choice) and choose "Web" as the platform. Hit "Create," and you’ll be presented with two important pieces of code. These are your golden tickets!
Don’t be intimidated by the code. You don't need to be a programmer to understand its purpose. One piece is for the `
` of your website, and the other is for just after the opening `` tag. Your mission, should you choose to accept it, is to get these snippets into the right places on your WordPress site.Step 2: Inserting the GTM Code into WordPress (The Easy Ways!)
Now, here’s where we get to choose our adventure! There are a few fantastic ways to get those GTM code snippets into your WordPress site. We’ll look at the easiest and most recommended methods.
Method A: Using a Plugin (Your Best Friend!)
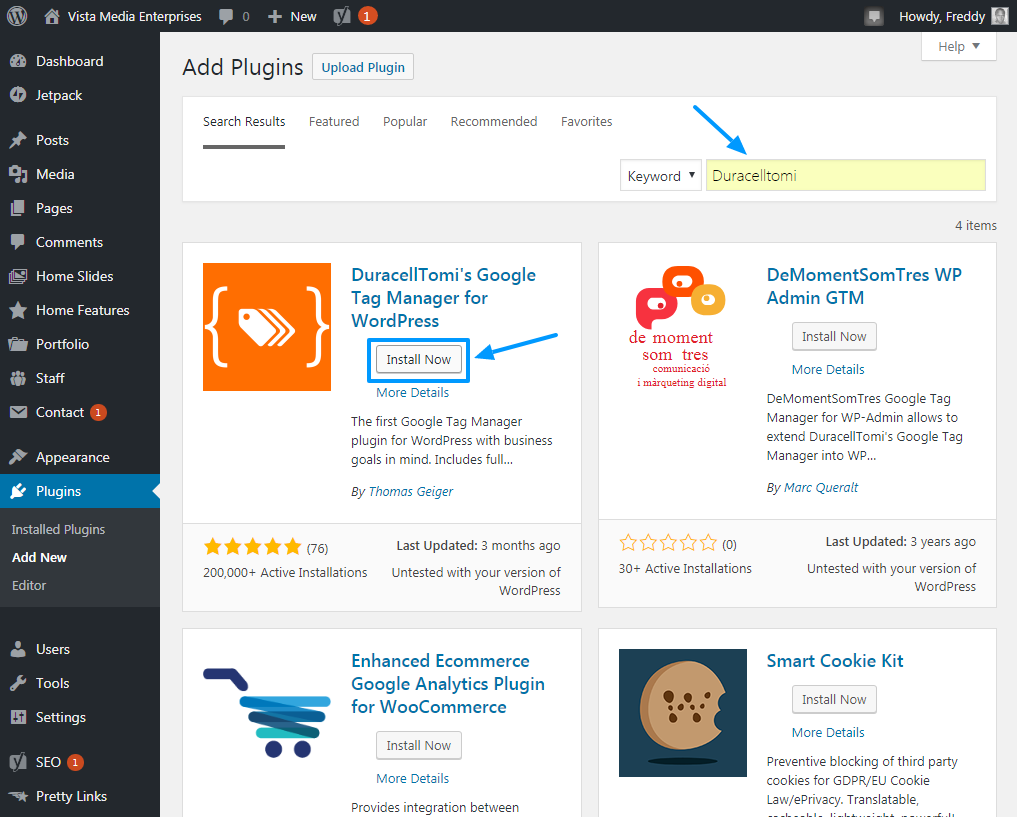
For most folks, this is the absolute easiest and safest route. Plugins are like helpful little assistants for your WordPress site. There are several excellent plugins designed specifically for adding Google Tag Manager. Some popular choices include:

- GTM4WP (Google Tag Manager for WordPress): This is a fan favorite and for good reason. It's powerful, flexible, and plays nicely with Google Analytics.
- Site Kit by Google: If you’re using other Google services like Analytics and Search Console, Site Kit integrates them all, including Tag Manager, beautifully.
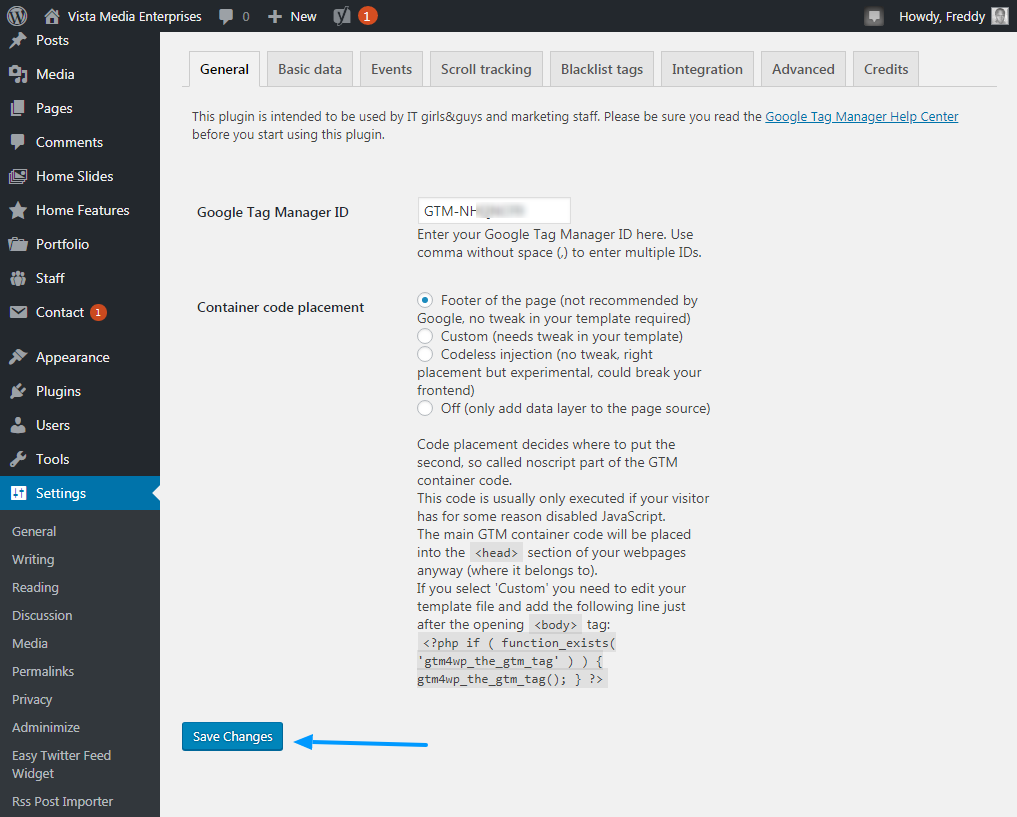
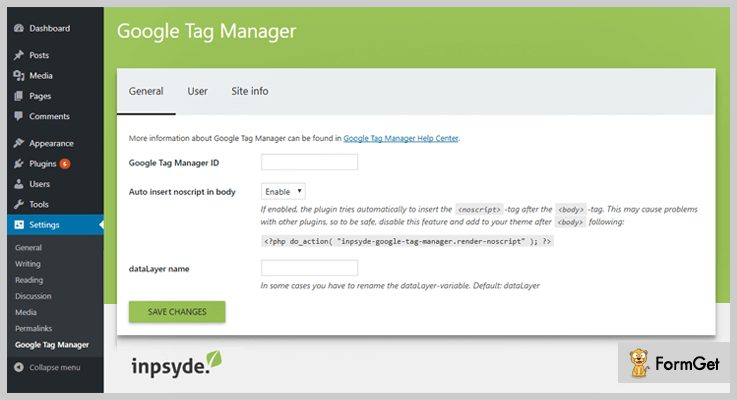
Let’s take GTM4WP as an example, as it’s incredibly popular. Once you’ve installed and activated the plugin through your WordPress dashboard (Plugins > Add New, then search for "GTM4WP"), you’ll find a new menu item for it. Navigate to its settings. You’ll see fields where you can paste your GTM Container ID (that’s the `GTM-XXXXXXX` code you got from Google Tag Manager). You can also paste the full code snippets directly into the designated areas. Follow the plugin’s instructions carefully; they're usually super clear!
The beauty of using a plugin like this is that it handles all the code placement for you. It ensures the code goes in the correct spots (`
` and ``) without you having to mess with theme files. Less risk, more reward!Method B: Theme Options or Customizer (If You're Feeling Brave-ish)
Some WordPress themes have built-in options to add custom scripts or code snippets to the header or footer of your website. You can find this in your theme's settings or under Appearance > Customize. Look for sections labeled "Header Scripts," "Footer Scripts," "Custom Code," or something similar.
If you find such a section, you can carefully paste the relevant GTM code snippets into the appropriate boxes. The first snippet usually goes into the "header" section, and the second snippet goes into the "body" or "footer" section. Be cautious here – if you make a mistake, it could affect how your site displays. Always make a backup of your site before making manual code changes, just in case!

Method C: Editing Theme Files Directly (For the Daring Coders!)
This is the most advanced method and generally not recommended for beginners unless you're comfortable with coding and understand the risks. If you decide to go this route, you'll need to access your theme's files. You can do this via your WordPress dashboard under Appearance > Theme File Editor or using an FTP client.
You’ll need to edit the `header.php` file. The first GTM code snippet (the one for the `
`) needs to be pasted just before the closing `` tag. The second GTM code snippet (the one for the ``) needs to be pasted right after the opening `` tag.A HUGE word of caution: If you make a mistake in the `header.php` file, your website could break completely! Always, always, always create a backup of your `header.php` file before you make any changes. And if you update your theme, your changes might be lost, so you’d have to re-add them. This is why plugins are generally the preferred method for most people.
Step 3: Verify and Test!
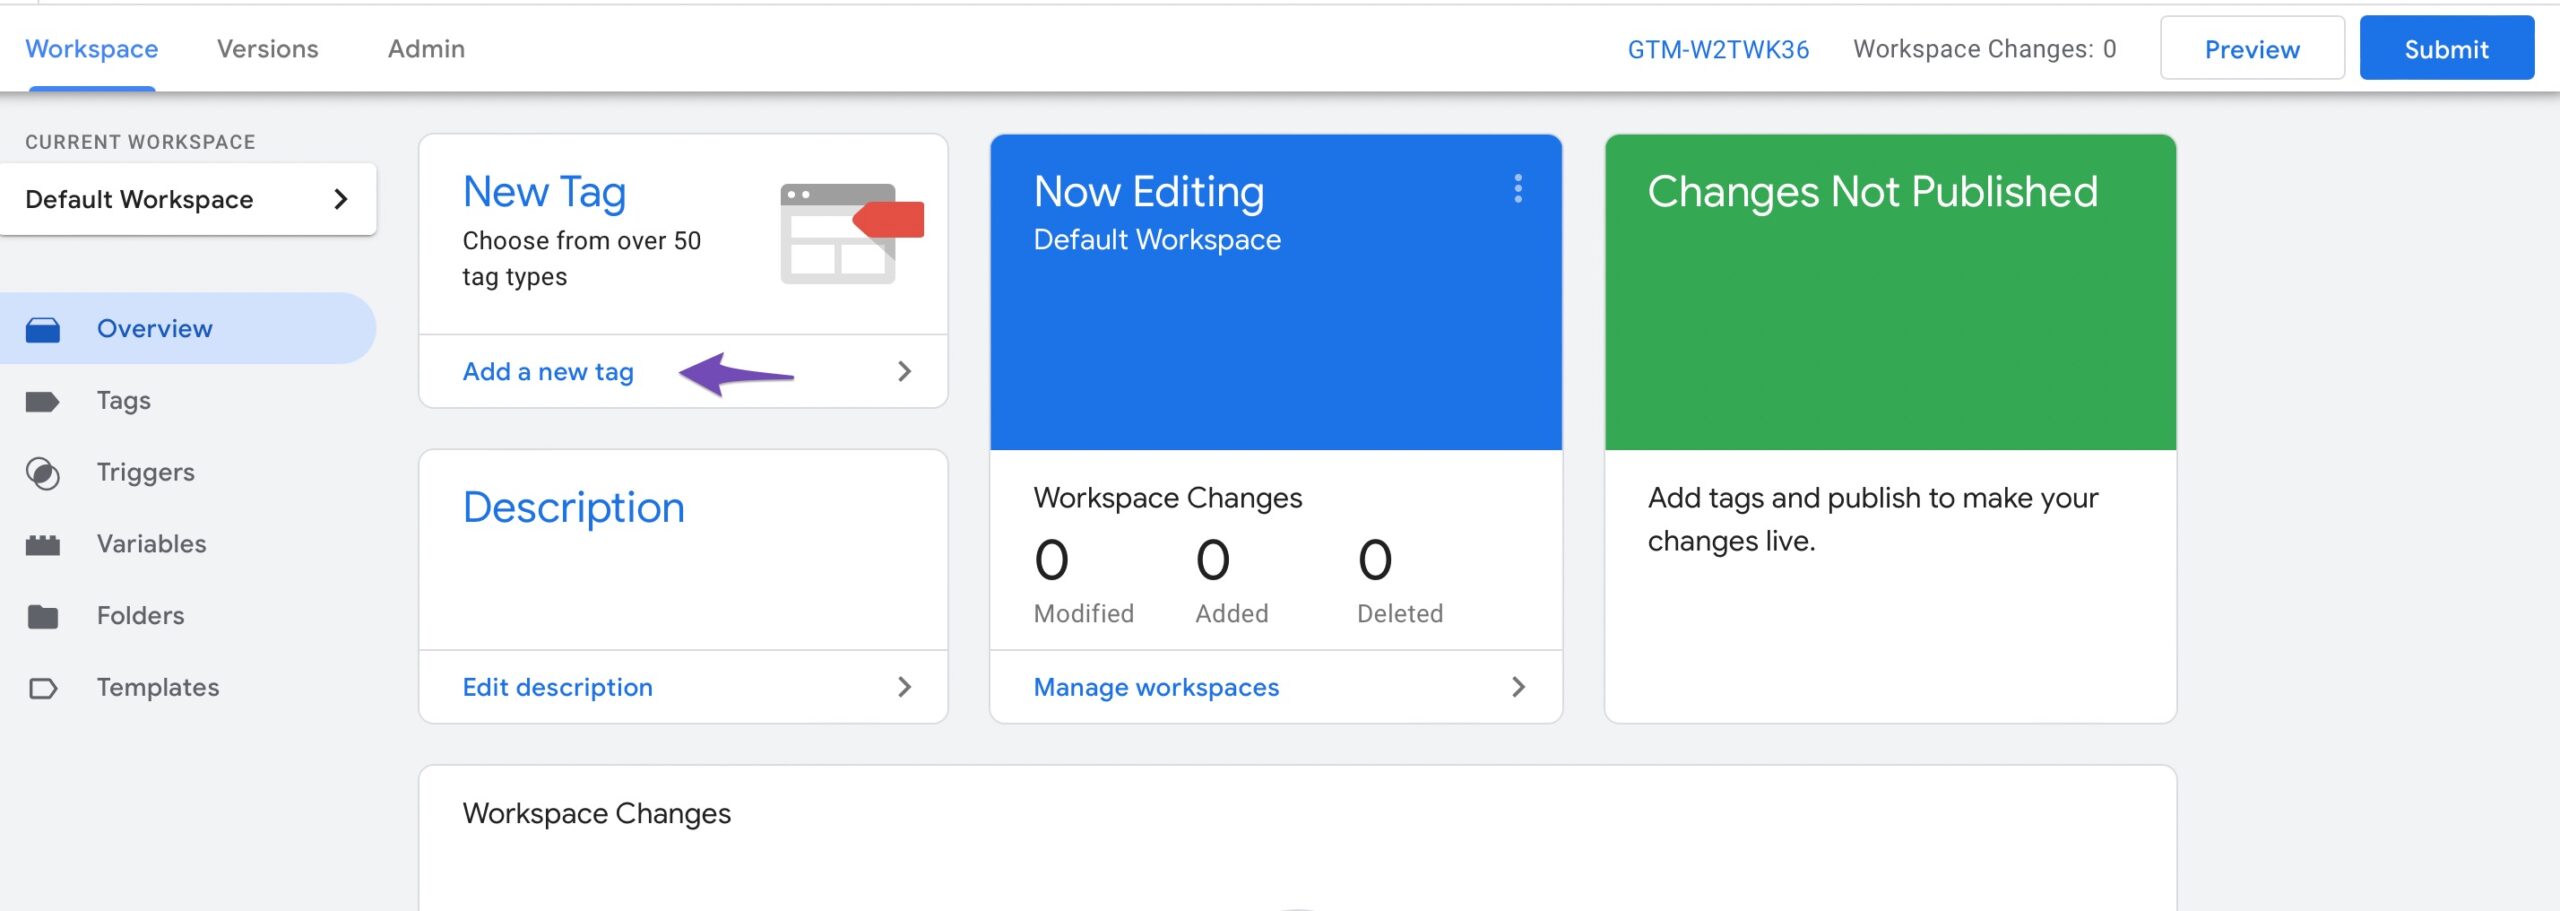
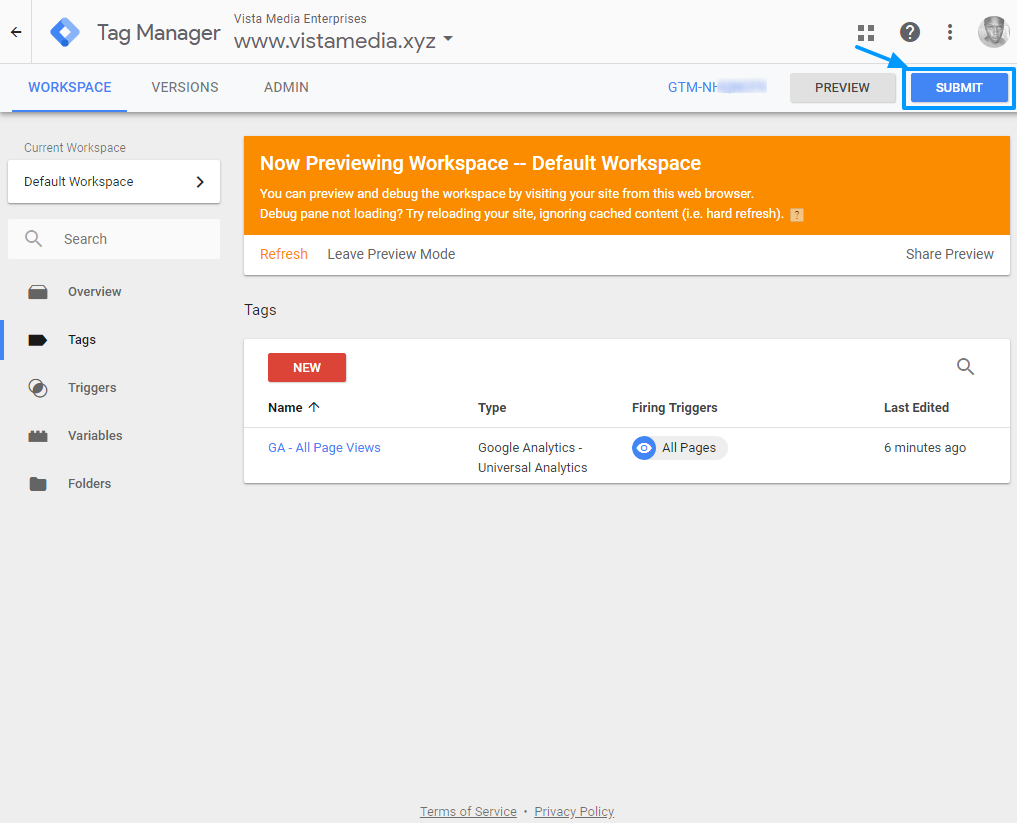
Once you've implemented the GTM code using your chosen method, it's time for the fun part: testing! Go back to your Google Tag Manager dashboard. You should see your website listed. Now, open your website in a new browser tab. In the Google Tag Manager dashboard, look for the "Preview" mode (it's usually a button at the top). Enter your website's URL and click "Start."
A new window or tab will open with your website, and you should see a "Tag Assistant" window pop up at the bottom. If it says "Connected" and you see your GTM Container ID, congratulations! You've successfully installed Google Tag Manager. You can now see which tags are firing on your site. This is your moment of triumph!
This little act of verification is super important. It’s like making sure your party invitations actually reached your guests. If it’s not working, double-check where you put the code and ensure there were no typos. Remember, patience is a virtue, especially in the digital realm.
And there you have it! You've just unlocked a powerful tool that will transform how you understand and interact with your WordPress website. It’s like gaining X-ray vision for your online presence. You can now start adding those fun tracking tags, like seeing how many people watch your embedded videos or click on your social media links. The possibilities are truly endless, and each new tag you add is like learning another secret language your website speaks.
Don't stop here! This is just the beginning of your journey into the exciting world of data and optimization. Dive deeper into Google Tag Manager, explore its vast capabilities, and experiment with different tags. You’ll be amazed at what you can learn and achieve. Your website is a canvas, and Google Tag Manager is one of your most powerful brushes. Go create something magnificent!