How To Create A Wordpress Staging Site
Ever felt that little flutter of nervousness before hitting the "update" button on your WordPress site? You know, the one that whispers, "What if something goes spectacularly wrong and my beautiful website turns into a digital tumbleweed?" We've all been there, right? It's like standing at the edge of a cliff, holding a brand new, untested parachute. Exciting, but also… a tad terrifying.
Well, what if I told you there's a way to test out all those shiny new plugins, experiment with daring design changes, or even completely revamp your content, all without risking your live, public-facing website? Sounds pretty neat, doesn't it? This magical little solution is called a WordPress staging site. Think of it as your website's secret laboratory, a safe haven where you can play, tinker, and break things without anyone knowing. Pretty cool, huh?
So, What Exactly Is This "Staging Site" Thingy?
In simple terms, a staging site is an exact replica of your live WordPress website, but it’s hidden away from the internet. It lives on a private server or a subdomain, meaning only you (and maybe your developer buddy) can see it. It's like having a dress rehearsal for your website before the big premiere. You get to iron out all the kinks, perfect your performance, and make sure everything is flawless before you step out onto the main stage.
Must Read
Why is this so awesome? Well, imagine you're about to launch a brand new product or announce a major company update. You wouldn't just shout it from the rooftops without checking if your marketing materials are correct or if your product actually works, would you? A staging site lets you do that same due diligence for your website. It's your personal sandbox, your playground for digital innovation.
Why Should You Even Bother? Aren't Live Updates Scary But Manageable?
Ah, the optimism! And sure, sometimes updates go swimmingly. But have you ever updated a plugin only to have your entire site greet you with a blank white screen of death? Or maybe a theme update completely messes up your carefully crafted layout? These things happen, and when they do, it can be a real headache. You're scrambling to fix it, your visitors are seeing a broken mess, and your carefully built online reputation takes a hit.
A staging site acts as your digital safety net. It's your chance to get your hands dirty without the pressure of immediate consequences. You can try out a new WooCommerce extension to see if it integrates well, test a different caching plugin to speed things up, or even experiment with a completely new homepage design. If it all goes south, no biggie! You just wipe the staging site and start again. Your live site remains perfectly untouched, humming along happily.
It's also a fantastic tool for collaboration. If you work with a designer or a developer, they can make changes on the staging site, and you can review them in a real-world environment before they're pushed live. No more endless email chains trying to describe a change you saw on your screen. You can point and say, "See that button? It needs to move three pixels to the left."
Okay, I'm Intrigued. How Do I Actually Make One of These Things?
Creating a WordPress staging site isn't some arcane wizardry that only the tech-savvy can perform. In fact, it's become surprisingly straightforward, especially with the help of your hosting provider or some handy plugins. Let's break it down into a couple of common approaches.
The "My Host Does It For Me!" Approach (The Easy Button)
Many modern WordPress hosting providers understand the importance of staging. They've built in features that allow you to create a staging site with just a few clicks. This is often the smoothest and most recommended path, especially if you're not super comfortable poking around in server settings.
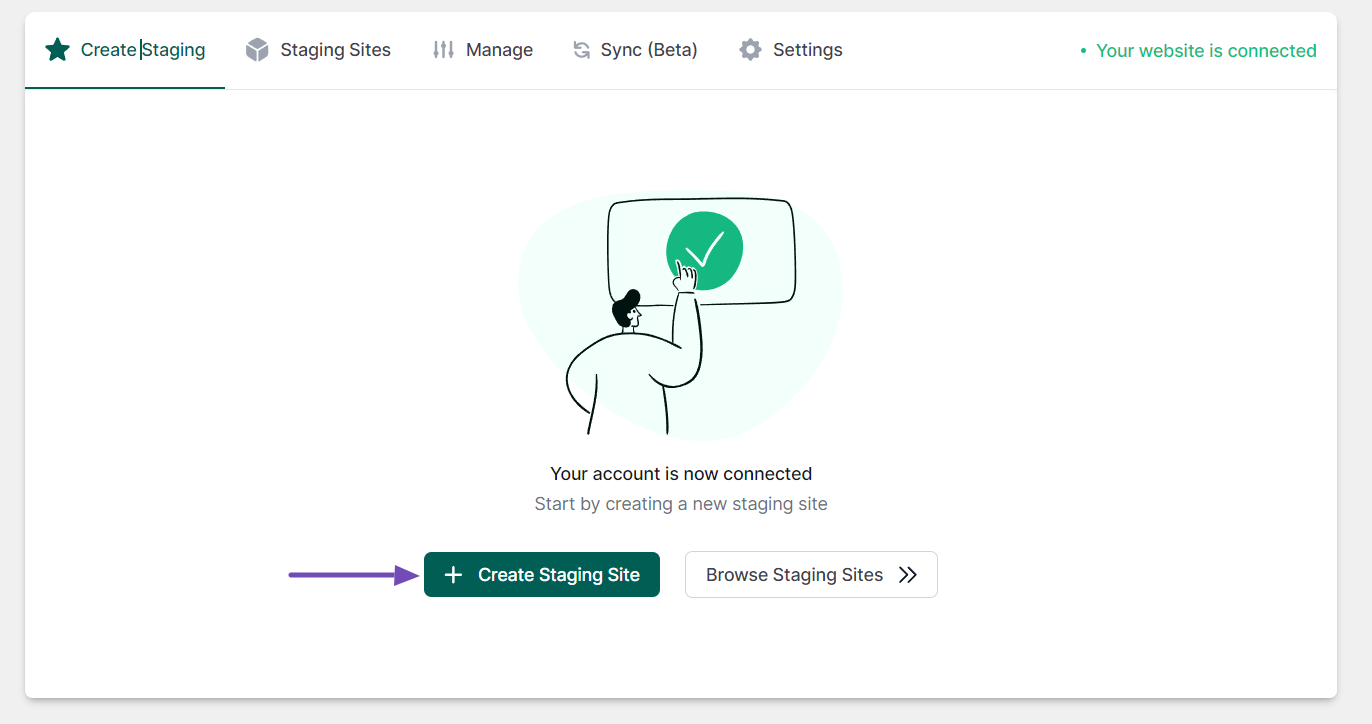
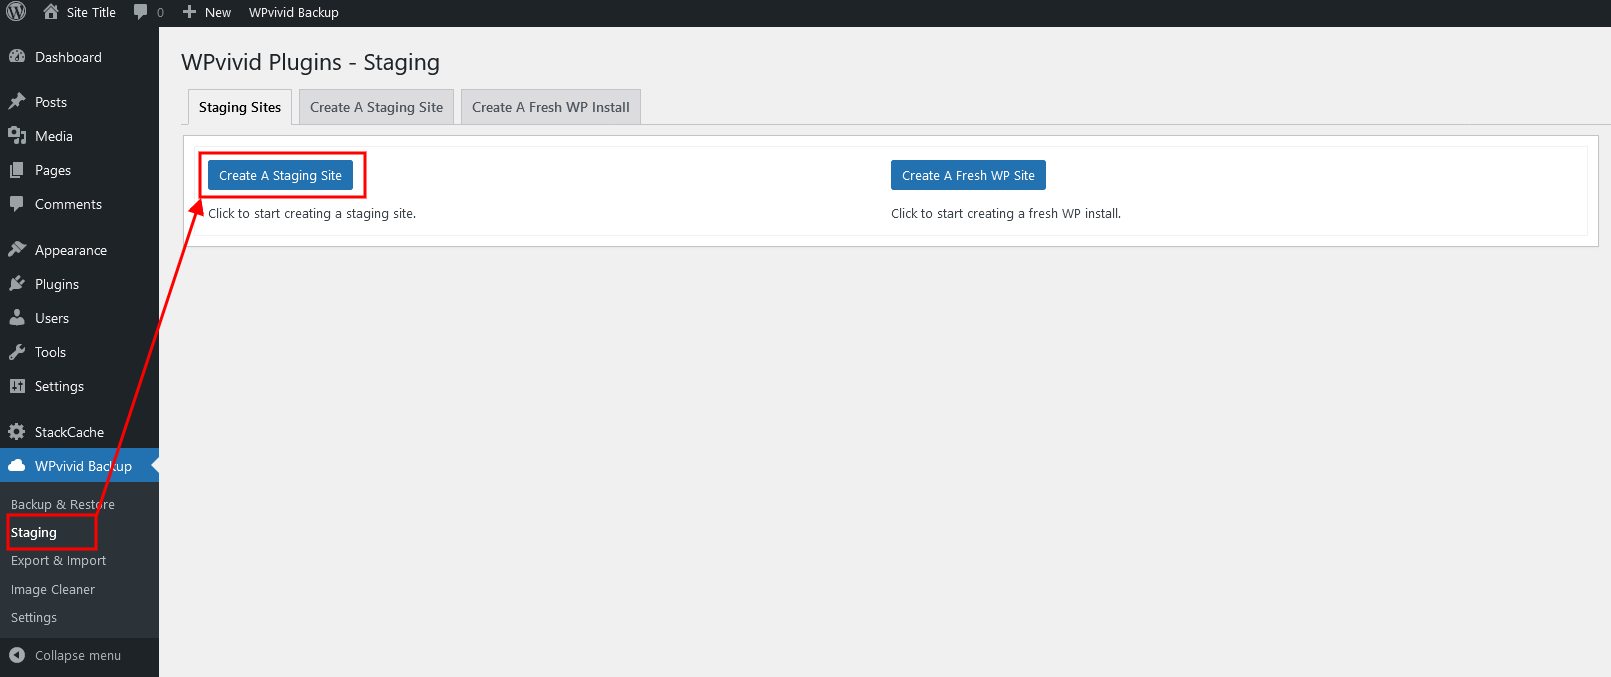
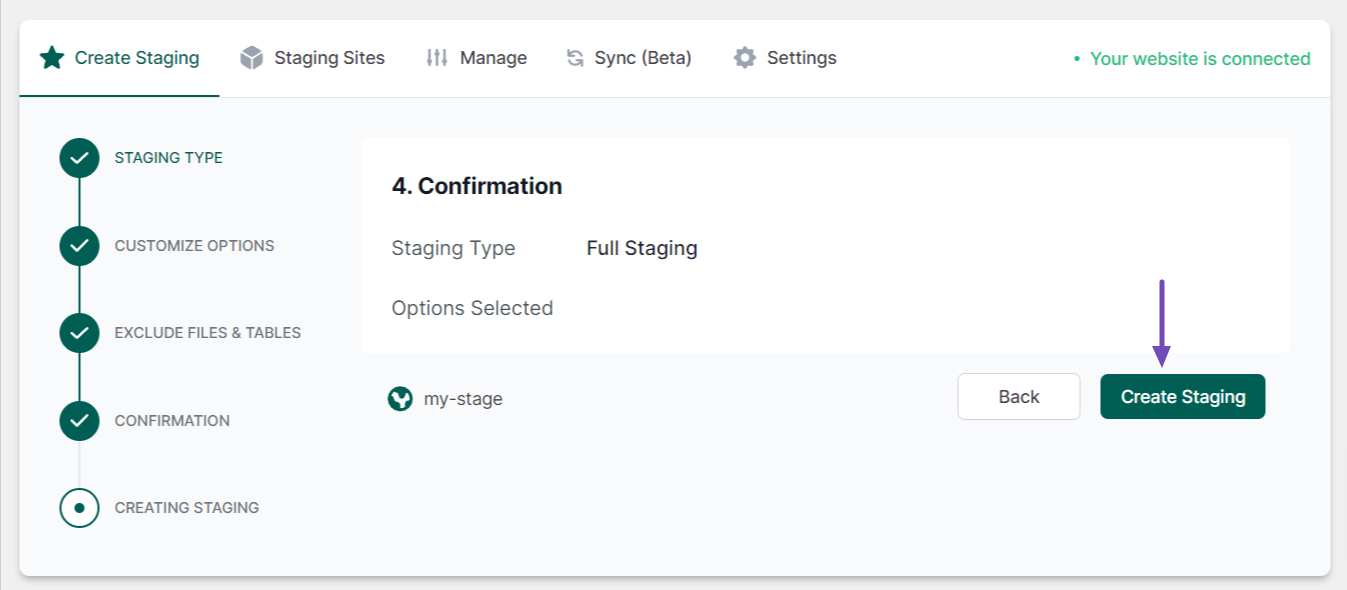
You'll typically log into your hosting account's control panel (like cPanel, Plesk, or their custom dashboard). Look for a section related to "Staging," "One-Click Staging," or "WordPress Tools." You'll usually see an option to "Create Staging Site." The host will then automatically copy your live site to a temporary location. Ta-da! You've got a staging environment ready to go. Once you're happy with your changes on the staging site, there's usually a button to "Push to Live" or "Deploy to Production," which will overwrite your live site with the updated version.
It's like having a magic wand that duplicates your entire WordPress kingdom, letting you play around in a miniature version before you expand your real empire. Effortless and efficient!
The "Let's Get Our Hands A Little Dirty" Approach (With Plugins!)
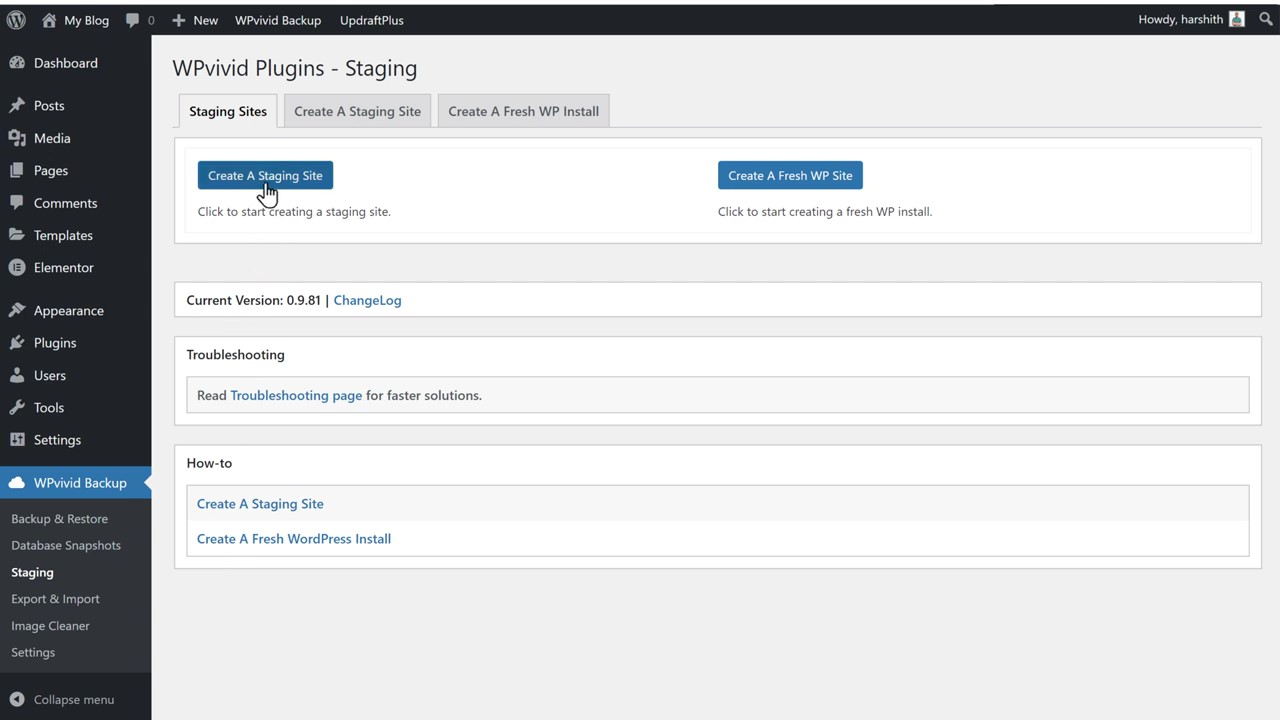
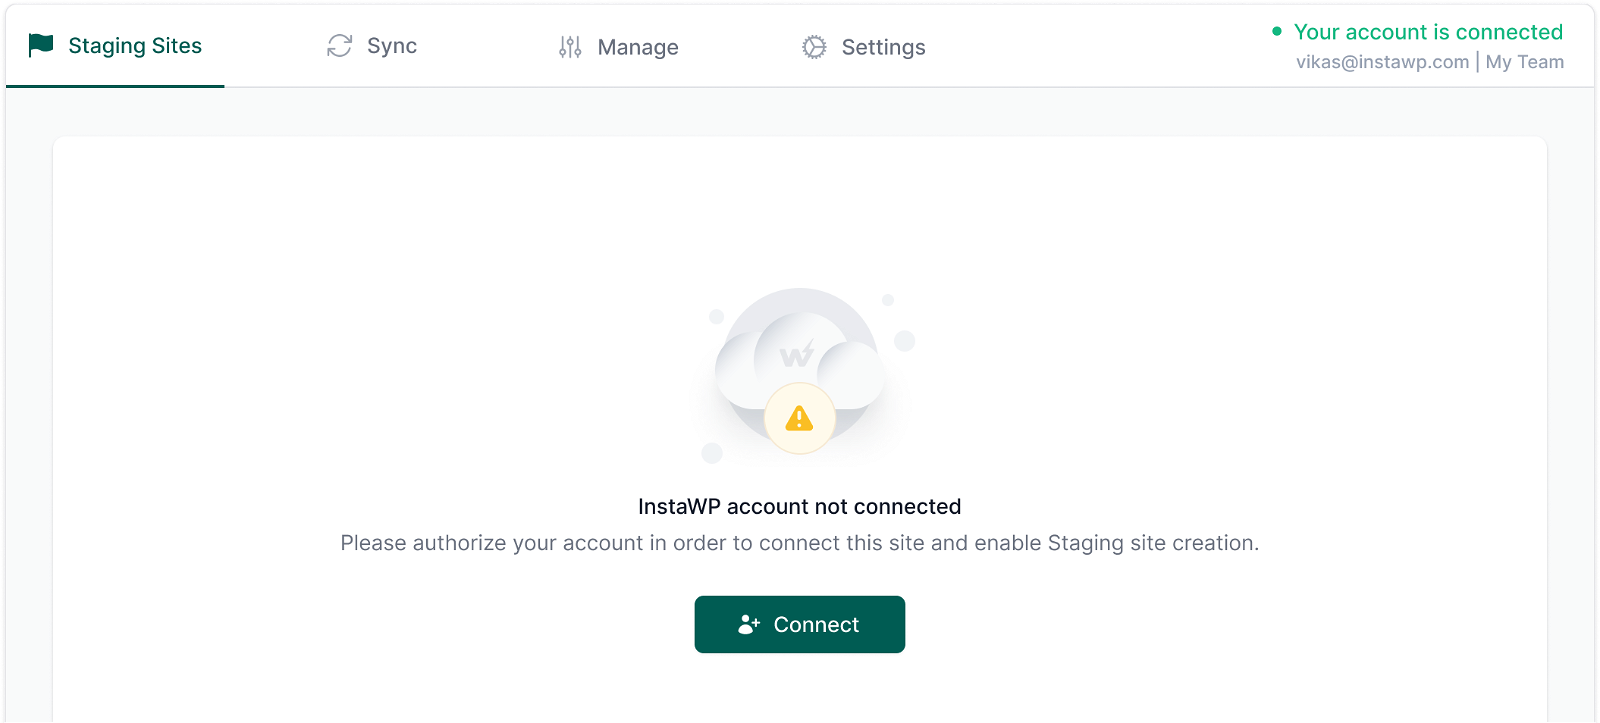
If your hosting provider doesn't offer a one-click staging solution, don't fret! There are some fantastic WordPress plugins that can help you achieve the same result. These plugins essentially create a copy of your site within your existing hosting environment, often in a subdirectory or as a separate installation that's not publicly accessible.
Popular choices include:
- WP Staging: This is a well-loved plugin that creates a complete copy of your site, including your database and uploads. It gives you a separate WordPress installation that you can access via a special URL. It's pretty user-friendly and allows for easy pushing of changes back to your live site.
- Duplicator: While primarily known for backups and migrations, Duplicator can also be used to create a staging site. You'd essentially build your staging site from scratch using a backup of your live site. It's a bit more manual but gives you a lot of control.
- All-in-One WP Migration: Similar to Duplicator, this plugin allows you to export your entire WordPress site and then import it into a new installation, which you'd configure to be your staging environment.
The general idea with these plugins is that you'll install the plugin on your live site, run a process to copy everything over to a new, private location, and then you'll access that new location to make your changes. When you're done, you'll use the plugin again to push those changes back to your live site. It’s like making a master copy of your blueprints to experiment with, before committing them to the actual building.
Setting Up Your Staging Playground: A Little More Detail
Whichever method you choose, the process usually involves a few key steps:
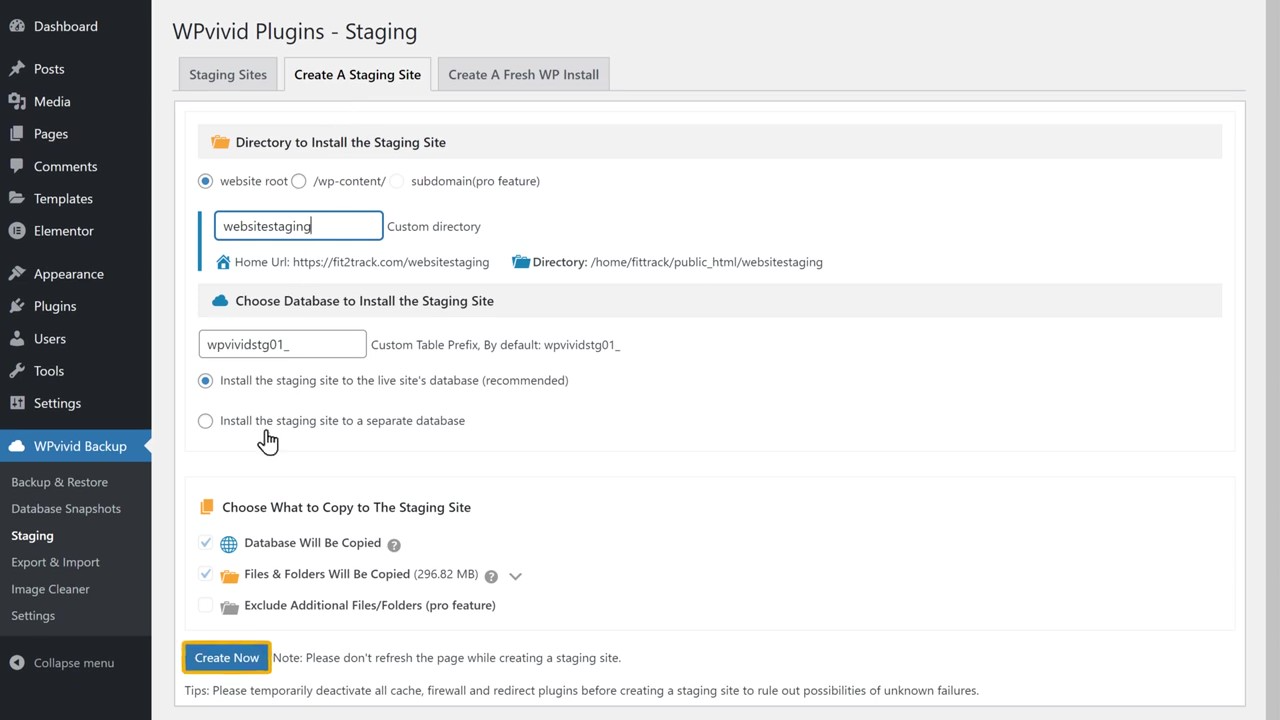
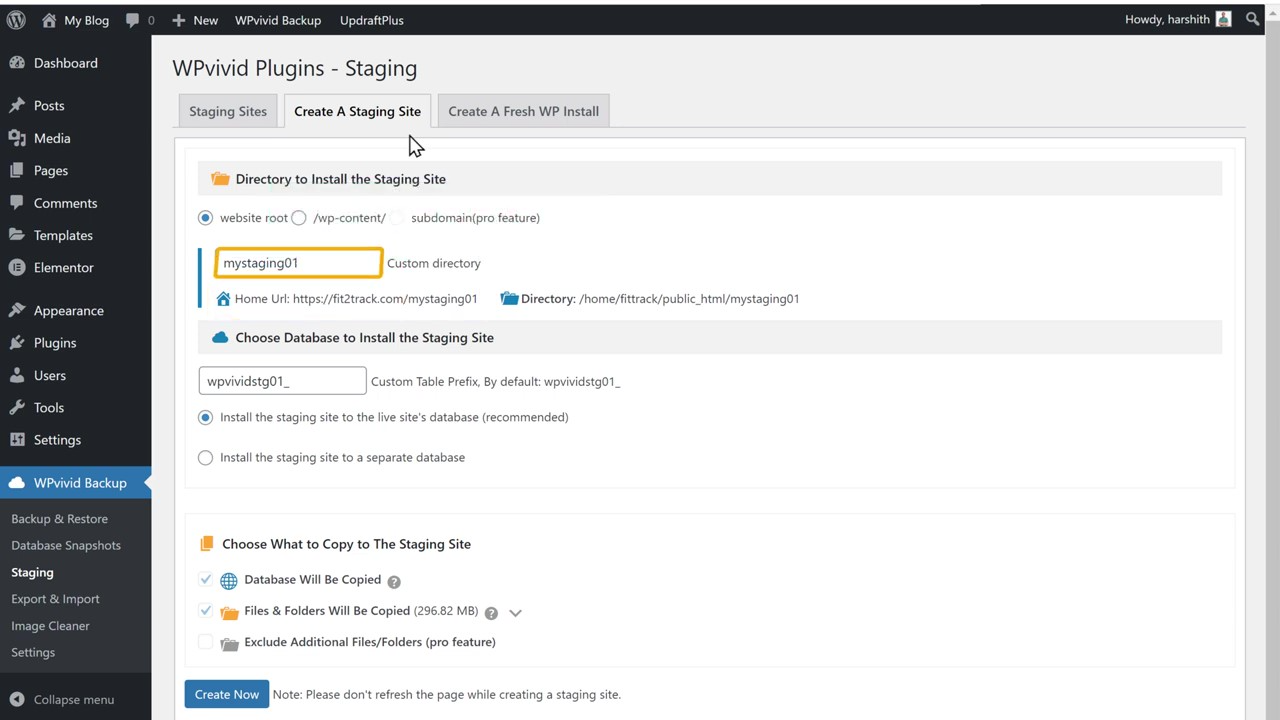
- Creating the Copy: This is where your hosting provider's tool or your chosen plugin does the heavy lifting. It duplicates your database, your theme files, your plugin files, and your uploaded media.
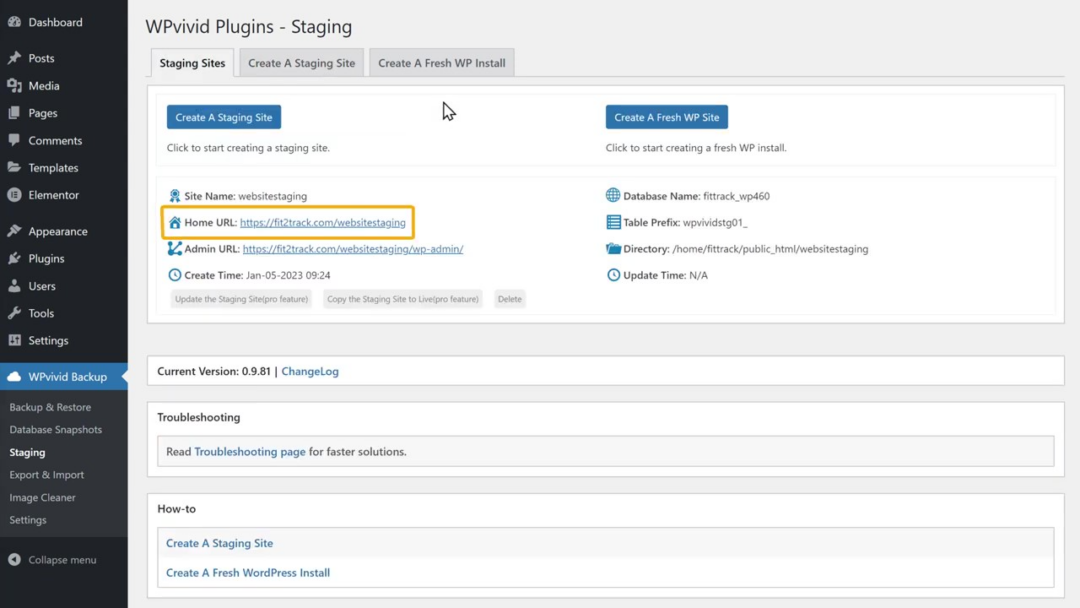
- Accessing Your Staging Site: Once created, you'll be given a specific URL to access your staging site. This URL is usually something like
staging.yourwebsite.comor a subdirectory likeyourwebsite.com/staging, but it's kept private. - Making Your Magic Happen: Now comes the fun part! Log into your staging site's WordPress dashboard and go nuts! Install that new plugin, change that color scheme, rewrite that blog post. Test everything thoroughly.
- Review and Push: Once you're satisfied with your work on the staging site, it's time to bring it to your live site. Most staging solutions have a "Push to Live" or "Sync" option. Be absolutely sure you've tested everything and are ready for this step. It’s like the final review before the grand opening – you want to be 100% confident.
It's crucial to remember that when you "push" changes, you're essentially overwriting your live site with the version from your staging site. So, if you accidentally broke something on staging and pushed it, you'd then break your live site. That's why thorough testing is your best friend here.
The "Wow, This Is Actually Useful!" Moments
Beyond just preventing disaster, staging sites open up a world of possibilities:
- Confidence in Updates: No more holding your breath when WordPress core, themes, or plugins release updates. You can test them on staging first.
- Experimentation Without Fear: Want to try a completely different look for your homepage? Go for it on staging! If you hate it, you can easily revert.
- Developer Workflow: If you work with others, it provides a clear environment for them to develop and for you to review.
- Learning and Discovery: It's a great way to learn about WordPress's inner workings without the risk of breaking your income stream.
Think of it as having an unlimited "undo" button for your website. You get to be bold, you get to be creative, and you get to ensure your website is always running at its best, all without the sleepless nights. So, next time you're about to make a significant change, remember your website's secret laboratory. Go forth and stage!