How To Get Wifi To My Shed

So, there I was, wrestling with a stubborn lawnmower that clearly had a personal vendetta against me. It sputtered, it coughed, it just… died. Mid-August heat, a yard that was starting to look like a jungle, and my trusty smartphone, which I’d been using for a YouTube tutorial on “Shed Shedding for Dummies” (yes, that’s a thing), suddenly declared, “No internet connection.” The sheer audacity! My shed, the sanctuary of forgotten tools and questionable DIY projects, had become an internet black hole. And in that moment of horticultural despair, a thought struck me: my shed deserves better. It deserves WiFi!
Think about it. Your shed is more than just a storage unit for dusty bikes and Christmas decorations. It's a workshop, a studio, maybe even a secret hideout for your teenager. It’s a place where inspiration should strike, not where your connection dies. So, if you've ever found yourself squinting at a weak signal in your outbuilding, or worse, resorting to that ancient landline (if you even have one anymore!), then this article is for you. We’re going to explore the magical, sometimes baffling, world of getting WiFi into your shed.
Let's face it, the main house WiFi is usually perfectly fine. It blankets the living room, the kitchen, probably even reaches that weird corner in the hallway where socks mysteriously disappear. But as soon as you step outside, even a few feet, that signal starts to get… shy. And a shed? That’s practically a different country to your router. So, how do we bridge that digital divide? Don't worry, we're not going to need to hire a team of highly trained squirrels to run Ethernet cables.
Must Read
Why Your Shed Needs WiFi (Besides My Lawn Mower Incident)
Okay, maybe my lawnmower drama was a bit dramatic, but there are legitimate reasons for giving your shed some digital love. For starters, what about all those smart tools? You know, the ones that connect to an app to tell you their battery status or let you control them remotely? They're just… sad and disconnected out there. Lonely.
And if you're into DIY, a shed is prime territory for all sorts of projects. Imagine streaming instructional videos directly to your tablet while you're building that birdhouse. Or maybe you're a gardener who wants to monitor temperature and humidity levels with smart sensors. The possibilities are literally endless. Plus, who wouldn't want to occasionally enjoy a podcast or some music while they're tinkering away, far from the madding crowd of household chores?
Honestly, it’s about extending your digital life beyond the four walls of your home. Your shed is an extension of your property, why shouldn’t it be an extension of your network too? It just makes sense in this interconnected world, doesn't it?
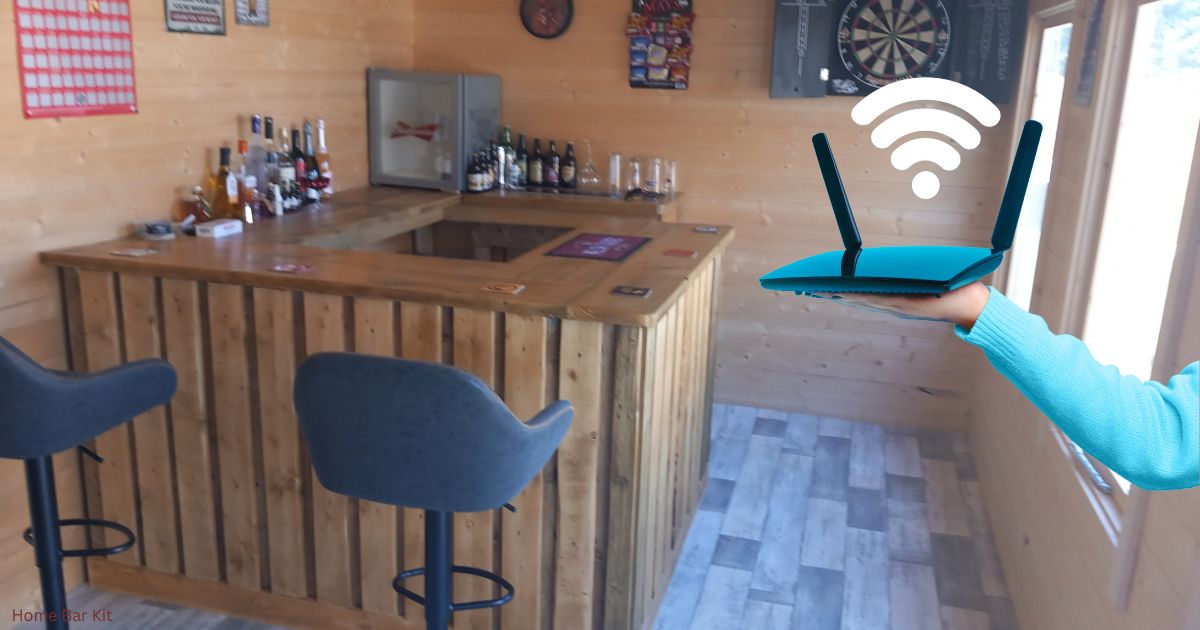
The Main Players: How WiFi Gets to Your Shed
So, how does this magic happen? There are a few main ways to tackle this, and they all involve getting that precious WiFi signal from your house out to your shed. Think of it like this: we need to extend the reach of your existing network.
The most common and often the easiest solutions involve some form of signal boosting or extension. We’re not talking about reinventing the wheel here, just giving it a little nudge in the right direction. It’s all about making your router’s signal play nice with your shed.
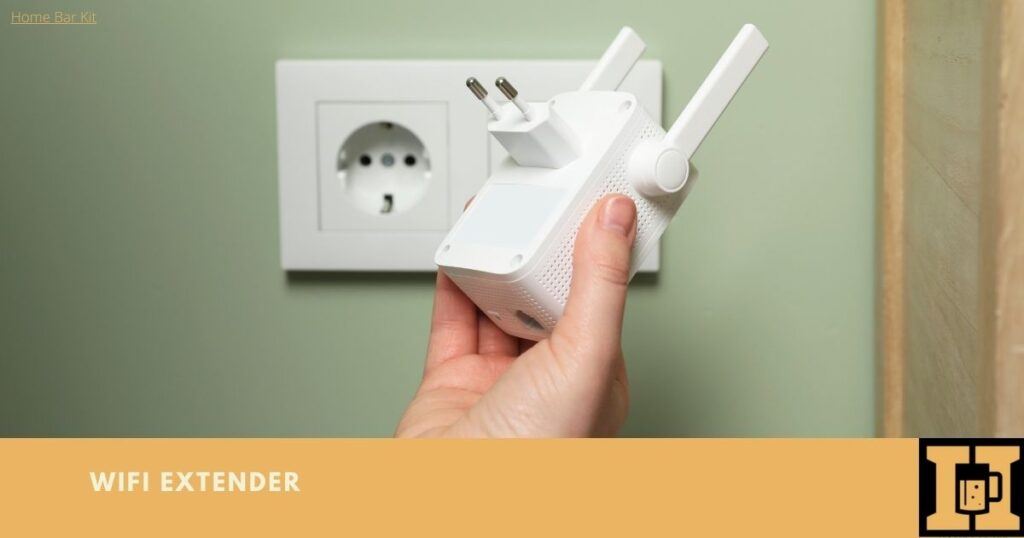
Option 1: The WiFi Extender (aka The Signal Booster)
This is probably the most popular and accessible option for most people. A WiFi extender, sometimes called a repeater, is a small device that you plug into a power outlet somewhere between your router and your shed. What it does is pretty simple: it picks up your existing WiFi signal and rebroadcasts it. It’s like a relay race for your internet.
Pros: They’re usually super easy to set up. Just plug it in, press a couple of buttons, and voilà! They’re also relatively inexpensive, which is always a bonus. Plus, they’re a good solution if your shed isn’t too far away.

Cons: The biggest drawback is that extenders can sometimes halve your internet speed. It’s like trying to shout a message across a crowded room – some of the clarity gets lost in translation. Also, their effectiveness can really depend on the distance and any obstacles (like thick walls or trees) between your router, the extender, and your shed. If the signal to the extender is already weak, then the rebroadcast won't be much better. Think of it as trying to copy a blurry photograph – the copy will be blurry too!
My take: If your shed is relatively close to the house, and you’re just looking for a casual connection for browsing or checking emails, an extender can be a perfectly good starting point. Don’t expect lightning-fast speeds for streaming 4K movies, but for general use? Give it a shot!
Option 2: The Mesh WiFi System
Now, if you’ve heard the term “mesh WiFi” thrown around, you might be picturing something futuristic. And in a way, it is! A mesh WiFi system is a more advanced solution that uses multiple nodes (think of them as mini routers) spread around your home to create a single, seamless WiFi network. One node connects to your router, and the others act as extensions, intelligently passing your connection between them.
Pros: This is where things get really good. Mesh systems are designed to provide consistent and strong WiFi coverage throughout your entire home and even into your outbuildings. They’re much smarter than simple extenders; they don’t just rebroadcast, they actively manage the network and ensure you get the best possible connection. They also typically don’t suffer from that significant speed drop that extenders can cause. It’s all about a unified, strong signal everywhere.
Cons: The main hurdle here is the cost. Mesh WiFi systems are generally more expensive than a single extender. You’ll also need to consider where you’ll place the additional nodes to ensure they can effectively reach your shed.
My take: If you’ve got a larger property, or if you’re serious about having robust WiFi everywhere, a mesh system is probably the way to go. It’s an investment, sure, but the payoff in terms of reliable connectivity is usually worth it. It’s like building a superhighway for your internet, instead of a bumpy dirt road.
Option 3: The Powerline Adapter
This one sounds a bit like something from a science fiction movie, doesn't it? Powerline adapters use your home's existing electrical wiring to transmit network data. You plug one adapter into a power outlet near your router and connect it via Ethernet cable. You then plug another adapter into a power outlet in your shed and connect your device (or a WiFi hotspot) to that.
Pros: This is a fantastic option if you have thick walls or a long distance that’s causing WiFi signals to struggle. The electrical wiring is already in place, so you’re leveraging existing infrastructure. They can be surprisingly effective, especially if the wiring in your house is relatively modern.
Cons: The performance of powerline adapters can be a bit hit-or-miss. It really depends on the quality and age of your home's electrical wiring. Old or complex wiring systems can interfere with the signal. Also, you might need to plug them directly into the wall socket, as surge protectors can sometimes block the signal. And, importantly, both your house and shed need to be on the same electrical circuit for this to work properly. If they’re on separate breakers, you’re out of luck.
My take: This is a great “if all else fails” option or a good alternative if your house is particularly difficult for wireless signals. It's worth investigating if you have a lot of brick or concrete to contend with. Just do a quick check of your electrical layout first!
Option 4: The Outdoor WiFi Access Point
This is the most robust and professional-looking solution. An outdoor WiFi access point (or AP) is designed to be mounted outside, usually on the side of your house or on a pole, and then run an Ethernet cable directly from your indoor router to this outdoor unit. This outdoor AP then broadcasts a strong WiFi signal that can reach your shed.
Pros: This is the most reliable and high-performance option. Outdoor APs are built to withstand the elements and provide a strong, stable signal over a good distance. It’s essentially bringing the WiFi signal directly to the vicinity of your shed.
Cons: This is also the most involved and potentially the most expensive option. Running an Ethernet cable from your router to the outdoor AP might require drilling holes or some minor outdoor cable management. You also need to ensure the AP itself is properly positioned for optimal coverage.
My take: If you’re looking for a rock-solid, long-term solution and don’t mind a bit of DIY (or hiring someone to do it), an outdoor access point is the premium choice. It's like having a dedicated WiFi tower for your shed!
Option 5: The Cellular Booster (The "Last Resort" Option)
Now, what if your shed is in the absolute middle of nowhere, and even your phone struggles to get a signal out there? In that case, a dedicated cellular booster might be your best bet. This device amplifies your mobile phone's signal and rebroadcasts it within a small area, including your shed.
Pros: This is perfect if your primary need is cellular data for a hot-spot or for your phone, and your home WiFi simply can't reach. It bypasses your home network altogether.
Cons: This doesn’t give you your home WiFi network. It gives you a cellular signal. So, if you have unlimited data, this could work. If you’re on a tight data plan, this might get expensive quickly. Also, the effectiveness depends heavily on the cellular signal strength in your area.
My take: This is truly a niche solution. Only consider this if you can't get any kind of reliable connection to your shed through other means and are happy to rely on cellular data.
Things to Consider Before You Buy Anything
Before you get too excited and start clicking “add to cart” on a whole bunch of gadgets, let’s pause for a moment. There are a few key things you should think about to make sure you pick the right solution for your specific shed situation.
Distance to the Shed: This is probably the most important factor. Is your shed 20 feet away, or 200 feet away? A short distance might be fine with an extender, while a longer distance might require a more robust solution like a mesh system or an outdoor AP.
Obstacles Between House and Shed: Are there solid brick walls, thick trees, or a pond between your router and your shed? These physical barriers can significantly weaken WiFi signals. The more obstacles, the more powerful your solution needs to be.
What Do You Need WiFi For?: Are you just checking emails and browsing the web? Or are you planning on streaming high-definition videos, playing online games, or running multiple smart devices? Your intended use will dictate the speed and reliability you require. Don't buy a sprinter if you need a marathon runner!
Your Budget: Let’s be honest, this is always a consideration. Extenders are the cheapest, followed by powerline adapters, then mesh systems, and finally outdoor APs which can be the most expensive. Figure out what you’re comfortable spending.
Your Existing Router: Is your current router old and a bit… sluggish? If your main router is outdated, even the best extender or mesh system might struggle. Sometimes, upgrading your router is the first step to better WiFi everywhere. Just a thought!

Putting it All Together: A Step-by-Step (ish) Guide
Okay, so you've weighed your options and considered the important factors. Here's a general roadmap to getting that sweet, sweet WiFi into your shed:
Step 1: Assess Your Situation
Grab a tape measure and a notepad. Walk from your router to your shed. Note the distances, any walls, trees, or other obstructions. Think about what you’ll actually do with WiFi in the shed.
Step 2: Choose Your Weapon of Choice
Based on your assessment, pick the solution that seems like the best fit. Don't be afraid to do a little more research on specific brands or models once you have an idea.
Step 3: Installation (The Fun Part!)
Follow the instructions that come with your chosen device. Most extenders and powerline adapters are plug-and-play. Mesh systems have apps to guide you through setup. Outdoor APs might require a bit more technical know-how (or a handy friend).
Step 4: Test, Test, Test!
Once everything is set up, go to your shed and do some speed tests. Try doing the things you intend to do – browse websites, stream a video, whatever. If it’s not quite right, don’t despair!
Step 5: Tweak and Troubleshoot
If the signal is still weak, try repositioning your extender or mesh node. If you’re using powerline adapters, try different outlets. Sometimes a small adjustment can make a big difference. Don't be afraid to consult the manual or do a quick online search for troubleshooting tips specific to your device.
And there you have it! Your shed, once a forgotten corner of your digital life, is now a fully connected hub of productivity and entertainment. Imagine the possibilities! No more running back and forth to the house for a signal check. Your tools can sing their connected songs. And that lawnmower? Well, hopefully, you can now find a YouTube tutorial to fix it in real-time, right there in the shed.
So, go forth and conquer that WiFi dead zone! Your shed deserves it. And who knows, maybe you'll even start spending more time out there. Happy connecting!

