Migrate Client Websites To New Agency Hosting Platform Steps
So, you’re the proud owner of a website, a digital storefront that’s been chugging along nicely. Maybe it’s been humming like a well-oiled sewing machine, or perhaps it’s been more like a sputtering lawnmower on a Sunday morning. Regardless, you’ve decided it’s time for a change of scenery. You’re ditching your old hosting provider for a swanky new one, a place with all the bells and whistles. Think of it like moving from a cozy, slightly cluttered studio apartment to a penthouse suite with a rooftop infinity pool. Exciting, right? But also, let’s be honest, a little bit terrifying. Like packing up all your belongings, but instead of boxes, it’s all digital bits and bytes, and if you drop one, poof! Your precious online presence vanishes into the ether. Fear not, intrepid website wrangler! Migrating your client websites to a new agency hosting platform can be less of a terrifying ordeal and more of a… well, a slightly less terrifying adventure. We’re going to navigate this digital jungle together, armed with coffee, questionable jokes, and a whole lot of patience.
First things first, let’s acknowledge the elephant in the room. Or rather, the giant, invisible, digital elephant that’s currently residing on your old server. This elephant is your website. It’s got all its friends with it: the code, the images, the databases, the little digital dust bunnies that have accumulated over the years. We need to pack this whole shindig up, and gently. This isn't a spontaneous move to a new city where you just shove everything into a U-Haul and hope for the best. This is a meticulously planned operation, worthy of a heist movie. Except, instead of diamonds, we’re stealing… web pages. The stakes are high, people!
Before we even think about packing, we need to do our homework. This is like choosing your new apartment. You wouldn't just sign a lease without checking the plumbing, right? Same goes for your new hosting platform. What are their specs? Do they offer enough bandwidth to handle your clients’ surging popularity (or at least their occasional surge of sudden interest)? What about storage? Is it like a walk-in closet or a shoebox? And don’t forget about support. Are they the kind of people who answer the phone with a cheerful “How can I help you?” or the ones who respond with a monotone “Your call is important to us. Please hold for the next century”? You want the former, trust me. A good support team is like a superhero cape for your hosting woes.
Must Read
Step 1: The Pre-Flight Checklist (Don't Skip This!)
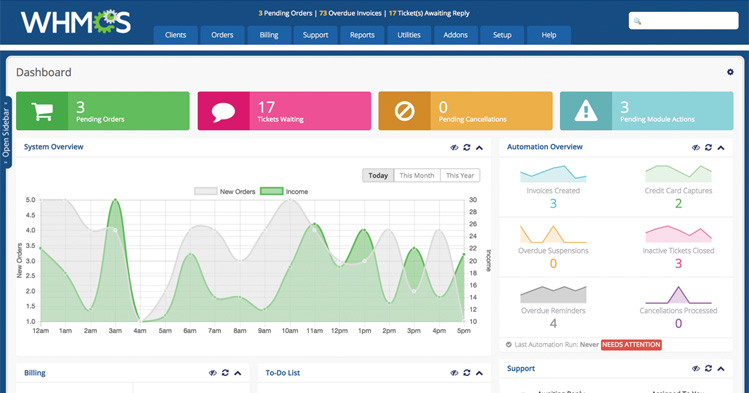
Okay, deep breaths. We’re not launching a rocket, just moving a website. But still, a good pre-flight checklist is crucial. Think of it as the pre-game warm-up. First, back up everything. I cannot stress this enough. It’s like having a spare tire for your car, but for your website. If anything goes spectacularly wrong (and let’s just pretend it won’t, but be prepared anyway), you’ll have a way to get back on the road. This isn’t a suggestion; it’s a non-negotiable commandment. If your current host offers a simple backup tool, use it. If not, there are plenty of plugins and scripts that can do the job. Just make sure you have a copy, a digital time capsule of your website’s current state.
Next, document your current setup. What’s the version of PHP your website is running? What about the database? Are there any special configurations or plugins that are… well, a bit quirky? Write it all down. This is like writing down the recipe for your grandma’s secret cookies. You don’t want to lose that magic. This documentation will be your lifeline when you’re trying to replicate the environment on your new platform. Imagine trying to bake that cookie recipe from memory – you’d probably end up with something that tastes suspiciously like burnt toast.
Finally, communicate with your clients. Now, this might sound like a radical idea, but hear me out. Let them know something is happening. You don’t need to send them a 50-page technical document detailing the intricacies of DNS propagation. A simple, friendly email like, “Hey, we’re giving your website a sweet new home to make it even faster and more awesome! There might be a tiny bit of downtime, but we’ll do our best to make it seamless,” should do the trick. Some clients might be super chill, others might start sweating bullets. Just be upfront, be honest, and let them know you’ve got this. It’s like telling your kids you’re moving to a new house – they might complain about leaving their friends, but they’ll be excited about the bigger backyard.
Step 2: The Digital Packing Party (Where the Real Fun Begins)
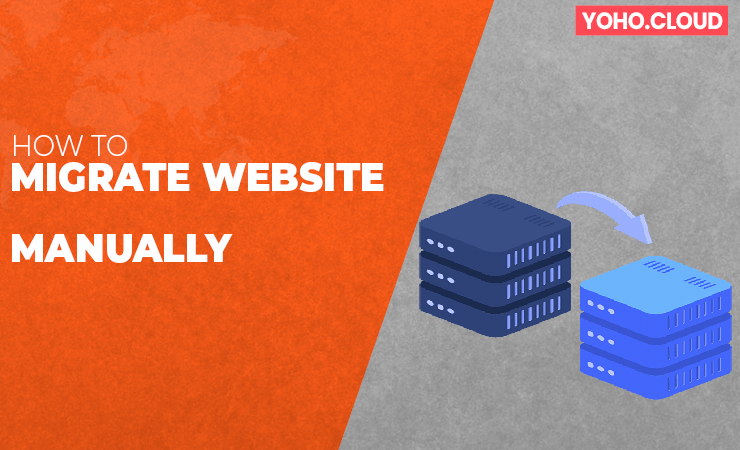
Alright, the bags are packed (metaphorically, of course). Now it’s time to actually transfer your website files. This is where you'll often use an FTP client (File Transfer Protocol). Think of FTP as a digital moving truck. You log into your old server, grab your website’s files (the HTML, CSS, JavaScript, images – all the good stuff), and then you upload them to your new hosting platform. It's a bit like playing Tetris, but with much more important shapes. Speed and stability are your friends here. If your connection is slower than a sloth on tranquilizers, this could take a while. And if it’s unstable, well, you might end up with half a website and a serious urge to throw your computer out the window. Don’t do that. We’re professionals here, remember?

Then there’s the database migration. This is the brain of your website. It’s where all your content, user data, and settings live. Migrating a database can be a bit more technical. You’ll likely export your database from your old host and then import it into your new one. This often involves tools like phpMyAdmin. If this sounds like a foreign language, don’t panic. Most hosting providers have excellent documentation or tutorials on how to do this. It’s like following a recipe for the first time – you might mess up a step, but the end result is usually edible. And in this case, hopefully, very functional.
Don't forget about your email accounts! This is crucial. Your clients’ professional reputation often hinges on their email. You need to make sure their emails are migrated too. This usually involves setting up the email accounts on the new server and then migrating the actual emails. This can sometimes be the trickiest part, as it involves not just the setup but also the historical data. Think of it as moving your entire inbox, including all those spam emails you keep meaning to delete but never do.

Step 3: The Grand Unveiling (Testing, Testing, 1, 2, 3)
You’ve packed, you’ve moved, you’ve unpacked. Now it’s time to test, test, and test again. Before you flip the switch and officially point everyone to your new home, you need to make sure everything is working as it should. Browse every page. Click every link. Fill out every form. Test your e-commerce checkout process if applicable. It’s like doing a final walkthrough of your new apartment before you sign off. Are the lights working? Is the water pressure decent? Does the Wi-Fi actually reach the bedroom?
The best way to do this is by using your new host’s temporary URL or by modifying your computer’s hosts file. This lets you preview the website on the new server before the official domain name points to it. Think of it as a secret sneak peek. You get to see the new digs before the world does. This is your chance to catch any glitches, any broken images, any typos that magically appeared during the move. A surprising number of typos love to sneak into websites during migrations – it’s like they’re on vacation too.

Once you’re confident that your website is performing like a seasoned Olympian, it’s time for the DNS propagation. This is the final, exciting step. DNS (Domain Name System) is basically the internet’s phone book. When someone types in your website address, DNS tells their browser where to find it. You’ll update your domain’s DNS records to point to your new hosting server. This process can take anywhere from a few minutes to 48 hours to fully propagate across the internet. So, be patient. It’s like waiting for a package to be delivered – you track it obsessively, and then suddenly, there it is!
Step 4: Post-Move Jitters and Celebration
After the DNS has propagated and your website is officially live on its new platform, there’s still a little bit of work to do. Monitor your website like a hawk. Keep an eye on your analytics. Are you seeing any unusual spikes or drops in traffic? Are there any new error messages popping up? It’s like checking your new apartment for leaks after a big storm. Better safe than sorry.
And then, my friends, it’s time for a well-deserved celebration! You’ve navigated the treacherous waters of website migration. You’ve wrestled with FTP clients and databases. You’ve potentially consumed an alarming amount of caffeine. You deserve a pat on the back, a round of applause, or at the very least, a really good slice of cake. You’ve successfully moved your clients’ digital homes, ensuring they have a faster, more reliable, and hopefully, a more awesome online presence. Go forth and migrate, brave digital movers! The internet is your oyster, and now, your oyster has an even shinier, more robust shell.