How Do You Use A Toner For Hair

So, you’ve heard about this “hair toner” thing, right? Maybe you’ve seen it splashed across your social media feeds, a magical potion promising to banish brassy tones and bring your hair dreams to life. It sounds a bit like something out of a fairytale, doesn't it? Well, in a way, it kind of is, but a very real, very achievable fairytale for your locks.
Imagine your hair has just had a little… oopsie. Maybe after a salon visit, or perhaps you’ve bravely dabbled in DIY dye. Whatever the reason, your beautiful blonde has suddenly developed a yellowy, orangey tinge that makes it look less like sunshine and more like a grumpy duck. Don't fret! This is where our hero, the hair toner, swoops in to save the day. It's like a tiny superhero for your strands, on a mission to neutralize those unwanted hues.
Think of it this way: have you ever seen those fancy paint palettes? They have all sorts of colors, and sometimes, to get the exact shade you want, you have to mix them. Hair toning is a bit like that, but instead of pigments on a canvas, we’re talking about pigments in a liquid or cream that interact with your hair color. It’s all about creating balance.
Must Read
Now, how do you actually use this magical stuff? It’s not exactly rocket science, but it does require a touch of finesse and maybe a deep breath if you’re doing it at home for the first time. The first thing you need is the right toner. This is crucial. It’s like choosing the right ingredients for your famous chocolate chip cookies; get it wrong, and well, it’s just not the same. Your hairdresser, the wizard behind the curtain, will know exactly which toner will sing in harmony with your hair's current situation. If you’re venturing solo, do your homework! There are toners designed to combat yellow, others for orange, and even some for those sneaky greenish tints.
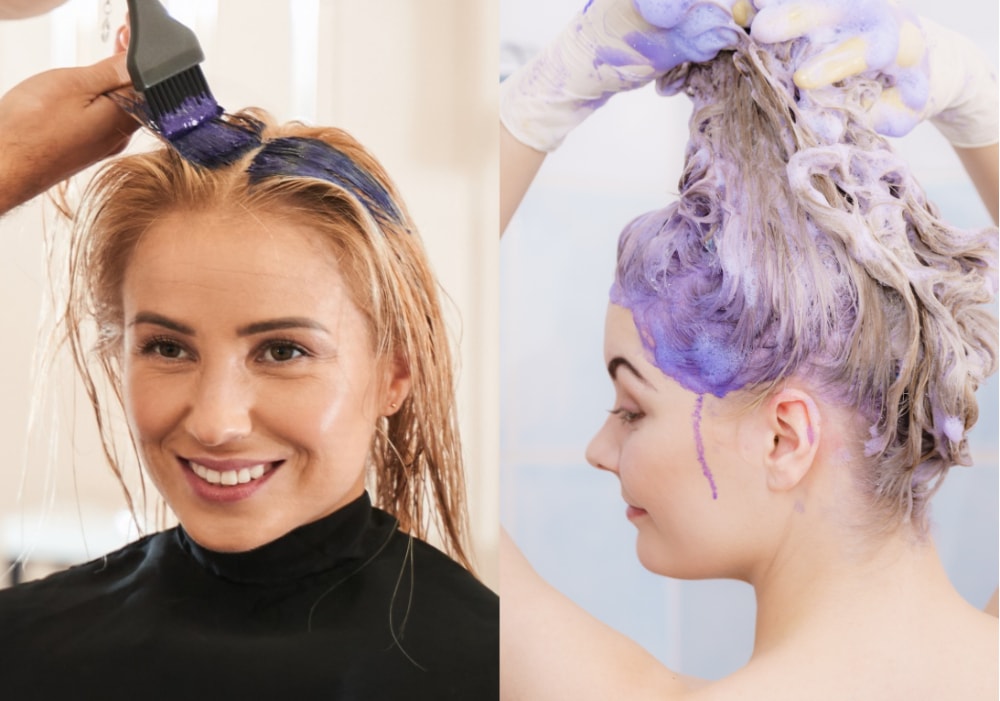
Once you’ve got your chosen elixir, it’s time to get down to business. Typically, you’ll start with freshly washed, towel-dried hair. Think of it as a clean slate, ready to be transformed. The toner usually comes with a developer, which is like the catalyst that makes the magic happen. You'll mix these two together in a non-metal bowl. And yes, non-metal is important. Metal can sometimes react with the chemicals, and nobody wants unexpected hair experiments, right?

Now, for the application. This is where you might need a friend, or at least a really good mirror situation. Sectioning your hair is key. Think of it like frosting a cake – you want even coverage. Using an applicator brush, you’ll carefully paint the toner onto the areas that need toning. It usually starts at the roots and works its way down, or it might be applied all over, depending on what you're trying to achieve. You want to make sure every strand that’s feeling a bit… off… gets its fair share of the toning goodness.
As you apply, you'll start to notice a change. It’s not a dramatic, instant transformation like a superhero changing costumes, but a subtle, yet significant shift. Your hair might start to look a little… funny. Don’t panic! Sometimes, toners can make hair look a bit purple or gray temporarily. That’s the toner doing its job, fighting those yellowy undertones. It's like a little color battle happening on your head.

Then comes the waiting game. This is where patience is a virtue. The processing time can vary, usually from just a few minutes to about 20 or 30 minutes. It’s a bit like letting your favorite mask sit on your face; you have to trust the process. Keep an eye on your hair. Many people like to rinse and check progress every 5-10 minutes. It’s a good way to avoid over-toning and ending up with hair that looks like it’s been dipped in a lavender field unintentionally.
When it’s time, you rinse, rinse, rinse! Use cool water, as this helps to seal the cuticle and keep your color vibrant. After rinsing, you’ll follow up with a shampoo and conditioner. Some people prefer to use color-safe products, which is always a good idea to extend the life of your freshly toned hair. And then… the grand reveal!

You look in the mirror, and there it is. The brassiness is gone. Your blonde is brighter, cooler, or whatever beautiful shade you were aiming for. It’s that satisfying moment when you realize the little bit of effort was absolutely worth it. It’s the feeling of having your hair back on track, looking and feeling its absolute best. It’s a small victory, but for anyone who’s battled unwanted hair tones, it feels like a major win.
"It’s like a little bit of salon magic in a bottle, but you get to be the magician!"
Using a hair toner isn't just about fixing a problem; it's about enhancing what you've got. It’s about refining your color, giving it that polished, professional look. It’s the secret weapon in the arsenal of beautiful hair. Whether you’re a seasoned toner-user or just curious about dipping your toes in, remember it’s a journey of color correction and enhancement. And sometimes, that journey can be surprisingly fun, a little bit messy, and ultimately, incredibly rewarding. It’s a reminder that with a little bit of care and the right tools, you can achieve those dream hair colors, one toner application at a time.