Wordpress Theme Update Best Practices Backup Testing Child Theme

Hey there, website wizards and wannabe WordPress gurus! So, you've been chugging along with your awesome website, feeling pretty smug about it, when BAM! That little notification pops up: "Your theme needs an update." Don't you just love that feeling? It's like finding a mysterious sock in the laundry – you know it's supposed to be a good thing, but a tiny seed of doubt starts to sprout.
Now, before you go clicking that "Update Now" button faster than a toddler spotting a cookie, let's have a little chat. Updating your WordPress theme is super important, like flossing your teeth or remembering your best friend's birthday. It keeps your site secure, makes it run smoother, and often throws in some snazzy new features. But, and it's a big ol' "but," if you don't do it right, you could end up with a broken website and a sinking feeling in your stomach. Nobody wants that, right? We're aiming for sunshine and rainbows, not pixelated nightmares!
So, let's break down the magic formula for a smooth theme update, shall we? It's not rocket science, I promise! Think of it more like baking a cake – a few key steps, and you'll be enjoying a delicious (and functional!) result.
Must Read
Step 1: The All-Important Backup (Seriously, Don't Skip This!)
Okay, deep breaths. This is the most crucial step. If you take away nothing else from this whole spiel, please, please remember to back up your website before you even think about touching that update button. I know, I know, it sounds like a buzzkill, but trust me, your future self will be sending you thank-you notes.
Think of a backup as your website's personal superhero cape. If anything goes haywire during the update (and sometimes, despite our best intentions, things do go haywire – it's the internet, folks!), your backup is there to swoop in and save the day. It's like having a "rewind" button for your entire online presence. Pretty neat, huh?
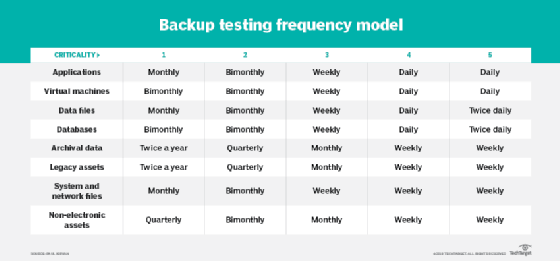
There are a bunch of ways to get your backup on. Many hosting providers offer automatic backup services. You can also use a WordPress plugin. Some popular ones include UpdraftPlus, BackupBuddy, and VaultPress. Do a little digging, find one that tickles your fancy, and set it up. Make sure it’s backing up your entire site: all your files and your database. You don't want to be missing any of those crucial bits and bobs!
For the tech-shy among us, don't be intimidated. Most backup plugins are pretty user-friendly. They’ll guide you through the process, and before you know it, you'll have a lovely, safe copy of your website stashed away. It’s like putting your precious vase in a padded box before moving it. Better safe than sorry, right?
And once you've got that backup, double-check it! Does it actually exist? Can you find it? Is it the latest version? Don't just assume. A quick peek is all it takes to sleep soundly knowing your digital baby is protected.
Step 2: The Testing Ground – Your Staging Site is Your Bestie
Alright, you've got your superhero cape (aka the backup). Now, before we unleash the update beast on your live, public-facing website, let's give it a little test run. This is where your staging site comes into play. Ever heard of it? No? No worries, let me introduce you!
A staging site is basically a private copy of your website that lives on a separate server. It’s like having a secret practice room for your website's performance. You can do whatever you want on your staging site – test plugins, try out new features, and, of course, update your theme – without affecting your live site one bit. It’s a digital sandbox, and it’s your new best friend in the world of website maintenance.
Why is this so darn important? Because themes can interact with plugins and other themes in unexpected ways. Sometimes, an update might be perfectly fine on its own, but then it clashes with a plugin you're using, and poof! Your contact form suddenly decides to take a permanent vacation, or your image gallery starts displaying photos of grumpy cats instead of your fabulous products. It happens!
Many hosting providers offer a one-click staging site setup. If yours doesn't, don't despair! There are also plugins that can help you create a staging environment. It might take a little extra effort to set up, but believe me, the peace of mind it provides is priceless. Imagine being able to experiment with wild abandon, knowing that if something goes spectacularly wrong, your actual website remains untouched and fabulous.
So, here’s the drill: Copy your live site over to your staging site. Then, on your staging site, go ahead and update your theme. Browse through your entire site. Click on every button, fill out every form (even if it's just gibberish for testing), check out your galleries, your blog posts, your pages. Pretend you’re a super-picky visitor who’s trying to find fault with everything. Be thorough.
Look for any weird visual glitches, broken links, or functionality issues. If you spot anything that looks less than ideal, you can either try to fix it on the staging site or decide not to proceed with the update on your live site. It’s like a dress rehearsal before the big show! You wouldn't want to wear mismatched socks on opening night, would you?
Step 3: The Child Theme – Your Theme's Loyal Sidekick
Now, let’s talk about something called a child theme. If you've ever customized your theme's code directly (you brave soul!), or even if you just like to make small tweaks to the styling, a child theme is your new secret weapon. And if you haven't customized your code, well, consider this a friendly heads-up for the future!
Imagine your original theme is like a fancy, pre-built house. It's got all the rooms, the plumbing, the electricity – it works great! Now, you want to repaint a wall a different color or add a cool new bookshelf. If you just go in and start painting directly on the original house's walls, what happens when the house gets a renovation (i.e., a theme update)? All your beautiful paintwork might get covered up or messed up! That’s a bummer.
A child theme is like building an extension onto your original house. You can make all your changes and customizations in this extension without touching the original structure. So, when the main house gets its update, your extension remains perfectly intact. Your custom paint job is still there, your bookshelf is still standing tall, and your sanity is still intact. Win-win!
When you update your parent theme (the original one), all your customizations made directly to that theme will be lost. Poof! Gone like a magician's rabbit. But if you're using a child theme, those updates will only affect the parent theme. Your child theme, with all your precious modifications, will continue to work as intended. It’s the ultimate protection for your hard work and creative flair.
Creating a child theme used to sound like something only advanced developers could do, but thankfully, it’s become much more accessible. There are plugins that can help you generate a basic child theme, and the process itself is actually quite straightforward once you understand the concept. Think of it as building a smaller, more manageable shed next to your main house – easier to manage and customize!
So, if you're planning on making any modifications to your theme's files, or even if you're just thinking about it for the future, get a child theme set up. It’s a small step now that will save you a huge headache later. It’s the difference between a smooth sailing and a shipwreck of code.
Putting It All Together: The Grand Finale
So, let's recap our theme update adventure. We've got our trusty backup, our secret testing ground (the staging site!), and our theme's loyal sidekick (the child theme!). Now, how do we actually do the update?
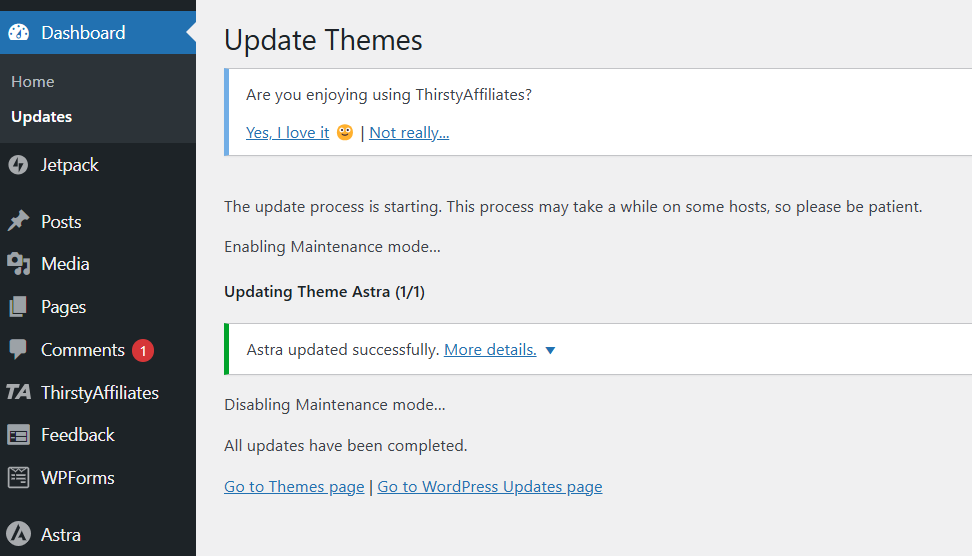
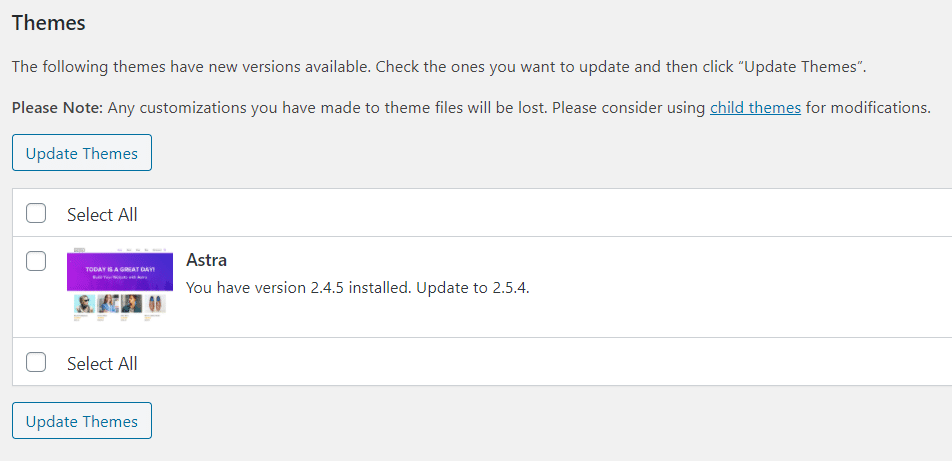
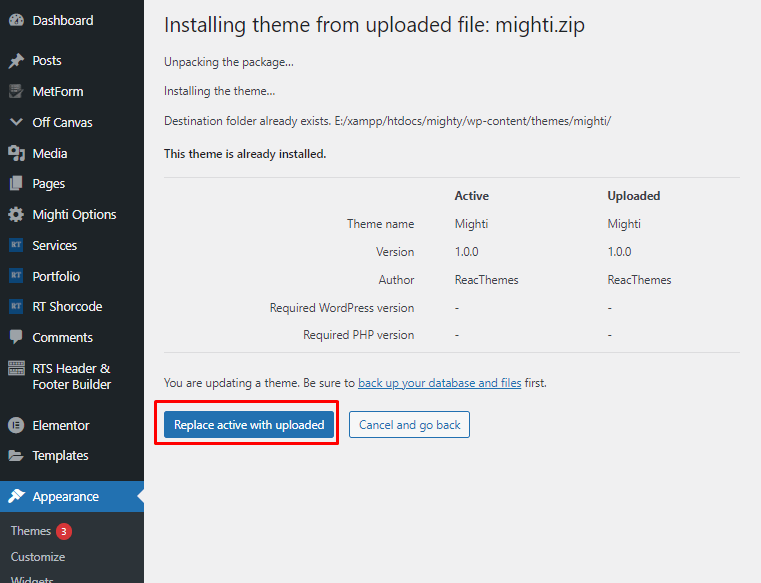
First, make sure your backup is solid as a rock. Seriously, double-check. Then, if you haven't already, set up your staging site and push a fresh copy of your live site to it. On your staging site, go to your WordPress dashboard, navigate to "Appearance" -> "Themes," and you should see the available update for your theme. Click that update button!
Once the update is complete on your staging site, spend some quality time exploring every nook and cranny. Click all the links, test all the forms, make sure everything looks and functions as it should. If you encounter any issues, try to troubleshoot them on the staging site. If you're using a child theme and made customizations, ensure they are still working correctly.

If your staging site is looking good and everything is shipshape, then it’s time to update your live site. First, take another backup of your live site. Yes, it might seem excessive, but it’s better to have too many backups than not enough. Think of it as having a spare tire and a spare can of gas.
Now, go to your live WordPress dashboard, navigate to "Appearance" -> "Themes," and update your theme. Again, go through your live site with a fine-tooth comb. Test everything. This time, you’re looking for any last-minute surprises.
And if, by some slim chance, something does go wrong on your live site, don't panic! Remember that superhero backup you made? It's time to put it to work. Restore your site from the backup, and then you can go back to your staging site to figure out what went awry before trying again. It’s all about having a plan and a safety net.
Remember, keeping your WordPress theme updated is like giving your website a regular check-up at the doctor's. It ensures it stays healthy, strong, and secure. It might seem like a bit of work upfront, but the benefits are enormous. You get a faster, safer, and more feature-rich website, and you get to avoid those heart-stopping moments of a broken site.
So, there you have it! The not-so-scary secrets to a smooth WordPress theme update. With a little preparation and these simple steps, you can confidently tackle those update notifications and keep your website sparkling. You've got this!
And hey, if all else fails and you end up with a wonderfully quirky, slightly broken website, just embrace it! Maybe it's a new "feature." Or maybe it's just time for a cup of tea and a laugh. Because at the end of the day, you’re building something amazing online, and that’s something to be incredibly proud of. Go forth and update with confidence, you magnificent website warrior!