How To Use The Grill On An Oven
Alright, gather 'round, my culinary comrades, because we're about to embark on a glorious journey. Forget those fancy, smoke-billowing behemoths that cost more than your first car. Today, we're unlocking the secrets of the humble, the often-overlooked, the miraculously effective grill that lives inside your oven. Yes, you heard me right. Your oven, that metal box that's probably just seen its fair share of frozen pizzas and questionable baked goods, has a secret superpower: the broil setting. Think of it as your personal, portable, indoors-friendly barbecue. It's like getting a puppy and a pizza oven all rolled into one, but without the shedding and the existential dread of carb loading. So, let's ditch the rain-soaked backyard and the frantic dash for a lighter, and get ready to grill like a boss!
Now, I know what some of you are thinking. "Broil? Isn't that just for burning toast to a crisp or giving your steak those weird, uneven char marks?" And to that, I say, "Bless your heart!" While it's true that broiling requires a certain… vigilance, when done right, it’s your golden ticket to perfectly seared proteins, blistered veggies, and that delightful smoky essence we all crave, without having to explain to your neighbors why you’re setting off their smoke detectors at 7 PM on a Tuesday. It’s like a magic trick, but the only disappearing act involved is the raw food into deliciousness.
First things first, let's talk about the star of the show: the broil element. Most ovens have it, usually situated at the very top. It’s that glowing, fiery serpent ready to unleash its culinary fury. Before you go wielding it like a lightsaber, we need to get our ducks in a row. And by ducks, I mean your ingredients and your equipment. Cleanliness is king here, folks. A greasy oven is a fire hazard, and nobody wants their gourmet grilled chicken to taste like last week's forgotten casserole. Give that oven a good scrub. Think of it as a spa day for your appliance. It deserves it.
Must Read
Operation: Indoor Barbecue - The Nitty Gritty
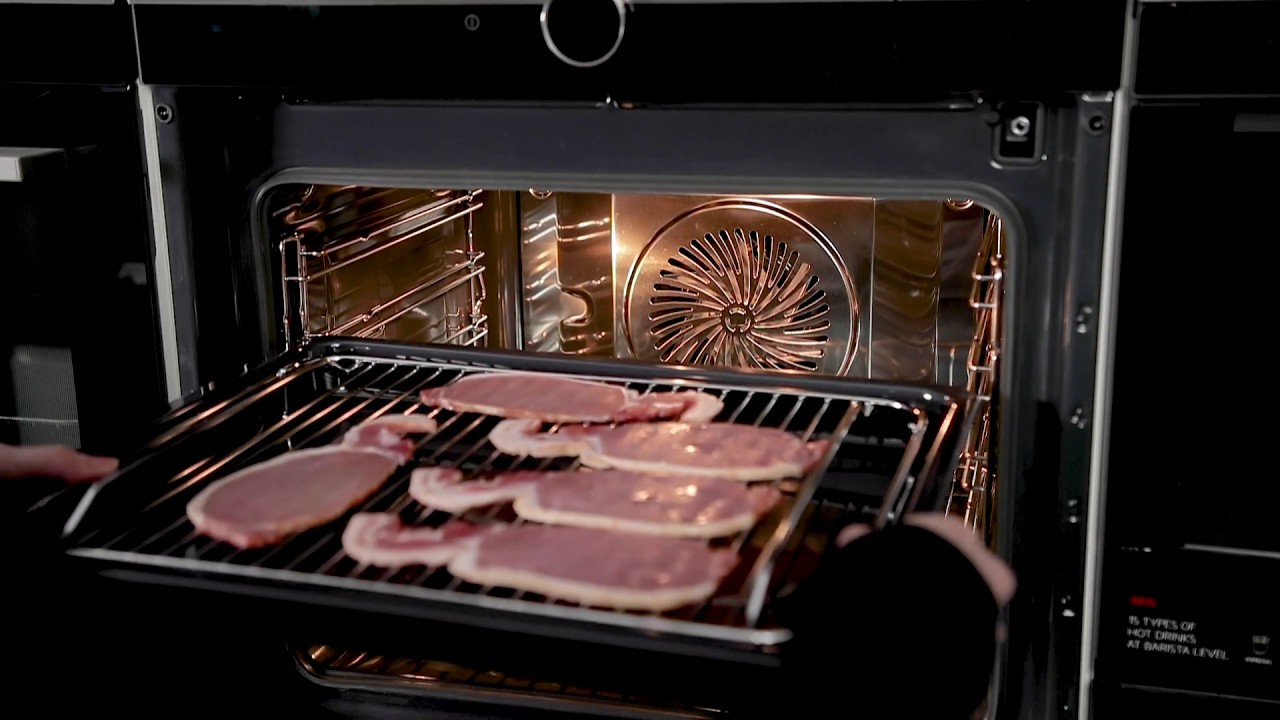
Okay, now for the actual "how-to." It’s not rocket science, but it does require a touch more attention than, say, microwaving a burrito. You’ll want to position your oven rack. For most things, a medium to high position is your sweet spot. You want that heat to kiss, not scorch, your food. Think of it as a gentle hug from a very hot relative. Too low, and you’ll just be baking. Too high, and you’ll be creating charcoal briquettes that even the most enthusiastic griller would shun.
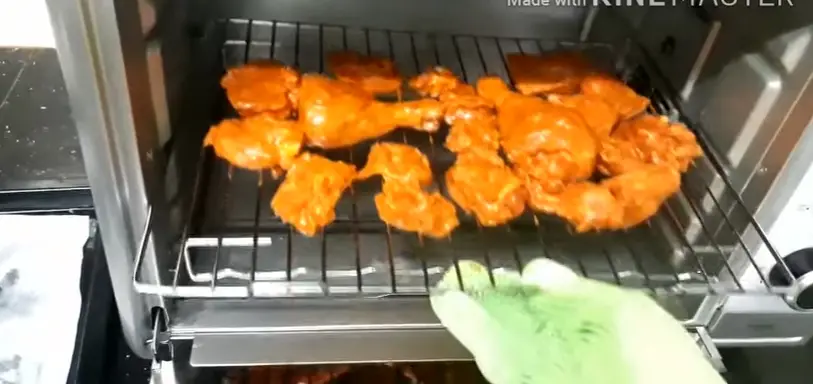
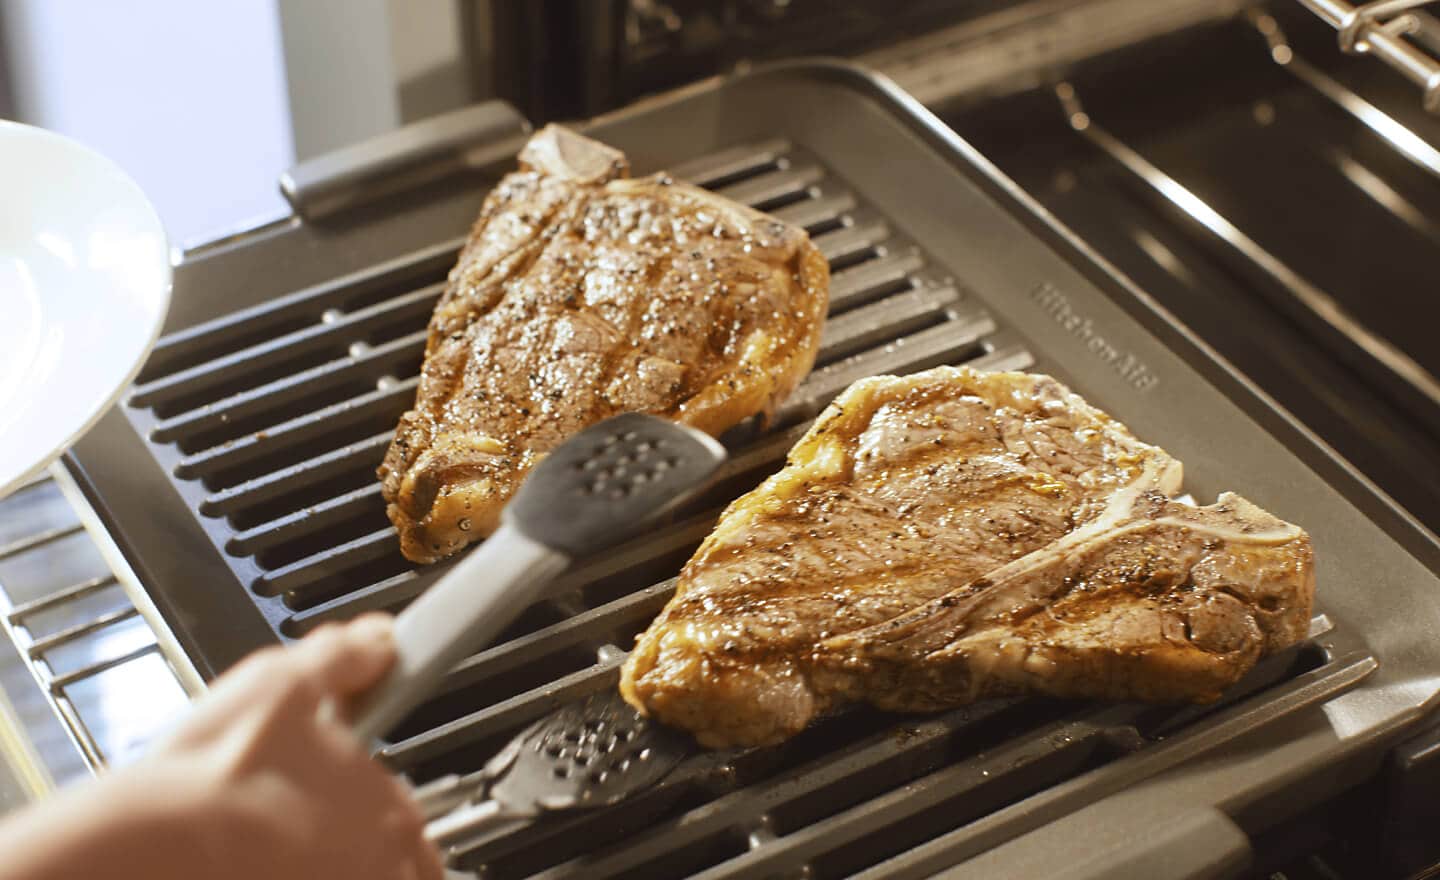
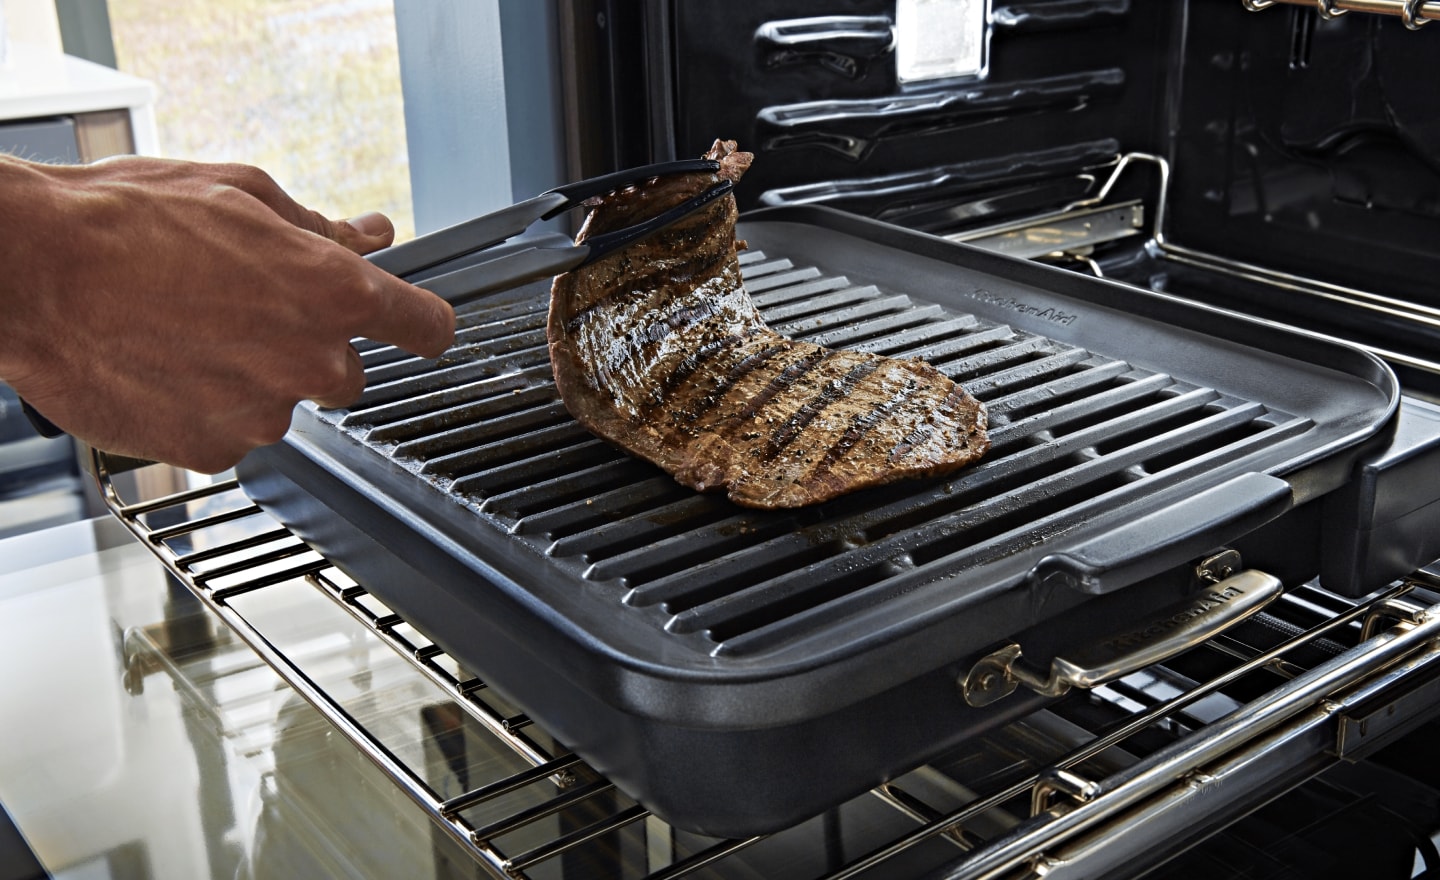
Next, we select our prey. What can you actually grill under this fiery gaze? Think thin cuts of meat, like chicken breasts (flattened, please, unless you enjoy playing culinary roulette with doneness), thin steaks, pork chops, and fish. Delicate seafood, like shrimp and scallops, are also fantastic candidates. They cook super fast, and under the broiler’s watchful eye, they get that beautiful char without turning into shoe leather. And don't even get me started on vegetables! Asparagus spears, bell pepper strips, zucchini rounds, cherry tomatoes – they all transform into little flavor bombs when kissed by the broiler.
The Pre-Heat: Patience is a Virtue, Especially When Fire is Involved
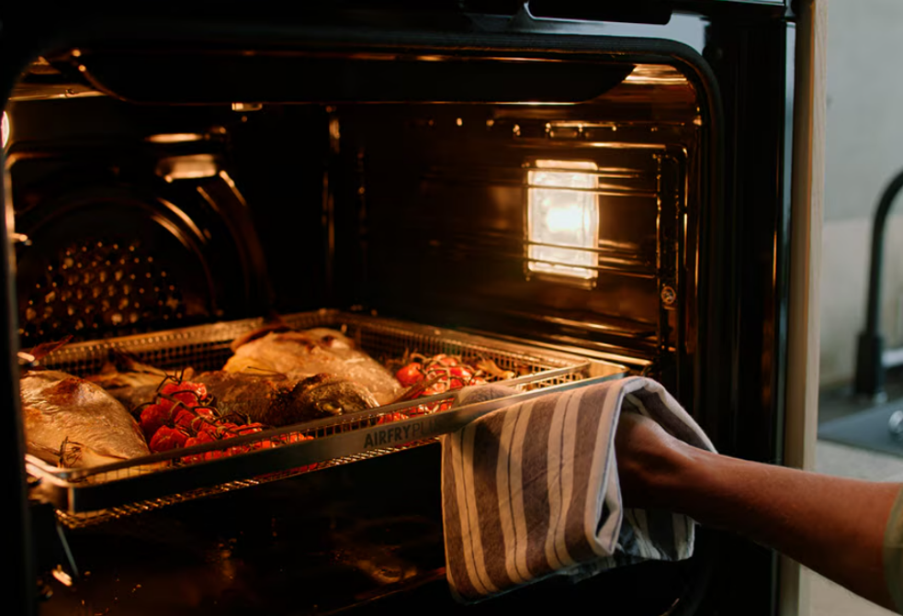
Now, this is where the magic really begins. You’ve got your rack in place, your ingredients prepped. It’s time to crank up the heat. Set your oven to the “broil” setting. You’ll likely have two options: “broil” and “broil high.” For most of us, “broil high” is the way to go for that authentic grill-like sear. But remember, this thing gets HOT. Like, "did I leave the oven mitts too close?" hot. So, give it a good five to ten minutes to preheat. You want that broiler element to be glowing a vibrant red. It’s like a tiny, angry sun in your kitchen. Beautiful, isn't it?
While it’s preheating, get your food ready. Lightly oil your ingredients. This prevents sticking and helps with that gorgeous, even browning. Season generously! Salt, pepper, your favorite spices – this is your chance to shine. And here's a pro-tip straight from the smoky depths of my kitchen: use an oven-safe baking sheet or a cast-iron skillet. This catches any drips, prevents a greasy mess, and ensures even cooking. Plus, a sizzling cast-iron skillet after a session under the broiler? Pure culinary poetry.
Now, the moment of truth. Carefully, and I mean carefully, place your baking sheet or skillet with your precious cargo onto the preheated rack. And this is where the vigilance comes in, folks. Unlike a backyard grill where you can step away for a breather, your oven broiler is a hands-on experience. You need to be present. Like, really present. Think of it as a high-stakes game of "Simon Says" with your food and a very powerful heat source.
The Blink-and-You’ll-Miss-It Magic
The cooking time under the broiler is fast. We’re talking minutes, not hours. For thin chicken breasts, you might be looking at 4-6 minutes per side. Steaks? Even less. Shrimp? Practically seconds. This is where those playful exaggerations I promised come in: you’ll be flipping your food so fast, you’ll feel like you’re auditioning for a culinary gymnastics team. Keep an eye on it. Peek through the oven door (carefully, the glass gets hot too!). You’re looking for that beautiful golden-brown sear, that slight char on the edges.
And here’s a secret weapon: flipping is your friend. You want to rotate that food halfway through to ensure even cooking and that glorious grill mark effect. Use tongs, and do it quickly. Don't dawdle. If you see a spot getting a little too enthusiastic with the charring, move that piece to a cooler part of the pan or flip it over sooner. It’s a dance, a delicate ballet of heat and timing.
What about those surprisingly delicious facts? Did you know that broiling is actually one of the oldest cooking methods known to humankind? Ancient civilizations would hang meat over open fires, essentially creating a giant, primitive broiler. So, when you’re broiling, you’re tapping into thousands of years of culinary wisdom! How cool is that? You're not just cooking; you're partaking in a historical reenactment, but with better ventilation and fewer sabre-toothed tigers.
Once your food reaches that perfect point of doneness – that tender, juicy, slightly charred perfection – it's time to get it out. Again, use oven mitts. Be cautious. Place your masterpiece on a cutting board and let it rest for a few minutes. This allows the juices to redistribute, ensuring maximum moistness. It’s like letting your steak take a little nap after its fiery adventure. A well-deserved rest, indeed.
And there you have it! You've just successfully "grilled" indoors. You've conquered the broiler. You've transformed humble ingredients into something spectacular, all without leaving the comfort of your kitchen. So, go forth, my friends! Embrace the broiler. Experiment with marinades. Conquer your fears of rogue char marks. Because with this secret weapon in your arsenal, you're not just a home cook; you're an indoor grilling maestro. Now, if you'll excuse me, I think I hear my broiler calling. It’s time for some perfectly seared halloumi… wish me luck!