How To Take Photos Of The Moon

Ah, the moon. That big, glowing disc in the sky. We've all tried to photograph it, right? You pull out your phone, point it up, and snap. Then you look at the picture. It's usually just a tiny, blurry white blob. Maybe a bit of yellow if you squint. Not exactly the majestic lunar spectacle you were hoping for. Don't worry, you're not alone. Most of us are in the same boat, armed with our trusty smartphones and a dream of capturing that celestial beauty. But what if I told you there’s a secret? A way to actually get a decent moon shot, without needing a telescope that costs more than your car? And no, it doesn’t involve complicated math or sacrificing a goat under a full moon. Though, let’s be honest, a little moon magic never hurt anyone.
My unpopular opinion? You probably don't have the right gear. Or rather, the perception of the right gear. We think "moon photo" means "super fancy camera." And sure, the pros with their DSLRs and telephoto lenses can get some truly stunning shots. But for the rest of us? We're often left with a digital smudge. It's a bit like wanting to bake a gourmet cake and only having a spork. You can do it, but it's going to be an adventure. And not necessarily a delicious one. We’re told to zoom, zoom, zoom. And we do! We crank that digital zoom all the way up. The result? A pixelated mess that looks like it was drawn by a toddler with a crayon. It’s a valiant effort, a heroic attempt at photographic glory. But often, the moon just laughs at our phone cameras. It’s a cosmic joke, really. The moon is up there, all serene and majestic, while we’re down here, fumbling with our touchscreens.
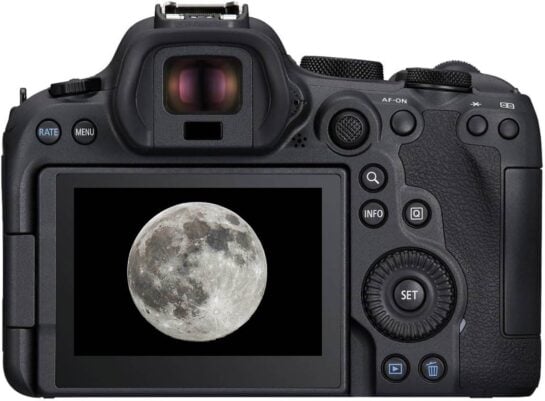
So, what's the secret sauce? It’s simpler than you think. First, ditch the built-in digital zoom. Seriously. It’s the devil in disguise for moon photography. It just blows up the existing pixels, making things look worse. Think of it like trying to make a tiny drawing bigger by just stretching the paper. It doesn't add detail; it just makes the existing flaws more obvious. What you actually need is something that can gather more light and get closer without losing quality. This usually means a camera with a decent optical zoom. A DSLR or a mirrorless camera with a long lens is your best friend here. If you're picturing yourself lugging around a giant camera bag, don't despair! There are more compact options too. Some bridge cameras offer impressive zoom capabilities. It’s all about that optical reach, not just digitally stretching what's already there.
Must Read
And don't forget the tripod. Yes, a tripod. I know, I know. Who has time for a tripod? It sounds like something only serious photographers use. But hear me out. When you’re trying to capture something far away, even the tiniest shake of your hand can blur the image. Especially when you're using a long lens and the camera is more sensitive to movement. A tripod keeps everything steady. It's like giving your camera a little concrete foundation. It eliminates that hand-shake wobble that turns your moon into a fuzzy ghost. Plus, using a tripod forces you to slow down. You have to think a bit more about your shot, which is usually a good thing. It’s a mindful approach to moon photography. You’re not just pointing and shooting; you’re composing. You’re creating. It’s a whole different vibe. You might even start to enjoy the process. Gasp.

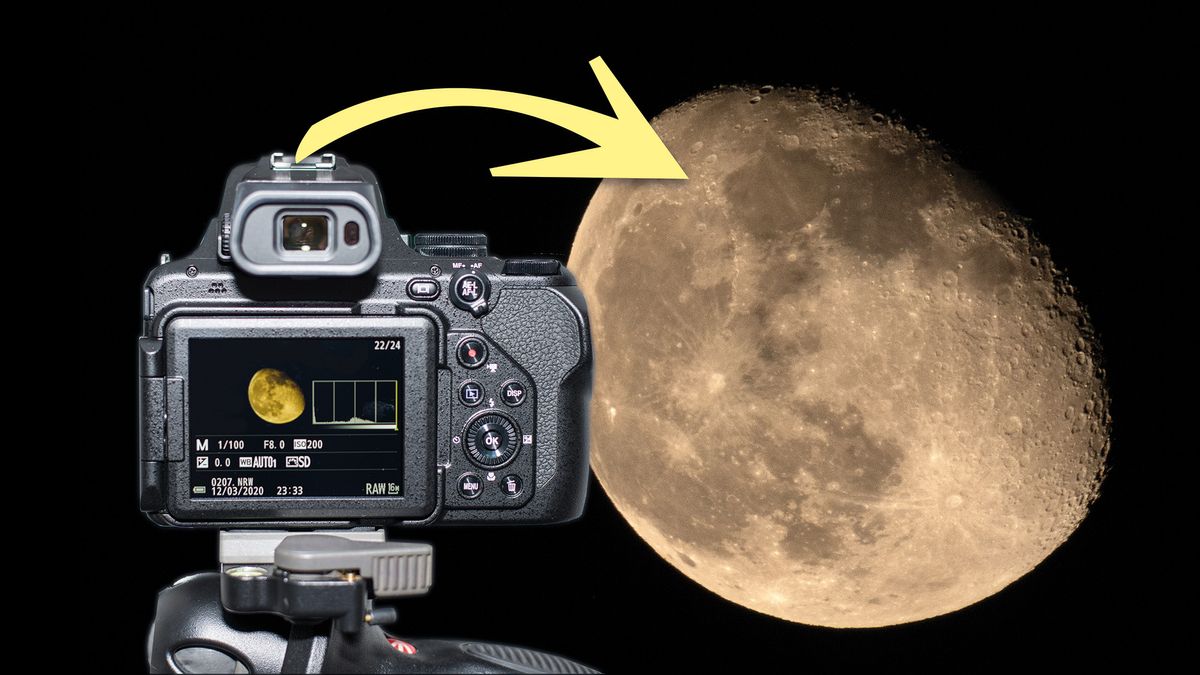
Now, about the settings. This is where it gets a little technical, but we'll keep it simple. You want to use a relatively fast shutter speed. This is because the moon is bright, and you don't want to overexpose it. Think of it like this: the moon is shining super bright, so you need to tell your camera to "close its eyes" quickly so it doesn't get blinded. A shutter speed of around 1/125th of a second is often a good starting point. Next, your aperture. A mid-range aperture, like f/8 or f/11, is usually a good bet. This gives you a good balance between sharpness and depth of field. You want the moon to be in focus, obviously. And finally, ISO. Keep your ISO as low as possible, ideally 100 or 200. High ISO settings introduce graininess, which is not what you want for a crisp moon shot. Think of ISO as how sensitive your camera is to light. Low ISO means less sensitive, meaning less “noise” or grain. It’s like trying to hear a whisper in a loud concert – you want your microphone to be sensitive. But for the bright moon, you don't need super sensitivity, you just need clarity.
Timing is also key. The moon looks different at different times. A full moon is bright and dramatic, but can sometimes be a bit washed out. A crescent moon or a half moon can reveal more texture and craters. And don't forget about the blue hour or the golden hour. Shooting the moon just as it rises or sets, especially when it’s near the horizon, can create some truly magical shots. You get that atmospheric haze, and the moon might appear larger and more colorful. It’s a whole different ballgame compared to the moon high up in the inky blackness. It’s like getting dressed up for a party versus rolling out of bed. Both are the moon, but one has a bit more flair.
My truly unpopular opinion? Sometimes, the best moon photos are the ones where you don't try too hard to make it the main subject. Try incorporating it into a landscape. Seeing that glowing orb peeking over a mountain range or silhouetted against city lights can be incredibly captivating. It adds a sense of scale and wonder. It’s not just a picture of the moon; it’s a story about the moon in our world. It’s the difference between a portrait of someone and a candid shot of them enjoying life. One is posed, the other is real. And sometimes, the real is more beautiful.
So, there you have it. A few little tricks to elevate your moon photography game. It’s not about having the most expensive gear, but about understanding how to use what you have, or making smart choices about what to get. And remember, even if your first few attempts are still a bit… blobby, that’s okay! The moon is always there, waiting for its close-up. Keep practicing, keep experimenting, and most importantly, keep enjoying the view. After all, the moon is a constant in our ever-changing lives. It’s a little piece of cosmic comfort, and a fantastic excuse to go outside and look up. So grab your camera, find a clear spot, and give it a go. Who knows, you might just capture a little bit of that lunar magic.