How To Lay A Brick Garden Wall

So, I was at my mum’s the other day, poking around her garden. You know how it is – one minute you're admiring her prize-winning petunias, the next you're eyeing up that slightly wonky section of her old brick wall. It’s always been a bit… tired. Sagging in places, with a few bricks doing their best impression of a Tetris piece that’s about to fall out. And I, being me, couldn't help but think, "Right, Mum, that’s coming down and a new one’s going up." Her initial reaction was a mixture of horror and delighted anticipation. Horror at the thought of the mess, anticipation of a shiny new garden feature. And that, my friends, is how I found myself on a mission to build a brick garden wall.
Now, before you picture me as some sort of bricklaying samurai, let me tell you, I'm about as experienced with mortar as a cat is with a vacuum cleaner. But hey, that’s the beauty of a DIY project, right? You learn as you go. And if I can tackle it (with a few hairy moments, I’ll admit), then you probably can too. This isn't going to be a stuffy, technical manual. This is more of a "let's figure this out together" kind of guide, sprinkled with the occasional "oh crap" moment.
The idea behind building a brick garden wall is pretty straightforward: you want something sturdy, something that looks good, and something that doesn't decide to spontaneously rebuild itself into a pile of rubble next Tuesday. It’s about creating a defined space, adding some visual interest, and, let's be honest, making your garden look a whole lot more put together. Think of it as giving your garden a chic new haircut. Or maybe a very well-structured beard. Whatever floats your botanical boat.
Must Read
So, You Want to Build a Brick Wall, Eh?
Alright, deep breaths. You’ve decided the wobbly old thing needs to go, or perhaps you’re starting from scratch. Excellent! Let’s break this down. Building a brick garden wall isn't rocket science, but it does require a bit of planning, some elbow grease, and a healthy dose of patience. Think of it as a marathon, not a sprint. You wouldn't just run a marathon without training, would you? (Okay, maybe some people do, but they're probably a bit mad.)
The first thing you need to consider is the purpose of your wall. Is it purely decorative? Will it be retaining soil? Is it just to keep the neighbour’s dog from mistaking your petunias for a personal chew toy? The height and strength needed will vary dramatically depending on the answer. For a simple low border, you might get away with a single skin. For anything that's holding back earth, you're looking at a different beast altogether. And that, my friend, might require a chat with someone who knows more than a blog post. Seriously, safety first!
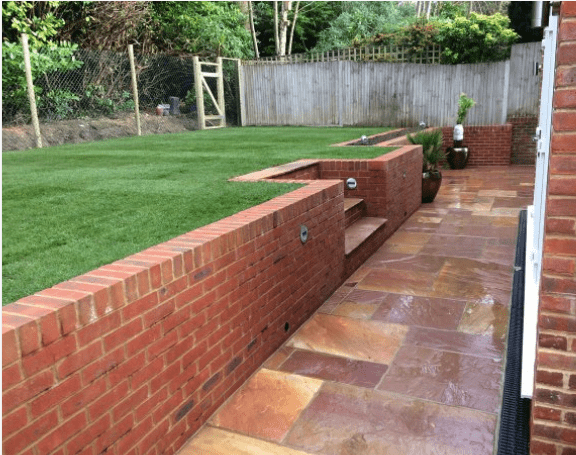
Next up, design. What kind of bricks are you after? Standard red engineering bricks? Fancy reclaimed ones with a bit of history? Exposed aggregate for that modern vibe? And what about the mortar colour? This is where you can really make your wall sing. A contrasting mortar can make the bricks pop, while a matching one can create a more subtle, unified look. Don't just pick the first bag you see; take a moment to consider the aesthetic. It’s like choosing an outfit – you want it to complement the rest of your garden’s ensemble.
Gathering Your Tools and Materials: The Bricklayer's Arsenal
Okay, let's talk about what you'll need. This is where the fun (or mild panic) really begins. You can’t build a wall with just sheer willpower and a stern look, sadly. You’ll need some gear.
The Bricks: Obviously. Figure out how many you need. A good rule of thumb is to calculate the surface area of your wall (length x height) and then work out how many bricks fit into that. Add a little bit extra for breakages and mistakes – trust me, you’ll thank me later. Nobody wants to run out of bricks mid-lay. It's the DIY equivalent of getting halfway through a Netflix binge and realizing the Wi-Fi is out. Agony.

Mortar: This is the sticky stuff that holds everything together. You can buy pre-mixed mortar bags, which are great for beginners. Just add water! Or, if you’re feeling brave, you can mix your own cement, sand, and lime. For garden walls, a general-purpose mortar is usually fine. Check the bag instructions for the right water-to-mix ratio. Too wet and it’ll be a sloppy mess; too dry and it won’t bind properly. It’s a bit like making a cake – precision matters!
Tools:
- Trowel: This is your primary weapon. A brick trowel has a flat, pointed blade, perfect for scooping and spreading mortar.
- Spirit Level: Absolutely essential for ensuring your wall is straight and true. Get a decent-sized one; it'll make life easier.
- Brick Hammer: For trimming bricks when needed. It has a flat striking face and a chisel end.
- Jointer: This tool is used to create those nice, neat lines (called "joints") between the bricks.
- String Line and Pegs: To guide your bricklaying and keep your courses (the horizontal layers of bricks) straight.
- Measuring Tape: For… well, measuring things. Groundbreaking, I know.
- Wheelbarrow: For mixing mortar and transporting bricks. Your back will thank you.
- Bucket: For water and cleaning.
- Stiff Brush: For cleaning excess mortar.
- Gloves and Safety Glasses: Protect your hands and eyes! Mortar can be nasty stuff.
Foundation: This is probably the most crucial part, and often overlooked by enthusiastic DIYers who just want to get to the fun bit. A wall needs a solid base. For most garden walls, a concrete strip foundation is the way to go. It needs to be wider than your wall and deep enough to get below the frost line (if you’re in a place that gets proper frost). Don't skimp on the foundation. It’s like building a house on sand – it’s not going to end well. You might need to dig a trench, lay some hardcore (crushed rubble), compact it, and then pour the concrete. This part is a bit more involved, and you might need to hire a small digger if you're going for anything substantial.
Step-by-Step: Let the Bricklaying Commence!
Right, you’ve got your materials, your tools, and you've hopefully got a nice, solid foundation waiting patiently. Let's get down to business. This is where the magic (and a bit of mess) happens.
1. Laying the First Course (The Foundation of Your Foundation!)
This is arguably the most important step. If your first course of bricks isn't straight and level, the whole wall will be wonky. Lay your string line taut, about a brick’s width away from the edge of your foundation. This is your guide.

Mix up your mortar to a workable consistency – think thick peanut butter. Scoop a generous amount onto the foundation and spread it with your trowel, creating a bed about 20-25mm thick. Don’t be shy with the mortar; you need enough for the bricks to bed into.
Now, take your first brick. Hold it firmly and push it down into the mortar bed, giving it a gentle wiggle. You want to tap it down with your trowel handle so it’s level with the string line and snug against the brick next to it. Leave a consistent gap between bricks for the vertical joints – usually about 10mm. This gap is where the mortar will go.
Continue laying bricks along your string line, ensuring they are level with each other and the line. Use your spirit level across the tops of the bricks regularly. For the ends of the wall, you’ll need to cut bricks to fit. This is where the brick hammer comes in handy. A sharp rap with the hammer on a scored line can do the trick. It takes a bit of practice to get clean cuts. Mine looked like they'd been attacked by a badger initially, but they held!
Remember to butter the ends of the bricks with mortar before placing them next to each other. This fills the vertical joints. You want a nice, solid bed of mortar all around.
2. Building Upwards: The Art of the Stretcher Bond
For most simple garden walls, you'll be using a "stretcher bond." This is where all the bricks are laid lengthwise (as stretchers), with the vertical joints staggered. This creates a strong and visually appealing pattern.
Once your first course is laid and checked for level and plumb (vertical), you're ready for the second. You’ll spread a new mortar bed on top of the first course, making sure to fill the vertical joints from the previous row as well. Then, you lay your next bricks, ensuring the vertical joints are offset from the ones below. Ideally, they should be half a brick length apart. This is called overlapping. This is what makes the wall strong, like a good hug.
You’ll use your string line again for each subsequent course. Keep checking your level and plumb as you go. It's much easier to correct small errors as you build rather than trying to fix a whole section later. Seriously, just keep checking the level. It’s your best friend.
As you lay each brick, you’ll notice excess mortar squeezing out. Don't worry about this too much just yet. We'll tidy it up.
3. Finishing Touches: The Jointer and the Brush
Once you’ve laid a few courses, or when the mortar has started to firm up a bit (but is still workable), it’s time to tidy up the joints. This is where your jointer comes in.
You’ll run the jointer along the mortar joints, both horizontal and vertical. This compacts the mortar and creates a neat, consistent finish. There are different types of joints, but for a garden wall, a "weather-struck" or "recessed" joint is common and helps shed water. Experiment a little to see what you like. This is where your wall starts to look like a proper wall, not just a stack of bricks.
After you’ve jointed, use your stiff brush to gently sweep away any loose mortar crumbs. Be careful not to drag the brush through the wet mortar, as this can make a mess.

You’ll repeat this process course by course. It’s repetitive, I know. You might find yourself singing a little bricklaying anthem to pass the time. Just try not to get too many mortar splatters on your favourite gardening hat.
4. The Final Stretch and Curing
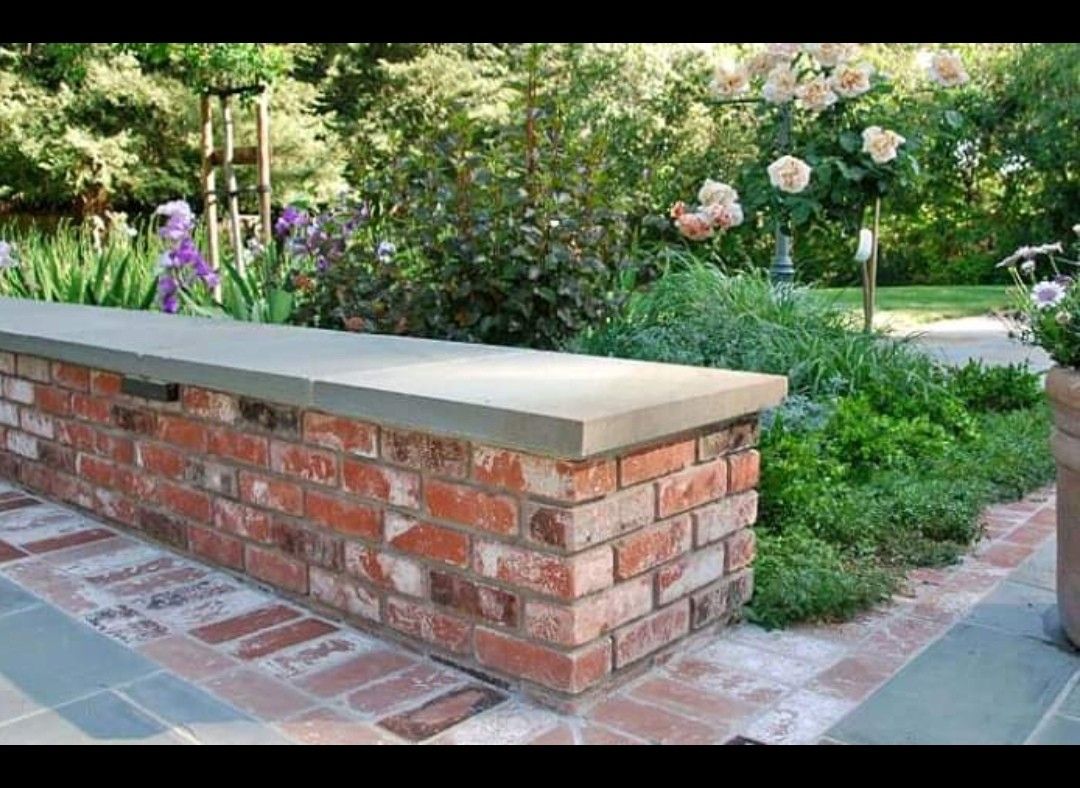
Keep building up your wall, course by course, always checking for level and plumb. When you reach your desired height, you'll finish the top course. This might involve a slightly different mortar mix for a decorative coping stone, or simply finishing off the last row of bricks neatly.
Once you're finished, resist the urge to poke it or lean on it for a good few days. Mortar takes time to fully cure and gain its strength. It’s like waiting for a good sourdough starter to be ready; you can’t rush perfection. Seriously, let it dry. I learned this the hard way when a section I was too impatient with sagged. Sigh.
Common Pitfalls and How to Avoid Them (Hopefully!)
Let's be real, building a brick wall isn't always a smooth sailing experience. Here are a few things that might try to trip you up:
- Running out of Mortar: Mix in smaller batches. It's better to mix a bit more than you need than to run out mid-lay and have to wait.
- Mortar Consistency: Too wet, and it won't hold; too dry, and it won't stick. Practice makes perfect here.
- Not Enough Foundation: I cannot stress this enough. A weak foundation equals a weak wall.
- Ignoring the Level: This is the silent killer of DIY walls. A slightly off brick early on will compound into a major problem later.
- Overworking the Mortar: Once the mortar starts to set, don't try to smooth it too much. It'll just look messy.
- Weather: Don't try to lay bricks in heavy rain or freezing temperatures. The mortar won't set properly.
The Satisfaction of a Solid Wall
When you're done, and the mortar has cured, stand back and admire your handiwork. There’s a genuine sense of accomplishment that comes with building something with your own hands. That slightly wonky wall at my mum’s? It’s now a proud, straight, and sturdy feature. She’s thrilled, and I’m secretly (okay, maybe not so secretly) beaming with pride. It’s not perfect, mind you. There are a few mortar blobs I missed, and one brick is slightly off-kilter if you squint just right. But it’s mine. And it's a darn good wall.
So, if you've got a wobbly bit of garden fence or just fancy adding a bit of structure and charm, give bricklaying a go. It’s a rewarding process, and who knows, you might just discover your inner bricklayer. Just remember to be patient, take your time, and don't be afraid to ask for help if you're tackling something that feels a bit beyond your DIY capabilities. Happy building!