How To Iron A Button Up Shirt
Ever stared at a beautifully crisp button-up shirt hanging in your closet, only to sigh at the thought of transforming its rumpled state into something presentable? Learning to iron a button-up shirt might sound like a rather mundane chore, but there's a quiet satisfaction, a certain elegance, in mastering this simple skill. It’s less about rigid rules and more about a gentle dance with fabric and heat. Think of it as a small act of self-care, a way to present your best self to the world, even if it's just for a casual coffee or a virtual meeting. Plus, who doesn't love the feeling of a perfectly pressed collar framing their face?
The purpose of ironing a button-up shirt is straightforward: to eliminate wrinkles and give it a polished, sharp appearance. The benefits are numerous. Beyond the obvious aesthetic improvement, a well-ironed shirt can instantly boost your confidence. It conveys a sense of being put-together and attentive to detail, whether you're heading into a job interview, a presentation, or even just a family gathering. It’s a subtle yet powerful way to make a positive first impression.
Think about the everyday scenarios where this skill shines. In the professional world, a crisp shirt is practically a uniform for many. It’s expected, and failing to achieve it can, unfortunately, send the wrong message. Even in more relaxed settings, like a smart-casual dinner or a date, a smooth shirt elevates your look. For students, while less critical for lectures, it can be a handy skill for presentations or formal events. It’s a practical life skill that transcends age and profession, a quiet victory over the everyday chaos of laundry.
Must Read
So, how do you embark on this wrinkly adventure? Don't be intimidated! You don't need a fancy dry cleaner; your trusty iron and a flat surface (like an ironing board, or even a sturdy, heat-resistant table covered with a thick towel) are your primary tools. Start by checking the care label on your shirt. This little tag holds the secret recipe for the perfect ironing temperature. Too hot, and you risk scorching the fabric; too cool, and the wrinkles will stubbornly cling. Look for symbols indicating recommended heat settings.

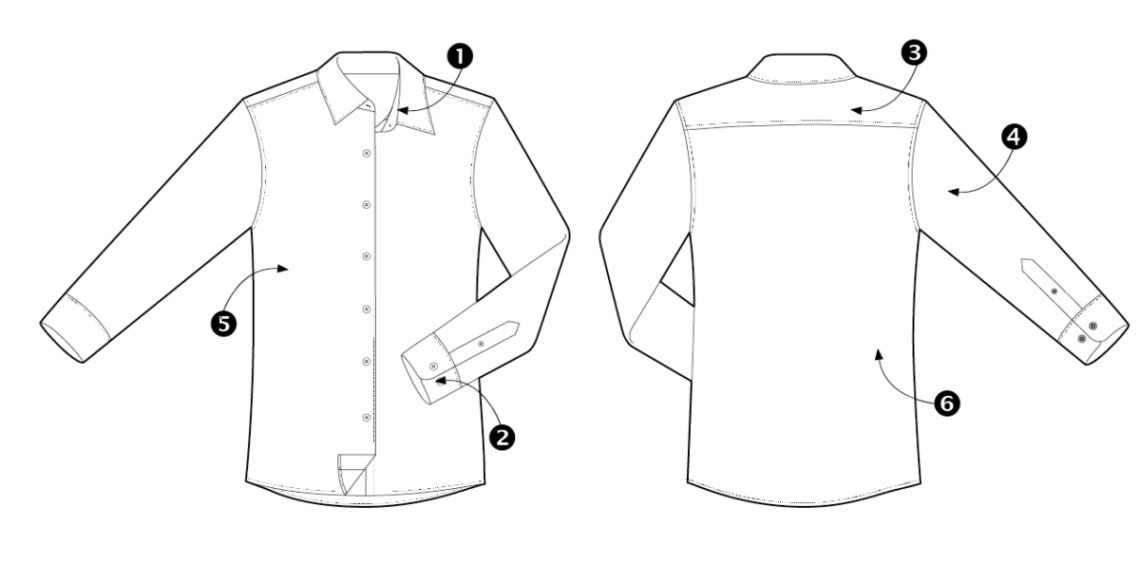
Here are a few practical tips to get you started. First, pre-treat stubborn wrinkles by lightly misting the fabric with water using a spray bottle. This helps the fibers relax. Then, begin with the collar, ironing from the points inward. Next, tackle the cuffs, unbuttoning them and ironing them flat. The sleeves can be a bit tricky; try to lay them out as flat as possible, ironing from the shoulder down. Finally, move to the body of the shirt, working in sections. Iron the back first, then the front panels, carefully navigating around the buttons. Don't press too hard; let the heat and steam do the work.
To explore this further, experiment with different fabrics. Cotton is generally forgiving, while silk or linen might require a gentler touch and lower heat. You can even watch a few short online tutorials – seeing it done can make a world of difference. The key is to be patient and persistent. With each shirt you iron, you’ll get a little faster and a little better. It’s a small skill, but one that pays dividends in confidence and presentation. So, the next time you see a rumpled button-up, don't despair. Embrace the challenge, and discover the satisfying art of a perfectly pressed shirt.