How To Format Sd Card To Camera
You know, I remember the first time I really messed up with my camera's SD card. It was a sunny afternoon, perfect for an outdoor family picnic. My nephew, bless his energetic heart, was doing his best impression of a human whirlwind, and I was determined to capture every single giggle and goofy grin. I had my trusty DSLR, batteries charged, and a brand new 32GB SD card. I popped it in, feeling like a pro, ready to document history. I must have taken… oh, a hundred photos? Maybe more? The little indicator light blinked happily, confirming my photographic prowess.
Then, later that evening, after the last crumb of cake had been devoured and the little ones were safely tucked into bed, I excitedly plugged my SD card into my laptop. Imagine my surprise – and mounting panic – when my computer sputtered and then declared, in that utterly soul-crushing way only a computer can, that the card was "unreadable." Blank. Empty. As if my photographic adventure had never happened. My nephew’s hilarious tantrum over a misplaced toy? Gone. The candid shot of my sister mid-laugh? Vanished. It was like reliving the moment I realized Santa wasn't real, but with more technical jargon. Utter devastation.
After a frantic hour of Googling, trying different card readers, and muttering increasingly creative curses under my breath, I finally stumbled upon the answer. The culprit? My own ignorance. I hadn't formatted the card in the camera first. This seemingly small oversight, this tiny little step I’d skipped, had rendered my precious memories inaccessible. And that, my friends, is how we get to the glorious topic of… formatting your SD card for your camera. It sounds terribly technical, doesn't it? Like something you’d only find in a dusty old manual. But trust me, it’s one of the simplest, yet most crucial things you can do to keep your photography life from going sideways.
Must Read
So, why all the fuss about formatting? Isn't it just a fancy word for deleting stuff? Well, kind of, but it’s a lot more than that. Think of it like this: your SD card is a tiny, digital filing cabinet. When you buy it, it’s usually pre-formatted with a generic system that works for most devices. However, your camera, bless its quirky electronic soul, often prefers its filing cabinets to be organized in a very specific way. It needs to know where to put files, how to label them, and how to find them later. Formatting the card in your camera tells the camera, “Hey, this is your filing cabinet now. Organize it however you see fit. I trust you.”
When you format your card in the camera, you’re essentially telling the camera to create a brand new file system on the card. This ensures that the card is compatible with your camera’s internal software and that the camera can properly write and read data from it. It’s like giving a new employee a clean desk and a company-specific set of instructions. Everything is set up perfectly for them to succeed, and for you to get the job done.
If you skip this step, especially with a brand new card or a card that’s been used in a different device (like a computer, or a different brand of camera, or even your phone!), you’re basically handing your camera a messy, unorganized desk. The camera might try its best, but it’s going to struggle. It might write files in a way it doesn’t understand, or it might get confused and refuse to save anything at all. And then, BAM! You’re staring at an “Error” message, or worse, a blank card with no photos. My nephew's giggles, lost forever in the digital ether.
The "Why Me?" Factor: Common SD Card Headaches Solved by Formatting
Let’s dive a little deeper into the specific problems that proper formatting can prevent. It’s not just about the initial setup; it’s about ongoing reliability. Because, let’s be honest, is there anything more frustrating than your camera suddenly refusing to take pictures when you’re in the perfect moment? I think not.
One of the biggest culprits for errors is using a card that’s been… shall we say… repurposed. Did you use that SD card in your laptop to transfer some photos? Did you use it in your old point-and-shoot, and now you’re trying it in your fancy new mirrorless beast? If so, it’s a prime candidate for a reformat. Computers and different camera models use different file systems (think FAT32, exFAT, etc.) and structures. When you swap cards between devices, you risk corrupting the card’s file system or leaving behind data that your new camera can’t read.
It’s like trying to fit a square peg into a round hole, but with data. Your camera has a specific way it likes to store information, and if it finds information structured in a way it doesn’t recognize, it can get… well, it can get grumpy. Formatting in the camera wipes the slate clean and sets up that specific structure your camera craves.

Another sneaky issue is related to… fragmentation. Yes, even digital files can get fragmented! Over time, as you delete and add files to a card, the data can get scattered all over the card. This isn’t usually a huge problem for computers, but for cameras, especially when they’re trying to write new files quickly, fragmented data can slow things down or even cause errors. Formatting the card essentially defragments it, organizing all the data in a neat, contiguous manner. It’s like tidying up your digital workspace, making everything run smoother.
And then there’s the sheer efficiency factor. When you format your card in the camera, you’re not just deleting files; you’re rebuilding the card’s directory structure. This makes it much easier and faster for your camera to locate and write new files. Think of it as giving your camera a freshly organized address book. It knows exactly where to go, no dilly-dallying required.
The Actual "How-To": Formatting Your SD Card Like a Pro (It's Easier Than You Think!)
Alright, alright, enough with the technical jargon. Let’s get down to business. How do you actually do this magical formatting thing? It’s surprisingly straightforward, and thankfully, most modern cameras have made it incredibly simple. You’re probably going to find it in the same menu where you adjust your ISO or white balance. Don’t worry, I’ll walk you through it, but remember, the exact wording and location might vary slightly depending on your camera’s brand and model. It’s always a good idea to give your camera’s manual a quick peek if you get lost, but 99% of the time, you won’t need to.
Step 1: Make Sure You've Saved Everything!
This is the most critical step, and I cannot stress this enough. Formatting will erase everything on the SD card. Yes, everything. So, before you even think about hitting that format button, make absolutely sure you have transferred all your precious photos and videos to your computer, an external hard drive, or your cloud storage. Double-check. Triple-check. Seriously, don’t be like me and have a digital meltdown over lost memories. Once it’s formatted, it’s gone.
Step 2: Power Up Your Camera and Insert the Card
Make sure your camera has a decent battery charge. You don’t want the formatting process to be interrupted halfway through because your battery died. That would be… inconvenient. Insert your SD card into the camera’s card slot as you normally would.
Step 3: Navigate to the Menu System
Turn on your camera. Now, you’ll need to dive into the camera’s menu system. Look for a button that usually says “Menu” or has a little icon that looks like a gear or a wrench. Press it. You’ll see a screen with various options. Don’t be intimidated by all the buttons and settings; we’re just looking for one specific thing.
Step 4: Find the "Format" Option
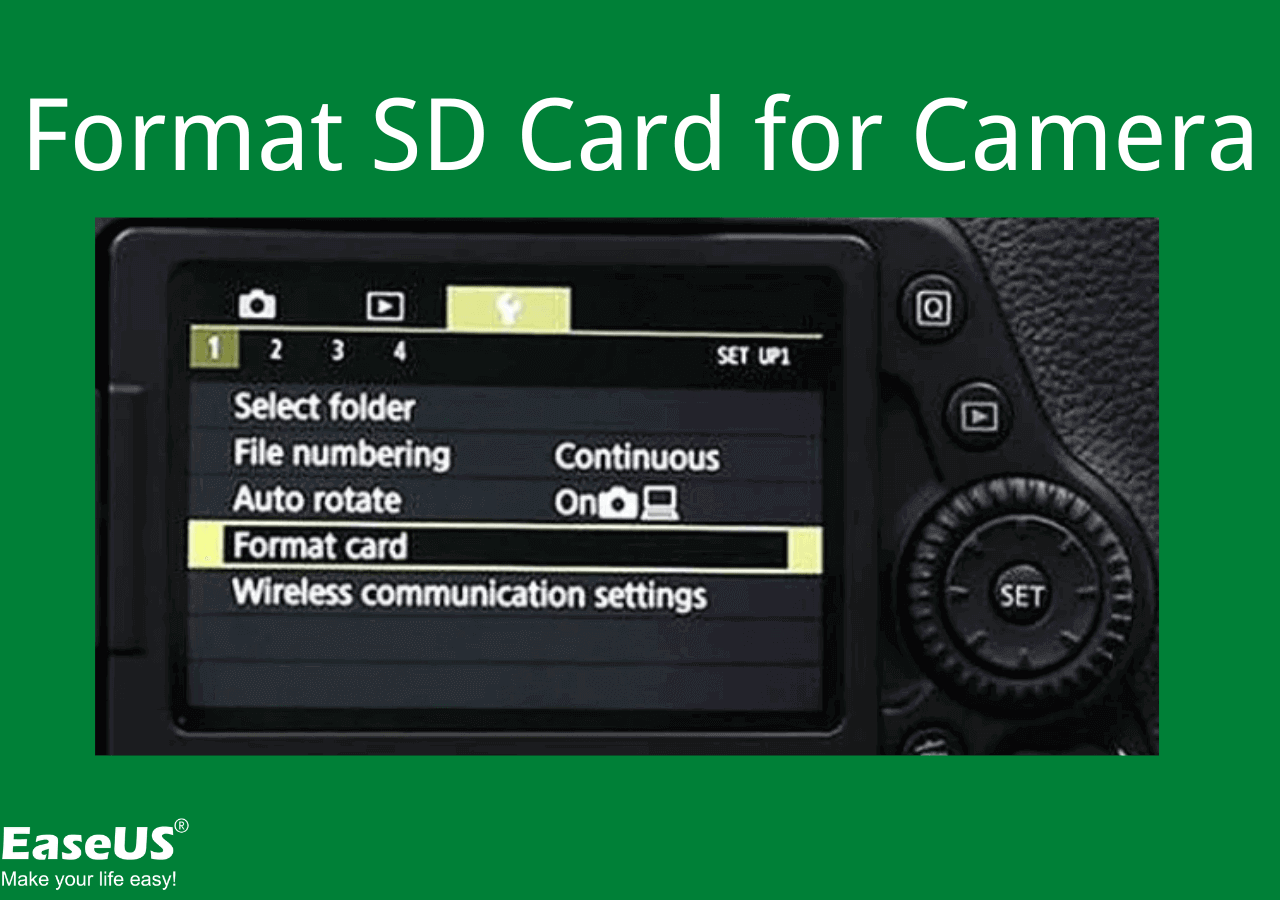
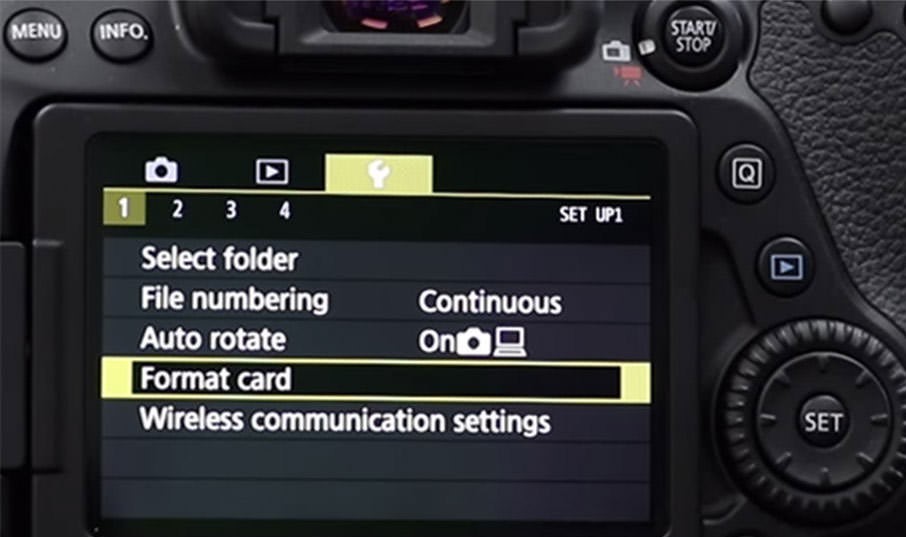
This is where it gets a little bit different depending on your camera. Usually, the format option is tucked away in the “Setup” or “Tools” section of the menu. Look for headings like: * Setup Menu * Tool Menu * Wrench Icon Menu * Settings
Once you’re in the right menu section, scroll through the options until you see something that says “Format,” “Format Card,” or “Initialize Card.” You might even see a little icon representing a card being wiped clean. You’re looking for that magic word!
Step 5: Select and Confirm
Highlight the “Format” option and press the “Set” or “OK” button on your camera. Your camera will then likely ask you to confirm that you really, really want to format the card. It’ll probably say something like, “All data on the card will be erased. Are you sure?” This is your last chance to back out if you forgot something. If you’re absolutely positive that you’ve saved everything, select “Yes” or “OK” and press the button again.
Step 6: Wait Patiently (It’s Quick!)
![How to Format SD Card For Camera? [on PC/Mac/Camera]](https://4ddig.tenorshare.com/images/sd-card/how-to-format-sd-card-for-camera.jpg?w=623&h=351)
Your camera will then go to work formatting the card. This process is usually very quick, often taking just a few seconds to a minute. You’ll see the card indicator light blinking, and then the camera will likely show a confirmation message that the card has been formatted. Ta-da! Your SD card is now ready to be used with your camera, perfectly optimized and raring to go.
Pro-Tips and Tricks for SD Card Sanity
So, you’ve mastered the art of formatting. Congratulations! But we’re not quite done yet. To truly become an SD card guru, there are a few extra nuggets of wisdom I’ve picked up along the way. These little habits can save you a world of hassle and ensure your camera keeps humming along happily.
1. Format Regularly!
This is probably my biggest piece of advice, and it ties back to my initial, embarrassing blunder. Don't just format a card once when it's new. Make it a habit to format your card in your camera at least: * When you put a brand new card into your camera for the first time. * When you’ve transferred photos from the card to your computer. * Before a major shoot where you absolutely cannot afford any errors. * If you’ve used the card in another device (phone, tablet, another camera).
It takes mere seconds, and the peace of mind it provides is priceless. It’s like doing a quick system reset for your digital storage.
2. Use the "Safely Remove Hardware" Feature on Your Computer
When you’re done transferring photos and want to remove the card reader from your computer, always use the “Safely Remove Hardware” option (on Windows) or drag the drive to the Trash (on Mac). Yanking the card reader out without doing this can corrupt the data on the card, even if you formatted it properly in your camera. It’s the digital equivalent of a sudden, violent disconnection. Not good for anyone involved.
3. Don't Rely on Just One Card
For important shoots, invest in a few SD cards. If one card fails, you have backups. It’s also good practice to use different cards for different events. This way, if one card does go bad, you’re not losing all your memories at once. Think of it as having spare tires for your photography adventures.
4. Buy Quality Cards from Reputable Brands
You might be tempted by those super-cheap, no-name SD cards. Resist the urge! Cheap cards are more prone to failure, slower, and can cause all sorts of frustrating issues. Stick with well-known brands like SanDisk, Lexar, Kingston, or ProGrade Digital. It’s an investment in the reliability of your photos.
5. Keep Your Cards Clean and Protected
When not in your camera, keep your SD cards in their protective cases. Avoid touching the gold contacts. Keep them away from extreme temperatures, moisture, and magnets. Treat them with a little respect, and they’ll serve you well.
6. Understand File Deletion vs. Formatting
When you delete photos from your camera or computer, the data isn’t truly gone. The space occupied by those files is simply marked as available. Formatting, on the other hand, completely wipes the card and rebuilds its file system. This is why formatting is so effective at resolving card errors and ensuring optimal performance.
It’s funny, really. In the grand scheme of photography, formatting an SD card is a tiny, almost insignificant step. It doesn't involve fancy lenses or complicated lighting setups. But without it, all those other fancy bits of gear and learned skills can be rendered useless by a simple digital hiccup. So, next time you pop a new SD card into your camera, or even if you’re just about to transfer a batch of photos, take those few extra seconds. Navigate to the menu, find that “Format” option, and hit confirm. Your future self, and your precious memories, will thank you for it. Trust me, I learned that the hard way!