How To Fix Peeling Paint On Car

There's a certain satisfaction, isn't there, in giving your trusty four-wheeled companion a little bit of TLC? For many of us, our cars are more than just a way to get from point A to point B. They're a reflection of our personality, a tool for our adventures, and sometimes, let's be honest, a bit of a status symbol. And when that once-gleaming paint starts to flake and peel, it can feel like a little piece of that pride is chipping away too. But fear not, fellow car enthusiasts (and even those who just want their ride to look presentable!), because fixing peeling paint is a surprisingly achievable and ultimately rewarding task.
The benefits of tackling peeling paint go beyond just aesthetics. A well-maintained paint job offers a crucial layer of protection for your car's body. The metal underneath, if left exposed, is vulnerable to rust and corrosion, which can lead to much more significant and costly repairs down the line. So, in essence, you're not just making your car look pretty; you're also preserving its structural integrity and potentially increasing its resale value. It’s a proactive measure that saves you headaches and money in the long run.
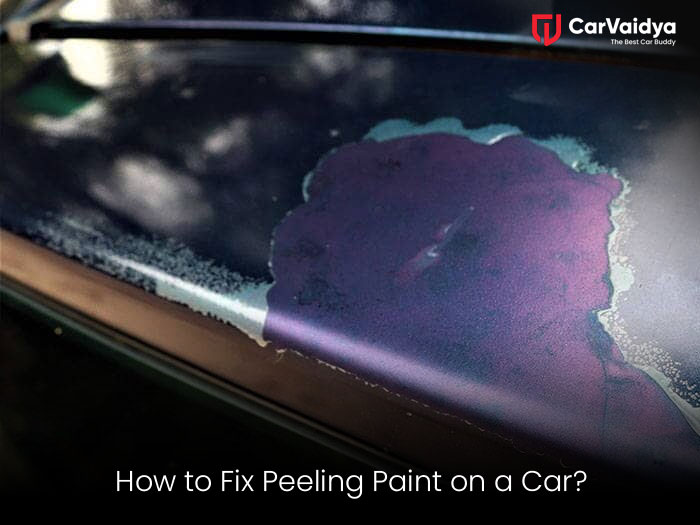
We've all seen it – that tell-tale sign of aging on bumpers, door edges, or the roof where the sun and elements have taken their toll. Common culprits often include areas that have been repainted improperly, chips from rocks and debris, or simply the natural wear and tear of time. The paint might be lifting in small patches, resembling a sunburned complexion, or in more severe cases, large sections could be coming loose.
Must Read
So, how do you get started on this mini car restoration project? First, gather your supplies. You'll likely need sandpaper (varying grits from coarse to fine), a good quality automotive primer, touch-up paint that perfectly matches your car's color code, and a clear coat. Don't forget some masking tape to protect the surrounding areas and a clean cloth for wiping away dust. Patience is also a key ingredient here – rushing the process will only lead to a less-than-ideal finish.
When it comes to the actual fixing, start by gently sanding away the loose, peeling paint until you reach a smooth edge. The goal is to create a clean surface for the new paint to adhere to. Once you've got a smooth transition, clean the area thoroughly. Then, apply a thin, even coat of primer. Let it dry completely, then lightly sand it again with a fine-grit paper for an even smoother surface. Now comes the satisfying part: applying your touch-up paint. Work in thin layers, allowing each to dry before applying the next. Finally, finish with a clear coat for protection and that showroom shine. Remember, practice makes perfect, and even if your first attempt isn't flawless, you'll have learned a valuable skill and improved your car's appearance significantly. It’s a small project that yields big rewards in terms of both pride and protection.
![How To Fix Peeling Paint On Car? [Easy Steps To Remember]](https://automotiveplanner.com/wp-content/uploads/2023/09/How-To-Fix-Peeling-Paint-On-Car.webp)