How To Dry Peppers In An Oven

Oh, the humble pepper. Such a powerhouse of flavor, right? I remember the first time I tried to really preserve them. It was a scorching summer, and my pepper plants were practically begging me to do something with the avalanche of jalapeños, bell peppers, and a few rogue habaneros that were ripening faster than I could eat them. My initial thought was, “Okay, dehydrator time!” Except, turns out, my fancy, multi-tiered dehydrator had mysteriously vanished during our last big move. Poof! Gone. I was left staring at a basket overflowing with vibrant peppers, feeling a pang of panic. What was a pepper-hoarder to do?
Then it hit me. The oven! My trusty, if sometimes temperamental, kitchen workhorse. I’d seen recipes for oven-dried tomatoes and thought, “If it works for tomatoes, why not peppers?” So, with a healthy dose of skepticism and a prayer to the patron saint of home preservation, I embarked on my oven-drying adventure. And you know what? It was a revelation! So much so, that I’m now a total convert and wanted to share the magic with you all.
So, if you’ve ever found yourself staring down a mountain of peppers and wondering how to keep those little flavor bombs from going to waste, or if you’re just itching to unlock a whole new world of smoky, concentrated deliciousness, you've come to the right place. We're going to talk about how to dry peppers in your oven. No fancy equipment required, just a little patience and your regular kitchen oven. Easy peasy, right?
Must Read
The Glorious Quest for Dried Peppers: Why Bother?
Before we dive headfirst into the nitty-gritty of oven-drying, let’s quickly chat about why you’d even want to do this. I mean, you can buy dried peppers, can’t you? Yes, you can. But there’s something incredibly satisfying about doing it yourself. For starters, it’s way cheaper, especially if you have a garden that’s gone berserk, or if you score a great deal on peppers at the farmer’s market. Plus, you get to control the whole process. No mystery additives, just pure pepper goodness.
And the flavor! Oh, the flavor. When you dry peppers, you’re essentially concentrating all their wonderful essences. They become intensely flavorful, with a smoky, often sweeter profile depending on the pepper. Think about it: those little dried flakes or powders can elevate a simple soup, add a kick to your rubs and marinades, or transform a basic sauce into something truly special. It’s like unlocking a secret ingredient that you made yourself. How cool is that?
Plus, it’s a fantastic way to extend the life of your harvest. Those fresh peppers might be great now, but in a week or two, they’re starting to look a little sad. Drying them means you can stash them away for months, ready to be rehydrated and used in countless dishes. It’s a little act of culinary foresight, if you ask me.
And let's not forget the sheer DIY satisfaction. There’s a primal joy in transforming a fresh ingredient into something preserved and ready for future enjoyment. It connects you to a long tradition of food preservation, and honestly, it just feels good to say, "Yep, I made these myself!"
Preparing Your Peppers: The Foundation of Flavor
Alright, let's get down to business. Before we even think about turning on the oven, we need to prep our peppers. This is a crucial step, so don't rush it!
Choosing Your Peppers
Honestly, you can dry pretty much any pepper. From the mildest bell pepper to the fiercest ghost pepper, they all dry beautifully. The key is to think about what you want to do with them once they’re dried.
- For general spice/flavor: Jalapeños, serranos, cayenne, chiltepins are fantastic choices.
- For smoky depth: Poblano, anaheim, ancho (which is a dried poblano, so you can skip a step if you start with those!), and even bell peppers will develop a lovely smoky character.
- For sweet notes: Bell peppers, especially red and yellow ones, will become wonderfully sweet and almost candy-like when dried.
- For serious heat: Habaneros, Scotch bonnets, ghost peppers, Carolina Reapers… if you’re brave, go for it! Just remember to handle these with extreme caution.
I usually end up with a mix. A few sweet bells for general cooking, some jalapeños for a mild kick, and maybe a couple of those super-hots that I’ll use very sparingly. Variety is the spice of life, right?

Cleaning and Cutting
First things first, wash your peppers thoroughly under cool running water. Get off any dirt or debris. Now, depending on the size and type of pepper, you’ll want to cut them. The goal here is to maximize surface area for drying and to remove the pith and seeds if you prefer a less intensely spicy result, or if you want them to dry faster.
For smaller peppers like jalapeños or serranos, you can simply slice them in half lengthwise. This exposes the inner membranes and seeds, allowing moisture to escape more easily. You can remove the seeds and pith if you want to dial down the heat, or leave them in for more oomph. Your call!
For larger peppers like bell peppers or poblanos, you’ll want to cut them into strips. Remove the stem, then cut them in half, scoop out the seeds and pith, and then cut them into uniform strips, maybe about 1/2 inch wide. This ensures even drying.
For really small peppers like chiltepins or bird's eye chilies, you might be able to just prick them a few times with a toothpick or slice them in half. Or, honestly, just toss them in whole if you’re feeling adventurous and don’t mind a bit of a longer drying time. Just know that the drying time will vary wildly depending on the size of the pieces.
Handling Hot Peppers: A Word to the Wise
Now, this is important. If you’re dealing with anything spicier than a jalapeño, wear gloves! I cannot stress this enough. You do not want to experience the fiery wrath of capsaicin on your fingers, let alone in your eyes. Trust me on this one. It’s a mistake you’ll only make once, and it’s a doozy.
After you’ve cut your peppers, wash your cutting board and knife thoroughly, and wash your hands again, even if you wore gloves. Just to be safe. We’re aiming for delicious dried peppers, not a trip to the emergency room.
The Oven-Drying Process: Low and Slow is the Way to Go
Okay, peppers prepped, hands de-spiced. Now for the main event! This is where your oven becomes your drying champion.
Preheating the Oven: Patience is a Virtue
This is perhaps the most critical part of the entire process, and it’s where a lot of people go wrong. You want to dry the peppers, not cook them into oblivion. Therefore, your oven needs to be on its lowest possible setting. We’re talking 150°F to 200°F (65°C to 95°C). Some ovens even have a "warm" setting that works beautifully. If your oven doesn't go that low, you might need to prop the door open slightly with a wooden spoon to allow for better air circulation and to prevent the temperature from creeping too high. This is where the irony comes in – we're using an appliance designed to cook, to do the exact opposite!
Why so low? Because we're aiming to remove moisture, not to toast or char the peppers. A low temperature allows the water to evaporate slowly, preserving the pepper's flavor and nutrients. High heat will just bake them, and you'll end up with sad, brittle, burnt husks, which is definitely not what we're after.
Arranging the Peppers: Give Them Space to Breathe
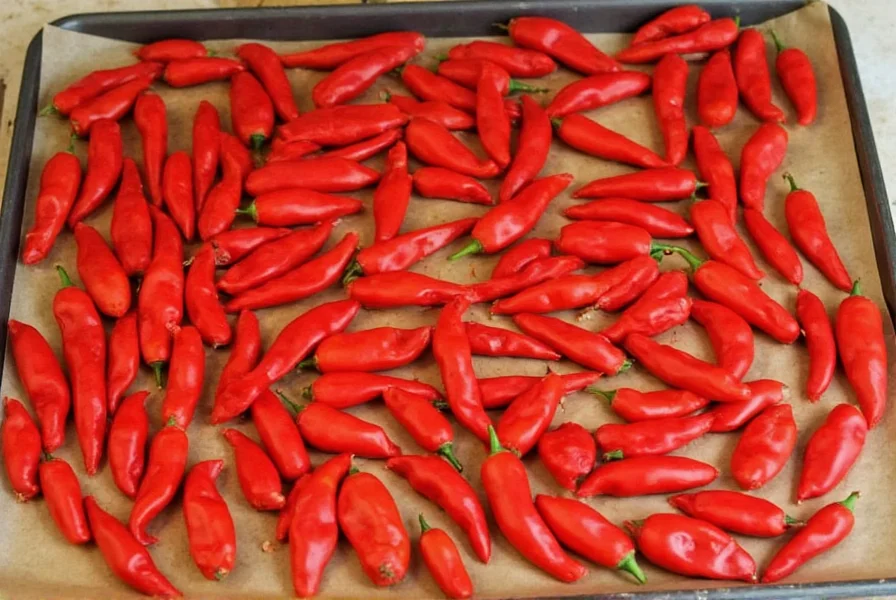
Once your oven is at the magic low temperature, it’s time to arrange your peppers. You’ll need baking sheets. Line them with parchment paper or a silicone baking mat. This will prevent them from sticking and make cleanup a breeze. Nobody likes scrubbing baked-on pepper bits.
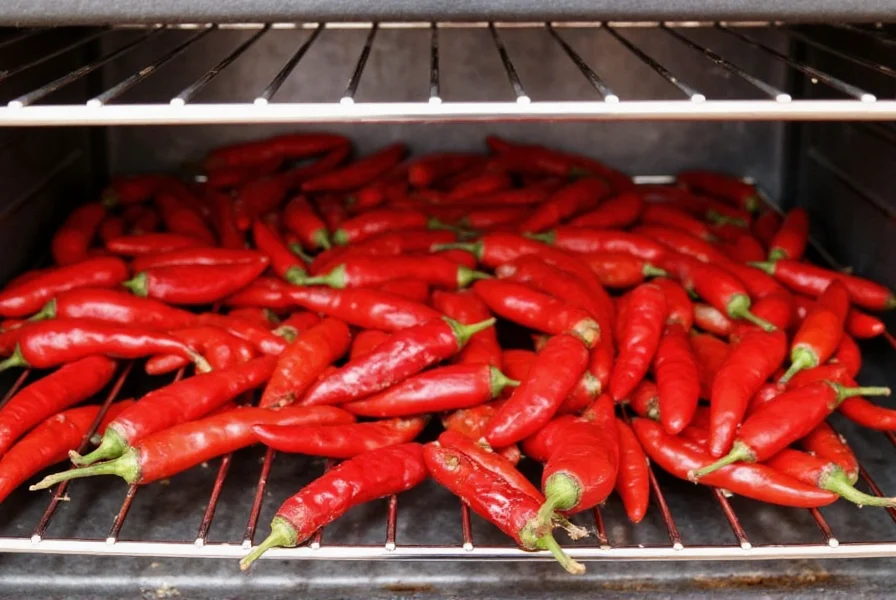
Now, lay your pepper pieces out in a single layer on the prepared baking sheets. Make sure they aren’t touching each other. This is vital for air circulation. If they’re piled up or overlapping, they’ll steam rather than dry, and you’ll end up with a sticky, gooey mess, or worse, mold. Give each piece plenty of room to breathe and let the hot air circulate around them. You might need to use multiple baking sheets and do this in batches, depending on how many peppers you have.
If you’re drying halved peppers, place them cut-side down on the baking sheet. For strips, just lay them flat. The more surface area exposed to the air, the faster they’ll dry. It’s like giving them their own little drying spa treatment.
The Waiting Game: Hours, Not Minutes
Now comes the part that requires the most patience: the waiting. This process can take anywhere from 4 to 12 hours, or even longer, depending on the type of pepper, the thickness of the slices, the humidity in your kitchen, and the exact temperature of your oven. Yes, you read that right. Hours!
Check on them periodically, say, every hour or so, especially in the beginning. You can gently stir them or flip them over to ensure even drying. As they start to dry, they’ll become leathery and pliable. The goal is for them to be completely dry and leathery, but not brittle. If they feel brittle, they're likely over-dried, and might turn to dust easily. If they still feel moist or pliable, they need more time.
Some people like to leave the oven door slightly ajar throughout the entire drying process. This allows the moisture to escape more readily. You can do this by wedging a wooden spoon or a heatproof spatula in the door. Just be mindful of your pets and small children around a hot oven with an open door. Safety first, always!
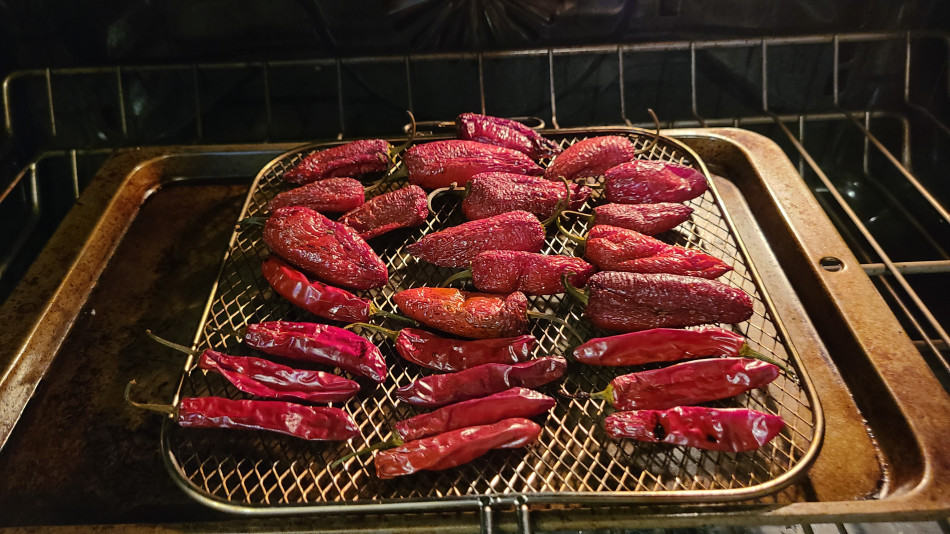
As the peppers dry, they will shrink considerably. Don’t be alarmed by this. It’s a sign that all that moisture is evaporating. You’ll notice their colors will deepen and become more vibrant. It’s quite a transformation to witness.
Knowing When They're Done: The Leathery Test
How do you know when your peppers are truly ready? This is the million-dollar question, isn't it? You’re looking for that leathery texture. Take a dried piece out and let it cool for a minute. It should feel pliable and a bit tough, like dried fruit. If you bend it, it should bend without snapping. If it snaps easily, it's too dry. If it feels flexible and you can still easily bend it, it's probably good to go.
Another test: try to tear a piece. It should resist tearing slightly but not be completely rigid. If it crumbles into dust, it’s overdone. If it feels soft and pliable, it needs more time. You want that nice chewiness that rehydrates well.
This might take some trial and error the first time you do it. Don't be discouraged! Every oven is different, and every pepper is different. You’ll get a feel for it.
Cooling and Storing Your Dried Treasures
You’ve done it! You’ve successfully transformed fresh peppers into dried wonders. But we’re not quite done yet. Proper cooling and storage are crucial for keeping your hard work from going to waste.
Cooling is Key
Once your peppers are dried to that perfect leathery stage, remove them from the baking sheets and let them cool completely on a wire rack. This usually takes about 30 minutes to an hour. Cooling allows any residual moisture to equalize, and it’s important to do this before storing them.
This step is non-negotiable. If you pack them up while they’re still warm, condensation can form inside your storage container, leading to mold. And nobody wants moldy peppers, right? Think of it as the final relaxation phase for your peppers before their long slumber.
Storage Solutions: Airtight is the Name of the Game
Once completely cool, it’s time to store your dried peppers. The best way to keep them fresh and flavorful is in airtight containers. This can be:
- Glass jars with tight-fitting lids: These are my favorite. They look pretty and you can see what you have.
- Vacuum-sealed bags: Excellent for long-term storage and space-saving.
- Good quality zip-top bags: Make sure to squeeze out as much air as possible.
Store your dried peppers in a cool, dark, and dry place. A pantry or a cupboard away from heat sources and direct sunlight is ideal. Properly stored, your dried peppers can last for up to a year, or even longer. How’s that for impressive shelf life?
Turning Them into Powder (Optional but Awesome!)
If you want to take it a step further, you can easily turn your dried peppers into flakes or powder. Once they’re completely dry and cooled, you can use a spice grinder, a clean coffee grinder (dedicated to spices!), or a food processor to grind them. For flakes, pulse a few times. For powder, grind until you reach your desired consistency. Again, make sure they are completely dry before grinding, otherwise, they'll clump into a paste.
Homemade chili powder or red pepper flakes? Yes, please! It’s so rewarding.
Troubleshooting Common Oven-Drying Woes
Even with the best intentions, sometimes things don't go perfectly. Here are a few common issues and how to fix them:
- Peppers are too brittle/dusty: This means they were likely over-dried or the oven was too hot. Next time, aim for that leathery texture and maybe lower the temperature slightly. You can still use these brittle ones for powdered spices, but they won't rehydrate as well for slicing.
- Peppers are still moist/sticky after many hours: Your oven might be running cooler than you think, or you might have packed them too densely. Increase the temperature slightly (if your oven allows) or prop the door open a bit more. Ensure they are spread in a single layer with plenty of air circulation.
- Mold growth: This is usually a sign of insufficient drying or improper storage. If you see mold, unfortunately, you have to discard them. It means they weren't dry enough to begin with.
- Uneven drying: Some peppers are done before others. That’s normal! Just pull the finished ones out and let the others continue drying. Stirring and flipping them periodically helps with evenness.
Don't get discouraged if your first batch isn't perfect. Every batch is a learning experience. You’ll start to understand your oven’s quirks and your preferred pepper textures. It’s all part of the fun!
The Final Verdict: Oven-Dried Peppers are Worth It!
So there you have it! Drying peppers in your oven is a simple, effective, and incredibly rewarding way to preserve this amazing ingredient. It’s a process that requires a little patience, a lot of low heat, and a keen eye, but the results are absolutely worth it. From adding a fiery punch to your favorite chili to creating your own unique spice blends, oven-dried peppers will become your new secret weapon in the kitchen.
Next time you find yourself with an abundance of peppers, instead of letting them go to waste, give this method a try. You might just surprise yourself with what you can create. Happy drying!