How To Dry Out A Blown Window

We’ve all been there, right? That moment when life throws you a curveball, or perhaps more accurately, a rogue sprinkler head or an overzealous toddler with a penchant for throwing toys. Suddenly, you’re staring at a wet, soggy mess where your pristine window used to be. A blown window – sounds dramatic, but often it’s just a minor (albeit inconvenient) incident. But the aftermath? That can feel like a mini-waterworld has decided to set up camp in your living room. Fear not, fellow humans navigating the delightful chaos of everyday life! Today, we’re diving into the surprisingly simple, and dare I say, almost zen, art of drying out a blown window.
Think of it as an impromptu home spa day, but for your house. Instead of cucumber slices and calming music, we’ve got towels, dehumidifiers, and a dash of optimistic energy. It’s not about dwelling on the "what if," but embracing the "what now." Because let’s be honest, life’s too short to stress over a bit of damp. We’ve got podcasts to listen to, sourdough starters to nurture, and Netflix binges to conquer. So, let’s get this drying party started.
The Immediate Aftermath: Taming the Flood
Okay, so the deed is done. Water is doing its best impression of Niagara Falls. The very first thing to do is… take a deep breath. Seriously. Panic won't magically dry things out. Now, assess the situation. How much water are we talking? Is it a gentle trickle or a full-blown monsoon?
Must Read
Your immediate priority is to contain the damage. Grab every towel you can find. Think of them as your valiant knights in shining terrycloth, ready to do battle with the moisture. Start by soaking up as much standing water as possible. Don't be shy; wring them out and go again. This is where your athletic prowess might surprisingly come in handy. Channel your inner Wimbledon player, but with less grunting and more absorbent cotton.
If the water has spread beyond the immediate window area, think about creating barriers. Old blankets, bath mats, even those questionable novelty rugs you received as a gift and never knew what to do with – now is their time to shine! Stack them up to prevent further spread. It’s like building a tiny, temporary levee system. Who knew you had this inner civil engineer?
The Silent Heroes: Towels, Buckets, and Beyond
Let’s talk tools of the trade. You’ve got your towels. What else? Buckets, my friends. Lots of buckets. For all that wringing out you’ll be doing. It’s a surprisingly effective, low-tech solution. If you’re feeling particularly organized, you might even have some old newspapers lying around. Believe it or not, newspapers are fantastic for soaking up moisture. Lay them down in damp areas, and they’ll act like absorbent sponges. Plus, you can catch up on last week’s headlines while you work. Multi-tasking at its finest!
Consider a wet-dry vacuum if you have one. These bad boys are like the superheroes of spill cleanup. They can suck up water with impressive efficiency, saving you a considerable amount of manual labor. If a blown window is a semi-frequent occurrence in your life (perhaps you live in a particularly lively neighborhood, or have a pet that enjoys extreme sports), investing in one might be a game-changer.
And for those truly epic water battles, a squeegee can be your best friend. Use it to push water towards your absorbent materials or into a bucket. It's a satisfying, almost therapeutic motion. Imagine you're a masterful painter, but instead of creating a masterpiece on canvas, you're creating a dry, pristine floor. Different strokes for different folks, as they say.
The Art of Airflow: Letting Nature Do the Heavy Lifting
Once the bulk of the water is gone, the real drying begins. This is where we harness the power of airflow. Think of your home as a giant, albeit slightly damp, lungs. We need to help it breathe.
Open up windows and doors on opposite sides of your home. This creates a cross-breeze, essentially a natural air conditioner that also happens to be a fantastic dryer. It’s like giving your house a good, long stretch after a nap. Let the fresh air in and the damp air out. This is especially effective on a breezy, dry day. Bonus points if you can do this while listening to some mellow indie folk music – it’s the ultimate chill vibe.
If opening windows isn't an option (hello, winter!), or if the humidity outside is higher than your indoor humidity (a common scenario), it’s time to bring in the big guns: fans. Box fans, oscillating fans, ceiling fans – any fan that can move air effectively will be your ally. Position them strategically to blow air across the damp surfaces. Think of them as tiny, tireless wind turbines working tirelessly to banish the dampness.
The Dehumidifier: Your Moisture-Gobbling Sidekick
Now, for the undisputed champion of indoor drying: the dehumidifier. If you don't own one, consider this your nudge. These magical machines are designed to pull moisture out of the air, and they are invaluable for situations like this. Place it near the affected area and let it work its magic. You’ll be amazed at how much water it collects. It’s like having a tiny, diligent butler dedicated to keeping your home dry.
:max_bytes(150000):strip_icc()/GettyImages-1218416633-a678216de91644c9ae760f2bed6c6bb6.jpg)
Remember to empty the water tank regularly. You’ll likely be doing this quite a bit initially, which is a good sign! It means your dehumidifier is working overtime to protect your home. Think of each full tank as a small victory in your battle against dampness. And hey, you can feel a sense of accomplishment with each empty. Who knew household chores could be so empowering?
Keep the dehumidifier running until the air feels noticeably drier and any lingering musty odors have disappeared. This might take a day or two, depending on the extent of the water damage. Patience is key here. Rushing the process can lead to mold and mildew, and nobody wants that kind of drama.
Beyond the Surface: Drying Out Walls and Floors
We’ve tackled the standing water, but what about those sneaky damp spots on walls and floors? These can be more insidious, and if left unchecked, can lead to bigger problems.
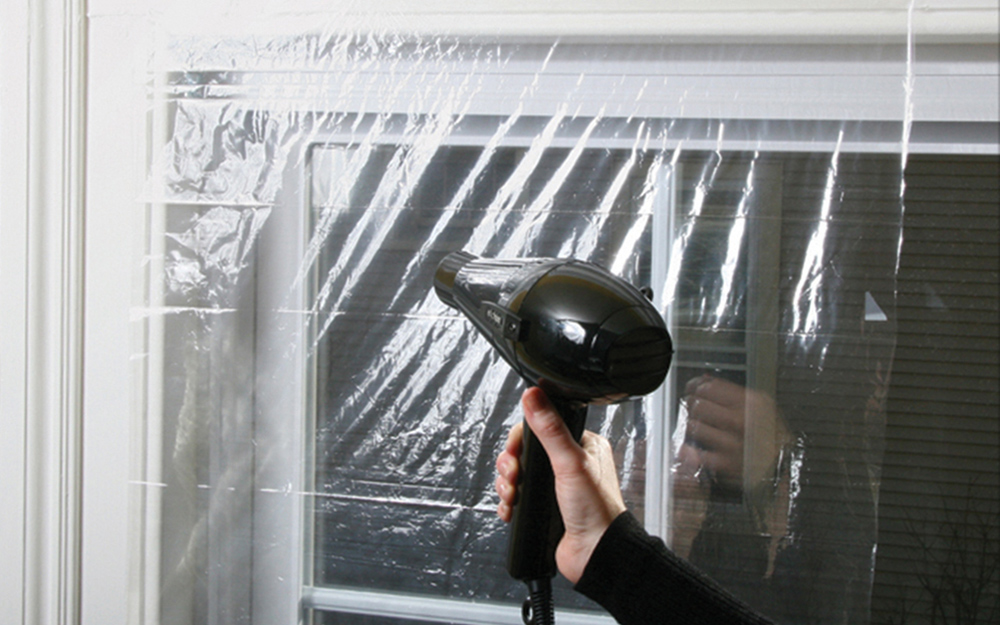
For damp walls, the goal is to increase airflow around them. If you can, position a fan to blow directly onto the affected area. This helps the moisture evaporate. You might also consider using a hairdryer on a cool setting for smaller patches. It’s a bit more time-consuming, but effective for targeted drying. Think of it as a very specific, localized spa treatment for your wall.
If the paint on your wall has bubbled or peeled due to moisture, don’t worry about fixing it just yet. Focus on getting the wall thoroughly dry first. Once it’s completely dry, you can then tackle any cosmetic repairs. Trying to paint over dampness is like trying to wear a wet swimsuit – it's just not going to end well.
Floors: The Silent Absorbers
Hardwood floors are notoriously susceptible to water damage. If your hardwood floors got wet, the key is to dry them thoroughly and evenly to prevent warping. Use towels and fans to direct airflow across the entire affected area. Avoid using excessive heat, as this can also cause damage. If the water sat for a prolonged period, you might notice some slight cupping or swelling. In most cases, with proper drying, this will eventually settle down. However, if you have any concerns, it’s always best to consult with a flooring professional.
For carpets and rugs, the process is similar. Absorb as much water as possible, then use fans to dry them thoroughly. If the carpet is heavily saturated, you might need to lift a section of it to allow air to circulate underneath. For persistent dampness or the dreaded musty smell, consider using a carpet cleaner with a drying function or renting a professional carpet dryer. It’s an investment in keeping your home smelling fresh and feeling dry.
Preventative Measures: Lessons Learned from the Drenching
Now that you’ve successfully navigated the aftermath and your home is once again a dry sanctuary, it’s a good time to think about prevention. What caused the blown window in the first place? Was it a faulty seal? A clumsy accident? Knowing the cause can help you avoid future drenchings.
Regularly inspect your windows for any signs of wear and tear, especially around the seals. A small crack or gap can let in a surprising amount of water. If you notice any issues, it’s best to get them repaired promptly. It’s like a small stitch in time saving you from a much larger, and wetter, problem down the line.
And if you have children or pets who are prone to accidental window-related incidents, perhaps it’s time to invest in some window guards or invest in a good quality window film. These are not just about aesthetics; they can provide an extra layer of protection. Think of it as a stylish shield for your glass.
The Cultural Cachet of a Dry Home
There’s a certain cultural cachet to a dry, comfortable home. Think of the classic cozy interiors depicted in literature and film – the crackling fireplace, the soft lamplight, the absence of any hint of dampness. It evokes a sense of peace and security. A blown window, while an inconvenience, is a temporary disruption to this ideal. Our efforts to dry it out are, in a way, our own small acts of restoring that sanctuary.
It’s a reminder of how much we rely on the integrity of our homes, those cocoons of comfort that shield us from the elements. And in overcoming a minor challenge like a blown window, we gain a little more appreciation for the simple pleasure of a dry space. It’s like a mini-resilience training session, disguised as a household chore.
Plus, let’s not forget the sheer satisfaction of a job well done. There’s a pride that comes with restoring order from a minor chaos. You faced the flood, you conquered the dampness, and now your home is a beacon of dryness once more. Bravo!
A Moment of Reflection: Embracing the Unexpected
So, there you have it. Drying out a blown window might not be the most glamorous task, but it’s a testament to our ability to adapt and overcome. It’s about rolling up our sleeves (literally and figuratively) and getting the job done. It’s a small reminder that life is full of unexpected twists and turns, and sometimes, those twists involve a bit of water.
But in those moments, we have the power to respond. We can choose to panic, or we can choose to grab some towels and a can-do attitude. And in the grand scheme of things, that’s a pretty empowering lesson. It’s about finding the calm in the (watery) storm, and appreciating the simple, profound comfort of a dry, peaceful home. Now, go forth and conquer any future dampness that dares to cross your path!