How To Dry Air Dry Clay Quicker
Ah, air-dry clay. The sculptural freedom, the tactile joy, the instant gratification of transforming a lump of earth into something real. It’s the artistic equivalent of a perfect picnic – accessible, enjoyable, and you don't need a kiln to have a blast. But let’s be honest, the “air dry” part can sometimes feel like waiting for that one notification you’re really hoping for. You’ve poured your heart (and maybe a little too much water) into your creation, and now it’s just… sitting there. Taunting you with its dampness.
Fear not, fellow clay enthusiasts! While we can’t exactly whip out a hairdryer and blast it like a pop star’s mane (though, imagine that!), there are definitely ways to coax your air-dry clay creations towards dryness with a little more pep in their step. Think of it less as speeding up nature and more as creating the ideal environment for it to do its thing, a bit like giving a plant extra sunlight. We’re talking about strategic patience, not frantic forcing.
The Gentle Art of Expedited Drying
Before we dive into the nitty-gritty, let’s set the stage. Air-dry clay is wonderful because it’s so forgiving. You don’t need a specialized studio or expensive equipment. Your kitchen table, a windowsill, a corner of your living room – these are your creative canvases. The key to faster drying isn’t about applying intense heat, which can cause cracking and ruin all your hard work. It’s about promoting good airflow and a controlled environment.
Must Read
Think about how we dry our clothes. Hanging them on a line outside on a breezy day is much faster than leaving them in a damp pile. The same principle applies to your clay. We want to maximize its exposure to dry air, but without any harshness.
Understanding the Clay's Nature
Air-dry clay is typically made from natural clay minerals, water, and a binder. When it dries, the water evaporates, leaving the binder to hold the clay particles together. It's a chemical process, and like any good recipe, it needs the right conditions. Too much moisture, and it takes forever. Too much heat, and it can become brittle. We’re aiming for a happy medium, a sweet spot of accelerated evaporation.
Consider this: a tiny bead will dry much faster than a large, solid sculpture. Why? Surface area. The more of your clay’s surface is exposed to the air, the more quickly the water can escape. So, when you're planning your project, keep this in mind. If you're in a hurry, smaller or thinner pieces are your friends. Think delicate figurines, thin-walled bowls, or intricate carvings rather than a hefty bust.
The Secret Weapon: Airflow, Airflow, Airflow!
This is the big one. The undisputed champion of quicker drying. You need to give your clay room to breathe. This means placing your piece in a location where air can circulate freely around it. Think of it like a little spa day for your sculpture, with gentle breezes pampering it into dryness.
Placement is Key: Don't bury your creation in a box or cram it into a corner. Elevate it if possible. A wire rack, a drying rack, or even a few strategically placed wooden skewers can lift your piece off the surface, allowing air to reach the bottom. This is especially crucial for pieces with a flat base, as moisture can get trapped underneath.
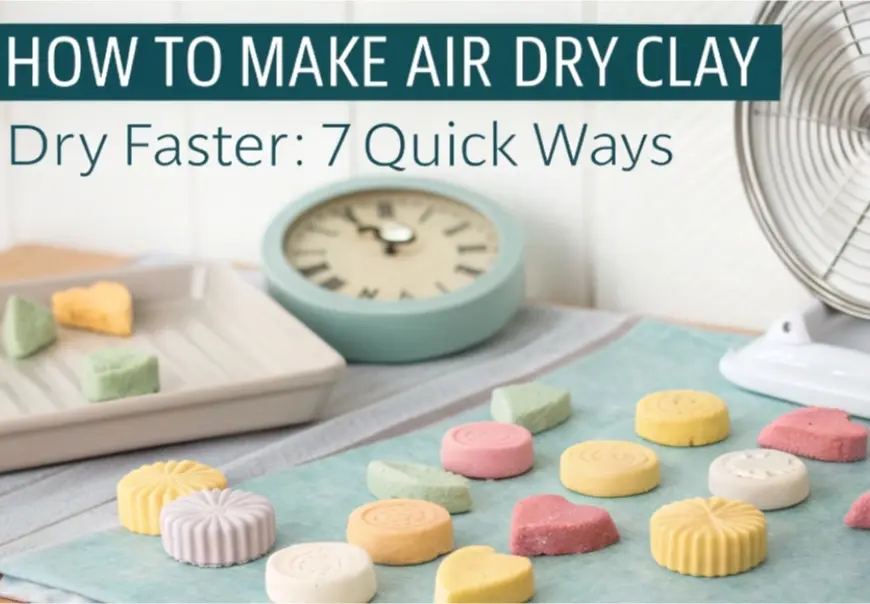
Fan Power (Gentle Edition): A small, oscillating fan set on a low setting can be your best friend. Position it a few feet away from your artwork, so it creates a gentle waft of air, not a gale. This constant circulation helps to carry away the humid air that builds up around the clay, encouraging further evaporation. It’s like having a personal drying assistant. Imagine it like the subtle, refreshing breeze you get when sitting near an open window on a pleasant day. No need for industrial-strength wind turbines here!
The "Rotation" Technique: Just like you'd rotate a pizza in the oven for even cooking, rotate your clay piece periodically. This ensures that all sides get equal exposure to the circulating air. A gentle turn every few hours can make a surprising difference. It's a small act of mindful intervention that pays dividends.
Humidity Hacks: Taming the Damp
Humidity is the nemesis of rapid air-dry clay drying. If you live in a particularly damp climate, or it’s a muggy day, you might need to take extra measures. Think of it like trying to dry your hair on a rainforest day – it’s an uphill battle.
Dehumidifier Delight: If you have a dehumidifier, now’s its time to shine! Place your drying artwork in a room with a running dehumidifier. This will actively pull moisture out of the air, creating a much more conducive environment for your clay to dry. It’s like giving your clay a VIP pass to a desert oasis.
The "Open Window" Strategy (with caveats): On a dry, breezy day, opening windows can be fantastic. However, be mindful of direct sunlight. While warmth is good, intense, direct sun can heat the clay unevenly, leading to cracking. So, a bright room with an open window is ideal, but perhaps avoid placing your piece directly in the path of a scorching sunbeam.
Avoid Enclosures: This might seem obvious, but it's worth reiterating. Do not cover your air-dry clay with plastic wrap, bags, or anything that traps moisture. This is the opposite of what you want! It's like trying to dry off with a wet towel – counterproductive.

Warmth: A Gentle Hug, Not a Fiery Embrace
A little bit of warmth can accelerate the evaporation process. Think of the difference between drying your hands on a cool day versus a warm day. The warmth helps the water molecules to move and escape.
Proximity to Gentle Heat: Placing your artwork in a moderately warm room can help. Think near a radiator (but not touching it!) or in a sunlit spot indirectly. The goal is a gentle, consistent warmth, not a blast of heat. Imagine the cozy feeling of a sunbeam on a chilly afternoon – that's the kind of warmth we're aiming for. It’s about encouraging, not forcing.
The "Oven Trick" (with extreme caution!): This is a more advanced technique and should be approached with great care. Some people use their oven on its lowest possible setting, often just the pilot light or a residual warmth after it's been turned off, with the door slightly ajar. Never put air-dry clay in a hot oven. This will almost certainly cause it to crack or burn. If you choose to experiment with this, do so at your own risk and only on very small, thin pieces that are already quite dry. It's more about creating a slightly warmer, drier microclimate than actually baking the clay. This is the clay equivalent of a warm hug, not a volcanic eruption.
Layering and Thickness: The Architect's Considerations
The way you build your clay creations significantly impacts drying time. If you're aiming for speed, be mindful of your construction.
Thin is In: Thicker sections of clay hold more moisture and will take exponentially longer to dry. If you're using air-dry clay for practical items, consider hollowing them out. For decorative pieces, aim for consistent, relatively thin walls. Think of it like building a house with thin walls versus thick, insulated ones – the thin ones dry out faster!

Hollow Out for Speed: For larger pieces, hollowing them out is a game-changer. If you're making a bowl, don't leave the base solid. Scoop out excess clay from the inside. This dramatically increases the surface area exposed to air and reduces the amount of water that needs to evaporate. It’s like creating little internal ventilation shafts for your artwork.
The "Pancake" Approach: If you're making a flat object, like a decorative tile or a plaque, ensure it's not too thick. A uniform, relatively thin layer will dry much faster than a bulky block. Imagine the difference between drying a pancake and a meatloaf – the pancake is ready in minutes!
Patience is Still a Virtue (But a Slightly Faster One!)
Even with all these tips, air-dry clay still takes time. It’s not instant like a 3D printer. The beauty of air-dry clay lies in its accessible nature and the meditative process of creation. Rushing it too much can lead to disappointment. The goal here is to optimize the drying process, not to cheat nature entirely.
Think of it like cultivating a sourdough starter. You can’t rush it, but you can provide it with the right warmth and food to get it bubbling happily. This is similar. We’re providing the optimal conditions for our clay to flourish and transform.
Signs Your Clay is Getting There
How do you know when your masterpiece is nearly ready? Here are a few indicators:
Color Change: As air-dry clay dries, it typically lightens in color. A damp piece will look a richer, darker shade than a dry one. Keep an eye out for this visual cue.
Temperature: A dry piece will feel the same temperature as the surrounding air. A damp piece will feel cool to the touch due to the evaporation process, which is a cooling phenomenon.
Sound: Gently tap your piece. A dry, hollow piece will often have a slightly resonant sound. A damp piece will sound more muted and thud-like.
Flexibility: When your clay is still damp, it will have a slight give. As it dries, it will become harder and more rigid. If it still feels slightly pliable, it needs more time.
A Final Word on Finishing Touches
Once your air-dry clay is completely dry, you can move on to the fun part: decorating! Painting, sealing, or adding other embellishments. But remember, your piece needs to be bone dry before you do any of that. Painting a still-damp piece can lead to bubbling or peeling paint. Sealing it prematurely can trap residual moisture.
Embrace the process. Enjoy the journey from a soft, pliable material to a hard, finished artwork. Whether you're making whimsical little figures, practical storage containers, or abstract sculptures, the satisfaction of creating something with your own hands is immense.
And in the grand scheme of things, what’s a few extra hours of drying time? It’s a small pause in our busy lives, a chance to appreciate the slower, more deliberate pace of creation. It's a reminder that some of the best things in life, like a perfectly dried clay masterpiece, are worth waiting for. Just like that perfectly brewed cup of tea or that slow-cooked meal, the anticipation often adds to the enjoyment. So, be patient, be strategic, and enjoy the delightful transformation of your clay into something truly special.

