How To Change A Washer On Tap
So, the other day, I was just trying to make myself a cuppa, you know, a proper British brew, when I noticed it. A drip. Not a dramatic, gushing torrent, mind you, but a persistent, insidious little drip from the kitchen tap. It was like a tiny, watery taunt, a constant reminder that my sanctuary of steamy goodness was being subtly invaded. For a moment, I considered just embracing the rhythmic plink-plink-plink. Maybe it would lull me to sleep. Maybe it would become the soundtrack to my life. But then, the eco-warrior in me (okay, mostly the slightly annoyed at my water bill self) kicked in. This was a problem. A small, fiddly, potentially messy problem.
And that, my friends, is how we find ourselves embarking on a little DIY adventure. We’re going to talk about changing a washer on your tap. Because let's be honest, who wants to pay a plumber for a 5-minute fix when you can totally DIY it and feel like a domestic goddess (or god, no judgment here)?
The Silent Drip: A Symbol of… Well, Dripping Things
That little drip. It’s more than just wasted water, isn't it? It’s a metaphor for all the little annoyances that creep into our lives. The squeaky hinge on the door, the slightly loose doorknob, the sock that always goes missing in the wash. These are the tiny battles we face daily, and sometimes, winning a small victory like fixing a dripping tap can feel disproportionately… satisfying. It’s like conquering Mount Everest, but with less altitude sickness and more chances of getting your fingers wet.
Must Read
So, why a washer? What exactly is this mysterious little rubbery thing that holds the watery fort? Think of your tap as a gatekeeper. When you turn the handle, you’re essentially lifting a little plunger or spindle. This plunger has a rubber washer at the bottom. When you turn the tap off, this washer presses down onto a valve seat, creating a watertight seal. Simple, right? Well, not always. Over time, this little washer gets worn down, cracked, or just plain… tired. And when it’s tired, it can’t do its job properly. Hence, the drip. The audacity!
Gathering Your Arsenal: What You’ll Need to Conquer the Drip
Before we dive headfirst into tap-tinkering, let’s make sure you’re armed and ready. No point in getting halfway through and realizing you’re missing a crucial piece of equipment. It’s like going into battle without your trusty sword, which, in this case, is probably a screwdriver.
Here’s a quick rundown of what you’ll likely need. Don't worry, it's not rocket science, more like… plumbing-adjacent science.
- A selection of screwdrivers: You'll probably need both flathead and Phillips head screwdrivers. Having a few different sizes of each is always a good idea. You never know what kind of screw is lurking in there, waiting to be… unscrewed.
- Adjustable wrench or pliers: This will be your go-to for loosening and tightening nuts and other bits. Think of it as your multi-tool of the tap world.
- The star of the show: Replacement washers! This is crucial. You can buy assorted washer kits at any hardware store. They’re usually pretty cheap and come with a variety of sizes. It's like a lucky dip for your tap! Crucially, try and identify your tap type first, or at least get a general idea of the size you might need. You don't want to end up with a bag full of washers that are all too big or too small.
- A cloth or rag: For wiping up any drips and generally keeping things tidy. Trust me, there will be drips. Embrace the dampness.
- Penetrating oil (optional but handy): If your tap is a bit old and stubborn, a little spray of penetrating oil can work wonders on stuck parts. It's like a spa treatment for grumpy metal.
- A small bowl or container: To put all those little screws and parts in so they don't go on an unexpected adventure across your floor. Losing a tiny screw is the worst.
- Patience: This might be the most important tool of all. Take your time, don’t force anything, and remember that it’s okay to pause and regroup. We’re not trying to break the tap, after all. We’re trying to fix it.
The First Hurdle: Turning Off the Water!
Okay, before you even think about touching that tap handle, this is the most important step. You absolutely, positively, 100% need to turn off the water supply to the tap. If you don't, well, you'll have a much bigger, wetter problem on your hands, and that's a call for a professional plumber, not a DIY blog post.
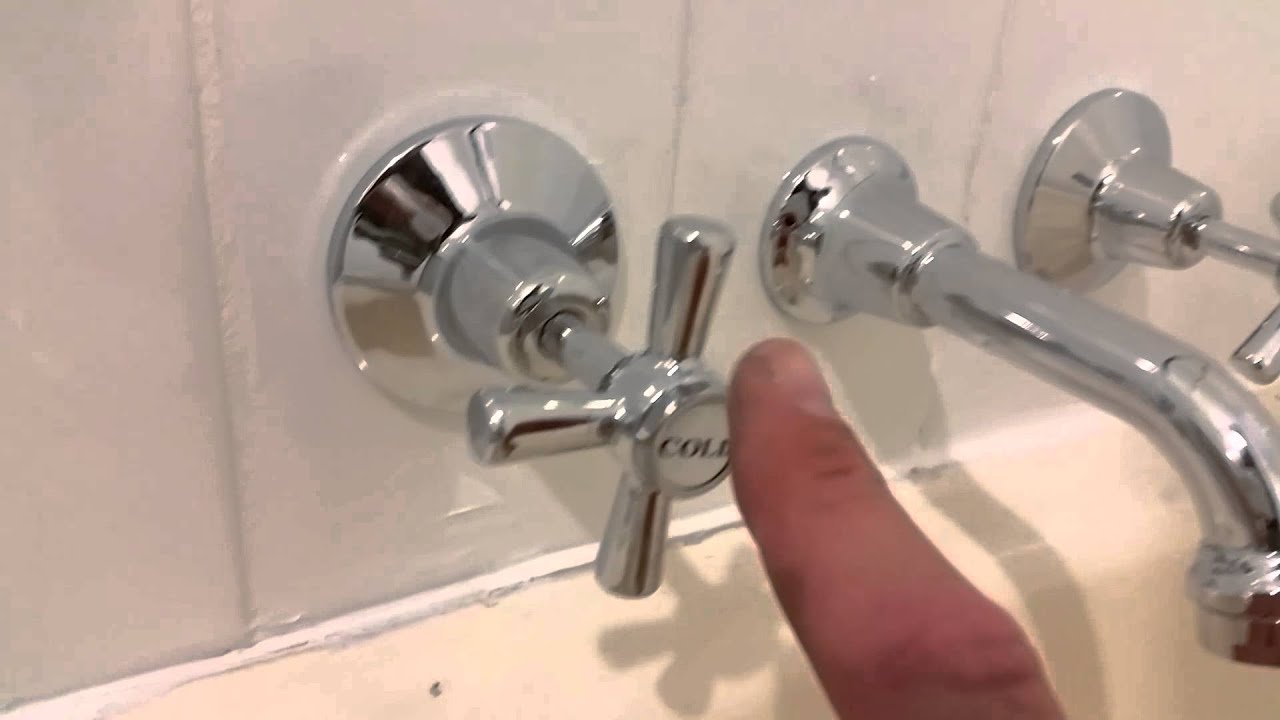
Where do you find the isolation valves? This can vary. For sinks, they're usually located underneath, behind the basin. You'll see two small taps, one for hot and one for cold. Turn them clockwise until they stop. For a standalone tap, like in a utility room or garage, you might need to turn off the main water supply to the house. This is usually found in a basement, garage, or sometimes even outside. Consult your home's manual or a more experienced DIYer if you're unsure. When in doubt, ask! It’s far better than a minor flood.

Once the water is off, turn on the tap you’re about to work on. This will drain any residual water that’s left in the pipes and confirm that the water supply is indeed off. If water still trickles out, double-check those isolation valves. Don’t be shy. Give them a good twist.
Disarming the Tap: Taking It Apart (Carefully!)
Right, water off? Good. Now, we can start dismantling. This is where those screwdrivers and wrenches come into play. The exact method will depend on the type of tap you have (compression, ceramic disc, ball, etc.), but most common household taps follow a similar pattern.
Step 1: Remove the decorative cap. Many tap handles have a small decorative cap, often with an indicator for hot or cold. This usually pries off with a small flathead screwdriver or even your fingernail if you’re feeling brave. Be gentle; you don’t want to scratch it.
Step 2: Unscrew the handle. Underneath the cap, you’ll find a screw. Unscrew this, and the handle should lift off. Sometimes, the handle can be a bit stiff. A gentle wiggle might be needed. Don’t force it, or you might damage the spindle or the handle itself. If it’s really stuck, that penetrating oil might be your friend here.
Step 3: The decorative shroud (if present). Some taps have a decorative cover or shroud that sits around the base of the handle. This might just lift off, or it might be screwed on. Again, be gentle.
Step 4: Unscrew the valve or spindle. Now you’re getting to the heart of the matter! You should see a hexagonal nut or a larger fitting. This is what holds the valve assembly (also called a stem or spindle) in place. Use your adjustable wrench or pliers to carefully unscrew this. Turn it anti-clockwise. You might need to hold the tap body steady with your other hand to prevent it from turning. This is where that small bowl comes in handy for any nuts or washers that might fall out.

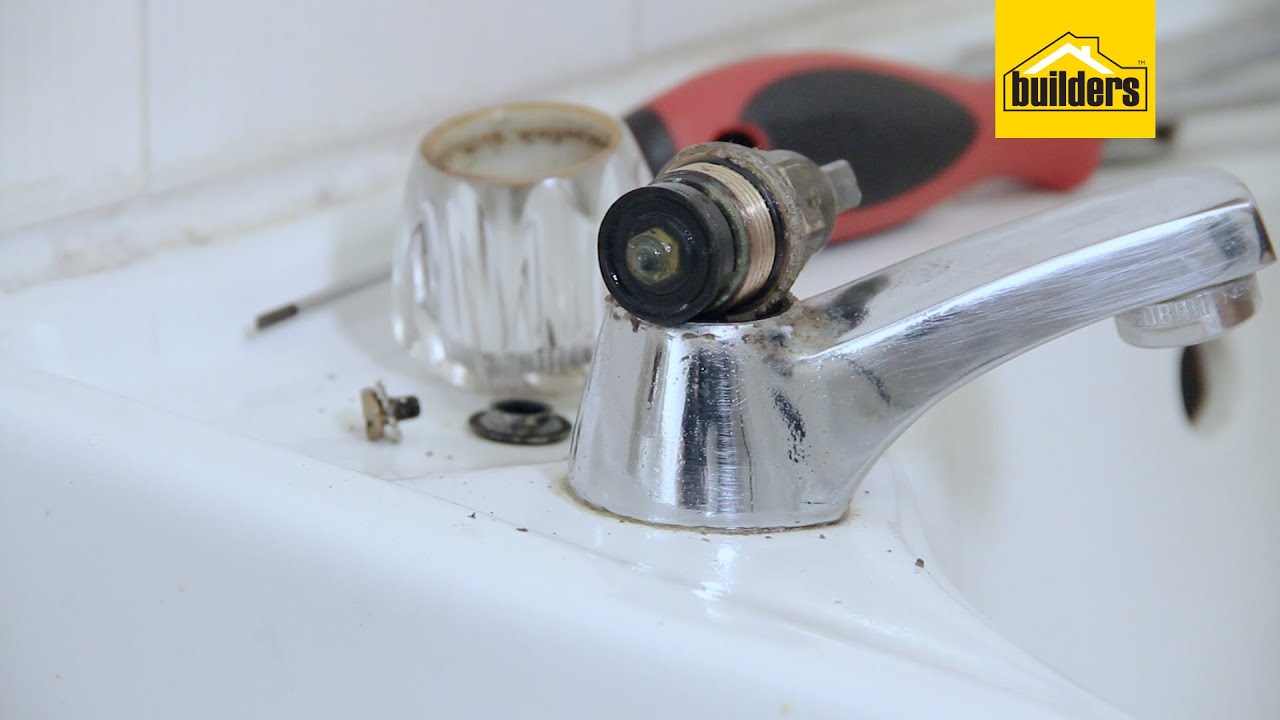
Step 5: Extract the valve assembly. Once the nut is off, you should be able to pull out the entire valve assembly. This is the part with the washer at the bottom.
The Moment of Truth: Replacing the Worn-Out Washer
Congratulations, you’ve reached the inner sanctum of your dripping tap! Now, let’s find that culprit, the humble washer.
Look at the bottom of the valve assembly you just removed. You should see a small, usually black, rubber washer held in place by a screw. This is it. The source of all your dripping woes.
Step 1: Remove the old washer. Use your screwdriver to undo the screw holding the washer in place. Be careful not to drop the screw! Then, simply pull off the old, worn-out washer. You might need to pry it off gently with a screwdriver or pliers if it’s really stuck. You’ll probably notice it’s hardened, cracked, or deformed. It’s seen better days, that’s for sure.
Step 2: Inspect the valve seat. While you have the assembly out, take a look at the valve seat inside the tap body. This is the surface that the washer presses against. If it’s rough, pitted, or damaged, even a new washer might not solve the problem completely. In some cases, you can buy a valve seat dresser tool, but for a simple washer replacement, you're usually hoping it's in decent condition. If it looks really bad, it might be time to consider a new tap or a more involved repair.

Step 3: Fit the new washer. Take your new washer from the kit. Make sure it’s the correct size. It should fit snugly onto the base of the valve assembly. Place it on, and then reinsert and tighten the screw that holds it in place. Don’t overtighten the screw, as you could damage the new washer.
Step 4: Clean up. Give the valve assembly a quick wipe down to remove any debris before reinserting it.
Reassembly: Putting Humpty Dumpty Back Together Again
You’ve replaced the offending washer, so now it’s time to put everything back in reverse order. This is usually the easier part, but also where you need to be a little mindful not to force anything.
Step 1: Reinsert the valve assembly. Carefully slide the valve assembly back into the tap body. It should slide in smoothly. If it feels like it’s catching, something might be out of alignment. Wiggle it gently until it settles into place.
Step 2: Screw on the retaining nut. Place the hexagonal nut (or whatever fitting holds the valve assembly) back on and tighten it with your wrench. You don’t need to overtighten it, just make it snug. Remember, you’re creating a seal, not trying to crush metal.
Step 3: Replace the decorative shroud (if applicable). Put any decorative covers back on.

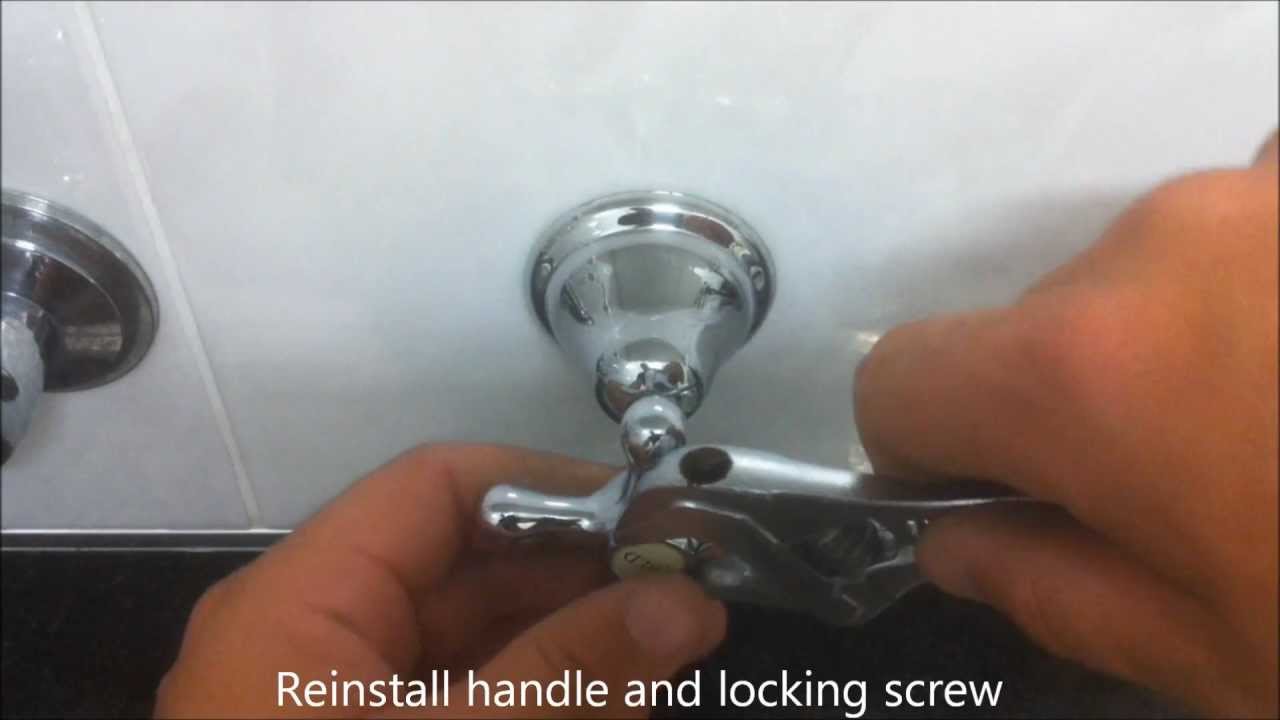
Step 4: Reattach the handle. Place the handle back onto the spindle and tighten the screw you removed earlier. Then, pop the decorative cap back on.
The Grand Reveal: Turning the Water Back On
You’ve done it! You’ve navigated the intricate world of tap mechanics and emerged victorious. Now for the moment of truth. It’s time to turn that water back on and see if your efforts have paid off.
Slowly turn the isolation valves (or the main water supply if you had to go that far) back on. Turn them anti-clockwise. Keep an eye on the tap. Listen for any sudden hissing or gurgling that might indicate a leak. Once the water is fully on, turn the tap handle on and off a few times, both hot and cold if applicable.
And then… silence. No drip. Just the satisfying sound of… well, nothing dripping. It's a beautiful, silent symphony. You did it! You conquered the drip! Give yourself a pat on the back. Maybe even make yourself that well-deserved cuppa, and enjoy the sweet, sweet sound of a non-dripping tap. It's the little victories, right?
Troubleshooting: What If It Still Drips?
Okay, so sometimes, even with the best intentions and the brightest new washer, things don’t go perfectly. If your tap is still dripping, don’t despair! Here are a few things to check:
- Did you use the right size washer? This is the most common culprit. Double-check that you’ve got the correct diameter and thickness.
- Is the valve seat damaged? As mentioned earlier, if the surface the washer presses against is rough or pitted, it won’t seal properly. This might require a valve seat dresser or, in worse cases, a new tap.
- Is everything tightened correctly? Make sure the retaining nut is snug, but not so tight that it’s causing damage.
- Is it a different type of tap? Some taps, like ceramic disc taps, don't have traditional washers. They have cartridges. If you have one of these, the process is a bit different, and you'll be replacing a cartridge, not a washer. A quick Google search for your tap model will tell you what you're dealing with.
- Could it be the O-ring? Sometimes, there's also an O-ring on the spindle that can wear out and cause leaks around the base of the handle. If you noticed a leak there, that's what you'd need to replace.
If you’ve gone through these steps and it’s still giving you grief, it might be time to call in the cavalry. But for most common dripping taps, a simple washer replacement is the ticket. And you, my friend, have just learned how to do it! You’re practically a certified tap whisperer now. Go forth and conquer those drips!