How Long Does Clay Take To Dry
Hey there, fellow clay enthusiast! So, you’ve been getting your hands nice and dirty, shaping some awesome creations, and now you’re staring at your masterpiece, wondering… when will this thing actually be dry? Ah, the age-old question that haunts every beginner (and let’s be honest, even some pros!). It’s like waiting for a pot of pasta to boil, but way less edible.
Don’t worry, my friend, we’ve all been there. That moment of anticipation, the checking and poking (gently, of course!), the sheer impatience! But fear not, because understanding how long clay takes to dry isn't some secret ancient ritual. It’s actually pretty straightforward, and once you get the hang of it, you’ll be a drying ninja in no time. So grab a cuppa, get comfy, and let’s dive into the wonderful world of clay dehydration!
The Big "It Depends!" - Why There's No Magic Number
Alright, let’s get this out of the way first. If you’re looking for a definitive answer like, "Clay takes exactly 3 days and 7 hours to dry," I’m going to have to burst that bubble. Sorry! But the truth is, the drying time of clay is a bit of a diva. It’s got a whole list of things it likes to consider before it’s ready for its next adventure (like firing, painting, or just being admired).
Must Read
Think of it like asking, "How long does it take for a cake to bake?" Well, it depends on the oven, the size of the cake, what ingredients are in it, right? Clay is much the same. It's a whole ecosystem of factors at play, and we’re going to break them down for you, so you can stop guessing and start predicting!
Factor 1: The Clay Itself – Not All Clays Are Created Equal!
This is probably the biggest player in the drying game. You see, there are different types of clay, and they all have their own personalities.
Earthenware is your friendly, beginner-level clay. It’s generally a bit more porous and can dry a tad quicker than some of its fancier cousins. It’s like the eager beaver of the clay world, ready to get on with it.
Stoneware is a bit more of a slow and steady wins the race type. It’s denser and often has a finer texture, meaning it holds onto its moisture a little longer. Think of it as the thoughtful philosopher of clays.
Porcelain? Oh, porcelain is the delicate ballerina. It’s super fine and can be quite unforgiving, but when it comes to drying, it can sometimes dry surprisingly quickly due to its low water absorption. However, it can also be prone to cracking if dried too fast, so it needs a bit of tender loving care. It’s the artiste who needs just the right conditions.
So, the first step to figuring out drying time is knowing what kind of clay you’re working with. If you bought a big bag of "modeling clay" from the craft store that feels a bit like playdough, it’s probably an air-dry clay, and those dry pretty fast! If you’re using a potter's clay for wheel throwing or hand-building, then you’re likely dealing with earthenware, stoneware, or porcelain, and those will take longer.
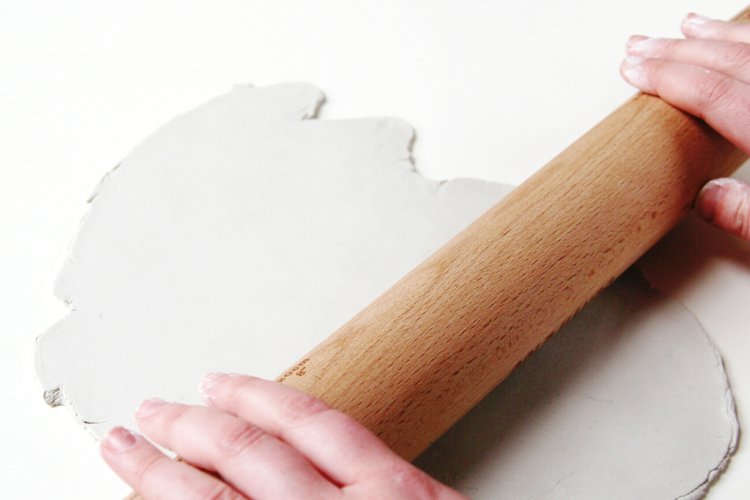
Factor 2: Thickness is Destiny! (For Drying Time, Anyway)
This is a no-brainer, right? A thin little pinch pot is going to dry a heck of a lot faster than a giant, hollowed-out sculpture. Imagine trying to dry a slice of bread versus a whole loaf. Get it?
Thick sections of clay are where the moisture loves to hang out. It takes a lot longer for that water to evaporate from the center of a thick wall compared to the edges. So, if you’ve got a chunky piece, you’re going to need to be patient. Very, very patient. Maybe take up knitting while you wait.

Thin sections, on the other hand, are like speedy Gonzales. They’ll dry up in a flash. This is why potters often try to get their walls nice and even when throwing on the wheel – it helps with consistent drying and prevents those annoying cracks.
When you’re hand-building, always consider the thickness of your piece. If you’ve got a thick base and thin walls, the base will take much, much longer to dry. It’s all about that moisture gradient!
Factor 3: Size and Surface Area – The More the Merrier (for Drying!)
This is closely related to thickness, but it’s also about the overall shape. A flat, wide slab of clay will dry faster than a tightly packed ball of the same volume. Why? Because more of its surface is exposed to the air!
Think of it like a wet shirt. If you hang it out in a big, spread-out way, it dries faster than if you scrunch it up into a ball. The same principle applies to clay.
Larger pieces with lots of nooks and crannies might have areas that are more protected from airflow, slowing down the drying process in those specific spots. This is why sometimes you might have a piece that looks dry on the outside but is still a bit damp inside.
So, if you’re making a sprawling landscape with lots of little bits sticking out, that’s going to take its sweet time. If it’s a simple, smooth sphere, it might be a bit quicker.
Factor 4: The Environment – It’s Not Just About Your Clay!
This is where the magic (or the lack thereof) really happens. The conditions in your studio (or your kitchen table, or wherever you’re creating your clay magic) play a HUGE role in how quickly your clay dries.
Temperature: Warmer air can hold more moisture, but it also speeds up evaporation. So, a warm room will generally dry clay faster than a chilly one. Think of it like putting your clothes on the radiator in winter – they dry quicker! But be careful not to overheat your clay, as we’ll get to that.
Humidity: This is a biggie! High humidity is the enemy of fast-drying clay. If the air is already thick with moisture, it’s going to take a lot longer for your clay to release its own water. Think of a steamy bathroom after a shower – things take ages to dry in there!
Conversely, in a very dry climate, your clay can dry too quickly, leading to cracking. It’s a delicate balance, like walking a tightrope while juggling… well, clay.
Airflow: This is your best friend when it comes to drying! Good airflow helps to carry away the moisture that’s evaporating from the clay. If your piece is sitting in a still, stagnant corner, it’s going to take much longer to dry than if it’s in a breezy spot.
Using a small fan on a low setting (not directly pointed at the clay, mind you!) can make a world of difference. Just a gentle circulation of air can speed things up considerably.
Factor 5: How You’re Drying It – The “Tent” Method vs. Open Air
This is where your strategy comes into play! You can influence the drying process quite a bit with how you store your work.
The "Tent" Method: This is a classic for a reason! When your clay is initially drying, especially if it’s a more delicate piece or you want to avoid rapid drying and potential cracking, you can loosely cover it. Think of a plastic bag or a large plastic sheet. You want to create a humid micro-environment around the clay. This slows down the evaporation process, allowing the moisture to equalize throughout the piece.
It’s like giving your clay a cozy little sauna. You might leave it tented for a day or two, or even longer for very thick pieces. Periodically, you’ll want to lift the tent to let some of the moisture escape and check the progress. It's a bit like "checking your homework" for the clay!
Open Air Drying: Once your piece is no longer in danger of rapid cracking (you'll start to feel it firming up), you can remove the tent and let it dry more completely in open air. This is where that good airflow we talked about really shines.
Direct Sunlight/Heat Sources: I’m going to give this a big, fat NOPE! Unless you are intentionally trying to create cracks and warping, avoid placing your clay in direct sunlight or too close to radiators, heaters, or other intense heat sources. This is like giving your clay a sunburnt and heatstroke all at once – it’s not going to end well! Rapid, uneven drying is the enemy.
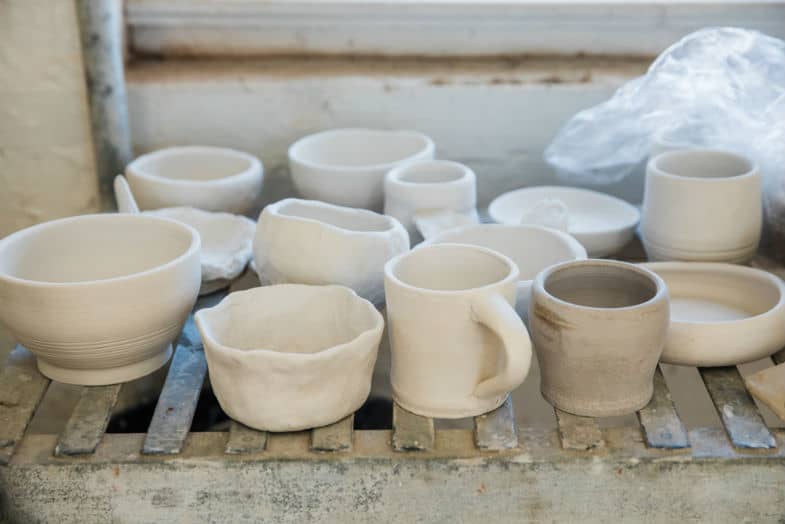
So, How Long ARE We Talking? A General Guideline (With a Pinch of Salt!)
Okay, okay, I know you want some kind of number, even if it’s a fuzzy one. So, let’s try to give you a ballpark figure, but remember, these are just estimates and can vary wildly!
For a typical, medium-sized piece of pottery (say, a mug or a small bowl) made from stoneware or earthenware clay, with moderate thickness (around 1/4 to 1/2 inch walls), in a room with decent temperature and humidity, you’re looking at:
A few days to a week for it to become leather hard. This is when the clay is firm enough to handle without deforming, but still damp enough to carve or attach new pieces to.
Another week to two weeks (or even longer!) to become bone dry. This is when all the visible moisture has evaporated. The clay will be lighter in color and feel completely dry to the touch. It's ready for bisque firing at this stage!
Thicker pieces can take significantly longer – think 3-4 weeks or even a month or more if they are substantial. Some very large sculptures might need to dry for months!
Very thin pieces, like small tiles or delicate embellishments, might be bone dry in just a couple of days.
Air-dry clays are generally much faster, often drying to the touch within 24-48 hours, and fully dry within a few days to a week, depending on thickness.

How Do You Know When It's TRULY Dry? The Detective Work!
Besides just waiting and hoping, there are some ways to be a clay detective and figure out if your piece is ready for its next step.
The Color Test: As clay dries, it usually becomes lighter in color. Bone dry clay will be significantly lighter than wet clay. This is a good visual clue, but it’s not foolproof on its own.
The Touch Test: This is the most common method. Gently feel the surface of your clay. If it feels cool to the touch, there’s still moisture there. Bone dry clay will feel room temperature. If you’re unsure, try touching it in a few different spots, especially thicker areas.
The Weight Test: This is a more advanced technique, but very accurate. If you have a very consistent type of clay, you can get a feel for how heavy a wet piece is compared to a bone dry piece. As the water evaporates, the weight significantly decreases.
The "Sound" Test (for the brave!): Some potters will gently tap a bone dry piece. It might make a slightly higher-pitched, more resonant sound than a piece with residual moisture. This takes practice to discern!
The “Scratch” Test: You can gently try to scratch a tiny, inconspicuous area of the clay with your fingernail. If it dents or gouges easily, it's still too wet. Bone dry clay will be much harder.
Ultimately, it’s a combination of observation, touch, and experience that will help you hone your drying-time intuition. Don’t be afraid to err on the side of caution. It’s better to wait an extra day or two than to have your piece crack or explode in the kiln because it wasn’t completely dry.
A Few Final Tips for Happy Drying
- Patience is a Virtue: Seriously. This is the number one rule of clay. Embrace the waiting process. Think of it as a meditative time for your creation.
- Even Drying is Key: Try to ensure your piece dries as evenly as possible to prevent stress and cracking. Rotate it occasionally if needed.
- Beware of Drafts and Heat Sources: As we’ve covered, these are the clay’s worst nightmares.
- Learn Your Clay: Get to know the specific properties of the clay you’re using.
- When in Doubt, Wait it Out: Better safe than sorry!
And there you have it, my friend! The not-so-mysterious world of clay drying. It might seem a bit daunting at first, with all these factors to consider, but trust me, with a little practice and observation, you’ll become a drying guru. You’ll start to intuitively know when your pieces are ready, and that feeling of satisfaction when you pull a perfectly dried (and then fired!) creation from the kiln is absolutely incredible.
So, go forth and create! Embrace the waiting, learn from each piece, and remember that every single delay is just a step towards a stronger, more beautiful finished product. Your patience will be rewarded with wonderful, enduring art. Happy drying, and even happier creating!