How Do You Save Images On A Mac

So, you’ve stumbled upon a truly magnificent image on your Mac. Perhaps it’s a picture of your cat doing something hilariously absurd, like wearing your slippers as a hat. Or maybe it’s a screenshot of that incredibly niche meme that only you and your three closest friends will ever understand. Whatever the visual masterpiece, you’ve decided: “This, my friends, must be mine.” And then… the existential dread kicks in. How do you actually save this digital treasure? Fear not, fellow digital hoarder and meme connoisseur, for I am here to guide you through the mystical art of image saving on your trusty Mac.
Let’s face it, sometimes computers can feel like they speak in ancient hieroglyphics. You’re staring at a beautiful image, and the only instinct you have is to somehow gently pluck it off the screen. Alas, magic wands are not standard Mac accessories (though wouldn’t that be amazing? Imagine conjuring up a perfectly brewed latte with a flick of the wrist. Sigh, one can dream).
But fear not! The process of saving an image on a Mac is about as complicated as teaching a squirrel to do your taxes. Which, by the way, I’m pretty sure they’d excel at. Think about it: they hoard nuts (digital assets), they’re incredibly organized (burying things for later), and they probably have some sort of secret squirrel stock market. We’re onto something here.
Must Read
Now, there are a few ways to snag your digital prize. It’s like a buffet of saving options! You can choose the one that tickles your fancy the most, or the one that makes you feel the least like you’re performing open-heart surgery on your laptop.
The Good Ol’ Right-Click Rescue
This is your bread and butter, your go-to move, your digital secret handshake. Most of the time, when you find an image on a website or within an application, you can simply right-click on it. Now, if you’re a two-finger-tap kind of person on your trackpad, that’s your equivalent of a right-click. Go ahead, give it a try. Feel the power!
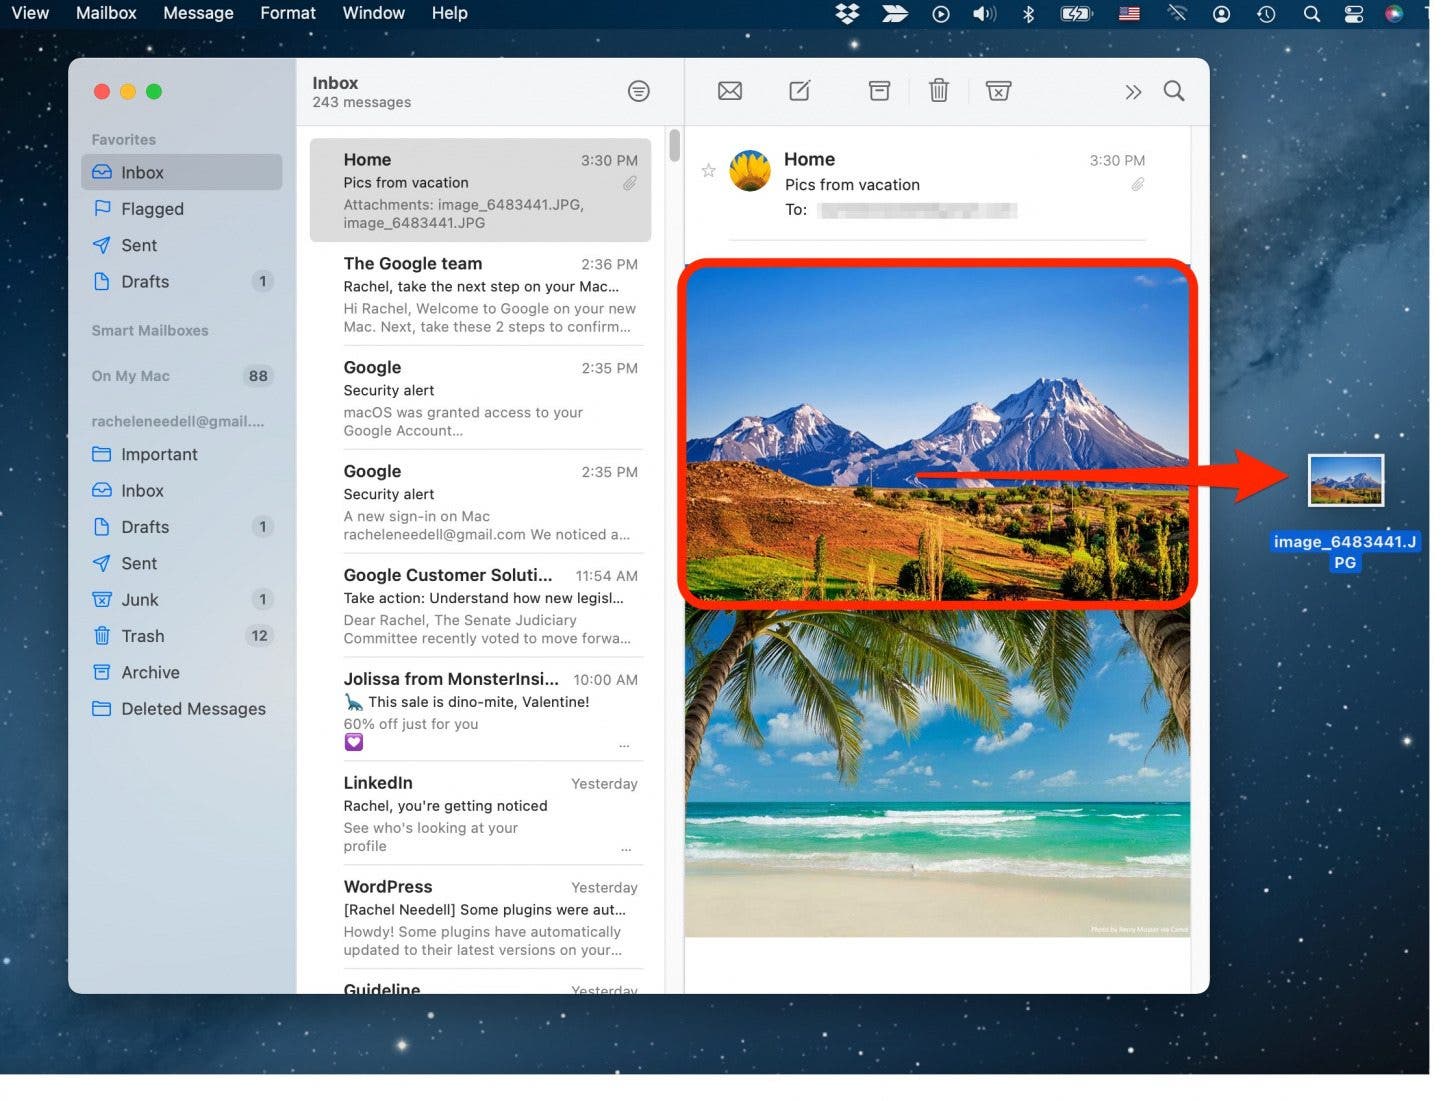
Once you’ve unleashed the right-click magic, a glorious little menu will pop up. And nestled amongst options like “Open Link in New Tab” (which, let’s be honest, is just a fancy way of saying “procrastinate later”), you’ll find the golden ticket: “Save Image As…”. Bingo! You’re practically a digital archaeologist unearthing ancient artifacts.

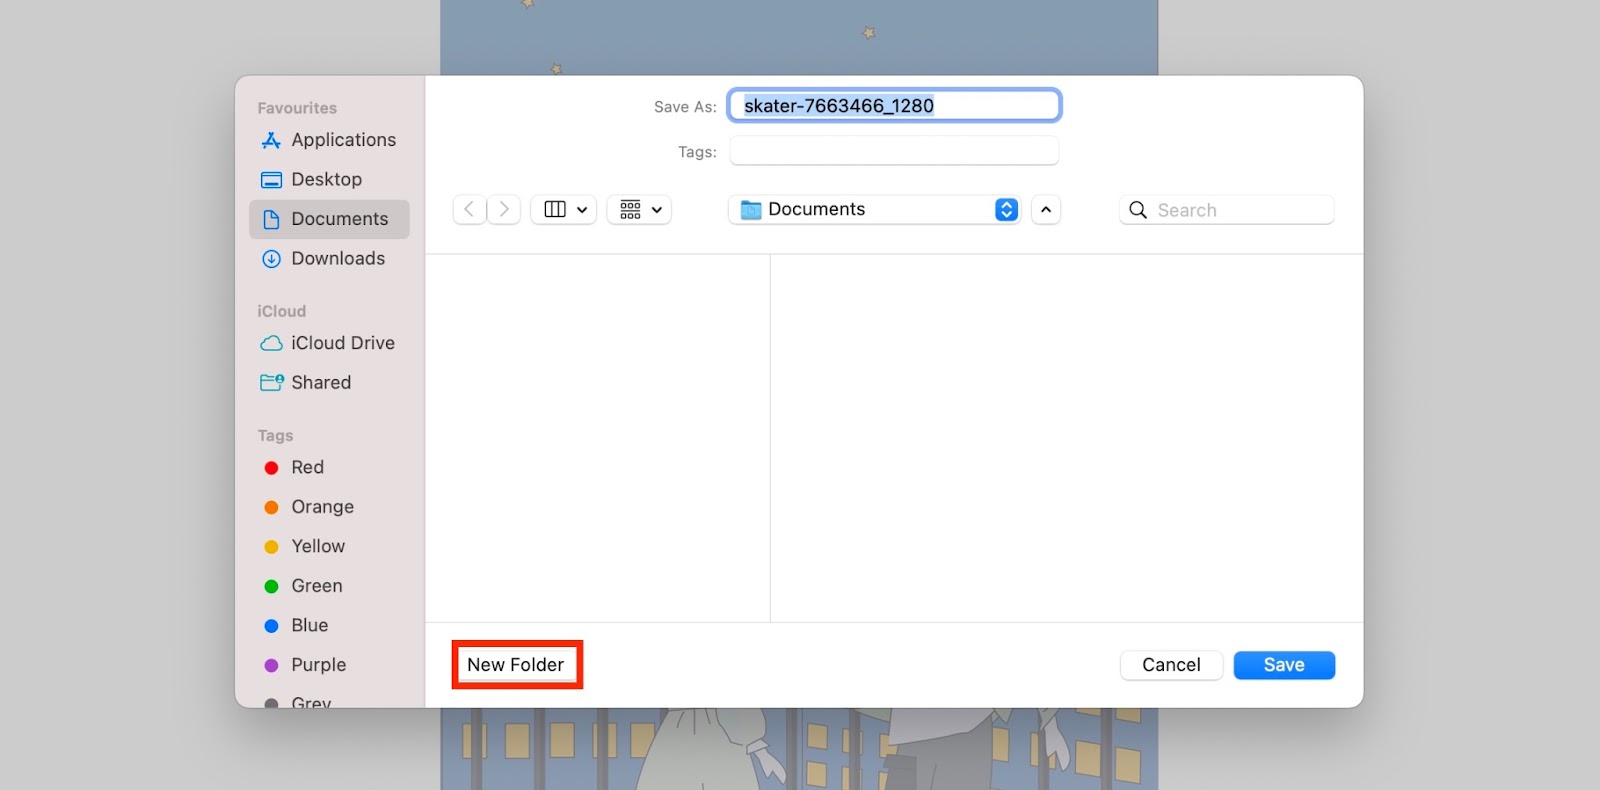
Click on that bad boy, and your Mac will kindly ask you where you’d like to stash your precious image. You’ll see a familiar window pop up, looking very much like the one you use to save documents. You can choose your Desktop, your Downloads folder (the digital equivalent of a junk drawer, let’s be real), or create a brand new folder dedicated solely to pictures of your cat in hats. The possibilities are truly endless!
Pro-tip: Some websites, in their infinite wisdom or sheer mischievousness, might have protected their images. In those cases, “Save Image As…” might be grayed out or mysteriously absent. Don’t panic! This is where the fun really begins, and we delve into the slightly more… adventurous methods.
The Screenshot Symphony
What if “Save Image As…” is playing hide-and-seek? Or what if the image is part of a larger screenshot, like a hilarious conversation you had with your best friend that needs to be preserved for all eternity (or at least until you need to blackmail them)? Well, my friend, it’s time to embrace the power of the screenshot.
Your Mac has a built-in screenshotting superpower, and it’s probably cooler than anything you could conjure with a magic wand. There are a few key shortcuts to remember here, and they’re surprisingly easy to memorize. Think of them as your secret agent codes for digital capturing.
The Full Monty: Command + Shift + 3
This is your all-or-nothing approach. Press these three keys simultaneously, and BAM! Your entire screen is captured. It’s like the computer is saying, “You know what? I’m just going to give you EVERYTHING.” The screenshot will then magically appear on your Desktop as a .PNG file. Easy peasy, lemon squeezy, and way less sticky than actual lemons.
The Picky Eater: Command + Shift + 4
Now, sometimes you don’t need the whole enchilada. You just want that one perfect slice of pizza. That’s where Command + Shift + 4 comes in. Your cursor will transform into a crosshair, allowing you to drag a box around the exact area you want to capture. It’s like being a sniper, but instead of bullets, you’re shooting pixels. Precise. Deadly. Hilarious.
:max_bytes(150000):strip_icc()/005-how-to-save-picture-mac-4570947-27159e56c9e14e94bf6dfcd383578b39.jpg)
Once you’ve selected your desired area, release the mouse or trackpad button, and poof! Your custom screenshot is saved to your Desktop. I like to imagine a tiny screenshot fairy zipping off to your Desktop to deliver the goods.
The Selective Sharpshooter: Command + Shift + 4, then Spacebar
This one’s a bit more advanced, a little like learning to do a kickflip on a skateboard. After pressing Command + Shift + 4, hit the Spacebar. Your cursor will change into a little camera icon. Now, when you hover over windows, they’ll get highlighted. Click, and you’ll get a perfect screenshot of just that window, complete with a shadow. It’s like framing your digital art with a fancy border. Very sophisticated.
All screenshots, by default, land on your Desktop. If your Desktop is already looking like a digital explosion of saved items (no judgment, mine usually does), you might want to tidy up. But hey, at least you’ve got your image!
![[Top 4 Ways] How to Save an Image on Mac in Different Ways?](https://iboysoft.com/images/en-news/how-to-save-an-image-on-mac/summary-how-to-save-an-image-on-mac.jpg)
The Browser’s Little Secret (Sometimes)
Every now and then, especially if you’re browsing on your Mac, you might notice that simply dragging and dropping the image from the webpage directly into a folder on your Mac might work. It’s like the website is handing you the goods directly. This isn’t always reliable, and it can sometimes save the image with a weird, generic name, but it’s worth a shot if you’re feeling lucky.
Think of it as finding a twenty-dollar bill in an old coat pocket. A small, but delightful, surprise!
When All Else Fails: Extensions and Apps (For the Truly Dedicated)
For those of you who are really into saving images, or perhaps you’re trying to snag a GIF that’s being particularly elusive, there are browser extensions and dedicated apps that can help. These are like the special tools for the serious image-saving artisan. You can find them in the Mac App Store or by searching online. They often add extra options to your right-click menu or give you more control over the downloading process. But for everyday saving? The built-in Mac tools are usually more than enough.
So there you have it! The seemingly daunting task of saving an image on your Mac is actually a series of simple, user-friendly steps. From the trusty right-click to the mighty screenshot, you’re now equipped to capture all the digital wonders your heart desires. Now go forth and save those cat photos, those epic memes, and those screenshots of your impressive high scores. Your digital hoard awaits!