Alright folks, gather 'round! Ever found yourself staring at a mysterious little rubber ring, wondering what its deal is? That, my friends, is probably an O-ring, and they are the unsung heroes of keeping things from getting… well, leaky! Think of them as the tiny, rubbery bouncers at the door of your pipes, your car engines, or even your fancy coffee maker, making sure nothing escapes that shouldn't. And the biggest question on everyone's mind when you need a new one is: How do you measure an O-ring?
Now, before you panic and think you need a degree in advanced geometry or a secret handshake with a gasket guru, let me tell you: it's way simpler than you think. It's like trying to figure out what size ice cream cone you need. You just… measure it! But with a little bit of O-ring flair!
Imagine you've got a leaky faucet. Drip, drip, drip. It's driving you absolutely bonkers, right? You've tried tightening it, you've tried pleading with it, but that persistent little drip just keeps on going. Eventually, you realize, "Aha! It's probably one of those sneaky O-rings!" And you're right! They're everywhere, doing their silent, important work.
When that dripping stops because of your O-ring wizardry, you'll feel like a superhero. A slightly damp superhero, perhaps, but a superhero nonetheless!
So, let's dive into the wonderfully wacky world of O-ring measurement. The two most important things you need to know about an O-ring are its dash number and its size. Don't worry about the dash number for now; we're going to focus on the size because that's what your eyes and a simple tool can tell you. Think of the dash number as its secret agent code name – very important, but not what you need to know to grab the right one from the spy shop.
Mastering O-Ring Measurement: A Step-by-Step Guide - Hongju
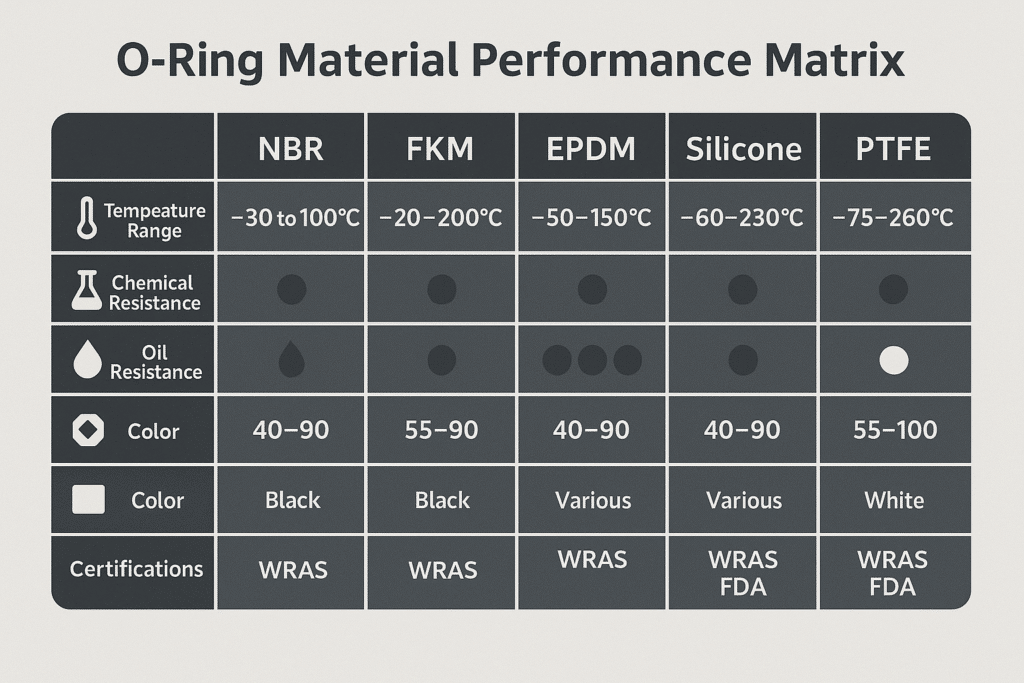
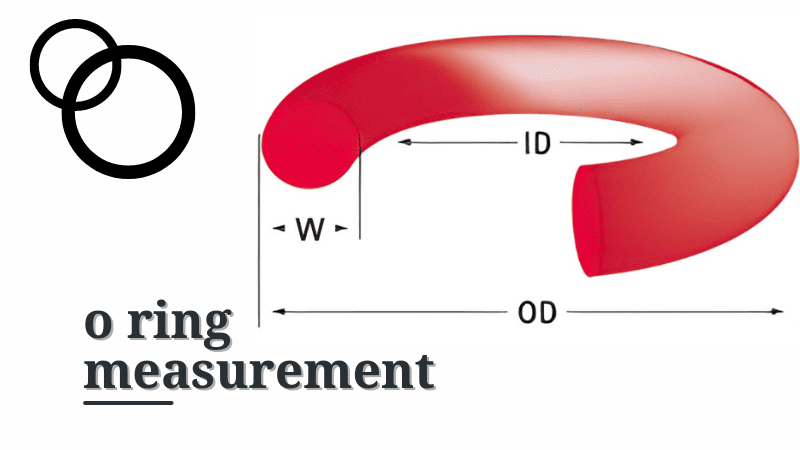
The two most fundamental measurements for an O-ring are its Inside Diameter (ID) and its Cross-Sectional Diameter (CS). Sounds fancy, right? But it’s just the measurement across the hole and the measurement across the thickness of the rubber itself. Easy peasy, lemon squeezy!
Let's get practical. You've got your suspect O-ring, or maybe you've successfully (and heroically!) extracted the old one. You can do this with your bare hands if you're feeling brave, or with a tiny, helpful tool like a dental pick or even a sturdy toothpick. Just be gentle! These little guys can be surprisingly delicate when they're not happily doing their job.
How to Measure O-Ring Dimensions? - Hongju
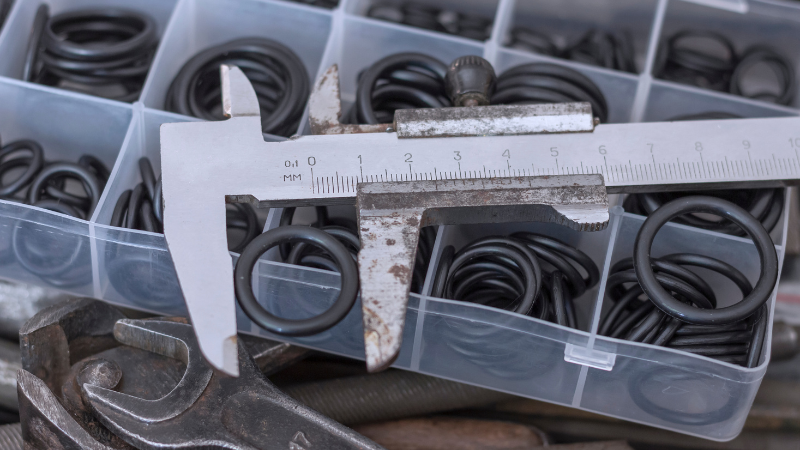
First up, the Inside Diameter (ID). Imagine your O-ring is a tiny, perfect donut. The ID is the measurement across the hole in the middle of that donut. Now, you could try to use a ruler, but honestly, that's like trying to thread a needle with boxing gloves on. It's a bit clunky. A much better tool, and one that makes you feel incredibly professional, is a set of calipers. You can get these at any hardware store, and they're super satisfying to use. Just gently place the jaws of the caliper inside the ring and close them until they snuggly touch the inner edge. Boom! You've got your ID.
If you don't have calipers (no judgment here, we've all been there!), you can get creative. You could use a piece of string, wrap it around the inside of the hole, mark it, and then measure the string with a ruler. Or, if you're really determined, you could find a dowel rod or a bolt that fits snugly inside the O-ring. The diameter of that dowel or bolt is your ID! It’s like a secret puzzle where the solution is a number.
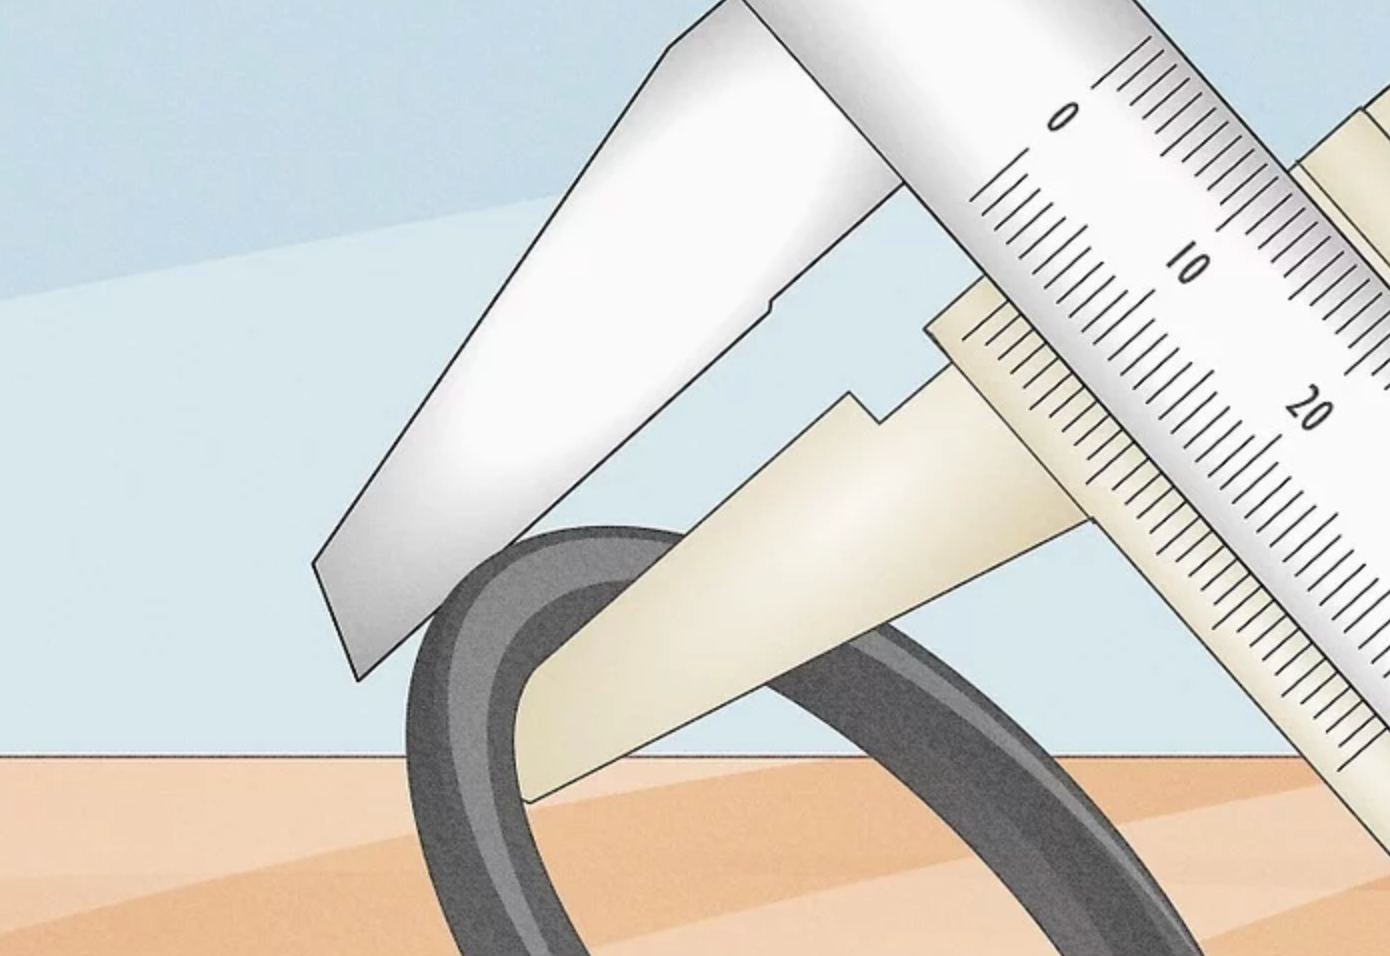
Next, the Cross-Sectional Diameter (CS). This is the measurement of the thickness of the rubber band itself. Imagine slicing your donut right down the middle. The CS is the diameter of that slice. Again, calipers are your best friend here. Just place the jaws on either side of the rubber ring and tighten until they meet the outer edges of the rubber. That number? That's your CS!
How to Measure O-Ring Dimensions? - Hongju
If you're going the string route again, wrap it around the thickest part of the rubber ring, mark it, and then measure the string. Or, you can try to compare it to common objects. Does it look about as thick as a standard pencil lead? Thicker? Thinner? Sometimes, a visual comparison can get you close, but for accuracy, especially for critical applications (like keeping your car from exploding in a puff of smoke – okay, maybe a slight exaggeration, but you get the idea!), calipers are the way to go.
Think of measuring an O-ring like trying to find the perfect size for your favorite cozy socks. You want them to fit just right – not too tight, not too loose, just… perfect!
How to Measure O-Ring Dimensions? - Hongju
Once you have your ID and your CS, you're basically an O-ring whisperer. You can then look up these dimensions on charts provided by O-ring manufacturers or sellers. They often have a handy system where they use these measurements to assign a dash number. So, even though we skipped the dash number initially, knowing your ID and CS is how you eventually decode it!
Why is this so important, you ask? Because if you get the wrong size, your O-ring won't seal properly. It'll be like wearing shoes that are too big; you'll trip, things will leak, and it'll just be a general mess. A properly sized O-ring creates a perfect seal, preventing fluids from escaping and unwanted contaminants from getting in. It's a tiny hero doing a massive job!
So, the next time you encounter a rogue O-ring, don't be intimidated. Grab your trusty calipers (or a clever substitute!), do a little measuring, and feel the immense satisfaction of knowing you've conquered the O-ring challenge. You've not only potentially fixed a leaky problem, but you've also gained a superpower – the superpower of understanding these essential little rubber rings. Go forth and seal with confidence!