How Do I Get Window Tint Off
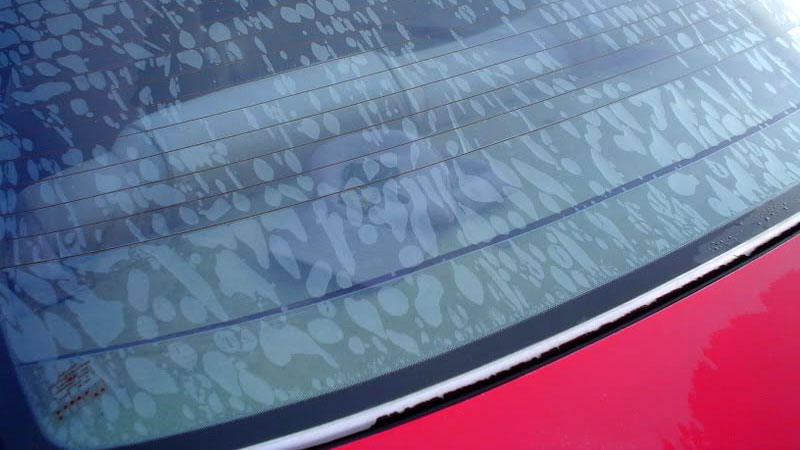
You know, I remember this one time, I was helping a friend move. He’d just bought this ridiculously cool, albeit slightly beat-up, classic car. Think vintage muscle, the kind that smells like old leather and has a rumble that shakes your fillings. Anyway, he was so excited to finally own it, and then he pointed to the windows. “Yeah, the previous owner put this… stuff… on,” he said, a hint of distaste in his voice. He was talking about the window tint. It was this dark, almost opaque film that was peeling at the edges like a sunburned tourist. Honestly, it looked less like a stylish upgrade and more like the car had a bad case of the measles. And that, my friends, is where our journey into the murky world of removing window tint begins.
So, you’ve inherited some questionable tint, or maybe you just changed your mind. Perhaps you bought a car with it already on, and it’s looking a bit… sad. Or, let’s be honest, maybe you thought you were channeling your inner movie star back in the day and now you’re regretting it. Whatever your reason, you’re staring at those darkened windows and thinking, “How the heck do I get this off?” Don’t worry, you’re not alone. It’s a common dilemma, and thankfully, not an insurmountable one. It just requires a bit of patience, a dash of elbow grease, and maybe a good podcast to keep you sane.
The Great Tint Debate: To Tint or Not To Tint?
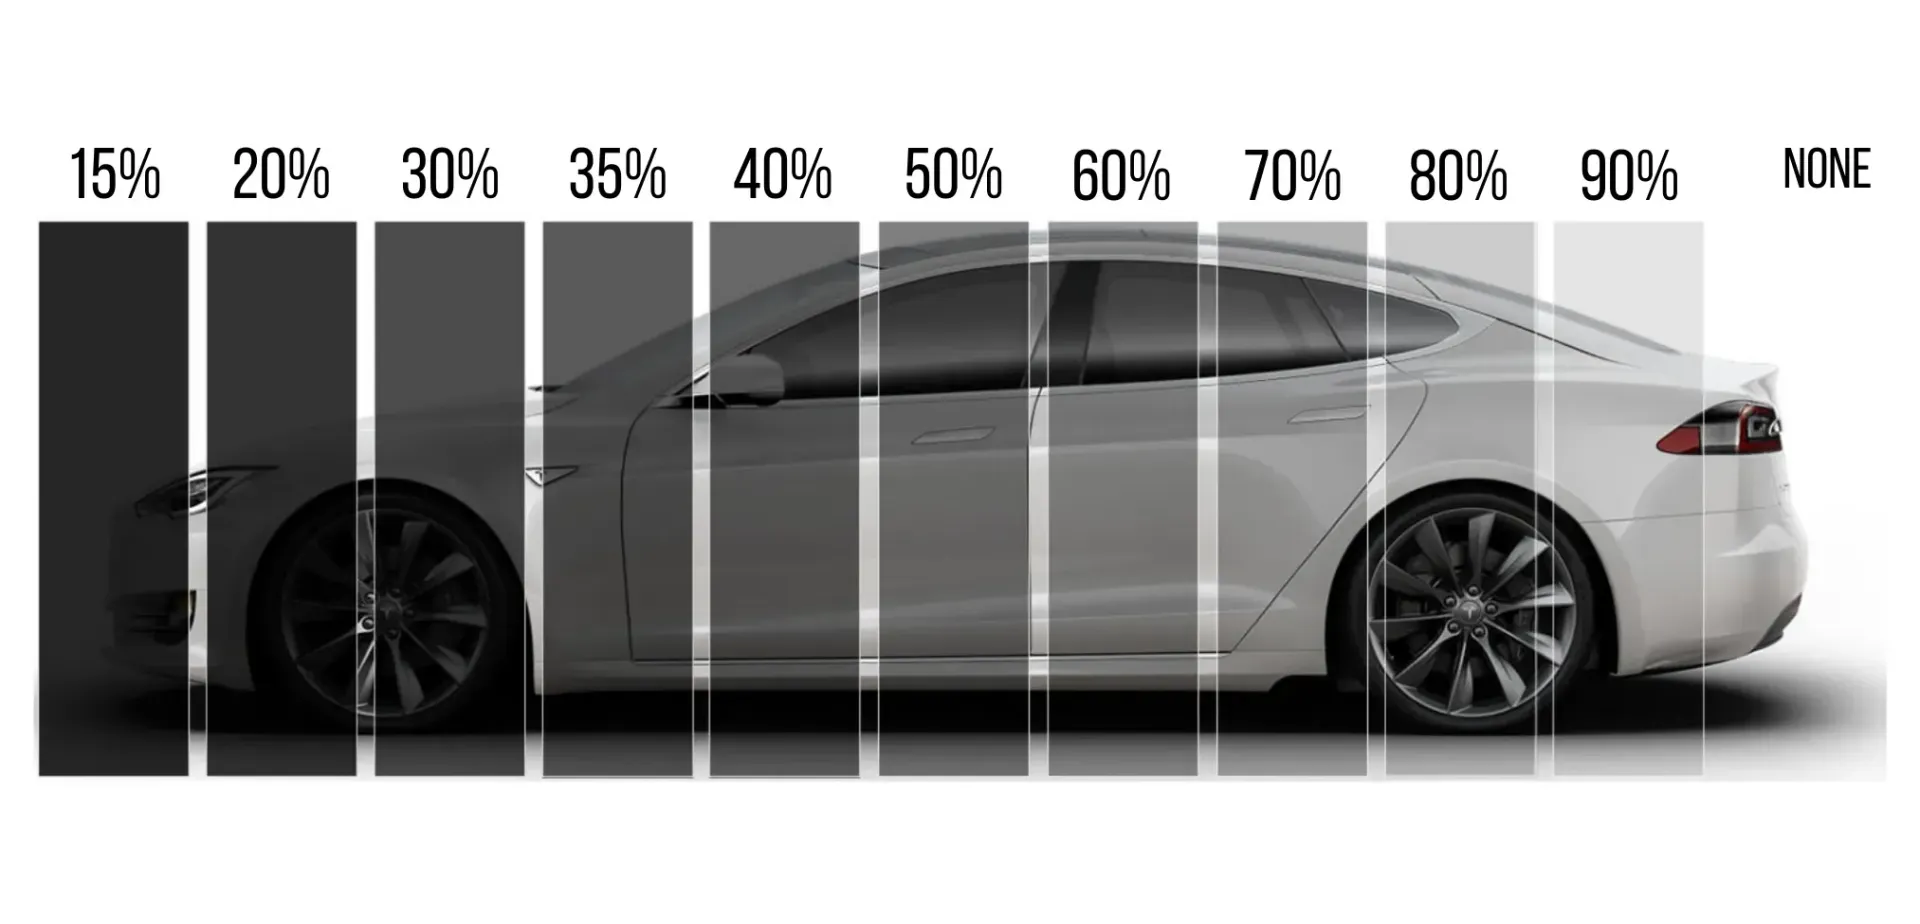
Before we dive headfirst into the removal process, let’s have a quick chinwag about tint itself. Why do people put it on in the first place? Well, there are a few compelling reasons. For starters, it’s a UV shield. That means it protects your car’s interior from fading and cracking under the relentless sun. Think of it as sunscreen for your dashboard. It also adds a layer of privacy. Who doesn't love a bit of mystery? Plus, it can keep your car cooler in the summer, making those hot commutes a little more bearable. Some folks even say it can help hold shattered glass together in the event of an accident, offering a little extra safety. Pretty neat, right?
Must Read
But, as with all good things, there’s a flip side. Over time, tint can degrade. It bubbles, it peels, it fades, and it can end up looking downright shoddy. And, in some places, there are laws about how dark tint can be. So, if yours is borderline illegal or just aesthetically displeasing, removal becomes the only sensible option. And that, my friend, is why you’re here.
Let’s Get Our Hands Dirty: The Removal Process
Alright, enough preamble. It’s time to get down to business. Removing window tint isn't rocket science, but it's definitely not a 5-minute job either. Think of it as a mini-marathon for your fingers. There are a few popular methods, and the best one for you will depend on the type of tint, how old it is, and how stubborn it’s decided to be. But the core principle is usually the same: heat and patience.
The most common and generally effective method involves a combination of heat and a sharp tool. You're basically trying to soften the adhesive that's holding the tint to the glass, and then carefully peel it away. Easy peasy, right? (Spoiler alert: not always).
Gathering Your Arsenal: What You'll Need
Before you start, do yourself a favor and gather your supplies. This isn't the time to be running back and forth to the store. You want to be in the zone, focused, and ready to conquer that tint. So, what do you need?

- A good heat source: This is usually a hair dryer or a heat gun. A hair dryer is safer and less likely to damage your car’s paint or interior if you’re a bit heavy-handed. A heat gun is more powerful but requires a bit more caution. Always start on a lower setting and test it out.
- A sharp tool: This is your primary weapon. A razor blade scraper (the kind with a long handle is best) or a single-edge razor blade is ideal. Just make sure it’s sharp. A dull blade will just make a mess and frustrate you to no end. You can also find specialized tint removal tools that are designed for this purpose.
- A spray bottle: For applying a soapy water solution.
- Mild dish soap: Just a few drops in the spray bottle is enough.
- Plenty of paper towels or microfiber cloths: You’ll be doing a lot of wiping.
- Gloves: To protect your hands.
- A bucket of clean water: For rinsing your scraper and cloths.
- Optional but recommended: Ammonia-based glass cleaner: For a final, sparkling finish.
- And most importantly: Patience! I cannot stress this enough.
The Heat is On: Step-by-Step Removal
Okay, supplies in hand? Ready to channel your inner DIY guru? Let’s do this. We'll start with the back window, as it's usually the trickiest.
Step 1: The Warm-Up
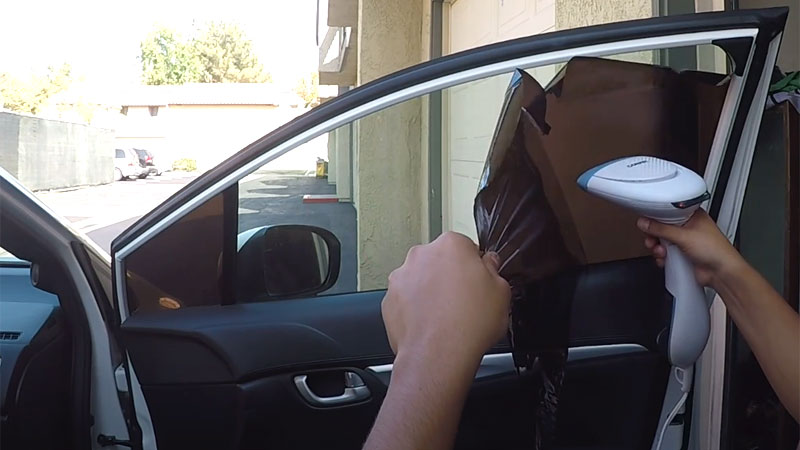
Start by spraying the window with your soapy water solution. This helps to lubricate the surface and makes it easier to start peeling. Now, grab your hair dryer or heat gun. Begin heating a small section of the tint, moving the heat source constantly in a circular motion. You don’t want to overheat any one spot, as you could damage the glass. The goal is to make the tint warm and pliable, not molten. You'll feel it start to soften under your fingers. Think of it like warming up old Play-Doh.
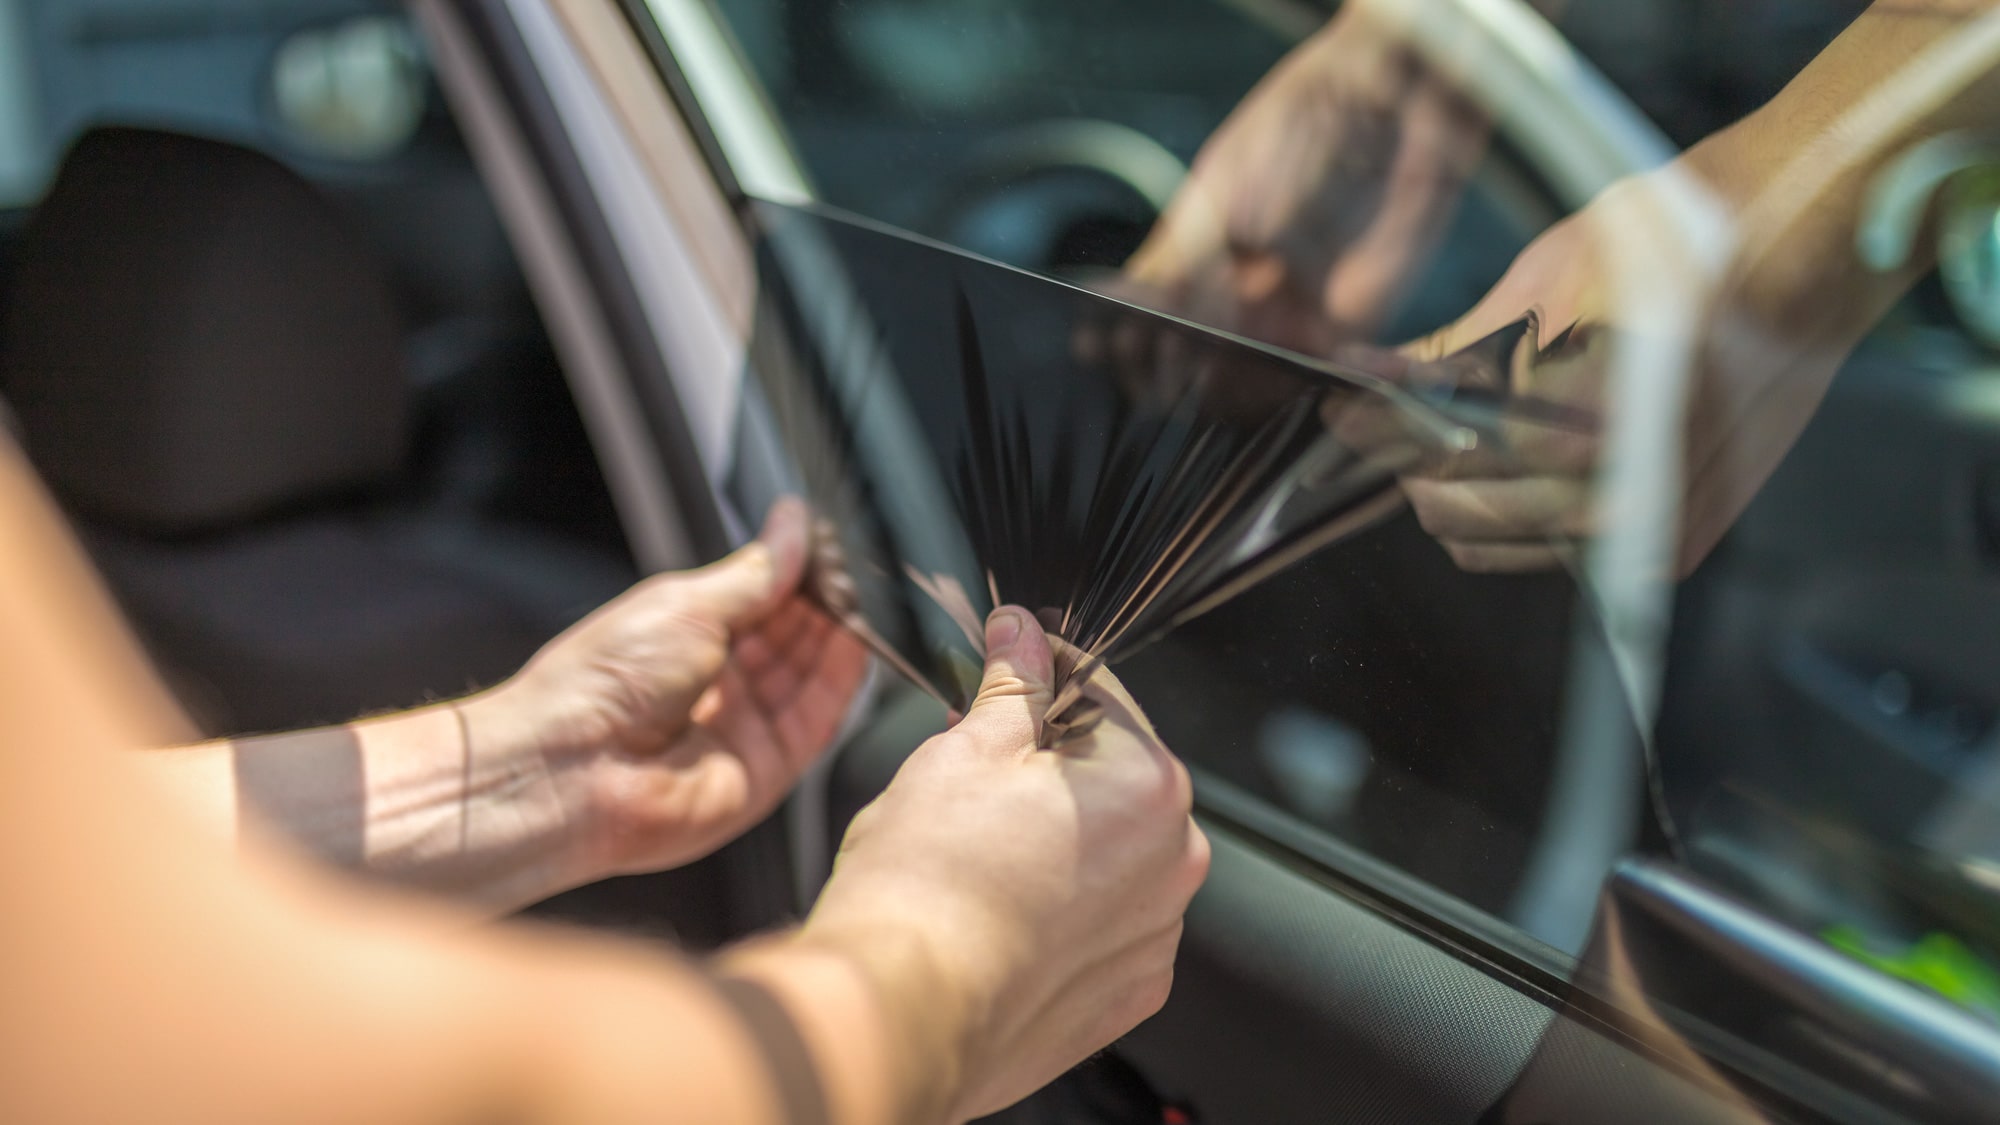
Step 2: The Peel Begins

Once a section feels warm enough, try to lift a corner of the tint with your fingernail or the edge of your scraper. If it starts to peel, great! Keep applying heat to the area you’re working on, and gently pull the tint away at an angle. If it’s not budging, apply more heat. If it’s coming off in tiny, annoying pieces, don’t panic. We’ll deal with that later. The key here is to pull slowly and steadily. Yanking will just cause it to tear and leave more adhesive behind. It’s a delicate dance between heat and pull. You might find yourself doing a little jig of heating and peeling. I know I do.
Step 3: Scraping for Glory
This is where your scraper comes in. If the tint is coming off in one piece, fantastic! If, however, it’s breaking into a million little shards (and trust me, this happens more often than you’d think), you’ll need to use your scraper. Hold the scraper at a low angle to the glass, almost flat. Keep applying heat to the area you're scraping. The heat will soften the adhesive, and the scraper will help lift it. Work in small, overlapping strokes. Be careful not to scratch the glass. This is where a sharp blade is crucial; a dull one will dig into the tint and make it harder to remove.
Step 4: Dealing with Stubborn Adhesive Residue
Ah, the dreaded adhesive. It’s the bane of every tint remover’s existence. Even if you get most of the tint off, there’s usually a sticky, gummy residue left behind. This is where your patience will be tested. You can try a few things:
- More Heat and Scraping: Sometimes, a little more heat and gentle scraping will do the trick.
- Soapy Water and Scrubbing: Spray the residue with soapy water and scrub with a microfiber cloth or a non-scratch scouring pad.
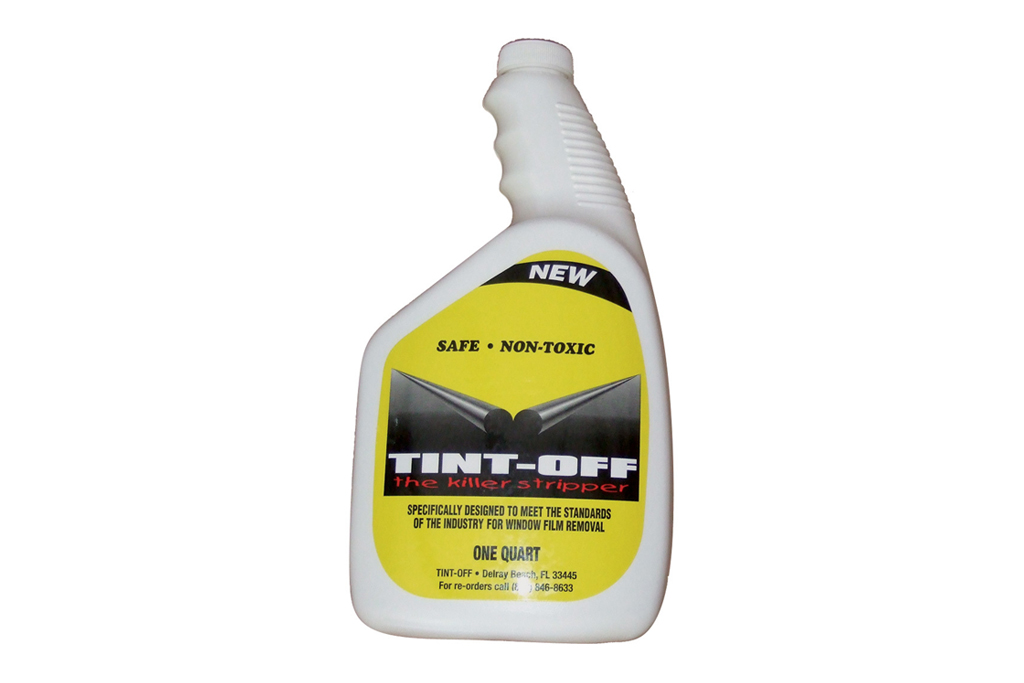
- Ammonia-Based Cleaner: This is often the secret weapon. Spray a liberal amount of ammonia-based glass cleaner onto the residue. Let it sit for a few minutes to break down the adhesive. Then, try to wipe it away with a cloth or paper towel. You might need to repeat this a few times.
- Specialized Adhesive Removers: If all else fails, you can find commercial adhesive removers at auto parts stores. Just be sure to follow the product instructions carefully.
Step 5: The Final Cleanse
Once you’ve removed all the tint and the adhesive residue, it’s time for the final clean. Spray the window generously with your ammonia-based glass cleaner and wipe it down thoroughly with a clean microfiber cloth. You want to ensure there are no streaks or leftover residue. Give it a good inspection. Does it look like new? Hopefully! If you see any tiny flecks you missed, go back to step 3. Nobody likes a streaky window.
The Front Windshield: A Different Ballgame
Now, let’s talk about the front windshield. Most places have laws against tinting the front windshield, so if yours is tinted, it’s probably just a very light strip at the top, often called a "visor strip." Removing this is generally easier than the side or rear windows because it's usually a single layer and not as deeply adhered.
The process is essentially the same: heat and scrape. However, be extra careful with the front windshield. It’s a larger, more exposed piece of glass. You’ll want to work methodically, ensuring you don’t miss any spots. The adhesive might be a bit more stubborn here because it’s been exposed to more elements. Take your time, and be patient. You’ve got this!
A Word to the Wise: What to Avoid
As tempting as it might be to speed things up, there are a few things you should definitely avoid doing:
- Using abrasive cleaners or scouring pads: Unless they are specifically labeled as safe for glass, these can scratch your windows.
- Using a metal brush: This will definitely scratch your glass.
- Using excessive heat: A heat gun on a high setting can crack or shatter the glass, especially if there are any existing chips or cracks.
- Rushing the process: This is the quickest way to get frustrated and make mistakes.
- Using overly aggressive scraping techniques: Again, this can lead to scratches.
It’s all about being gentle yet firm. Think of it as coaxing the tint off, not wrestling it.
The Aftermath: A Clearer View of Life
Once you’ve successfully removed the tint from all your windows, step back and admire your work. You’ve conquered the beast! You can now enjoy the unobstructed view and the knowledge that you tackled a task that many people shy away from. Your car will look cleaner, sleeker, and perhaps even a bit more refined.
And hey, if you made a bit of a mess, or if the residue was particularly persistent, don’t beat yourself up. It happens to the best of us. The important thing is that you’ve got a clear view again. Sometimes, it’s the little victories, like perfectly removed window tint, that make driving a joy again. Now go enjoy that fresh, clear perspective!