How Do I Dry Out Orange Slices
Have you ever admired those beautiful, rustic decorations featuring fragrant, sun-kissed orange slices? These aren't just pretty; they're a testament to a simple, yet profoundly satisfying DIY project that's capturing hearts and imaginations. Drying orange slices is more than just a craft; it's a way to preserve a bit of sunshine and bring a warm, natural element into your home. It’s surprisingly accessible, too, making it a perfect weekend activity for almost anyone!
The allure of dried orange slices extends far beyond mere aesthetics. For artists and crafters, they offer a unique medium. Imagine incorporating them into stunning wreaths, whimsical garlands, or even as natural embellishments for handmade cards. They add an organic, earthy texture and a touch of vibrant color that manufactured materials simply can't replicate. For hobbyists looking for a new creative outlet, it’s a wonderfully low-stakes way to experiment. You don't need fancy tools or extensive training to achieve beautiful results. And for casual learners, it’s a chance to connect with nature, learn a useful skill, and create something truly personal for your home or as thoughtful gifts.
The possibilities for styling dried orange slices are as diverse as your imagination! You can go for a classic, uniform look with perfectly round slices, ideal for a modern, minimalist aesthetic. Or, embrace the natural imperfections and create a more rustic, bohemian vibe with slices of varying thickness and shape. They're fantastic for seasonal decor – think of a fragrant Christmas garland or a cheerful summer centerpiece. Beyond simple decoration, they can be infused with spices like cinnamon and cloves for a delightful potpourri, or even used in natural dyeing projects. Some adventurous individuals have even experimented with incorporating them into edible creations, though this requires specific care and attention to food safety.
Must Read
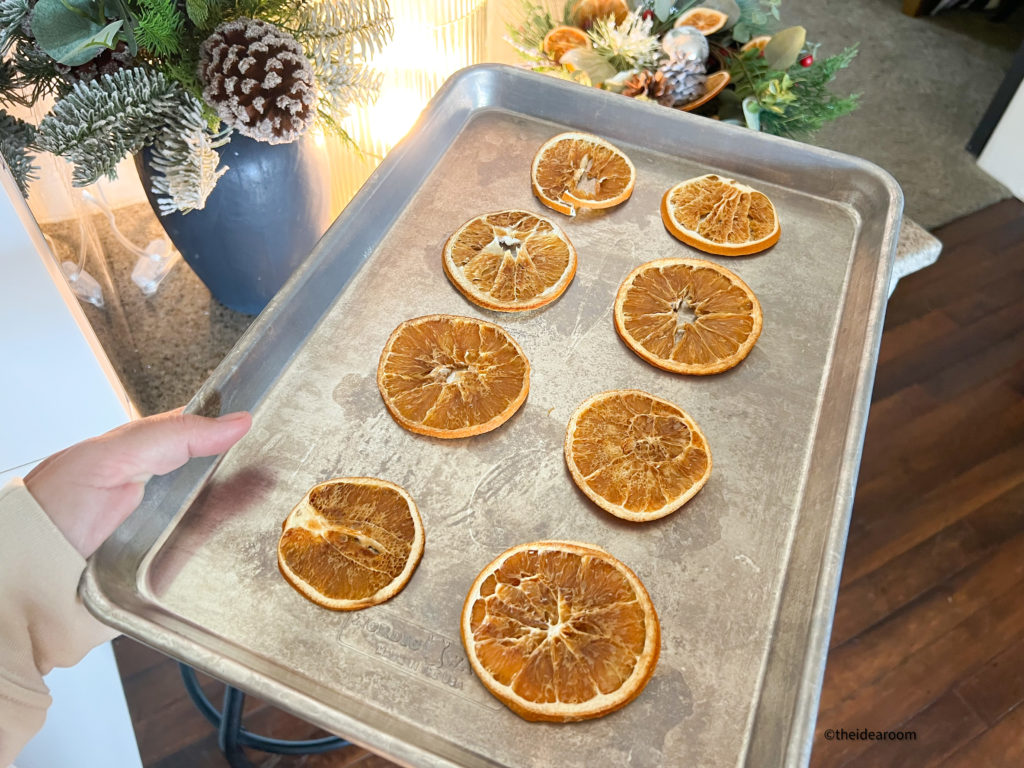
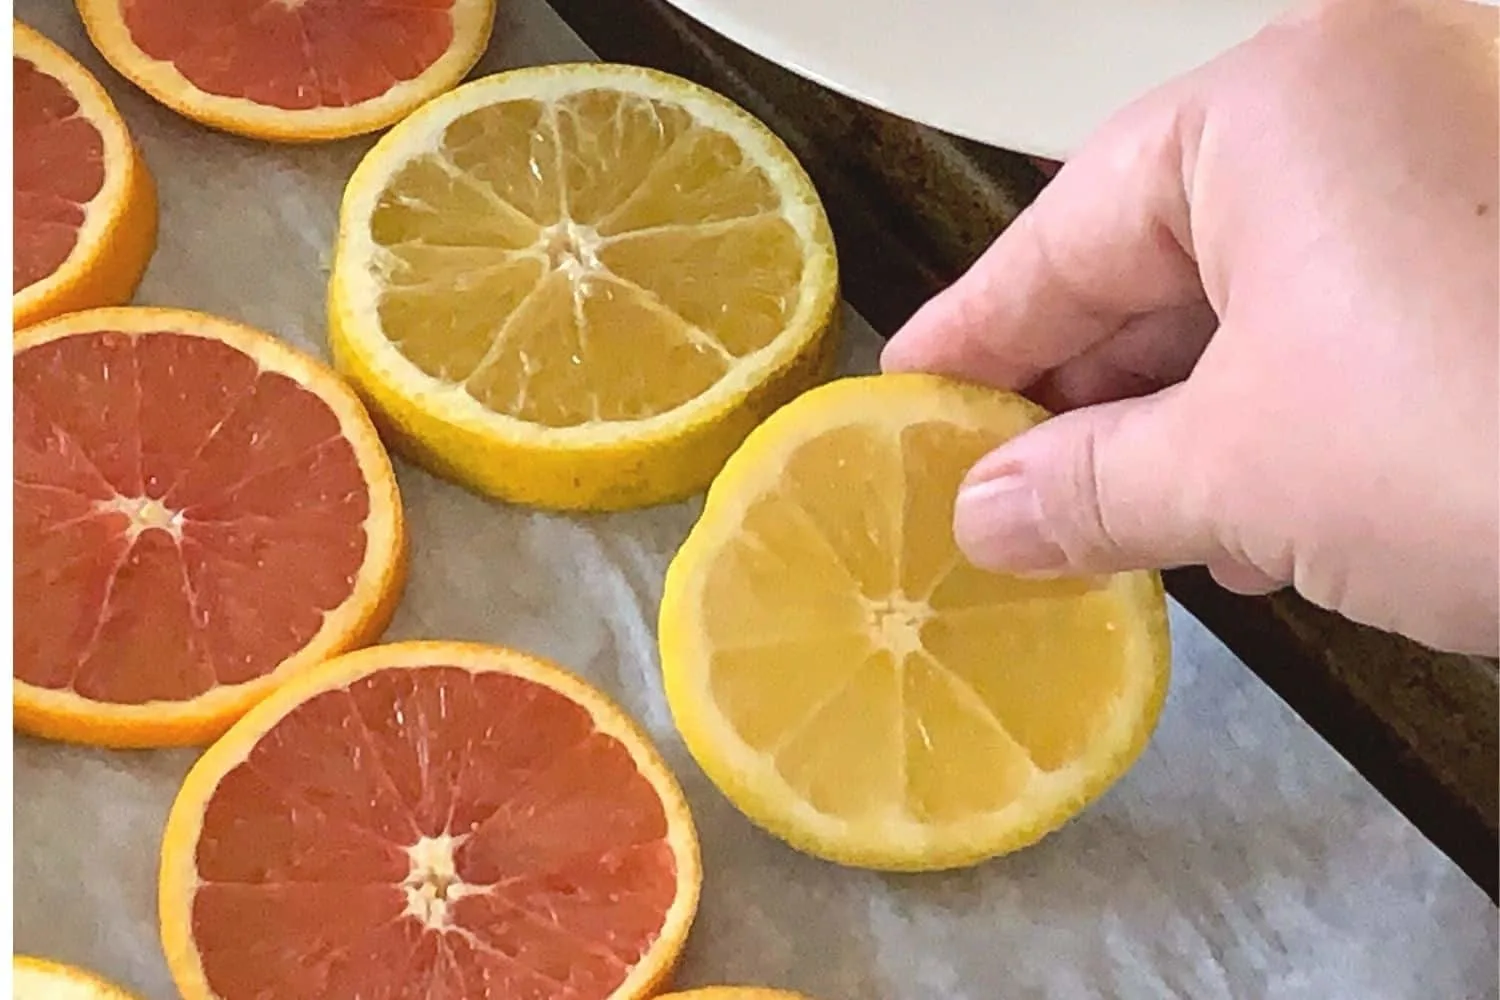
Ready to try it yourself? It’s remarkably simple! The key is selecting the right oranges – firm, ripe, and with a good amount of zest. Wash them thoroughly, and then slice them as thinly and evenly as possible. A sharp knife or a mandoline slicer will be your best friends here. For drying, you have a few options. The most popular and accessible is the oven method. Preheat your oven to a very low temperature, around 200°F (95°C), and arrange the slices on a baking sheet lined with parchment paper. Flip them every hour or so, and allow them to dry until they are leathery and completely dehydrated, usually taking several hours. Another method, perfect for sunny climates, is air drying. Simply lay them on a rack in a warm, dry, and well-ventilated area, turning them periodically. Patience is key with air drying!
What makes drying orange slices so enjoyable? It’s the sensory experience. The sweet citrus aroma that fills your home as they dry is incredibly uplifting. It’s the satisfaction of transforming something simple and perishable into something beautiful and lasting. It’s the quiet focus that a hands-on craft provides, a welcome respite from the hustle and bustle of daily life. And ultimately, it’s the joy of creating something that brings a little bit of natural warmth and cheer into your world. So, go ahead, grab an orange, and let the sunshine in!