How Do I Build A Shed Base
So, there I was, staring at this pile of lumber that was supposed to magically transform into a brand-spanking-new garden shed. You know the feeling, right? That giddy excitement of envisioning your perfectly organized sanctuary, free from the chaos of gardening tools, forgotten bikes, and that mystery box that’s been living in the garage for three years. I’d spent weeks agonizing over shed sizes, colours, and whether I really needed that fancy window. But then, reality hit. The instruction manual, which I’d optimistically ignored until this very moment, had a whole section dedicated to something called a “shed base.”
My immediate thought? “A base? For a shed? Isn’t the ground… the base?” Oh, how naive I was. Turns out, just plonking a shed directly onto the earth is a recipe for disaster, or at the very least, a very wonky, damp, and unhappy shed. Think of it like building a house without foundations. Not ideal, is it?
And that’s where we are today, my friends. We’re diving headfirst into the glorious, sometimes muddy, world of shed bases. Because, let’s be honest, no one wants a shed that looks like it’s had one too many strong drinks and is leaning precariously towards the neighbour’s prize-winning petunias. We want stability, longevity, and a structure that stands proud, come rain or shine. So, grab your cuppa, settle in, and let’s get this base-y business sorted!
Must Read
Why Bother With A Shed Base? It’s Not Just For Show!
Okay, okay, I get it. When you’re itching to get your shed up, the idea of spending more time and money on something that’s literally going to be hidden is… well, it’s not the most thrilling part. But trust me, this is where the real magic happens. A good shed base is the unsung hero of shed ownership.
First off, drainage. This is a biggie. If your shed is sitting directly on the soil, water will inevitably pool around it. This leads to dampness, rot, and a general sense of gloom for your precious belongings. A base provides a barrier, allowing water to run away and keeping your shed nice and dry. Nobody wants a soggy lawnmower, do they?
Then there’s stability. Ground can shift, especially after heavy rain or frost. If your shed isn’t on a solid, level base, it will start to wobble. This can put stress on the shed’s structure, making doors difficult to open and close, and generally making it feel… unsafe. We’re building a shed, not a Jenga tower!
And let’s not forget preventing pests. A well-constructed base can deter creepy crawlies from making your shed their new five-star hotel. No one wants mice or insects having free reign, right? So, a bit of effort now saves a lot of potential headaches later.
Finally, it’s about longevity. A shed built on a proper base will simply last longer. The wood will be protected from constant contact with damp soil, and the structure will remain sound. It’s an investment in keeping your shed looking good and functioning well for years to come. Think of it as the foundation of your shed’s future happiness.
Common Shed Base Options: What’s Your Poison?
Right, now that we’ve established why we need a base, let’s talk about how we’re going to build one. There are a few popular routes you can go down, each with its own pros and cons. It’s all about finding what works best for your budget, your DIY skills, and your specific garden situation. Don’t feel pressured into the most expensive option; sometimes, simpler is better!
1. The Good Ol’ Concrete Slab: The King of Durability
Ah, the concrete slab. This is often considered the gold standard for shed bases. And for good reason! It’s incredibly durable, level, and provides a rock-solid foundation. If you’re planning on storing heavy items, or want a base that will last for an eternity (or at least until you decide to move house), concrete is a fantastic choice.

The process: You’ll need to excavate the area, create a wooden formwork (like a giant picture frame), lay down a layer of hardcore (crushed stone and rubble), compact it thoroughly, and then pour in the concrete. You can even reinforce it with wire mesh for extra strength. Sounds like a bit of a workout, doesn’t it?
Pros:
- Extremely strong and stable.
- Excellent drainage if done correctly.
- Will last for decades.
- Great for uneven ground.
Cons:
- It’s a significant amount of work. Digging, mixing concrete, levelling… it’s not for the faint of heart.
- Can be expensive, especially if you’re hiring help.
- Not very flexible if you decide to move your shed later.
- Can crack over time in extreme weather if not properly prepared.
My two cents: If you’re feeling ambitious, have a decent budget, and want something truly bomb-proof, go for it! Just make sure you have plenty of strong mates available for the concrete pouring. And maybe some pain relievers for the day after.
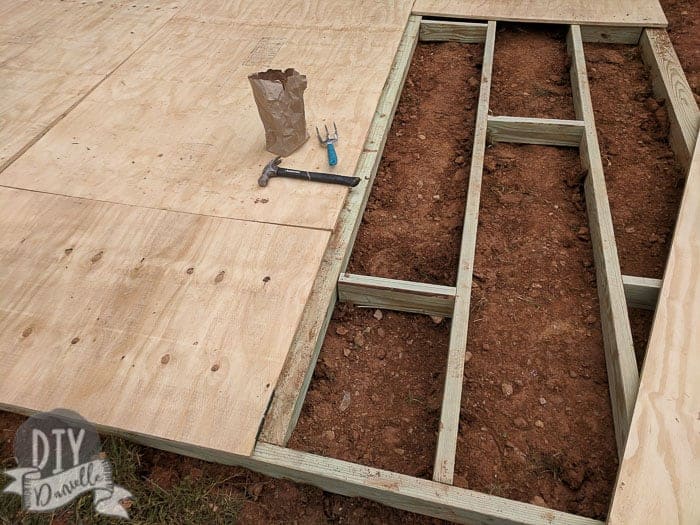
2. The Wooden Deck Base: Cosy and Customisable
This is a popular option for many DIYers, and I can see why! A wooden deck base is essentially a sturdy frame made from treated timber, often filled with gravel or laid directly onto concrete piers. It’s a bit more forgiving than a concrete slab and can look quite smart.
The process: You’ll build a rectangular frame using sturdy timber (like 4x4s or 6x6s, depending on the size of your shed). This frame sits on either treated timber joists or concrete blocks (piers) that are levelled. You can then infill the frame with gravel for drainage, or simply have the joists run the length of your shed’s footprint.
Pros:
- More DIY-friendly than concrete.
- Can be built to specific dimensions.
- Looks neat and tidy.
- Good drainage if gravel is used.
- Easier to level than a full concrete pour.
Cons:
- Requires treated timber to prevent rot.
- Can be susceptible to ground movement over time if not adequately supported.
- May not be as robust as a concrete slab for very heavy sheds or ground.
- Can be more expensive than simpler options.
My two cents: This is a great middle-ground option. If you’re comfortable with basic carpentry and want a solid, attractive base that’s more manageable than concrete, this is a strong contender. Just make sure to use good quality, pressure-treated wood – you don’t want your base rotting away faster than you can use the shed!
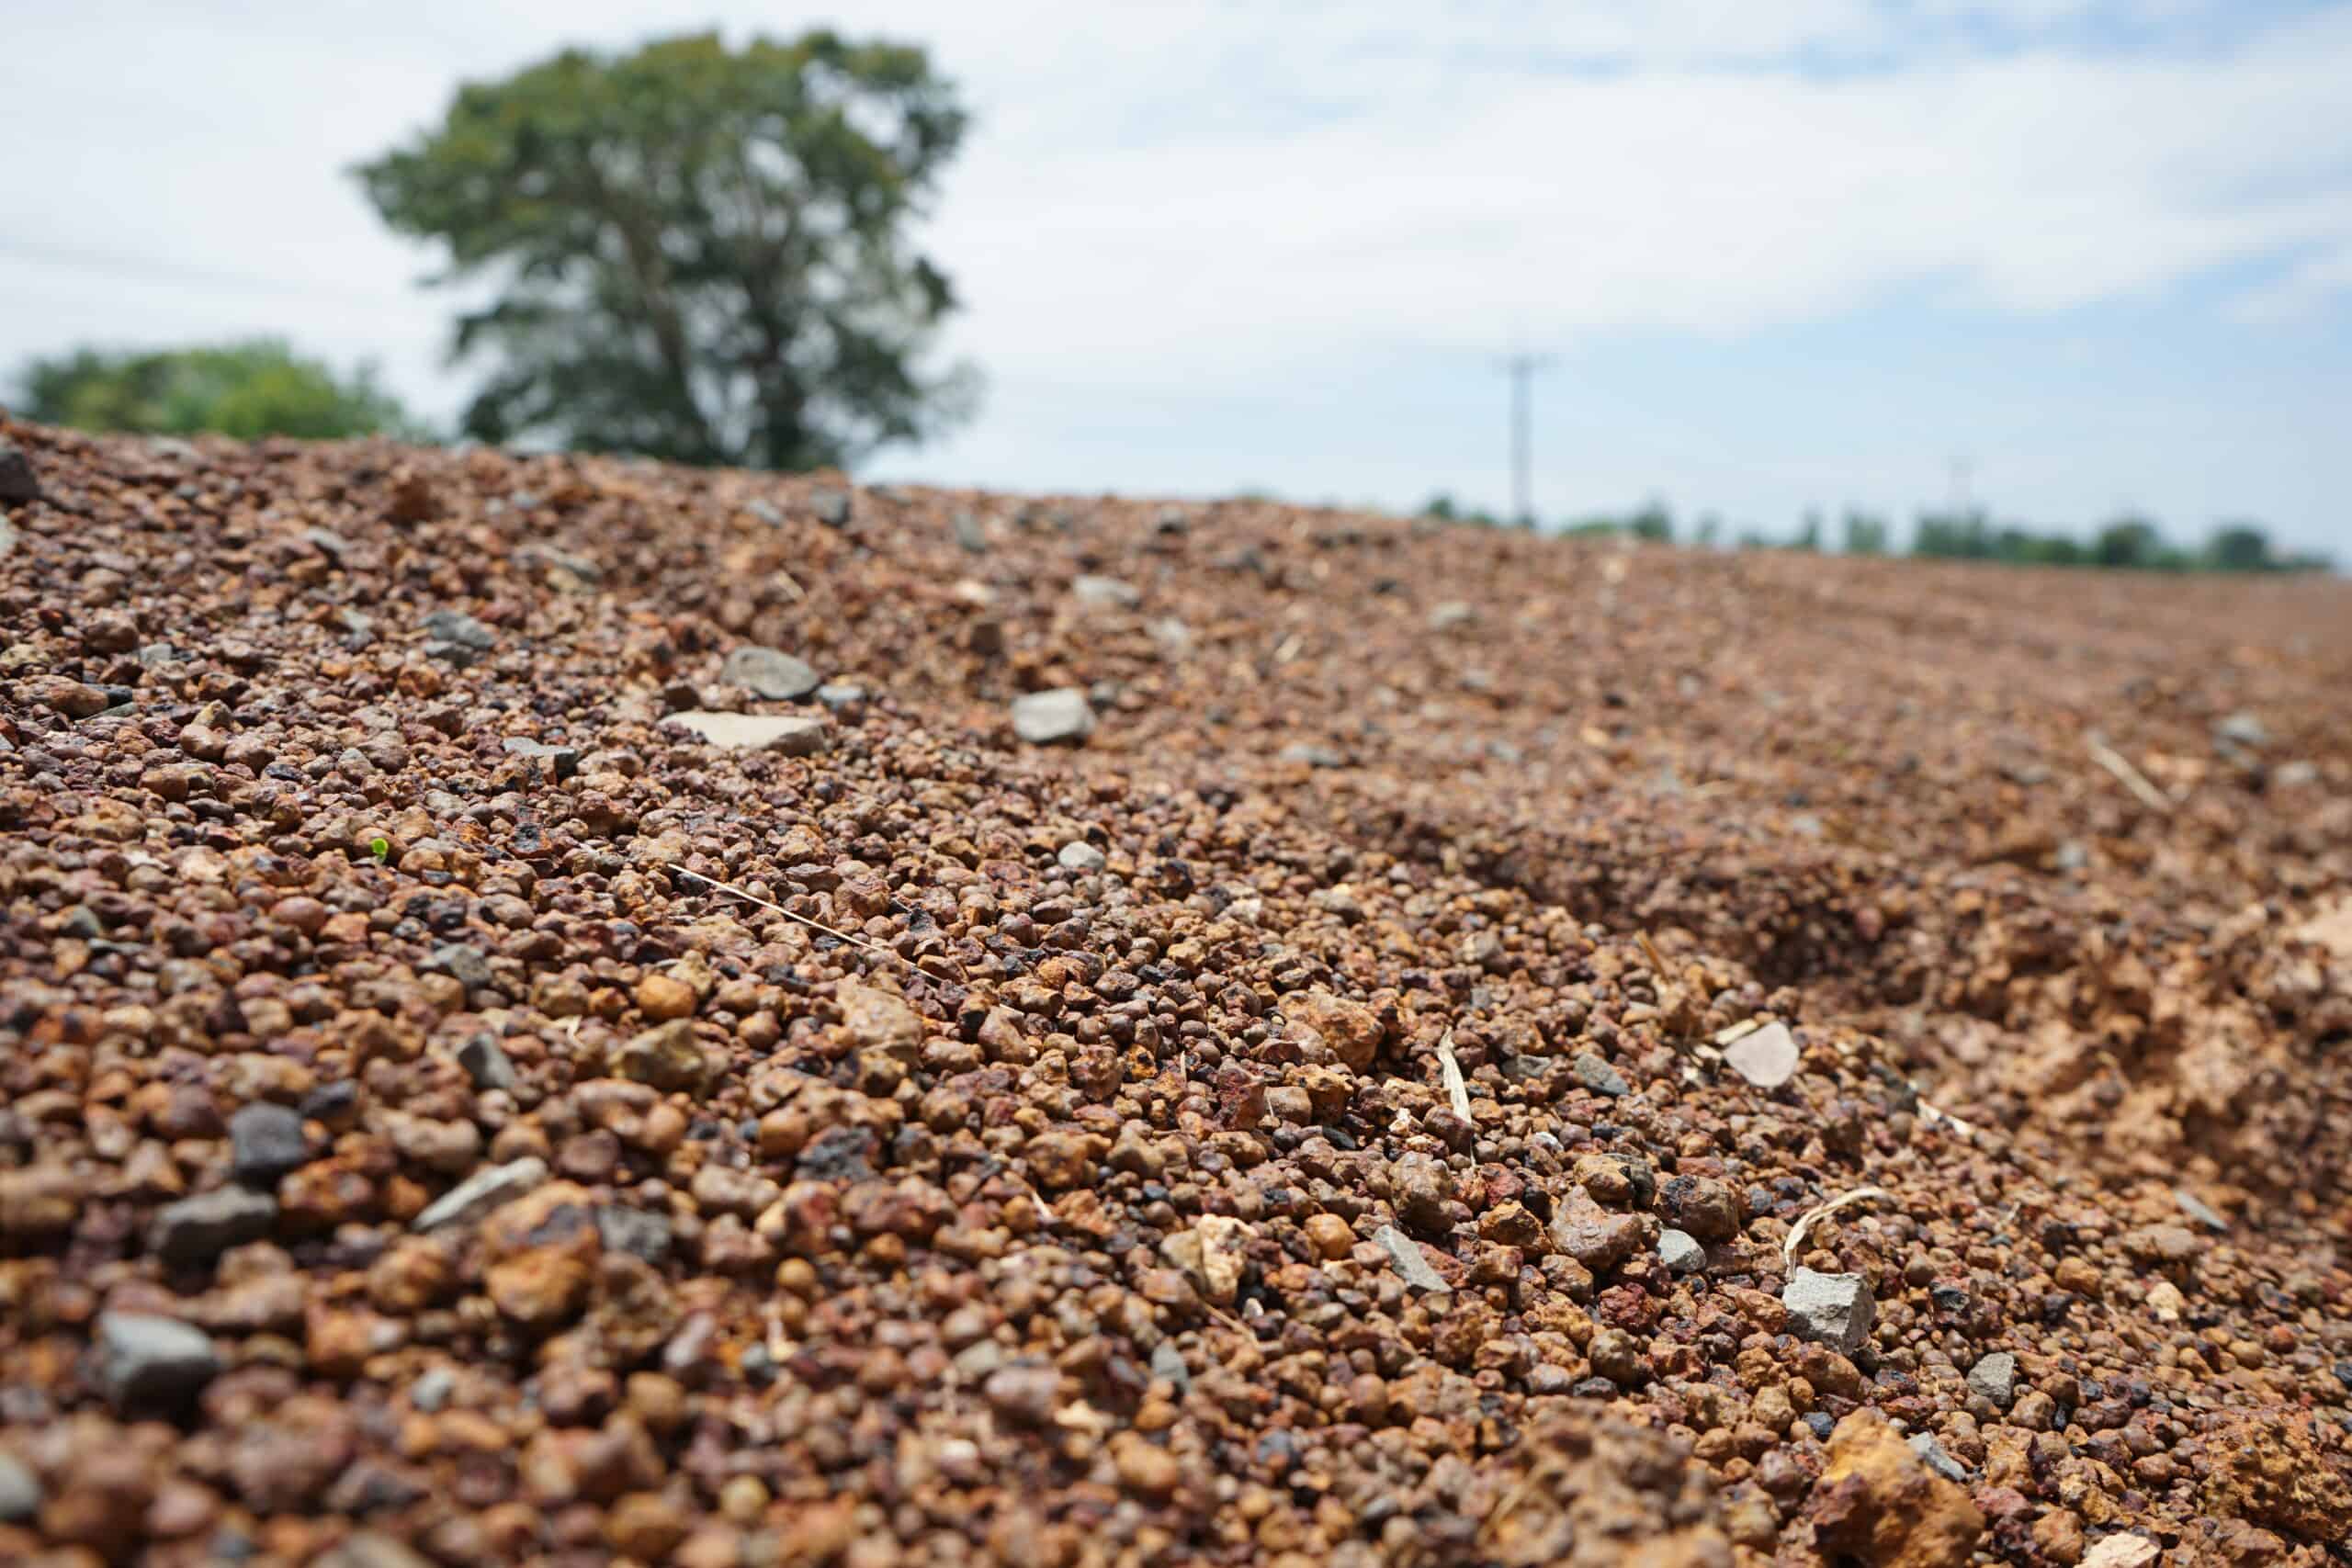
3. The Gravel & Timber Sleepers: The Budget-Friendly Warrior
If you’re on a tight budget or just want something straightforward and effective, the gravel and timber sleeper method is a real winner. It’s surprisingly simple to construct and offers excellent drainage.
The process: This involves excavating the area to a reasonable depth, laying a weed-suppressing membrane, then filling the excavated space with a layer of compacted gravel. You then place treated timber sleepers on top of the gravel, ensuring they are level and form a sturdy perimeter. Your shed then sits directly on these sleepers.
Pros:
- Very cost-effective.
- Excellent drainage due to the gravel layer.
- Relatively easy to build.
- Good for preventing damp.
Cons:
- May not be as stable as concrete or a full timber frame for very large or heavy sheds.
- Requires regular compaction of the gravel.
- The sleepers will eventually degrade over many years, though treated ones last a good while.
My two cents: This is the unsung hero of shed bases for many people. It’s practical, affordable, and surprisingly effective. Just be sure to use good quality, chunky treated sleepers and compact that gravel really well. You’ll be amazed at how solid it feels!

4. The Concrete Paving Slabs: The Quick Fix (with Caveats)
This is a popular choice for smaller sheds, or for those who want a relatively quick and easy solution. You lay paving slabs directly onto a prepared base of hardcore and sand.
The process: Excavate the area, lay a layer of hardcore, compact it, then add a thin layer of sharp sand. You then carefully lay your paving slabs, ensuring they are level and tightly butted up against each other. Some people even use a cement mortar to bed the slabs in.
Pros:
- Can be relatively quick to install.
- Looks neat and tidy.
- Good for smaller, lighter sheds.
Cons:
- Can be prone to cracking and movement over time, especially if not laid on a very solid and level foundation.
- May not be suitable for larger or heavier sheds.
- If the ground underneath shifts, the slabs will too.
- Drainage can be an issue if not properly managed.
My two cents: For a small potting shed or a lightweight storage unit, this can work. But for anything substantial, I’d be a little wary. The key is an absolutely impeccable foundation underneath. If you’re going down this route, spend a lot of time getting the hardcore and sand base perfectly level and compacted. Otherwise, you might end up with a jigsaw puzzle of broken slabs in a few years.
Let’s Get Down and Dirty: The Step-by-Step (ish) Guide
Alright, no matter which base you choose, there are some fundamental steps that apply to most of them. Think of these as the building blocks of your shed base building adventure!
Step 1: Planning and Preparation – The Foundation of Your Planning!
Before you even pick up a shovel, plan, plan, plan.
- Location, location, location: Where do you want your shed to go? Consider access, sunlight, and any potential drainage issues in that area. You don’t want it in the lowest, boggiest part of your garden!
- Size matters: Measure your shed’s footprint precisely. You want the base to be slightly larger than the shed itself, giving you a little bit of wiggle room.
- Check for utilities: Are there any underground pipes or cables? It’s a nightmare to hit one of those, so do your homework and contact your local utility companies if you’re unsure.
- Gather your tools: Shovels, spades, spirit level (your new best friend!), tape measure, wheelbarrow, rake, tamper (or a heavy piece of wood), saw (if using timber), screws, and of course, the materials for your chosen base.
Step 2: Marking Out and Excavating – The Big Dig!
Once you’ve got your plan, it’s time to get to work.
- Mark it out: Use pegs and string or spray paint to clearly mark the perimeter of your shed base. Double-check your measurements!
- Dig it out: This is where the muscle comes in. You’ll need to excavate the area to the required depth. The depth will depend on your chosen base type – generally, for gravel bases, you’ll need about 150-200mm (6-8 inches) of depth to accommodate the hardcore. For concrete, you might need more.
- Keep it level-ish: As you dig, try to keep the bottom of the excavation as level as possible. It doesn’t have to be perfect yet, but it will make your life easier later.
Step 3: Laying the Foundation – The Base Layer!
This is where your chosen base starts to take shape.
- For gravel bases: Lay down a layer of weed-suppressing membrane first. This stops those pesky weeds from growing up through your base. Then, fill the excavated area with your hardcore (crushed stone, rubble, etc.). Spread it out evenly and then compact it really well. A tamper is ideal, but a heavy piece of wood and some good stomping will do in a pinch! Repeat with more gravel and compaction until you reach your desired depth. Then, add your top layer of gravel (often smaller aggregate for a smoother finish) and level it off.
- For concrete bases: After excavating, you’ll build your wooden formwork around the perimeter. Then, lay your hardcore, compact it, and then pour in your concrete. This is where having help is essential. You’ll need to level and smooth the concrete as you go.
- For timber bases: You’ll be laying down your supporting piers (concrete blocks or joists) and ensuring they are perfectly level before building your frame on top.
Step 4: The Critical Leveling – The Moment of Truth!
This is arguably the most important part. A level base means a level shed, which means a happy shed.
- Use your spirit level constantly: Seriously, use it every few minutes. Check for levelness in all directions.
- Adjust as needed: If you’re using gravel, you can add or remove small amounts to achieve levelness. For concrete, you’ll be smoothing and levelling as you pour. For timber bases, you’ll be adjusting your piers.
- Take your time: This is not a step to rush. A slightly wonky base will cause problems down the line.
Step 5: Building Your Base Structure – The Home Stretch!
This is where the specifics of your chosen base come into play.
- Concrete: Once poured and levelled, let the concrete cure for the recommended time (usually several days).
- Timber Frame: Assemble your frame, ensuring it’s square and level. Secure it well with screws and consider adding joists for extra support depending on your shed's size.
- Gravel and Sleepers: Lay your treated timber sleepers on the compacted gravel, ensuring they are level and form a solid platform.
- Paving Slabs: Bed your slabs into the sand or mortar, checking for levelness with each one.
Step 6: Final Touches and Checking – Admire Your Handiwork!
You’ve done it!
- Clear away debris: Make sure the area around your base is clean.
- Double-check everything: Give your base a final once-over with the spirit level.
- Let it settle: If you’ve used concrete, ensure it’s fully cured before placing your shed on it.
Common Pitfalls to Avoid (Learned the Hard Way!)
We’ve all been there. You’re halfway through a project, feeling like a DIY god, and then… BAM! A mistake. Here are a few common shed base blunders to steer clear of:
- Not digging deep enough: Seriously, resist the urge to just scrape off the topsoil. You need depth for your hardcore or foundation materials.
- Not compacting enough: Loose hardcore is a recipe for a wobbly shed. Get stuck in and compact it properly!
- Ignoring drainage: Remember that damp shed? It all starts with poor drainage. Ensure your base allows water to flow away.
- Using untreated wood: If you're building a timber base, use treated wood. It’s a small extra cost that will save you a lot of heartache later.
- Rushing the leveling: I’m saying it again because it’s that important. Take your time with the spirit level.
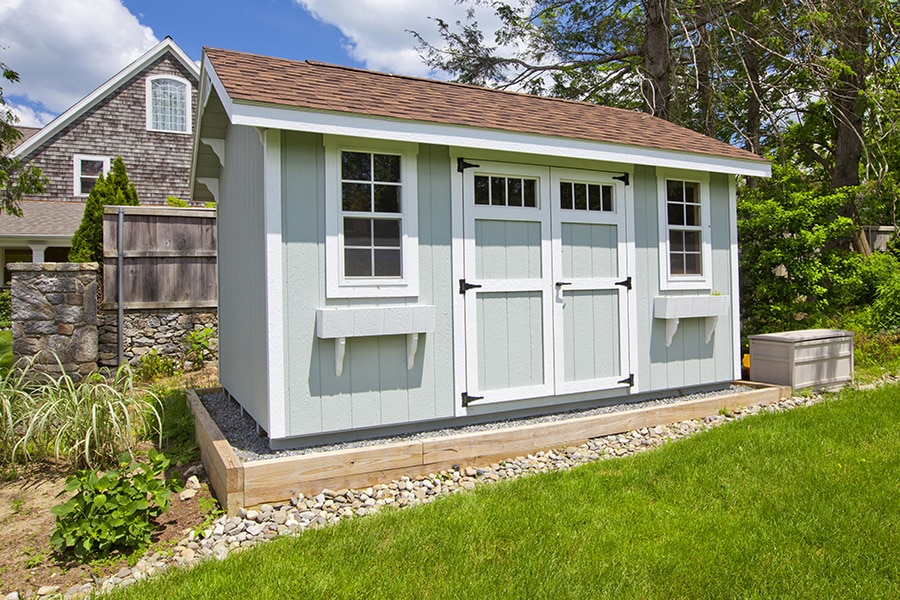
Building a shed base might not be the most glamorous part of shed ownership, but it’s absolutely essential. It’s the difference between a shed that serves you well for years and one that starts to sag and rot within a season. So, invest the time, do it right, and you’ll be rewarded with a sturdy, reliable, and perfectly level shed that you can be proud of. Now, go forth and build! And remember, if in doubt, a good YouTube tutorial is your friend!

