Can You Paint On Top Of Varnish
Ever found yourself staring at a beautifully varnished piece of furniture or art and thought, "Wouldn't it be even better with a splash of color?" Or perhaps you’ve inherited a beloved item with a protective layer of varnish, but its style just doesn't quite match your current vibe. This is where the age-old question pops up, sparking a little creative curiosity: Can you paint on top of varnish? It's a question that unlocks a world of possibilities for DIY enthusiasts, upcyclers, and anyone looking to give a second life to their cherished possessions. Forget tossing out that slightly dated, but structurally sound, table! This isn't just about slapping some paint on; it’s about understanding the 'how' and 'why' behind breathing new life into things with a bit of crafty know-how. It's like discovering a secret superpower for your home decor!
The Magic of Painting Over Varnish
So, why is this even a topic worth exploring? Well, think about it. Varnish is essentially a protective coating, a shield for your wood. It’s fantastic for preventing scratches, water damage, and general wear and tear. But sometimes, that shield can feel a bit… well, stale. Maybe the color is too dark, the finish is too glossy, or you’re simply yearning for a fresh aesthetic. The ability to paint over varnish opens up a treasure trove of opportunities. You can:
- Revamp Furniture: Give that antique dresser a modern makeover, transform a worn-out coffee table into a statement piece, or update those tired wooden chairs.
- Refresh Wooden Art: Got a varnished painting or decorative panel that feels out of place? A fresh coat of paint can instantly change its mood and integrate it seamlessly into your decor.
- Add Decorative Details: Even if you love the varnish, you can use paint to add stencils, freehand designs, or intricate patterns, creating a truly unique finish.
- Personalize Projects: Whether it's a DIY craft project or a beloved family heirloom, painting over varnish allows for deep personalization.
The beauty of this technique lies in its accessibility. You don't need to be a professional artist to achieve stunning results. With the right preparation and the right materials, you can achieve a durable, beautiful finish that looks like it was done by a pro. It’s about transforming the ordinary into the extraordinary, often with just a few key steps and a dash of enthusiasm. It’s a wonderfully satisfying way to express your style and extend the lifespan of items you love, rather than contributing to landfill waste. It’s the ultimate win-win for your wallet and the planet!
Must Read
The Crucial First Step: Preparation is Key!
Now, before you even think about dipping a brush into that vibrant new paint, we need to talk about the most important part of this whole operation: preparation. Painting directly over a smooth, sealed surface like varnish is a recipe for disappointment. The paint simply won't adhere properly, leading to chipping, peeling, and a general mess. But don't let that discourage you! This is where the magic of adhesion comes in, and it's not as complicated as it sounds.
The primary goal is to create a surface that your new paint can grip onto. Think of it like giving the varnish a little "tooth." There are two main ways to achieve this:
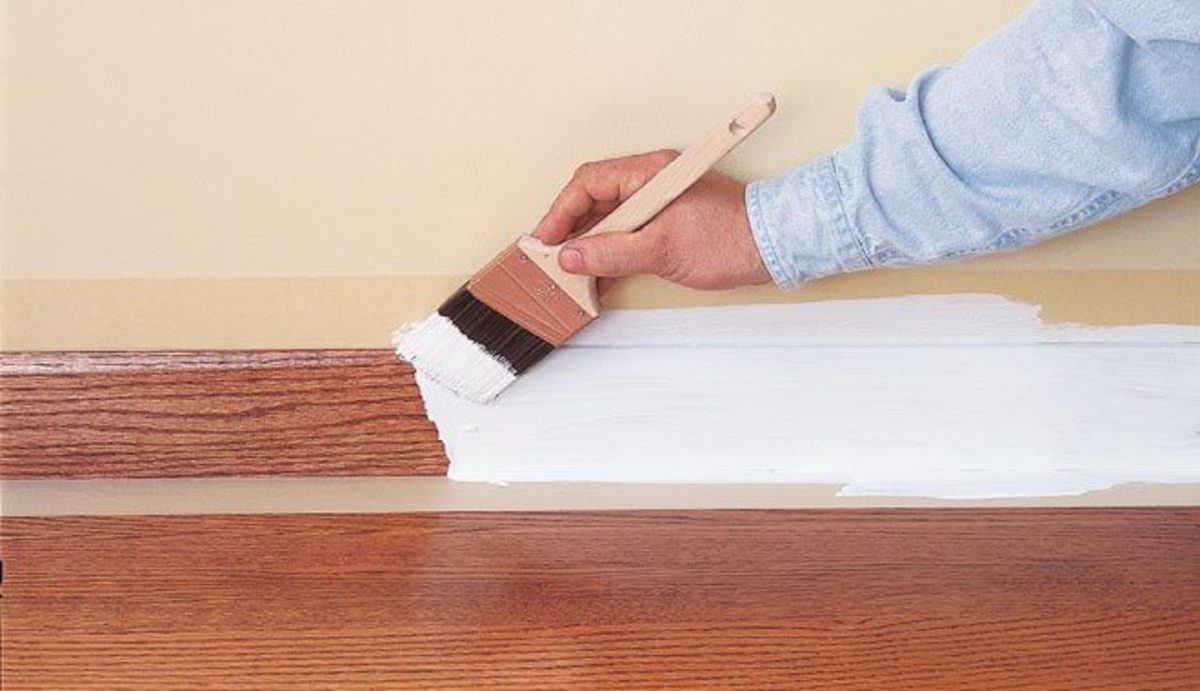
1. Light Sanding: This is your best friend. You don't need to strip away all the varnish, just scuff up the surface. Use a fine-grit sandpaper, something like 150 to 220 grit. You're looking for a dull, matte finish, not bare wood. The goal is to create microscopic grooves that the paint can nestle into. Make sure to sand in the direction of the wood grain for the best results. After sanding, it's absolutely vital to clean the surface thoroughly. Dust is the enemy of good adhesion! Use a tack cloth or a slightly damp microfiber cloth to pick up every last speck of dust. Wipe it down, and then wipe it down again!
2. Using a Bonding Primer: This is a fantastic alternative, especially if you're nervous about sanding or working with a delicate piece. A bonding primer is specifically designed to stick to slick surfaces like varnish, laminate, and even tile. Apply a thin, even coat of a good quality bonding primer. Once that primer is dry, you'll have a perfectly primed surface ready to accept almost any type of paint. This method is often considered more foolproof and provides an excellent base for a long-lasting finish. Read the primer's instructions carefully for drying times and any specific application tips.
Whichever method you choose, the key takeaway is that proper surface preparation is non-negotiable. Skipping this step is like building a house on sand – it’s destined to crumble. But by taking the time to scuff up or prime the surface, you’re setting yourself up for success, ensuring your new paint job will be beautiful and durable for years to come.
Choosing Your Paint: What Works Best?
Once your varnished surface is prepped and ready, the fun really begins: choosing your paint! The good news is that once you’ve properly prepared the surface, you have a wide range of paint options. However, some are better suited for this task than others, especially when it comes to durability and ease of use.

Here are some of the top contenders:
- Latex or Acrylic Paints: These are the go-to for most DIY projects. They are water-based, which means easy cleanup with soap and water, and they dry relatively quickly. They come in an enormous range of colors and finishes (matte, eggshell, satin, semi-gloss). For furniture or high-traffic items, opt for a higher quality, durable formula, often labeled as “cabinet paint” or “all-purpose enamel.” These have better scratch and chip resistance.
- Chalk Paint: This is a hugely popular choice for furniture transformations, and for good reason! Chalk paint is known for its matte, velvety finish and its incredible adhesion. Often, with chalk paint, you can get away with very minimal prep – sometimes just a light wipe-down is enough, though a light sanding is still recommended for the best adhesion. It dries quickly and is forgiving of brush strokes, creating a lovely, rustic or vintage look. You’ll typically need to seal chalk paint with a wax or a water-based polycrylic for protection.
- Milk Paint: Similar to chalk paint in its matte finish and adhesion, milk paint offers a slightly different aesthetic. It can sometimes have a chippy, aged look, which is desirable for certain vintage styles. Like chalk paint, it usually requires a topcoat for durability.
- Mineral Paints: These are a newer category, offering excellent durability, a smooth finish, and often a beautiful, subtle sheen. They are generally low-VOC and environmentally friendly, making them a great choice for indoor projects.
What to generally avoid (unless you're using a specific primer): Oil-based paints can be trickier to work with, requiring mineral spirits for cleanup, and their application over an existing finish might be less straightforward without proper priming. However, with the correct bonding primer, they can also be a viable option if you prefer their finish.
A Quick Note on Topcoats: Once your paint is dry, and especially if you're using chalk or milk paint, you'll likely want to apply a topcoat for protection. Options include polyurethane (water-based for less yellowing on lighter colors), polycrylic (another great water-based option), or furniture wax. The type of topcoat you choose will depend on the paint you used and the desired level of durability. Always test your topcoat on an inconspicuous area first to ensure it doesn’t alter the color of your paint.

So, whether you’re aiming for a bold, modern look or a soft, vintage charm, there’s a paint out there that’s perfect for your project. The key is to choose a paint that suits your desired finish and the intended use of the item. Happy painting!
The Finishing Touches: Sealing Your Masterpiece
You’ve done it! You’ve successfully prepped your varnished surface, chosen your perfect paint, and applied it with skill and care. The colors are vibrant, the finish is smooth (or delightfully textured, depending on your style!), and your transformed item is looking absolutely fantastic. But wait, there’s one more crucial step to ensure your hard work stands the test of time: sealing your masterpiece.
Think of this final layer as the protective shield for your new artwork. While some paints, like high-quality enamels, offer a degree of durability on their own, most painted surfaces, especially those on furniture or items that will be handled frequently, benefit immensely from a protective topcoat. This is especially true for chalk paint and milk paint, which have a naturally porous and matte finish that needs sealing to prevent stains, water damage, and general wear.

The type of sealant you choose will depend on several factors, including the type of paint you used, the desired sheen, and the intended use of the object:
- Water-Based Polycrylic: This is an excellent, versatile choice. It’s crystal clear, meaning it won't yellow over time (which is a big plus for light or white paint jobs). It’s durable, dries relatively quickly, and is available in various sheens, from matte to high gloss. It’s also easy to clean up with soap and water. This is a top recommendation for most painted furniture projects.
- Water-Based Polyurethane: Similar to polycrylic, water-based polyurethane offers excellent durability and protection. It’s a bit tougher than polycrylic and can be a great option for high-traffic surfaces. Like polycrylic, it’s available in different sheens. Be aware that some water-based polyurethanes can impart a very slight amber hue, so always test on a scrap piece first, especially if you’re working with white or very pale colors.
- Furniture Wax: This is the classic choice for sealing chalk paint and milk paint. It provides a beautiful, soft sheen and protects the paint. Furniture wax is easy to apply with a brush or a cloth and can be buffed to varying degrees of shine. It offers good protection against minor scuffs and spills. For areas that will see a lot of moisture or heavy wear, you might consider layering wax over a coat of polycrylic for added durability.
- Spray Sealants: For smaller projects or intricate details, spray sealants can be a convenient option. Look for clear acrylic spray sealants. Ensure you work in a well-ventilated area when using sprays and apply in light, even coats.
Application Tips for a Flawless Finish:
- Ensure the Paint is Completely Dry: This is crucial. Rushing this step can lead to the sealant lifting or damaging the paint. Check the paint can for recommended drying times, and err on the side of caution.
- Apply in Thin, Even Coats: Over-application can lead to drips, streaks, and an uneven finish. It’s always better to apply multiple thin coats than one thick, goopy one.
- Work in a Well-Ventilated Area: Especially important for oil-based products, but good practice for all sealants to ensure your safety and proper drying.
- Allow Adequate Drying Time Between Coats: Patience is a virtue! Each coat of sealant needs to dry thoroughly before you apply the next.
- Buff for Shine (if applicable): If you’re using wax or a sealant that can be buffed, use a soft, lint-free cloth and gentle circular motions to achieve your desired sheen.
By taking the time to properly seal your painted piece, you’re not just adding a protective layer; you’re investing in the longevity and beauty of your creation. It’s the final, satisfying step that elevates your project from a simple DIY to a piece of art you can enjoy for years to come. So go ahead, seal that deal and admire your handiwork!

