Laying A Base For A Garden Shed

Ah, the garden shed. That humble, often overlooked structure, yet it’s the bedrock of a well-loved garden. It’s where your trusty spade rests, where the bags of compost await their destiny, and perhaps, where you sneak a quiet moment with a cuppa, the scent of potting soil mingling with the sweet morning air. But before your shed can become the sanctuary of your green thumb dreams, it needs a solid foundation. And let's be honest, the thought of laying a base can sound as daunting as wrestling a particularly stubborn vine.
Fear not, fellow garden enthusiasts! We're not talking about building a Roman aqueduct here. This is about creating a stable, level platform that will keep your shed standing proud for years to come. Think of it as giving your future garden haven the proper respect it deserves. It’s an essential step, but one that can be tackled with a good dose of common sense and a touch of DIY spirit. So, grab your gardening gloves (or maybe your work gloves for this one), and let's dig in.
The 'Why' Behind the Foundation
Why all the fuss about a base? Well, imagine building your dream treehouse on a patch of wobbly jelly. Not ideal, right? A shed, even a modest one, carries weight – tools, soil, perhaps even a well-deserved lawnmower. Without a solid base, your shed can start to tilt, the doors might become sticky, and worse, moisture can creep in, leading to rot and decay. It's the unsung hero of shed longevity.
Must Read
A good base also ensures proper drainage. Nobody wants their wellies to be swimming in a puddle after a downpour, only to be met by a soggy lawnmower at the door. A level and well-drained base means your shed stays dry, your tools stay rust-free, and your gardening adventures remain joyful, not soggy.
Choosing Your Shed's Starting Point: Location, Location, Location!
Before we even think about digging, let’s talk about where your shed will call home. This isn’t just about aesthetics; it's about practicality. Consider:
- Sunlight: Will your shed be baking in direct sun all day, potentially making it an oven for your delicate seeds? Or will it be perpetually in shade, encouraging dampness?
- Drainage: Is the chosen spot naturally sloped away from any buildings? You don't want your shed to become a miniature swimming pool during heavy rain.
- Access: Can you easily get to it with a wheelbarrow, or will you be performing Olympic-level balancing acts to transport bags of compost?
- Overhead Obstacles: Are there any overhanging branches that could drop debris or even fall in a storm?
Think of it like choosing a campsite. You want a spot that's sheltered yet accessible, with good views and a bit of peace and quiet. Your shed deserves the same consideration.
A Little History Bite: Sheds Through the Ages
Did you know that the concept of dedicated garden structures has been around for centuries? From the elaborate orangeries of Georgian estates, designed to protect citrus trees, to the simple potting sheds that have served gardeners for generations, the need for a dedicated space for cultivation and storage is nothing new. Your modern shed is just the latest iteration of this long and illustrious tradition!
The Foundation Options: From Simple to Sturdy
Now, for the nitty-gritty: the base itself. You’ve got a few popular options, each with its own pros and cons. Let’s break them down:
1. The Gravel Base: The Classic and Accessible Choice
This is probably the most common and arguably the easiest DIY option. It’s cost-effective, relatively straightforward to install, and offers excellent drainage.

What you'll need:
- Spade and shovel
- Spirit level
- Measuring tape
- Timber for edging (pressure-treated wood is a good bet)
- Wacker plate or a heavy tamper
- Weed membrane (landscape fabric)
- Gravel (e.g., 10-20mm aggregate)
- Sand (for leveling)
The Process:
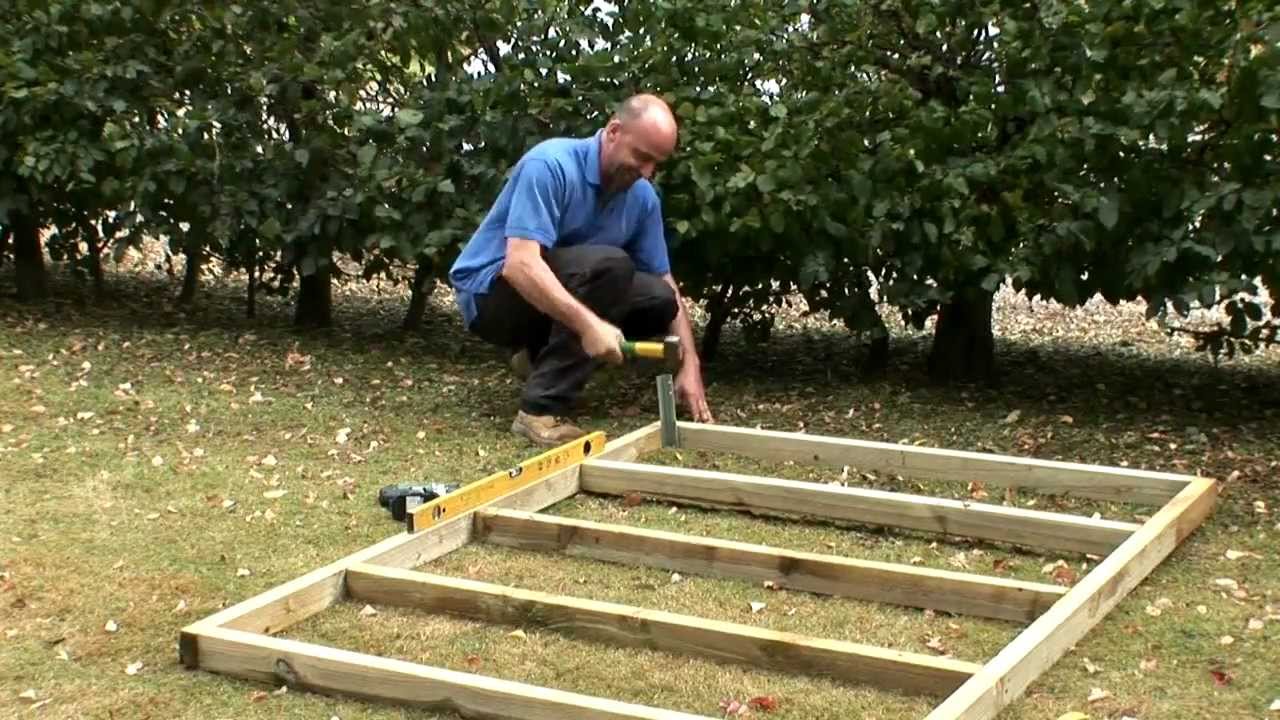
First, mark out the exact dimensions of your shed. Dig down about 150-200mm (6-8 inches) across this area. This depth allows for a good layer of gravel and a stable sub-base. While you're digging, ensure you’re digging out any turf or roots. This is where that weed membrane comes in. Lay it down across the entire excavated area. This is your secret weapon against unwanted greenery trying to sprout through your gravel.
Next, create a sturdy timber frame around the perimeter of your excavated area. This will act as your edging and will help to keep the gravel contained. Use a spirit level to ensure this frame is perfectly level. This is crucial for a stable base. If the frame is wonky, your shed will be wonky!
Now, for the filling. Add a layer of coarse aggregate (like MOT Type 1 or similar hardcore) as a sub-base, compacting it thoroughly with a wacker plate or tamper. This creates a solid, load-bearing layer. On top of this, add your decorative gravel, again compacting as you go. You can then add a thin layer of sharp sand to the top to achieve a perfectly level finish for your shed to sit on.
Pro Tip: Don't skimp on the compaction! This is where the stability comes from. Imagine building a sandcastle – you need to press it down firmly to make it strong.
Cultural Nod: Gravel paths have been a feature of gardens for centuries, adding a touch of rustic charm and practicality. Think of the gravel drives leading to stately homes – a testament to its enduring appeal!
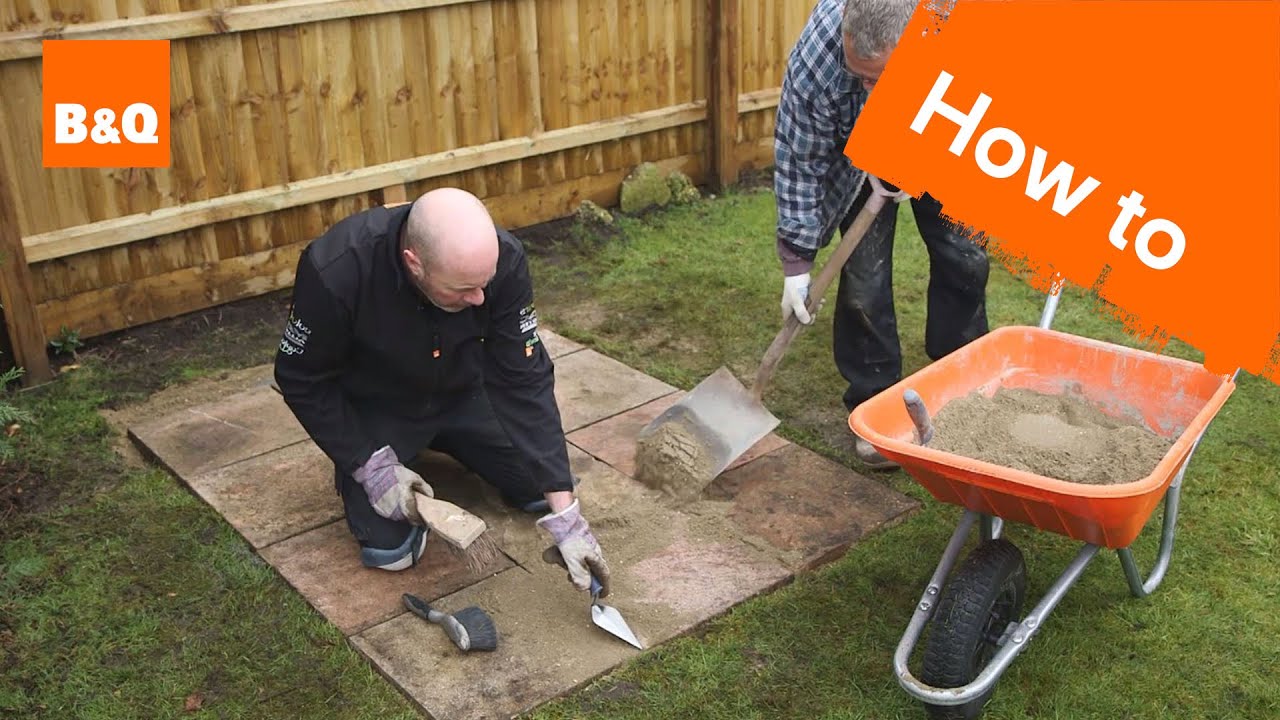
2. The Paving Slab Base: A Neat and Tidy Option
If you prefer a more structured and perhaps cleaner look, paving slabs are a great choice. They create a firm, flat surface and can be quite attractive.
What you'll need:
- Spade and shovel
- Spirit level
- Measuring tape
- Paving slabs (enough to cover the shed footprint)
- Sharp sand
- Weed membrane
- Edging (optional, but recommended for stability)
The Process:
Similar to the gravel base, mark out your shed area and excavate to a depth of around 100-150mm (4-6 inches). Lay your weed membrane. Create a level sub-base of compacted hardcore or even just well-compacted soil, ensuring it’s perfectly level. You can then lay a thin layer of sharp sand (about 20-40mm or 1-2 inches) over the entire area. This sand bed is what your paving slabs will sit on.
Now, carefully lay your paving slabs, working from the edges inwards. Use your spirit level on each slab and on the surrounding slabs to ensure everything is perfectly flush and level. You might need to tap them down gently with a rubber mallet to get them settled. Fill any small gaps between the slabs with sand or mortar, depending on your preference and how permanent you want it to be.
Pro Tip: Laying paving slabs can be a bit of a jigsaw puzzle. Take your time and plan your layout before you start laying them. Measure twice, lay once!
Fun Fact: The Romans were masters of paving, creating incredibly durable roads and pathways that have lasted for millennia. They understood the power of a well-laid stone!
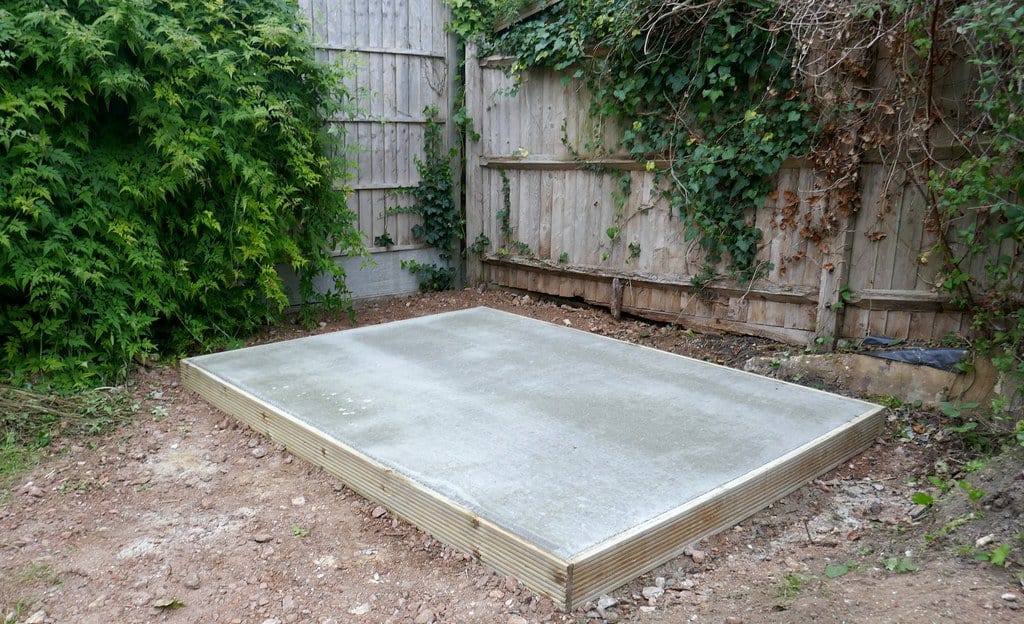
3. The Concrete Base: The Ultimate in Permanence and Strength
For the most robust and long-lasting foundation, concrete is the king. It offers incredible stability and is ideal for larger sheds or those intended for heavier storage.
What you'll need:
- Spade and shovel
- Spirit level
- Measuring tape
- Timber for shuttering (forms)
- Wooden stakes
- Weed membrane
- Hardcore or ballast
- Concrete mix (or cement, sand, and aggregate)
- Water
- Reinforcing mesh (optional, but recommended for larger bases)
- Float and trowel
- Wacker plate or tamper
The Process:
Excavate to a depth of around 150-200mm (6-8 inches). Install shuttering (wooden forms) around the perimeter of your excavation, ensuring it's level and square. This will contain the wet concrete. Lay your weed membrane and a layer of compacted hardcore as a sub-base.
If you’re using reinforcing mesh, lay it over the hardcore, ensuring it’s elevated slightly so it sits within the concrete, not on the bottom. Now, mix your concrete. The ratio is typically 1 part cement, 2 parts sand, and 3 parts aggregate, but pre-mixed bags are also readily available and often easier for DIYers. Add water gradually until you achieve a workable consistency – like thick porridge.
Pour the concrete into your shuttering, working it into the corners and edges. Use a float or trowel to smooth the surface and achieve a level finish. For larger bases, a screed board can help create a perfectly flat surface. You’ll need to work reasonably quickly as concrete starts to set.

Allow the concrete to cure for at least 24-48 hours, and ideally for a week or more, before placing your shed on it. Patience is a virtue when it comes to concrete!
Pro Tip: If you’re not experienced with concrete, consider buying pre-mixed bags. They take the guesswork out of ratios and are often easier to handle.
Cultural Nod: Concrete has revolutionized construction, from the Eiffel Tower to modern skyscrapers. It’s a testament to human ingenuity and its role in shaping our built environment. Your shed base is a mini-masterpiece of modern engineering!
The 'Don'ts' of Shed Bases
Just as important as knowing what to do is knowing what not to do:
- Don't build directly on soil: This is a recipe for dampness and sinking.
- Don't skip the weed membrane: A little effort now saves a lot of weeding later.
- Don't ignore the spirit level: A wonky base means a wonky shed, and that’s never a good look.
- Don't underestimate drainage: Water needs to flow away from your shed.
The Final Touches: A Level Head for a Level Shed
Once your base is laid and has had time to settle (especially important for concrete), it’s time to marvel at your handiwork. You’ve created a stable, level platform, ready to welcome your shed. This foundation is more than just concrete, gravel, or slabs; it's the promise of organized tools, protected equipment, and a dedicated space for your gardening passion to flourish.
It’s a small step in the grand scheme of things, perhaps, but it’s one that sets the stage for countless hours of enjoyment. Think of it as the opening chapter of your shed’s story, a story that will unfold with every seed you plant, every flower you prune, and every quiet moment you steal within its walls.
Connecting to the Everyday: The Beauty of a Solid Start
Laying a base for your garden shed, in its own small way, mirrors so many aspects of our daily lives. Whether it’s starting a new project at work, learning a new skill, or even nurturing a relationship, the foundation you build is what determines its resilience and longevity. A well-planned, carefully executed start makes all the difference. It’s about taking the time to do things right, understanding the ‘why’ behind the steps, and building something that will last. So, the next time you look at your sturdy shed, remember the effort that went into its base, and take a moment to appreciate the quiet strength of a job well done. It’s a reminder that even the most humble beginnings can lead to something truly magnificent.