Kt Tape How To Tape Knee
Hey there, amazing humans! Ever feel like your knees are staging a tiny, annoying protest every time you bend them? Maybe you’re a weekend warrior who’s slightly overdid it on the hiking trail, or perhaps you’re just someone who loves to move and groove but lately, your knees have been saying, “Uh, maybe a little less…enthusiasm?”
Well, guess what? We've got a little secret weapon that's been making waves in the world of active living, and it’s called Kinesiology Tape, or KT Tape for short. Don't let the fancy scientific name scare you; this stuff is seriously cool and can actually make a huge difference in how you move and feel.
Think of it like this: KT Tape isn't some rigid brace that tells your knee what to do. Oh no, it's much smarter (and way more colorful!). It's designed to work with your body, gently lifting your skin to create a little more space between it and the underlying muscles and tissues. What does that do? Well, it's like giving your knee a gentle, constant massage, which can help reduce swelling, improve circulation, and, most importantly, provide a little extra support and pain relief without restricting your movement. Pretty neat, right?
Must Read
And the best part? Taping your knee yourself is totally doable! Seriously, you don't need a degree in sports medicine to get the hang of this. We’re talking about a skill that can empower you to get back to doing the things you love, whether that's chasing your kids, perfecting that yoga pose, or finally conquering that hill you’ve been eyeing.
So, Ready to Give Your Knee a Hug?
Let's dive into the super-simple, step-by-step process of how to tape your knee with KT Tape. Grab your roll of colorful tape (pick a fun color, it totally adds to the experience!), and let’s get started. Remember, the goal here is to make things better, so keep it light and positive!
Step 1: Prep Time!
Before we slap on any tape, we need a clean slate. Make sure your skin is clean, dry, and free of any lotions, oils, or sunscreen. This is super important because we want that tape to stick like glue (but, you know, in a good way that doesn’t hurt to remove!).

Also, it’s a good idea to trim any excessive hair around the area. This isn’t about vanity; it’s about ensuring maximum adhesion. Nobody wants their tape peeling off mid-squat, right? We’re aiming for staying power here!
Step 2: Measure Twice, Cut Once!
KT Tape comes in a roll, and you'll want to cut strips of the right length for your knee. A good starting point for a standard knee application is two I-strips, each about 10-12 inches long. You can also cut a shorter Y-strip or a small anchor strip if needed, but let’s stick with the basics for now.
Most KT Tape rolls have helpful grid lines on the back. Use these to measure and cut your strips. And here's a little pro-tip: round off the corners of your tape strips. This prevents them from snagging on your clothes and helps them stay put for longer. Think of it as giving your tape a little smoother edge for a comfier ride.
Step 3: The Anchor - Setting the Stage
For our first strip, we're going to focus on the anchor point. Gently bend your knee to about a 90-degree angle. This position is key to getting good coverage and effective support.
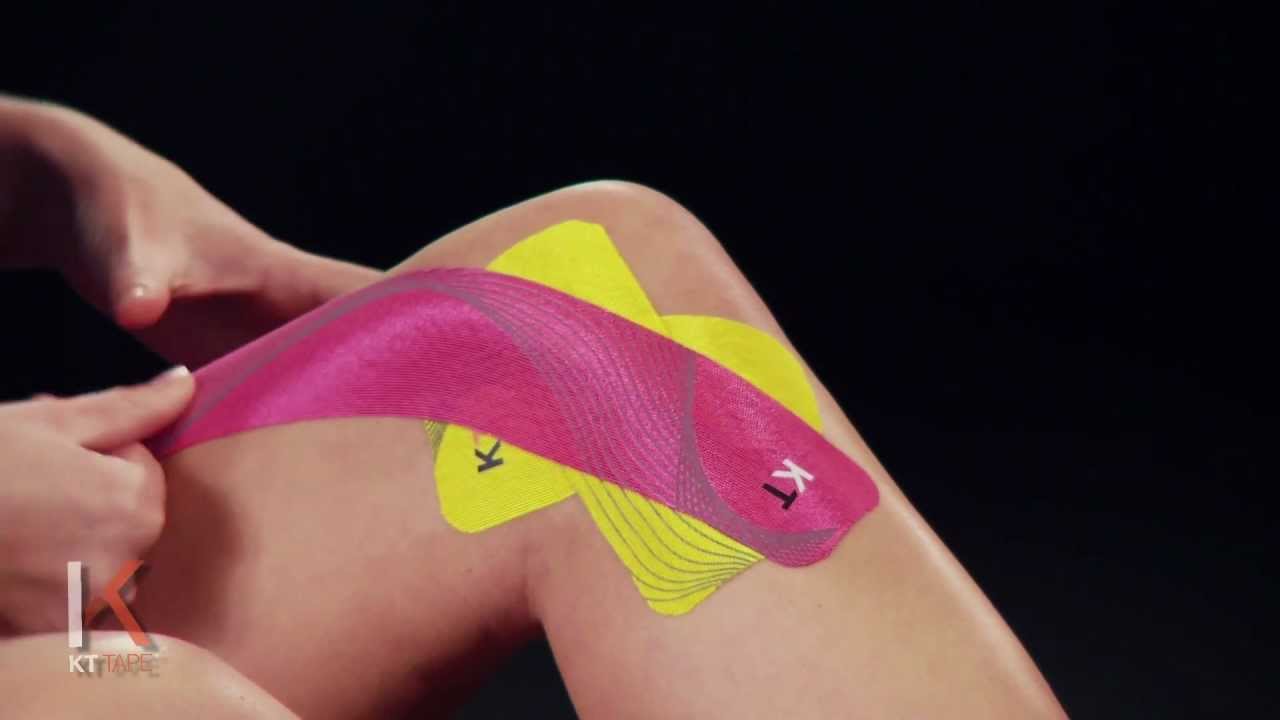
Take one of your I-strips. Peel off the backing from the center of the strip, but leave the ends still covered. Now, apply the sticky center of the tape to the front of your knee, right over the kneecap. Press it down firmly.
This is where the magic starts to happen. With the center secured, gently pull the ends of the tape and lay them down along your leg, both above and below the kneecap. You want to apply the tape with zero stretch at the anchor points. Think of this as creating a stable foundation.
Step 4: The Support Strip - Giving Your Knee a Lift
Now for the second I-strip. This one is all about providing that gentle lift and support. Again, gently bend your knee to about 90 degrees.
Peel off the backing from the center of the second I-strip. Apply this center section to the back of your knee, right in the bend. This might feel a little tricky, but just take your time!

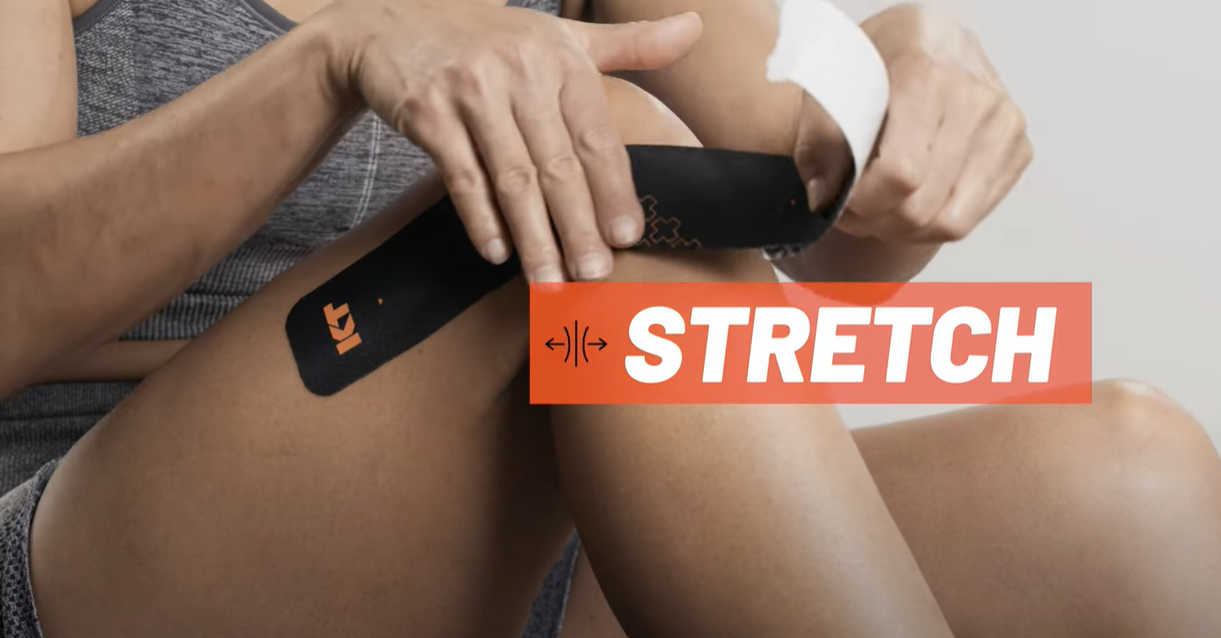
Now, this is where we introduce a little controlled stretch. Gently pull the ends of this second strip and lay them down along the front of your thigh and calf. You’re aiming for about a 50-75% stretch on these ends. You should feel a slight tension, but it shouldn't feel constricting or uncomfortable. Imagine you're giving your knee a little "hug" of support.
Again, make sure the very ends of this strip have no stretch. Rub the tape firmly for about 20-30 seconds. The heat from your hands activates the adhesive. This is the secret sauce for making sure it stays on!
Step 5: The Finishing Touches & What To Expect
Once both strips are applied and rubbed down, you're pretty much done! You might want to do a gentle range of motion test – a few bends and stretches – to ensure everything feels comfortable and supportive. If there’s any pinching or discomfort, you can gently peel it off and try again. We’re aiming for happy knees here!
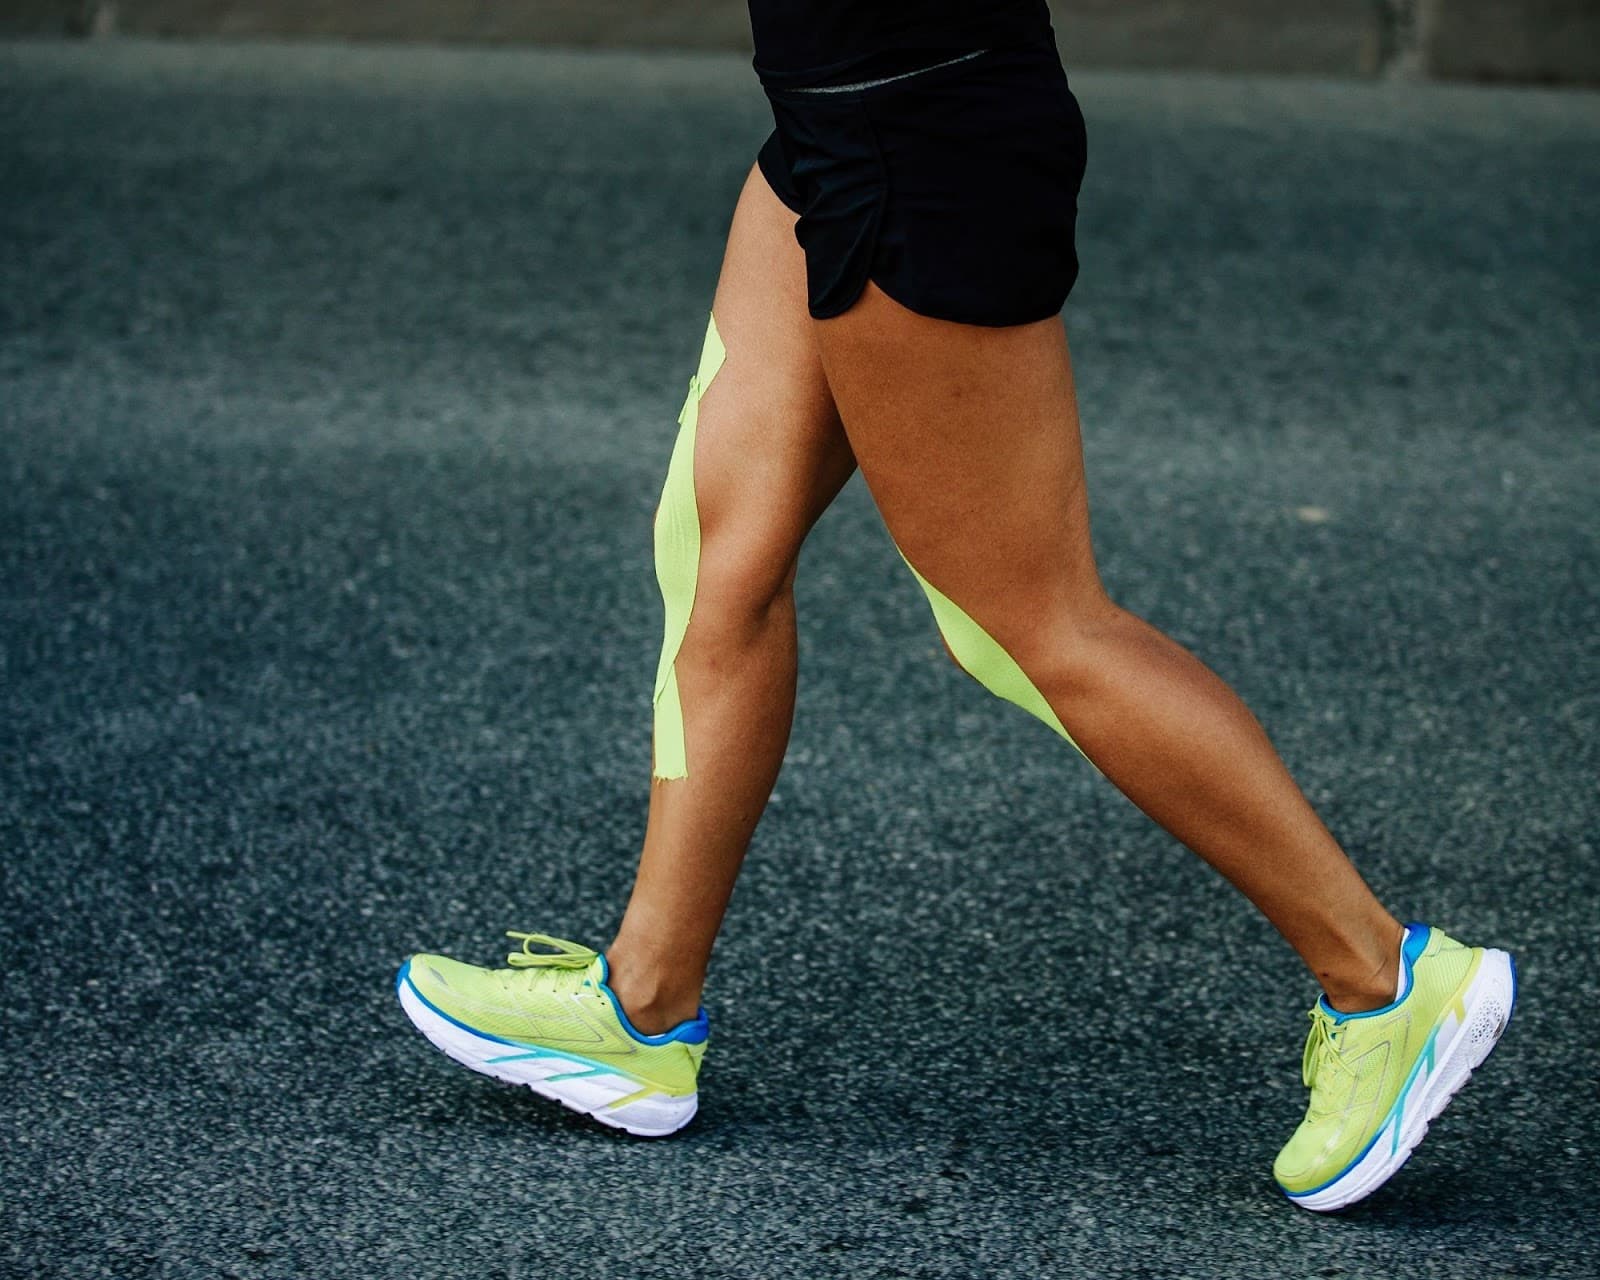
You can leave KT Tape on for 3-5 days, even through showers and workouts. It’s waterproof and designed to move with you. Pretty incredible, right? You’ll feel a noticeable difference, a sense of stability, and hopefully, a welcome reduction in any aches and pains. It's like having a little cheer squad for your knee, always there to offer a helping hand (or, well, a helping strip of tape!).

Why This Little Bit of Tape Can Be a Game-Changer
So, why go through the minor effort of taping your knee? It’s about empowerment, my friends! It’s about taking a proactive step in caring for your body so you can continue to enjoy all the amazing things life has to offer. Think about it: that nagging knee twinge shouldn’t stop you from enjoying a beautiful sunset walk, a spontaneous dance party with friends, or even just the simple joy of climbing stairs without a second thought.
KT Tape isn't a magic cure, but it's a fantastic tool that can help you manage discomfort, improve your biomechanics, and feel more confident in your movements. It's about getting back to living your life to the fullest, without being held back by a little knee complaint.
And let's not forget the fun factor! Choosing your tape color can be a little moment of self-expression. Bright pink for a cheerful day? Electric blue for a burst of energy? Go for it! It’s a small detail, but sometimes, those little things can make a big difference in our overall outlook.
So, don't let a little knee discomfort put a damper on your adventures. Give KT Tape a try! It’s a simple yet effective way to support your body and unlock your potential for more movement, more joy, and more living. You might be surprised at how much a little bit of tape can help you feel stronger, more supported, and ready to take on whatever the day throws your way. Go ahead, give it a whirl – your knees (and your spirit!) will thank you for it!