How To Wire In A Light Switch

Alright, my brave DIY adventurers! Ever stared at a blank wall and thought, "You know what this room needs? More POWER!" (Okay, maybe just more light, but you get the idea). Well, buckle up, buttercups, because today we're diving headfirst into the electrifying (pun intended!) world of wiring in a light switch. Forget those fancy electricians with their jargon and their clipboard-wielding seriousness. We're going to demystify this whole shebang with the grace of a caffeinated squirrel and the ease of making toast.
Think of it like this: a light switch is the bouncer for your light bulb. It decides when the party starts and when it’s time for everyone to go home. And guess what? You can be the ultimate party planner for your own lighting situation!
First things first, let's talk about safety. This isn't about being a killjoy, it's about being a survivor. Before you even think about unscrewing anything, you absolutely, positively, without a shadow of a doubt, need to turn off the power. Find that trusty breaker box. It's usually a grey metal panel, often humming with the low-grade anxiety of a thousand circuits. Locate the breaker that controls the lights in the area you're working in. If it's labelled "Living Room Lights," fantastic! If it's just a mysterious number, you might need to play a thrilling game of "breaker bingo" – flip one, see if the lights go out, flip another if not. Just remember, NO POWER = NO SHOCK! Seriously, this is more important than knowing your wifi password.
Must Read
Now that your workspace is as dead as a disco ball on a Monday morning, you can start. You’ll need a few trusty companions for this mission. First, a new light switch. They come in all sorts of snazzy designs these days – from simple white ones that blend in like a chameleon to fancy dimmer switches that let you set the mood like a seasoned rom-com director. Then, you'll need a screwdriver. A Phillips head is usually your best bet. And maybe, just maybe, a pair of wire strippers. These little beauties are like tiny scissors for the plastic coating on wires, exposing the shiny metal underneath. Think of them as giving the wires a little haircut.
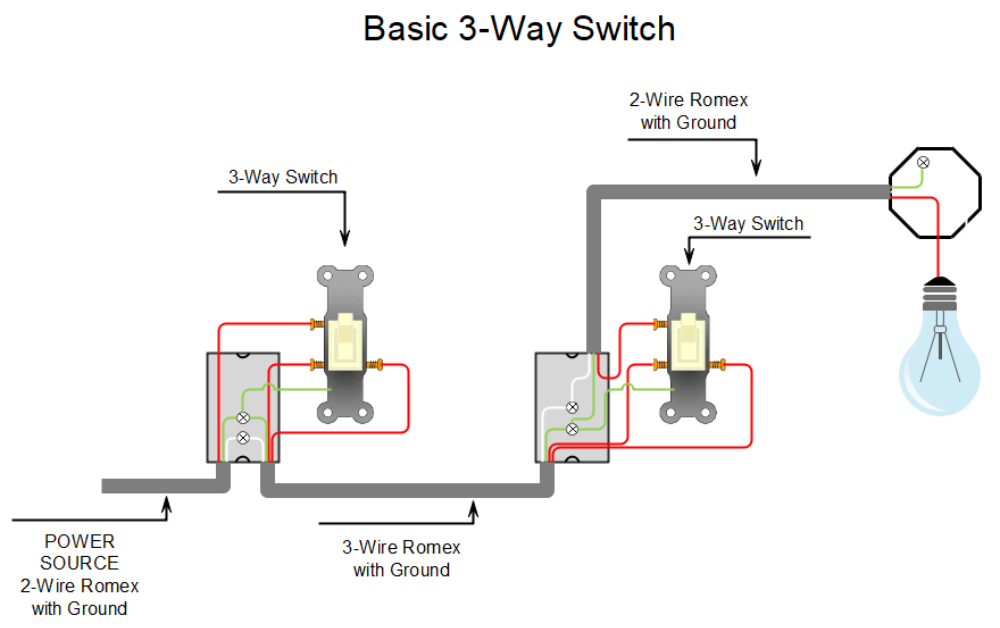
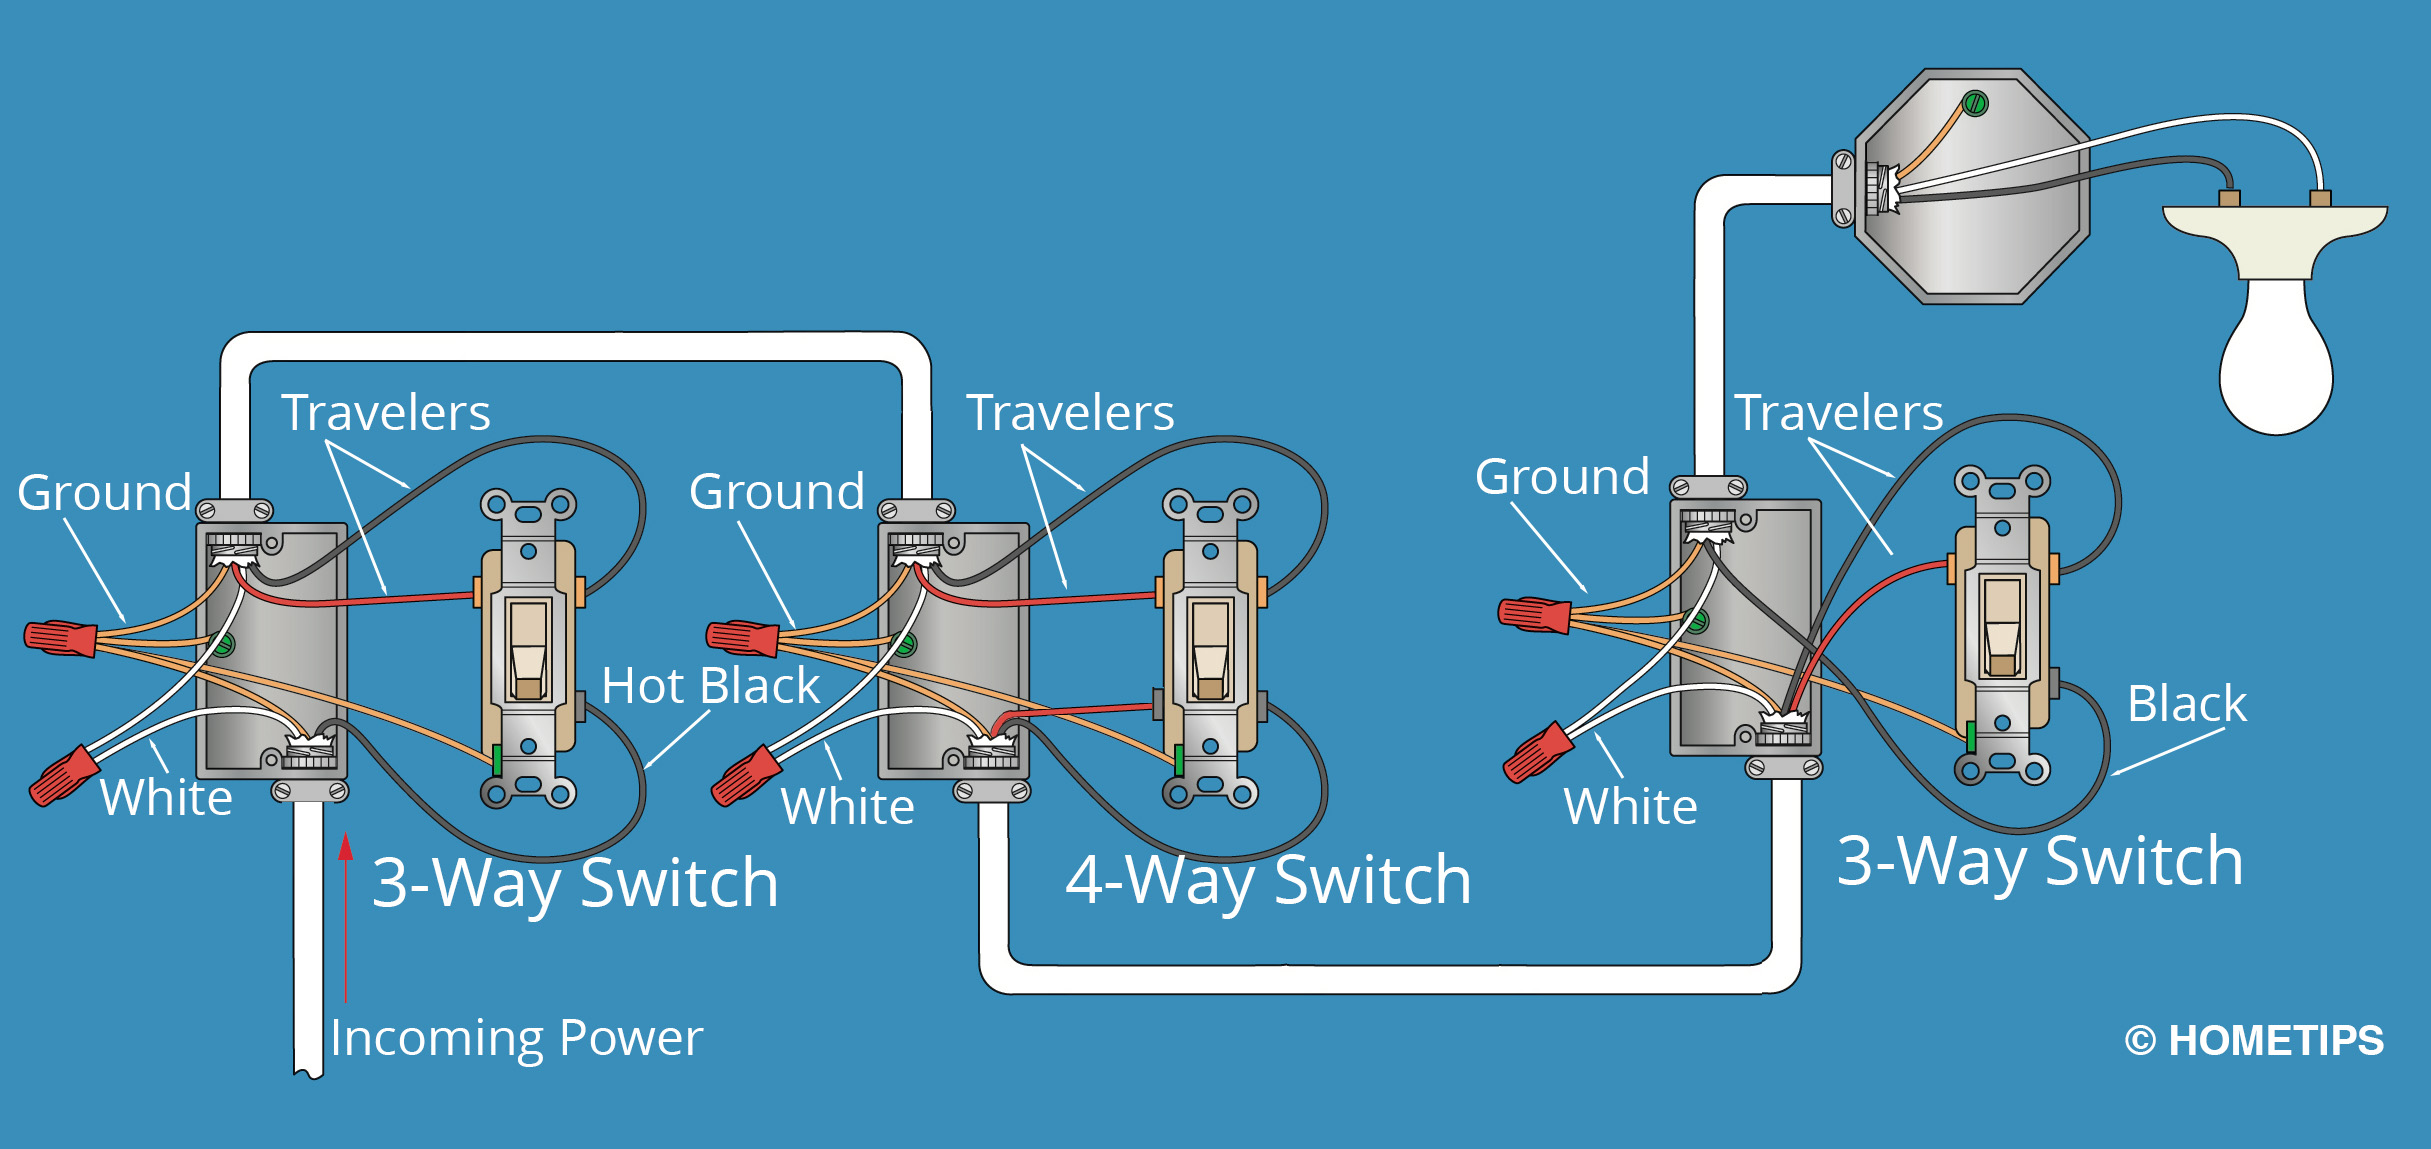
Okay, so you've got your old switch plate off, and you're staring at a tangled mess of wires. Don't panic! It's like a spaghetti junction, but with less traffic. You'll likely see a few wires, usually black and white, sometimes with a green or bare copper one lurking around. The black wires are the ones bringing the "oomph" – the electricity. The white wires are the "return trip" – they bring the used electricity back home. And the green or copper wire? That's the superhero, the ground wire, there to whisk away any stray sparks and save the day.
:max_bytes(150000):strip_icc()/how-to-wire-and-install-single-pole-switches-1152330-05-2de77af170364a6fb3846f30634a5cd3.jpg)
Now, your new switch will have little screws on the sides. These are the connection points. You'll want to connect the incoming hot wire (usually black) to one screw, and the wire going to the light fixture (also usually black) to the other screw. It’s like a tiny handshake between the electricity and your light. The white wire (neutral) usually just passes through the box and connects to another white wire. And the ground wire? It gets its own special screw, usually green, to keep it safe and sound.
Let's get down to the nitty-gritty of attaching those wires. If your wires are already stripped, you can just loop them around the screws and tighten them up. Make sure they're snug! You don't want a loose connection, that’s like trying to whisper sweet nothings to someone across a football stadium – it's not going to end well. If the wires are still covered in their plastic jackets, that's where your wire strippers come in. Just a gentle grip, a slight twist, and voila! You’ve got exposed wire ready for action. It’s like unzipping a tiny wire jacket. Easy peasy.
:max_bytes(150000):strip_icc()/tips-for-wiring-outlets-and-switches-1824668-12-0fe93a6a785d48bfa62c527820d0fb19.jpg?strip=all)
Remember, we're aiming for a connection that's as solid as your grandmother's hug and as secure as a secret handshake. Don't be afraid to give those screws a good tighten!
Once all your wires are happily connected to their respective screws, it’s time for the grand reveal. Carefully tuck all those wires back into the electrical box. This is like putting your superhero team back in their secret lair. Then, take your new switch and line it up with the screw holes in the box. Gently screw it in place. Don't overtighten, we’re not trying to compress the switch into a pancake.
Finally, put on the new switch plate. This is the stylish outfit for your new light switch. It’s the finishing touch, the cherry on top of your DIY sundae. Now, the moment of truth… head back to your breaker box and flip that breaker back on. Take a deep breath. And with a triumphant flourish, flick your new switch. If your light illuminates, you’ve done it! You’ve conquered the beast! You’ve become a light-switching ninja! Give yourself a pat on the back, maybe a little dance of victory. You’ve just added a touch of brightness and a whole lot of DIY pride to your home. And that, my friends, is truly electrifying!