How To Strip And Paint A Deck

So, your deck's looking a bit… sad, huh? Like it's seen better days, maybe even a few too many questionable BBQs? Don't worry, we've all been there. That weathered, peeling paint can really bring down your whole backyard vibe. But guess what? It's not some insurmountable task! Think of it as a spa day for your deck. And who doesn't love a good spa day?
You're probably thinking, "Strip and paint? That sounds like a lot of work." And yeah, it's not exactly lounging by the pool with a margarita. But it's totally doable. You've got this! We're going to break it down, step by step, so you can get that deck looking spiffy enough to host your next epic summer bash. Ready to roll up those sleeves?
Step 1: The Great Unveiling (aka Prep Work)
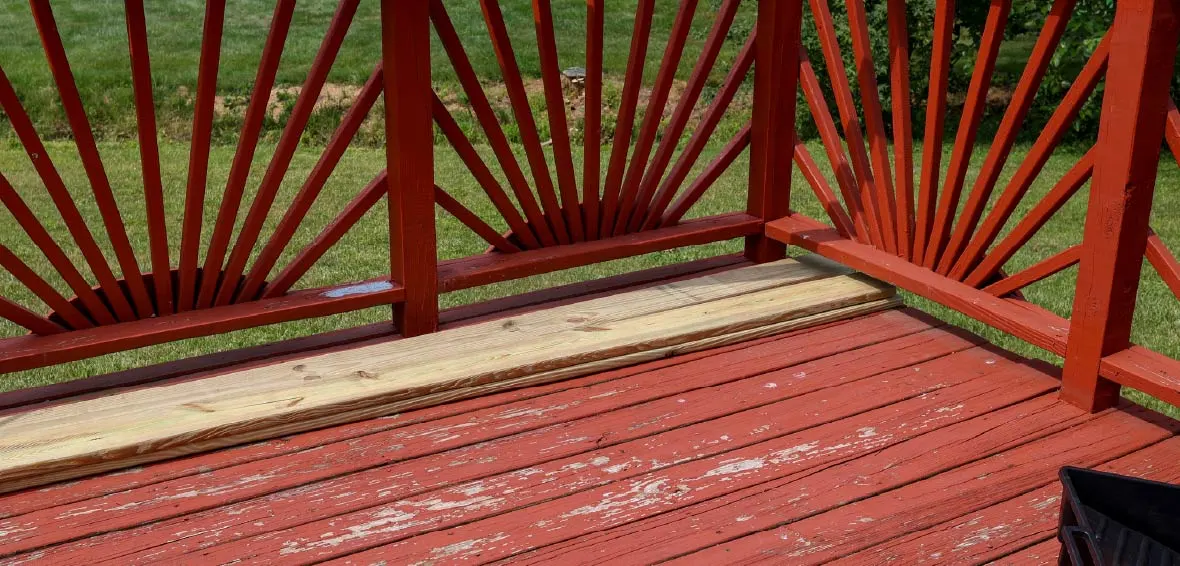
First things first, we gotta see what we're working with. Is it paint? Stain? Some weird hybrid that the previous owner swore was "maintenance-free" (spoiler alert: it never is)? You'll want to give it a good once-over. Look for peeling bits, fading patches, and areas that just look… blah.
Must Read
Now, before you even think about grabbing a paint can, we need to get rid of all that old stuff. Think of it as clearing the stage for the grand performance of your new paint job. If you skip this, your new paint will just be clinging to a flaky mess, and nobody wants that. It'll look worse than before, and you'll be crying into your lukewarm coffee.
So, what tools do we need for this exciting de-cluttering mission? A stiff-bristled brush is your best friend here. Get a good one, not that flimsy thing you use to clean your gutters. You want something that can actually do something.
Then comes the deck stripper. Oh, the glamour! This stuff is like magic potion, but it smells a bit like a unicorn sneezed industrial cleaner. Seriously, follow the instructions on the can. Most of them involve slathering it on, letting it sit for a bit (that’s when the magic happens, don’t rush it!), and then scrubbing like your life depends on it. Okay, maybe not that dramatically, but put some elbow grease into it!
And for the love of all that is holy, wear gloves and eye protection. Seriously. This stuff can be nasty. You don't want to explain to your significant other why your hands look like they've been pickled, or why you're squinting at everything like you've just seen a ghost.
The Scrub-a-Dub-Dub Phase
Once the stripper has done its thing, it's time to scrub. This is where you earn your stripes, literally. You'll be going up and down, side to side, getting into all those nooks and crannies. Think of it as a full-body workout. You might even break a sweat. Who needs a gym when you've got a deck to strip?
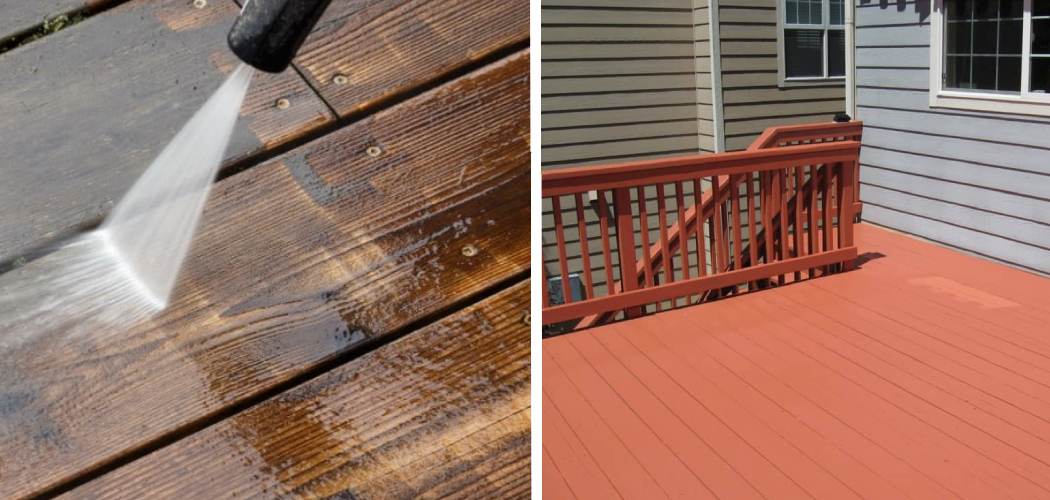
Some people use a power washer at this stage. Now, I love a power washer. It's like a super-powered hose that makes you feel like you can take on the world. But be careful! Too much pressure, and you could actually damage your deck boards. Start on a low setting, and test it on an inconspicuous area first. We're aiming for clean, not splintered chaos.
After all that scrubbing and rinsing (because yes, you'll have to rinse it all off!), you'll need to let it dry. Like, really dry. We're talking a couple of days, depending on the weather. Don't rush this part either. Damp wood and fresh paint are a recipe for disaster. Think mold. Think peeling. Think regret.
Step 2: The Sanding Serenade
Okay, the old stuff is off. High five! But we're not quite there yet. Now it's time for the sanding. This is like exfoliating your deck. It smooths out any rough spots, removes any stubborn bits of paint that refused to budge, and generally makes everything look and feel a lot nicer. You want a smooth surface for your beautiful new paint to cling to, right?
You have a couple of options here. You can go old school with a handheld sanding block. This is great for smaller areas or if you want to be really meticulous. It's a bit more work, but you have total control. Or, if you're feeling adventurous and have a larger deck, you could rent a floor sander. These things are powerful! Again, be careful. You don't want to accidentally gouge your deck. Practice on a scrap piece of wood if you can.
What grit sandpaper should you use? Start with something a bit coarser, like 80-grit, to get rid of any imperfections. Then, move to a finer grit, like 120-grit, for a nice smooth finish. You're basically giving your deck a spa treatment, from stripping to sanding. It's going to feel amazing!

And, surprise, surprise, you'll need to clean up the dust. A lot. A shop vac is your best friend here. Get it all, every last bit. Otherwise, that dust will get mixed into your paint, and you'll have a textured finish you never asked for. Nobody wants a glittery, dusty deck unless they're going for a very specific, and likely confusing, aesthetic.
Step 3: The Priming Party
Now, some people might tell you that priming isn't always necessary. And sure, if you're painting over a light color with a similar light color, maybe. But for a deck that's been stripped and is about to get a whole new look? I always say, primer is your best friend. It's like a good foundation for makeup; it makes everything else look better and last longer.
Primer helps your paint adhere better, it blocks stains (like tannins from the wood that might bleed through), and it helps create a more uniform surface for your topcoat. Plus, it can help you use less topcoat paint, which saves you money in the long run. See? Practical and pretty!
Choose a good quality exterior primer. Make sure it's compatible with your chosen paint. You can get primers that are specifically for wood, or ones that are all-in-one for stain and paint. Read the labels, my friends. They're there for a reason.
How do you apply it? You can use a roller for the larger, flat areas and a brush for the edges and in between the boards. Just like with painting, you want even coats. Don't go too thick; you'll get drips. And don't miss any spots! That old, unprimed wood will stick out like a sore thumb against your fresh paint.

Let that primer dry completely. Check the can for drying times. Impatience is the enemy of a good paint job, remember that. Let it do its thing, go have a cuppa, read a chapter of that book you've been meaning to finish. You've earned it.
Step 4: The Painting Paradise
This is the moment you've been waiting for! The painting! It's like the grand finale of your deck's makeover. Get ready to transform that tired old deck into a vibrant, welcoming space.
First, choose your paint. You want exterior paint, obviously. Something that can withstand the elements – sun, rain, snow, maybe even the occasional rogue squirrel invasion. Look for paints specifically designed for decks or exterior wood surfaces. They're formulated to be durable and weather-resistant. You can go for a solid color, a semi-transparent stain (which lets some of the wood grain show through), or even a fun pattern if you're feeling bold!
What color will it be? This is where you can really let your personality shine. Bright and cheerful? Classic and understated? The possibilities are endless! Just make sure it complements your house and your landscaping. No one wants a deck that clashes with their petunias. (Okay, maybe some people do, but they're probably a different breed of decorator.)
Now, for the application. Just like with the primer, you'll want to use a roller for the big areas and a brush for the details. Apply thin, even coats. It's always better to do two thin coats than one thick, drippy one. You'll get a smoother finish and it will last longer. Trust me on this.

Work in sections, moving with the grain of the wood. This helps prevent lap marks (those tell-tale lines where one section of paint ends and another begins). And try to avoid painting in direct, scorching sunlight. The paint can dry too quickly, making it difficult to work with and potentially leading to an uneven finish. Overcast days are your friend!
How many coats do you need? Usually, two coats are sufficient. But if you're going from a dark color to a very light one, or vice versa, you might need a third. Keep an eye on it as you go. You want that consistent, beautiful coverage.
The Final Touches and Waiting Game
Once you've applied your final coat, it's time for the hardest part: waiting. You'll need to let the paint cure. This is different from just drying. Curing is when the paint fully hardens and reaches its maximum durability. This can take several days, sometimes even a week, depending on the paint and the weather. Resist the urge to walk on it, place furniture on it, or let your dog do zoomies on it. Patience, grasshopper.
After it's fully cured, you can start enjoying your amazing new deck! Add some comfy cushions, string up some fairy lights, and get ready to create some wonderful memories. You did it! You transformed that sad, neglected deck into a beautiful outdoor oasis. You should be proud of yourself. Go on, have a little dance on your newly painted masterpiece. Just, you know, once it's actually cured.
And hey, if it's not perfect the first time? That's okay! It's a learning process. Your deck will likely need re-painting or re-staining every few years anyway. Think of it as an ongoing relationship with your outdoor living space. It’s a commitment, but totally worth it when you're out there, cocktail in hand, soaking up the sunshine. You've got this, and you'll be a deck-painting pro in no time!