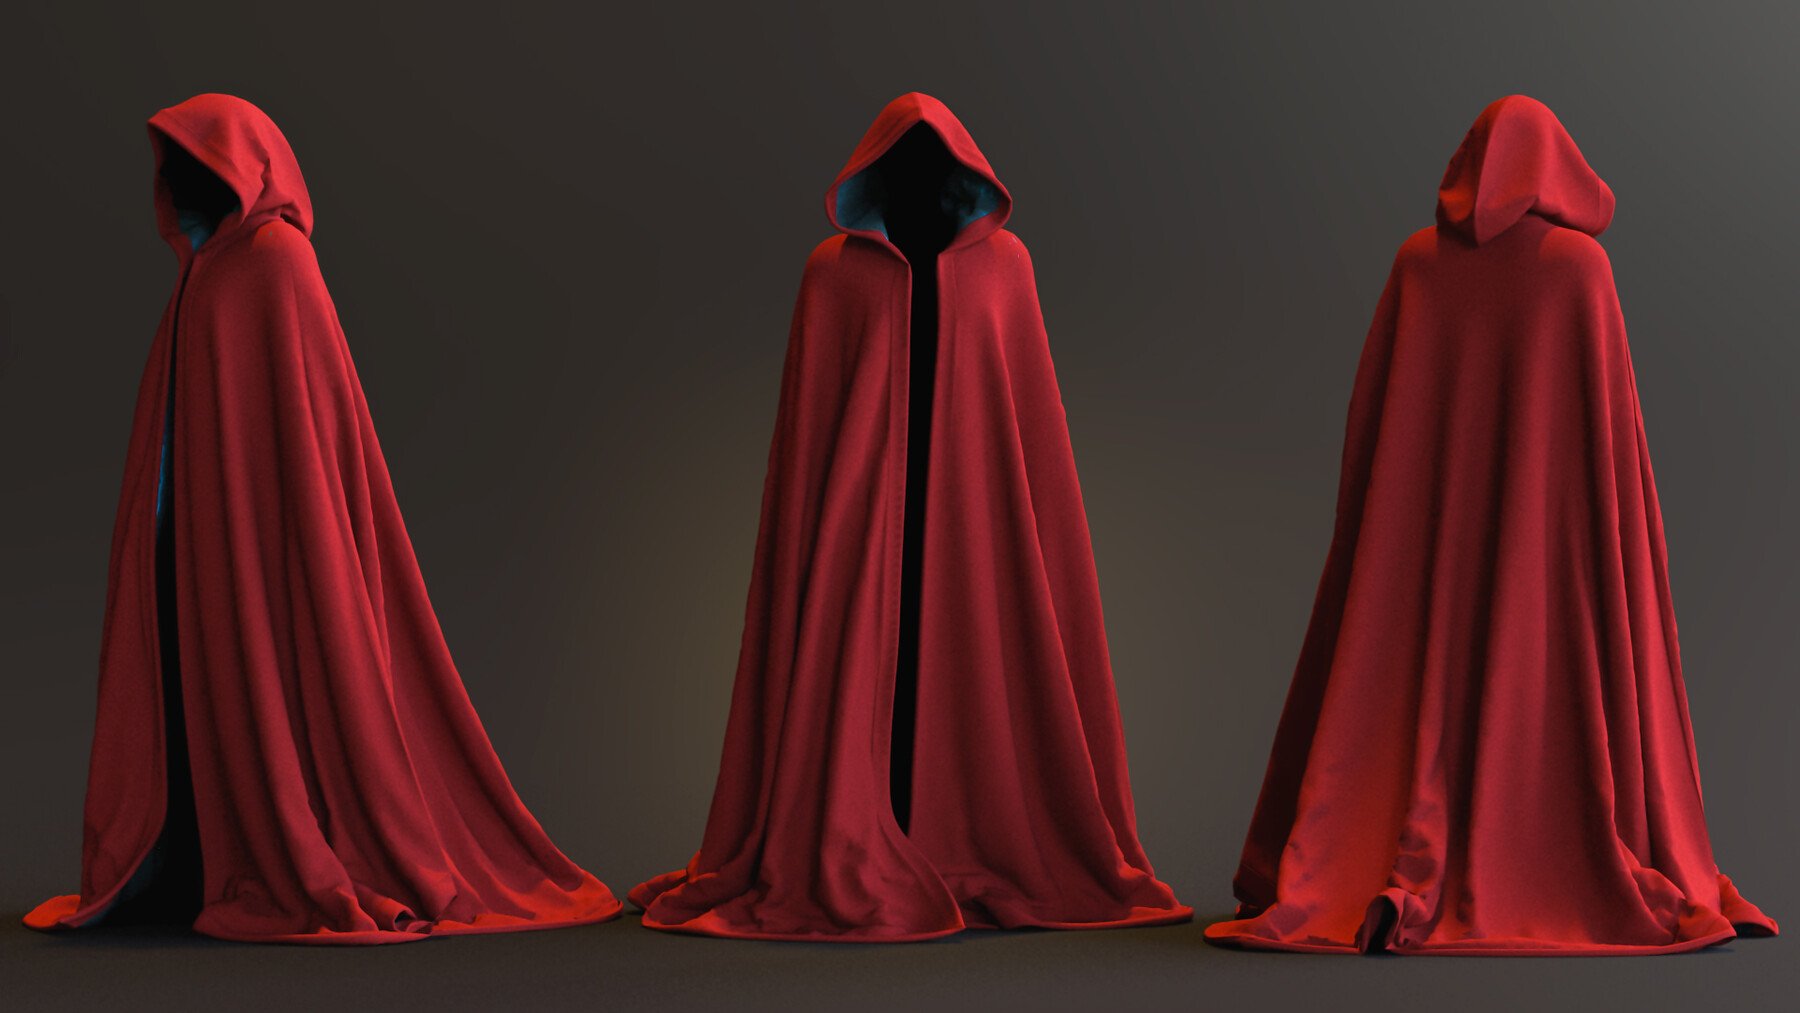
How To Sew A Cloak With Hood

Ever feel like life’s a bit too… structured? Like you’re constantly hemmed in by expectations and to-do lists? Sometimes, all you need is a little bit of dramatic flair, a touch of mystery, and the sheer, unadulterated joy of swishing fabric. And what better way to achieve that than by sewing your very own cloak with a hood? Forget fussy patterns and intimidating jargon; this is about embracing a more bohemian, perhaps even slightly witchy, vibe. Think of it as a wearable hug, a secret sanctuary, and a conversation starter, all rolled into one. Plus, who wouldn't want to channel their inner Gandalf or Little Red Riding Hood for a day? It’s surprisingly achievable, and the result is endlessly versatile.
Your Cloak, Your Canvas
The beauty of a cloak is its inherent simplicity. It’s basically a giant rectangle (or two, depending on your chosen design), draped and fastened. We’re going for an easy-going approach here, so no complex tailoring required. We’ll focus on a classic, flowing design that’s as comfortable as it is chic. This isn't about runway perfection; it's about creating something that feels you. Imagine yourself strolling through a crisp autumn market, the leaves crunching underfoot, your cloak billowing gently in the breeze. Or perhaps a cozy evening by the fire, your hood pulled up, lost in a good book. The possibilities are as vast as the fabric itself.
Before we dive into the nitty-gritty, let’s talk about fabric. This is where your personality truly shines. For that classic, drapey look, consider wool blends, fleece, or even a good quality flannel. These fabrics have a lovely weight and movement. If you're aiming for something lighter, perhaps for a summer festival or a costume piece, linen or a thick cotton sateen could be perfect. For a touch of drama and elegance, a velvet or a rich brocade would be absolutely stunning, though perhaps a little more challenging for a beginner. Remember, the wider the fabric, the fewer seams you’ll have, which is always a win in my book.
Must Read
As for color, the world is your oyster! Deep forest greens, midnight blues, earthy browns, or even a vibrant crimson – the choice is entirely yours. Think about the mood you want to evoke. Do you want to blend in with nature, or stand out like a beacon of fabulousness? Don't be afraid to experiment. Sometimes the most unexpected color choices lead to the most inspired creations.
Gathering Your Treasures (aka Supplies)
Alright, let's get down to business. You’ll need a few essential tools to bring your cloak dreams to life. Don’t worry, it’s not an overwhelming list. We’re keeping it simple and stress-free.
- Fabric: The star of the show! You'll need enough to create a generous rectangle for your cloak and a smaller piece for the hood. Measure yourself from shoulder to hem and double it for your cloak length, then add extra for ease of movement and seam allowance. For the width, aim for at least 60 inches (or the widest your fabric comes). For the hood, a piece about 20-24 inches wide and 18-20 inches long should suffice.
- Matching Thread: Of course! Make sure it's strong and suits your fabric type.
- Sewing Machine: While you could hand-sew, a machine will make this project a breeze.
- Sharp Scissors: For fabric, naturally. A good pair makes all the difference.
- Pins: To hold your fabric in place.
- Measuring Tape: Essential for accurate cuts.
- Chalk or Fabric Marker: To mark your cutting lines.
- Optional, but Recommended: A bias tape or binding for finishing the edges of your cloak and hood. This adds a professional touch and prevents fraying.
- For Fastening: A beautiful wooden toggle and loop, a large ornate button, or even some sturdy ribbon ties.
Fun Fact: Did you know that historically, cloaks were a symbol of status and protection? In ancient Rome, the sagum was a practical, woolen cloak worn by soldiers and commoners alike. Later, more elaborate versions became associated with nobility and even royalty. So, when you wear your cloak, you're tapping into a long and storied tradition!
The Art of the Drape: Cutting Your Cloak
This is where the magic starts to happen. We're going for a simple, rectangular cloak. No fancy curves here!
First, lay your main fabric flat on a large surface, like your floor or a big table. Fold it in half lengthwise. This means the selvage edges (the finished edges of the fabric) are touching. You now have a long, folded piece. Don't worry if it seems enormous – that's the point!

Now, measure down from the folded edge. This will be the top of your cloak where it hangs from your shoulders. You want to decide where your neckline will be. A good starting point is to measure down about 10-12 inches from the folded edge. This will create a gentle curve for your shoulders. Use your chalk or fabric marker to draw a line across the fabric at this point.
Next, let's think about the length. Decide how long you want your cloak to be. Measure from that shoulder line down to your desired hem length. Remember to add about 1-2 inches for the hem allowance. Mark this length with your chalk.
Finally, let's consider the width. You want your cloak to be nice and wide for maximum dramatic effect and comfort. If your fabric is 60 inches wide, that's usually plenty. If you have narrower fabric, you might need to join two pieces together. For a basic cloak, you don't need to taper the sides significantly. You can simply cut straight down from your shoulder line to your hem line. This creates a beautiful, flowing A-line shape.
So, to recap: Fold your fabric in half lengthwise. Measure down 10-12 inches from the fold and mark a horizontal line (this is your shoulder line). Measure down from that line to your desired hem length, adding seam allowance, and mark a vertical line. Cut along these lines. When you unfold your fabric, you'll have a large rectangle with a slightly curved top edge. Simplicity is key!
Practical Tip: Before you cut, give your fabric a good press. This will ensure your measurements are accurate and your cuts are clean. Wrinkled fabric can lead to wonky lines!
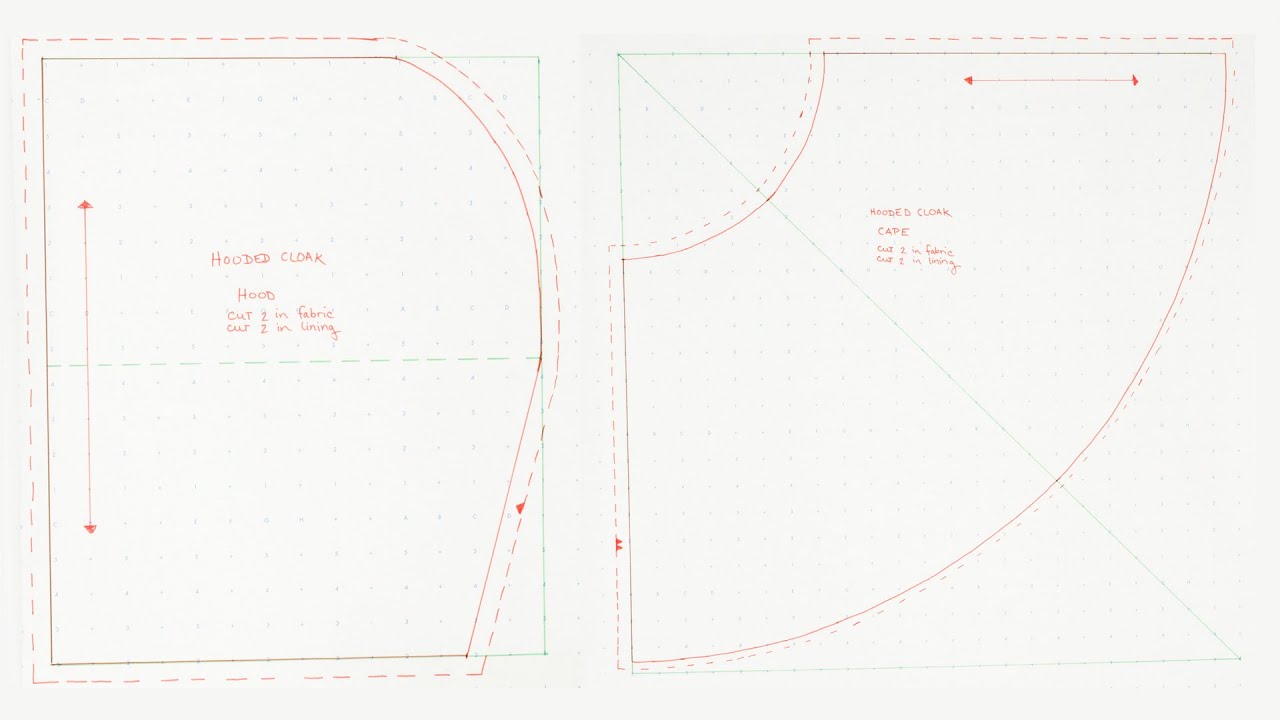
Crafting Your Cozy Canopy: The Hood
The hood is what elevates a simple cloak to something truly magical. It provides warmth, a touch of mystery, and a delightful sense of enclosure.

For the hood, take your smaller piece of fabric. Fold it in half widthwise, so the fold is at the top (this will be the crown of your hood). Now, you’re going to create a simple U-shape. Measure down about 18-20 inches from the fold, and draw a gentle curve down to the raw edges. This curve will create the shape of the hood as it falls around your face. Think of it as a soft cowl.
Cut along this curved line. When you unfold this piece, you'll have a shape that resembles a rounded rectangle with a U-shaped opening. This opening is where the hood will attach to your cloak.
Cultural Nugget: Hoods have a long and varied history across cultures. From the functional hoods of medieval tunics to the spiritual hoods in some monastic traditions, they've often symbolized protection, humility, or even anonymity. Your hood adds a layer of personal meaning.
Assembling Your Masterpiece: Sewing It All Together
Now for the satisfying part – bringing it all together! If you've decided to add a lining to your cloak for extra warmth and a polished finish, now is the time to prepare your lining fabric in the same way you did your main cloak fabric.
Sewing the Cloak Body: If you're using a single large piece of fabric for your cloak, you might have side seams if your fabric wasn't wide enough. If so, simply pin the side edges together, right sides facing, and sew a straight seam, leaving about a 1-inch seam allowance. For a truly simple cloak, you can even skip side seams altogether if your fabric is wide enough and just finish the raw edges.
Attaching the Hood: This is where the U-shape of your hood comes into play. Pin the raw edges of your hood opening (the U-shape) to the neckline of your cloak. Make sure to center the hood. You’ll be pinning the curved edge of the hood to the slightly curved neckline of the cloak. This can feel a bit fiddly, so take your time and distribute the fabric evenly. Pin generously!
Once pinned, sew the hood to the cloak. Use a seam allowance of about ½ to ¾ inch. If you’re using bias tape or binding for your edges, this is the perfect place to attach it to encase the raw seam. Alternatively, you can simply serge or zig-zag the raw edge to prevent fraying.
Finishing the Edges: Now, let's make it look polished! The easiest way to finish the hem and the outer edges of the hood is with bias tape or fabric binding. If you're not using bias tape, you can create a simple double-fold hem. Fold the raw edge up by ½ inch, press, then fold it up another ½ inch, press again, and stitch. Do this for the entire hem of the cloak and the outer edge of the hood.
Sewing the Hood Seam: Now, go back to that folded piece of fabric that forms your hood. Pin the two raw edges of the U-shape together, right sides facing. Sew a straight seam along this edge, leaving about a ½-inch seam allowance. This creates the back seam of your hood. If you’re feeling adventurous, you can add a small decorative trim or a button here.
Fun Fact: The term "bias tape" comes from sewing on the "bias" of the fabric, which means cutting at a 45-degree angle to the grain. This allows the tape to stretch and curve beautifully around corners, making it ideal for finishing necklines and hems.
The Grand Finale: Adding Your Touch
You're almost there! The most important part of any cloak is its fastening. This is where you can add a real personal touch.
Toggles and Loops: These are a classic and stylish choice. You can buy them in wood, bone, or metal. Sew the loop securely to one side of the cloak opening, and sew the toggle to the other side, positioned so it fastens comfortably. Make sure they are placed where they will lie flat when the cloak is open.

Buttons and Buttonholes: For a more traditional look, you can sew on a beautiful large button. You’ll need to create a buttonhole on the opposite side. This might be a bit more advanced, but many sewing machines have an automatic buttonhole function.
Ribbon Ties: For a softer, more casual feel, you can simply attach sturdy ribbon ties to each side of the cloak opening. You can tie them in a neat bow or a more dramatic knot.
Embellishments: This is where you can really let your creativity run wild! Consider adding embroidery to the edges, a few decorative stitches, or even some appliqué. You could sew on some faux fur trim for extra coziness and drama. The sky’s the limit!
Practical Tip: When deciding where to place your fastening, try the cloak on and see where it naturally falls open. This will help you determine the most flattering and functional placement.
A Moment of Reflection
There's something incredibly grounding about creating something with your own hands, isn't there? In a world that often feels fast-paced and disconnected, the simple act of sewing can be a form of meditation. As you stitch, you’re not just creating a garment; you’re creating a little piece of yourself, a tangible expression of your creativity and your desire for something a little bit more… enchanting.
This cloak, in its simplicity, is a reminder that we don't always need complex solutions. Sometimes, the most beautiful and functional things are also the most straightforward. It's a wearable sanctuary, a gentle embrace against the elements and the everyday hustle. So, when you slip on your newly sewn cloak, I hope you feel a sense of quiet confidence, a touch of whimsy, and the satisfying knowledge that you made this, just for you. It’s a reminder to embrace the flow, to find beauty in the unconventional, and to always leave a little room for a dramatic entrance (or a cozy exit).