How To Re Grout A Tile Floor
So, your tile floor is looking a little… tired? Those grout lines, once crisp and clean, have become dingy highways of doubt. Maybe they’re cracked. Maybe they’ve got the kind of questionable stains that make you want to avert your eyes. Fear not, my friend! You, yes YOU, can breathe new life into your floors. We're talking about regrouting. It sounds intense, right? Like a surgical procedure for your bathroom. But honestly? It's kinda fun. Think of it as a DIY spa day for your tiles.
Why is regrouting even a thing? Well, grout is like the glue that holds your beautiful tile dreams together. It’s also the unsung hero that takes a beating. Spills, scrubbing, the occasional rogue LEGO brick… grout endures it all. Over time, it can crumble, discolor, and generally become the fashion victim of your floor. But it doesn't have to be the end of the world! A little elbow grease and some trusty supplies, and you’ll be singing its praises.
Let’s talk about why this is actually a blast. I mean, who doesn't love a good transformation? It’s like watching a caterpillar turn into a butterfly, but instead of wings, you get shiny, new grout lines. Plus, you get to play with some cool tools. It’s practically an excuse to buy new gadgets. We’ll get to that later. But first, let’s get our minds in the regrouting zone. It’s a journey. A colorful, slightly dusty journey.
Must Read
The Glorious Quest for Fresh Grout!
Okay, ready to ditch the drab? First things first: gather your supplies. This is where the adventure truly begins. You'll need a grout saw, a utility knife, a stiff brush, a bucket, water, and of course, the star of the show: new grout. Don't forget a putty knife or grout float. And for the love of clean hands, some gloves!
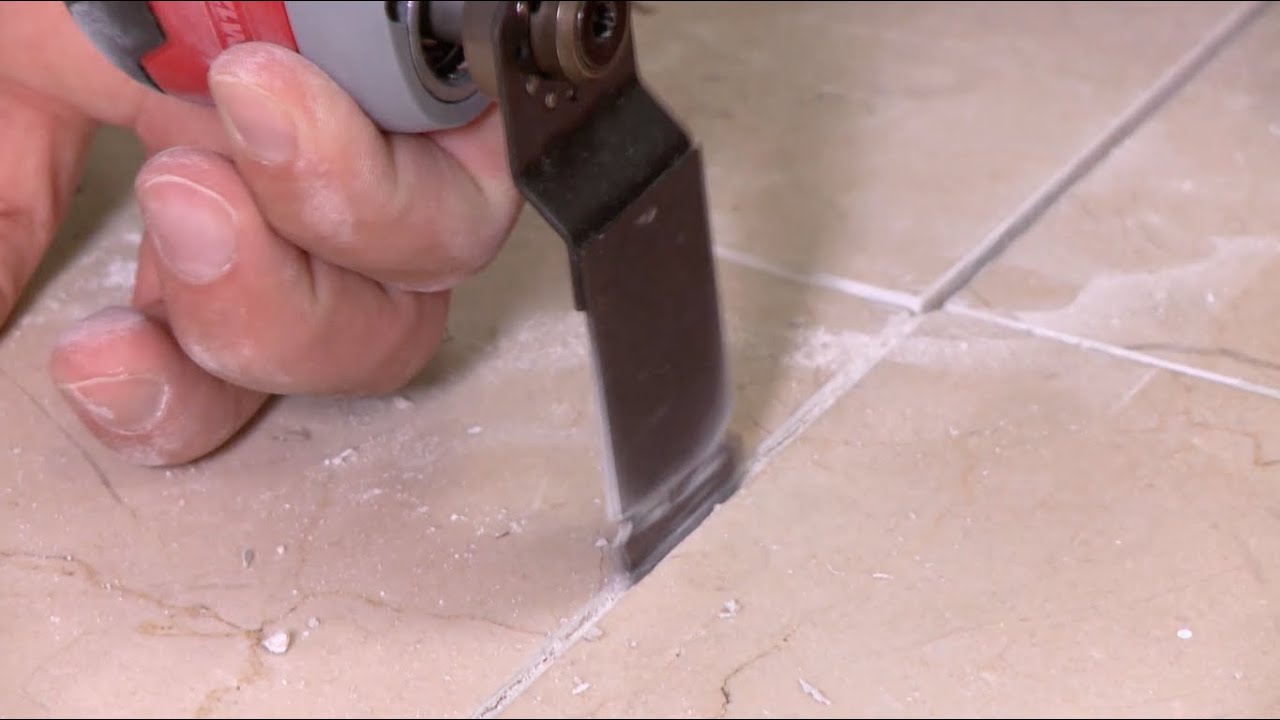
Now, about that grout saw. It’s not as intimidating as it sounds. Think of it as a tiny, very determined saw designed specifically for grout. It’s got a satisfying little rasping sound that’s oddly therapeutic. Or maybe I’m just weird. Either way, it’s your primary weapon against the old, yucky grout.
The utility knife? That’s for the stubborn bits. The tiny rebels that refuse to yield to the grout saw. It’s all about precision and a little bit of gentle persuasion. We're not trying to go all Hulk smash on your tiles, just neat and tidy removal.
Operation: Grout Eviction
This is the fun part, the physical exertion! Grab your grout saw and start carefully scraping out the old grout. Aim to get about half of the grout depth. Don't dig too deep, or you might disturb the tiles themselves. Nobody wants a wobbly tile situation. That’s a whole other can of worms.
Take your time. This isn't a race. Imagine you're a tiny archaeologist unearthing ancient secrets. Except the secret is… well, just old grout. But still, the principle is the same. Precision is key. You want clean edges so your new grout has a nice, fresh surface to adhere to.
Got a particularly stubborn patch? That’s where the utility knife comes in. Gently coax it out. It's like picking a very stubborn hangnail, but on a much grander scale. And probably less painful. Hopefully.
The Big Clean-Up: Dust Bunnies Beware!
Once you’ve evicted all the old grout, it’s time for the grand clean-up. This is crucial! You need a perfectly clean surface for your new grout to shine. Grab your stiff brush and a vacuum cleaner. Brush and vacuum away all that dusty debris. Get into every nook and cranny.
Then, you’ll want to wipe down the tiles and grout lines with a damp sponge. Rinse your sponge frequently! You want to remove any remaining dust and fine particles. Think of it as giving your floor a thorough rinse before its makeover. This step is super important for good adhesion. Don't skip it!
:max_bytes(150000):strip_icc()/How_to_Regrout_Ceramic_Tile_64434_08-63a0298cea2a47ba985a0a17ed65d278.jpg)
This might seem tedious, but trust me, it’s worth it. A clean canvas leads to a masterpiece. And your masterpiece is a fabulous, regrouted floor. High fives all around!
Mixing Up the Magic: Your New Grout!
Now for the exciting part: mixing the grout! This is where you get to choose your grout color. Do you want classic white? A dramatic dark hue? Or something in between? The possibilities are endless! It’s like picking out paint colors, but for your floor.
Follow the instructions on the grout packaging very carefully. Grout consistency is key. Too wet, and it’ll be a sloppy mess. Too dry, and it’ll be crumbly and hard to work with. You’re aiming for a peanut butter-like consistency. Thick enough to hold its shape, but spreadable.
Mix in small batches. Grout dries relatively quickly, and you don’t want it hardening in the bucket before you get a chance to use it. So, just mix what you think you can use in about 15-20 minutes. This is where the “play it by ear” approach really comes in handy.

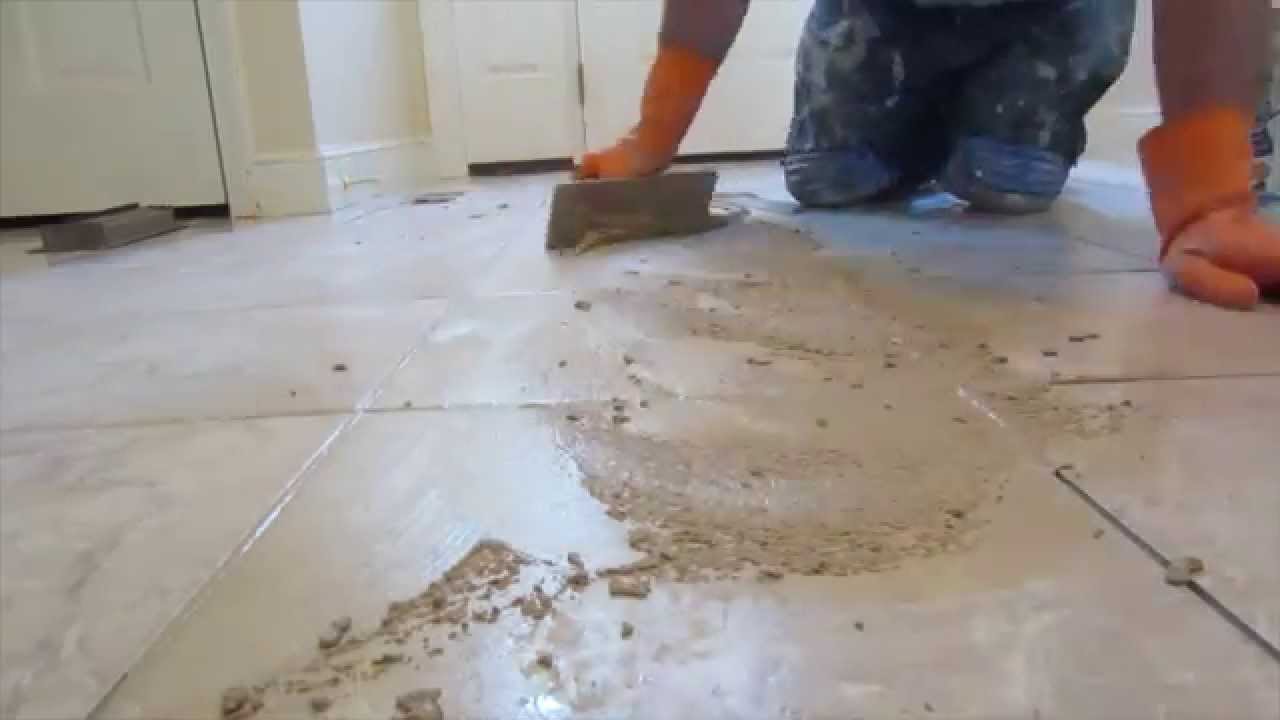
The Art of Grouting: Spreading the Love
Here comes the artistic part! Grab your putty knife or grout float. Scoop up some grout and start pressing it into the clean grout lines. Work in small sections. Angle your float to push the grout deep into the joints. You want to fill them completely, no air pockets allowed!
This is where you get to feel like a true craftsman. Smooth strokes, even pressure. Think of it as frosting a giant, tiled cake. A very sturdy cake. A cake you can walk on.
Don't worry if you get some grout on the tiles. That’s totally normal. We’ll clean that up later. The main goal right now is to get the grout into those empty spaces and make them look fantastic. It’s all part of the process!
The Initial Wipe-Down: The First Taste of Clean
Once you’ve filled a section, it’s time for the initial wipe-down. Grab a damp sponge (remember to rinse it often!) and gently wipe away the excess grout from the tile surfaces. Use light, circular motions. You’re not trying to remove all the grout from the lines, just the excess on the tiles.
This is where you start to see the magic happen. The tiles will start to look clean again, and the grout lines will be looking plump and proud. It’s a little bit of a balancing act. You want to clean the tiles without pulling grout out of the lines. It gets easier with practice!
The key here is to work efficiently. Don't let the grout dry on the tiles. The longer it sits, the harder it is to remove. So, keep that sponge handy!
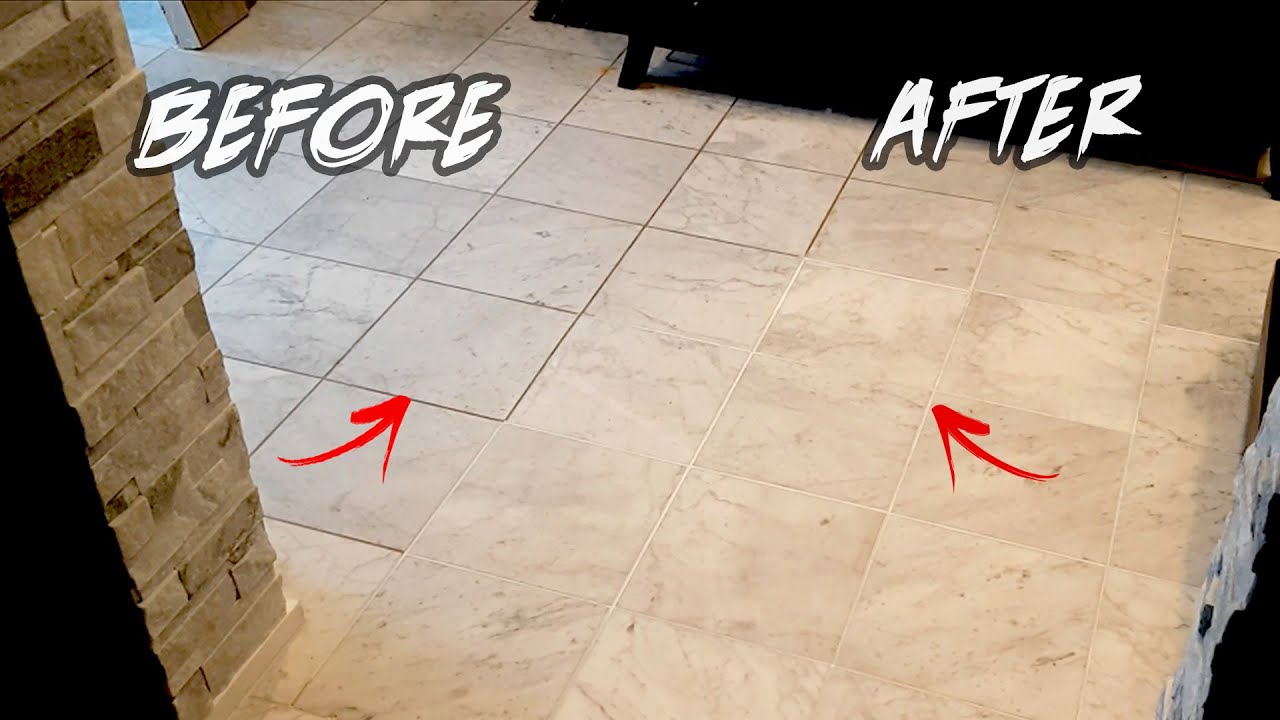
The Final Rinse and Shine: Behold Your Masterpiece!
After you’ve gone through your entire floor, it’s time for the final rinse. This is where you really buff it up. Use a clean sponge and fresh water. Wipe down the entire floor again, making sure to get all the remaining grout haze. You might need to do this a couple of times.
The goal is a clean, clear tile surface and beautifully filled grout lines. It’s like the grand unveiling! You'll be amazed at the difference. Your floor will look and feel brand new. Seriously, it’s one of the most satisfying DIY projects you can tackle.
And that’s it! You’ve successfully regrouted your tile floor. You’ve conquered the dust, tamed the grout, and emerged victorious. Go ahead, admire your handiwork. You deserve it. Now, go find some new floor decor because your floor just got a major upgrade. You’re basically a tile whisperer now.

