How To Put A Photo In Indesign
Hey there, fellow creatives and curious minds! Ever found yourself staring at a blank page, a beautiful photo tucked away in your camera roll, and just wishing you could magically plop it onto that page? Well, you're in the right place! Today, we're diving into the wonderful world of Adobe InDesign and tackling a super common, yet incredibly satisfying task: how to put a photo in InDesign. Don't worry, we're not going to get bogged down in jargon. Think of this as your friendly guide, like asking a neighbor for help with a tricky recipe.
Why should you even care about this, you ask? Well, imagine you're creating a family photo album that’s more than just a pile of prints. Or maybe you're designing a super cool flyer for your local bake sale. Or perhaps you’re whipping up a zine about your cat’s latest adventures. In all these scenarios, a killer photo can be the star of the show. It's what draws people in, tells a story, and makes your creation truly shine. Without photos, your cool ideas might just feel a little… flat. Like a pancake without syrup, you know?
So, let's get our hands dirty (virtually, of course!). The easiest way to get your precious pictures into InDesign is by using what we call "place." It's not like you're sacrificing your photo to the digital gods; it's simply a way to import it into your InDesign document. Think of it like opening the front door of your house and inviting your photo in for a visit.
Must Read
Here’s the super simple, step-by-step breakdown. Ready? Let’s go!
The Magic of "Place"
First things first, you need to have InDesign open and a document ready. It can be a brand new document or one you've already been tinkering with. Now, find your photo. Is it on your desktop? In a folder labeled "Awesome Pics"? Wherever it is, make sure you know where to find it. It's like knowing where you put your keys before you leave the house – essential!
Okay, now for the actual "placing." There are a couple of ways to do this, and both are pretty straightforward.

Option 1: The Menu Dive
This is your classic, tried-and-true method. You’ll head up to the "File" menu at the very top of your InDesign screen. See it? Good! Click on it, and a whole list of options will appear. Look for "Place...". It’s usually down a bit, not too hidden. Click on that.
A little window will pop up, and this is where you’ll navigate to find your photo. It’s like a digital treasure map! Once you’ve located your photo file (and hopefully you’ve named it something sensible, like "Fluffy_Nap_Time.jpg" rather than "IMG_7890.jpeg"), click on it to select it. Then, click the "Open" button.
Now, here’s the fun part. Your cursor will change! It might look like a little square or a tiny picture icon, depending on your InDesign settings. This is your photo waiting to be unleashed! Take that cursor and click where you want the top-left corner of your photo to be on your InDesign page. Voila! Your photo should appear.

Pro Tip: If you want your photo to be a specific size right from the get-go, you can drag your cursor after you click. So, instead of just a single click, click and hold, then drag to define the width and height you want for your photo. It’s like drawing a frame for your picture!
Option 2: The Drag-and-Drop Dash
This is for those who love a bit of speed and efficiency. Open up the folder on your computer where your photo is stored. Then, open up your InDesign document. Now, here’s the magic trick: simply click and drag your photo file directly from your folder and drop it onto your InDesign page. That’s it! It’s like teleporting your photo straight onto your layout.
This method also gives you control over the initial size. When you drag and drop, your cursor will change, and you can then click and drag on the InDesign page to set the dimensions before releasing. It’s a bit more visual and can feel really intuitive, especially if you’re used to working with files this way.
A Little Story: The Awkward Family Reunion Photo
Let's say you're designing a holiday card. You have this hilarious photo from last year's family reunion where Uncle Barry is wearing a truly questionable Santa hat. You want to put it in your card design. You find the photo, drag it into InDesign, and bam! it’s there. But, oh no, Uncle Barry’s hat is getting cut off because the photo is too big! Don't panic! This is where we can tweak things.
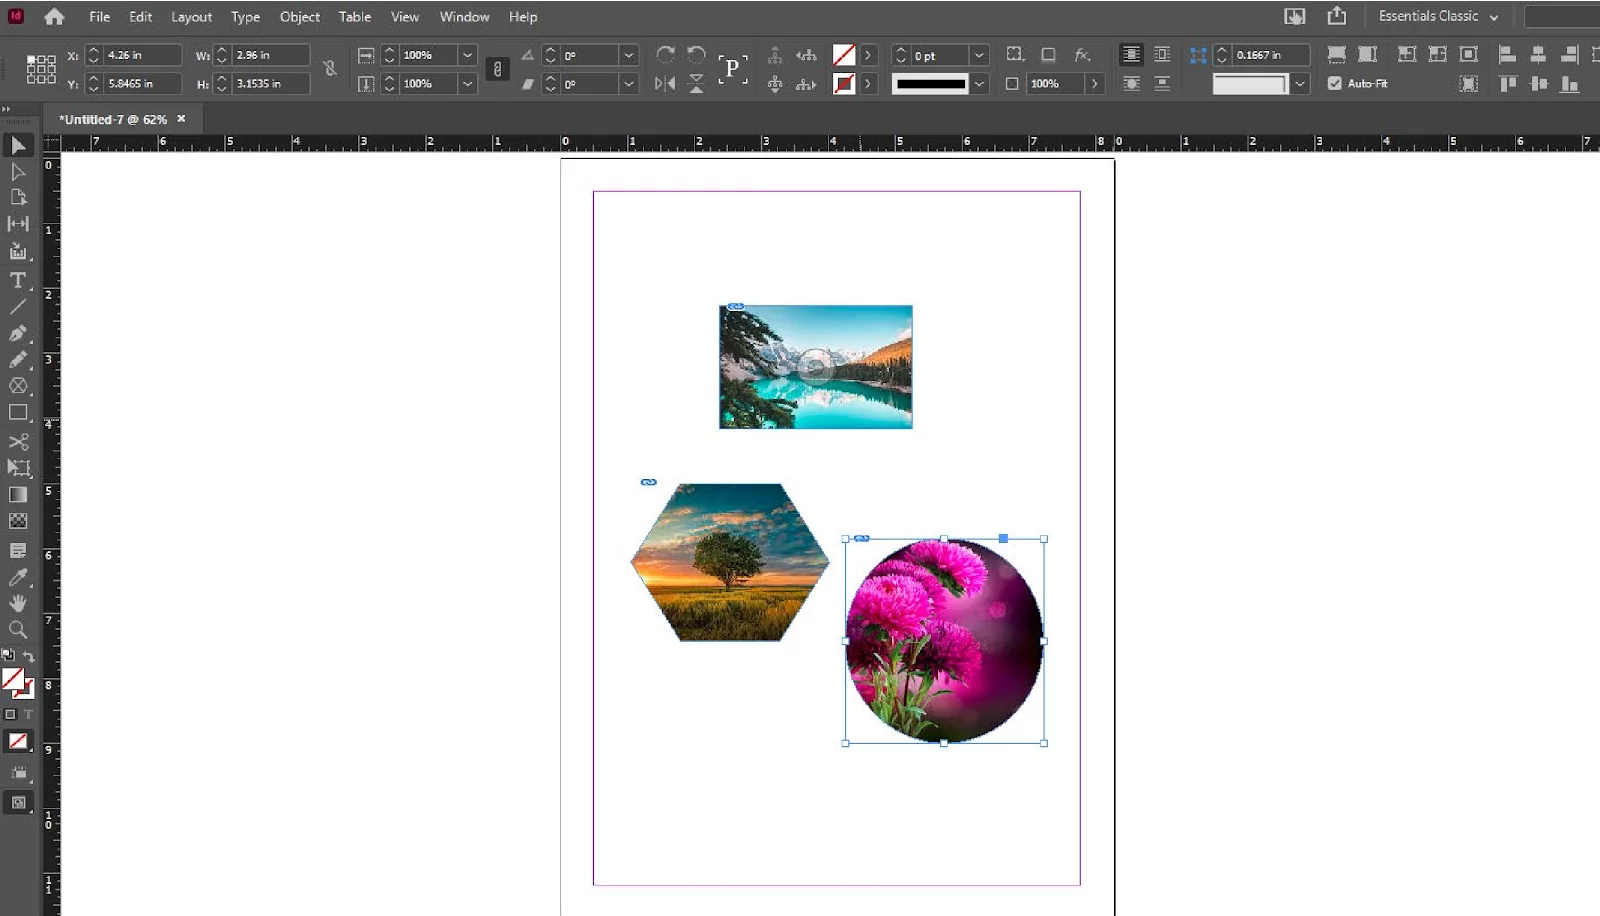
Taming Your Photo: Sizing and Fitting
Once your photo is in InDesign, it’s not set in stone. You can resize it, move it around, and even make sure it fits perfectly. Think of it like having a flexible picture frame. You can stretch it, shrink it, and reposition it until it looks just right.
Resizing with Ease
Select your photo by clicking on it. You’ll see a blue frame appear around it. Now, you’ll see little squares, or "handles," all around the edges and corners of this blue frame. To resize, just click and drag one of these handles. If you hold down the Shift key while dragging a corner handle, your photo will resize proportionally, meaning it won’t get all squished or stretched out of shape. This is like making sure your pancake doesn't turn into a weird oval shape – it stays a nice, round pancake!
Fitting Your Photo Just So
Sometimes, you want your photo to fill a specific space. InDesign has some nifty tools for this too. With your photo selected, head up to the "Object" menu. Look for "Fitting." Here you’ll find options like:

- "Fit Frame Proportionally": This is like saying, "Make my photo fit inside this box, but don't distort it." It’s great for ensuring your image looks natural.
- "Fill Frame Proportionally": This one is like, "Make my photo fill the entire box, even if it means cropping a little off the edges to make it fit perfectly." It’s good when you want no empty space.
- "Fit Content Proportionally": Similar to "Fit Frame Proportionally," but it focuses on the photo itself fitting into its container.
- "Fill Frame ( sesuai )": This option will stretch or squash your photo to perfectly fill the frame, no matter what. Use this one with caution, unless you're going for a deliberately distorted look!
You can also access these fitting options by right-clicking on your selected photo and going to "Fitting". It’s a quick way to adjust things without having to navigate through menus.
Why This Matters (Beyond Just Making Things Look Pretty)
Putting photos into InDesign isn't just about aesthetics; it's about communication. A well-placed, well-fitting photo can instantly convey emotion, illustrate a point, or make a dry subject much more engaging. Think about a travel brochure. A stunning image of a beach immediately makes you want to book a holiday, right? That's the power of a good photo in the right context.
InDesign gives you the control to make these visual elements work for you. You can create layouts that are both beautiful and impactful, whether you're a seasoned designer or just starting out. It’s about taking your ideas, your stories, your memories, and giving them the visual voice they deserve.
So, next time you have a fantastic photo that you want to share in a more polished way, remember the simple magic of the "Place" command. It’s your gateway to creating stunning layouts that will make people stop, look, and say, "Wow, that’s cool!" Happy designing!

