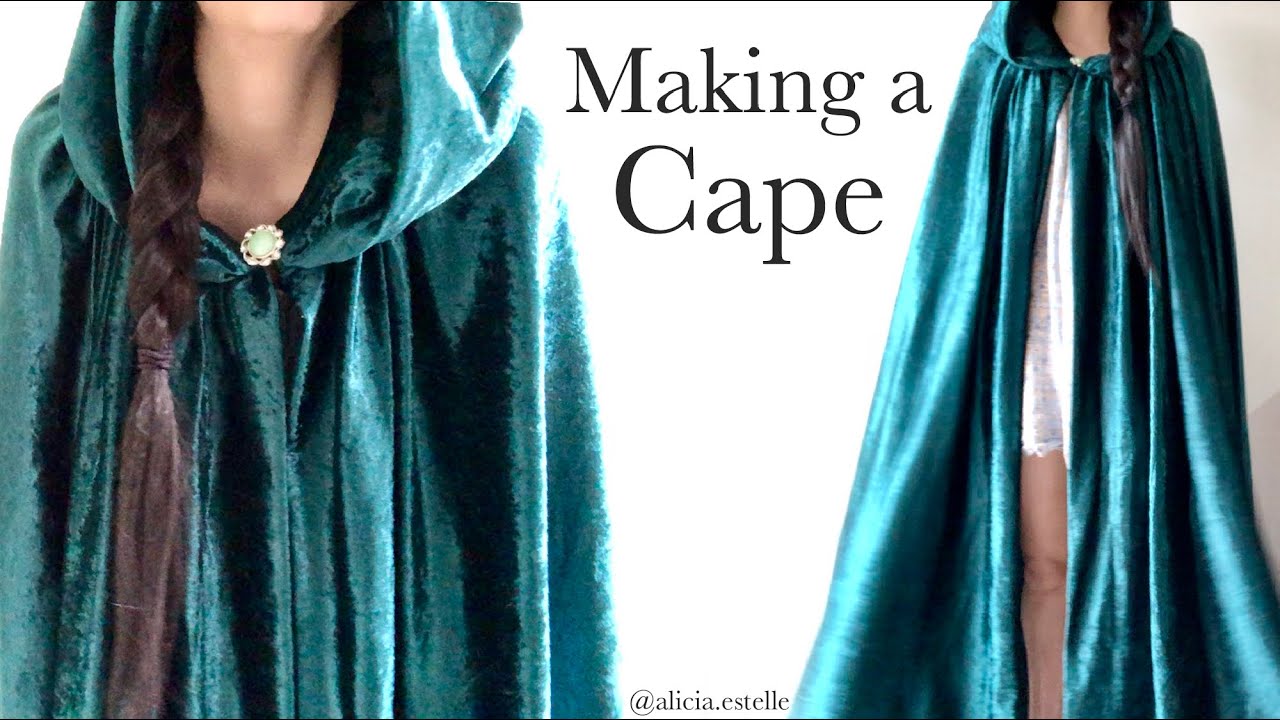
How To Make A Hood For A Cloak

Ever felt that little spark of magic when you imagine yourself draped in a flowing cloak? There's something so wonderfully dramatic about it, isn't there? And the best part? You can totally make your own cloak. It's not as tricky as it sounds!
Now, a cloak just isn't a proper cloak without a hood. It's like a hat for your cape, but way more mysterious. Think of all the fantastic characters who sport them! From wise wizards to sneaky rogues, the hood adds that perfect touch of intrigue.
So, let's dive into the fun world of making a hood for your cloak. It’s an adventure waiting to happen, and you’re the star of the show. Imagine the possibilities!
Must Read
The Joy of the Hood
Why is adding a hood so special? It's all about transformation. Suddenly, your cloak isn't just fabric; it's a shield from the world, a cozy nest, or a dramatic flourish for your grand entrance. It’s like giving your cloak a personality!
A good hood frames your face perfectly. It can hide your expressions or emphasize your eyes. It’s a powerful storytelling tool, all stitched together with simple steps. Plus, who doesn't love a bit of mystery?
Think about the feeling of pulling that hood up. It's a moment of quiet contemplation or a prelude to action. It adds that essential element of drama and fun to any cloak. You’re not just wearing a cloak; you’re embodying a character.
Getting Started: The Fun Stuff
The very first step is to gather your supplies. Don't worry, it's not like a science experiment. You'll need some fabric, of course. The type of fabric can really change the feel of your cloak. Think about what kind of vibe you're going for!
A nice, sturdy cotton is great for everyday adventures. For something more dramatic, maybe a bit of velvet or a faux suede would be amazing. The color choice is also super important. Deep blues, forest greens, or classic blacks are always popular. But what about a fiery red or a majestic purple?
You'll also need some scissors, a measuring tape, and some pins. Don't forget a needle and thread, or if you're lucky, a sewing machine! Even just a basic understanding of sewing is enough to get you going. It's all about the creativity.
Cutting Out the Shape
Now for the exciting part: cutting! You'll need to make a pattern for your hood. Don't let that word scare you. It's just a shape on paper to guide your cutting.
A simple hood shape looks a bit like a rounded triangle or a curved rectangle. Imagine the top of your head and then the sides that will drape down. You want it to be big enough to cover your head comfortably.
There are tons of free patterns online if you're feeling unsure. Just search for "cloak hood pattern." You can print these out, cut them, and trace them onto your fabric. It’s like a grown-up craft project!
The Fabric Fold Magic
Most hood patterns are designed to be cut on a fold of fabric. This means you fold your fabric in half. Then, you place the straight edge of your pattern piece along that fold. This creates a seamless hood without a side seam!

It’s a neat trick that makes things a little easier. You’ll want to pin your pattern piece to the fabric to keep it from shifting. This is crucial for accurate cutting. No one wants a wonky hood!
Once it's pinned, carefully cut around the outside edge of your pattern. Take your time. This is where precision leads to a beautiful finished product. Imagine your perfectly cut hood piece.
Sewing it Together
With your fabric cut, it’s time to start sewing. The simplest hood has just one main seam down the back. Remember that fold you cut on? You'll be sewing the two raw edges together.
Turn your fabric piece inside out. This way, your seam will be on the inside, hidden from view. Line up the raw edges as neatly as possible. The straighter you can get them, the better your hood will look.
Now, stitch along that edge. You can use a sewing machine for a quick and strong seam, or a needle and thread for a more traditional feel. A simple running stitch or a backstitch will work perfectly. Just keep your stitches relatively even.
Finishing the Edges
You've got a basic hood shape now! But the edges might look a little… raw. We need to tidy them up. This is where finishing touches come in.

The most common way to finish the edge that goes around your face is to fold it over twice. This is called a "hem." Fold it about half an inch, then fold it again. This creates a neat, double-folded edge that won't fray.
Pin this hem in place all the way around. Then, stitch it down. You can do this by hand or with your sewing machine. This is what gives your hood a clean, professional look. It’s the difference between a good cloak and a great cloak!
Attaching it to the Cloak
This is where your hood really becomes part of the cloak. You need to attach the finished hood to the neckline of your cloak. This sounds daunting, but it’s easier than you think.
First, find the center back of your hood. This will align with the center back of your cloak's neckline. You'll also need to find the center front of your hood, where it meets your face. This will align with the front of your cloak's neckline.
Now, pin your hood to the cloak's neckline. Start by matching those center points. Then, work your way around, pinning as you go. You'll likely have to ease the fabric a little to make it fit smoothly. It's like a gentle puzzle.

The Grand Stitching Finale
Once your hood is all pinned to the neckline, it's time for the final stitch. You'll be sewing the hood to the cloak all the way around the neckline.
Again, you can use a sewing machine for a strong and fast attachment. Or, a sturdy hand stitch will do the job beautifully. Make sure your stitches catch both the hood's edge and the cloak's neckline.
Take your time and try to make your stitches neat and even. This seam will be visible, so it's worth a little extra care. When you're done, trim any loose threads, and step back to admire your work!
The Magic Unfolds
And there you have it! Your very own cloak with a magnificent hood. It’s ready for all sorts of adventures, real or imagined. The world is your oyster!
Imagine the satisfaction of wearing something you made with your own hands. It's a tangible piece of your creativity. It’s a wearable story.
So, go ahead and embrace the enchantment. Don your cloak, pull up your brand-new hood, and step out into the world. The possibilities are as boundless as your imagination!

