How To Make A Crown Of Paper

Ever feel the sudden urge to be royalty? Maybe for a costume party, a pretend play adventure with the kids, or just to add a touch of regal flair to your day? Well, you’re in luck! Crafting your very own crown of paper is a surprisingly simple, delightfully fun, and wonderfully rewarding activity. It’s not just for kings and queens anymore; anyone can create a dazzling headpiece with just a few common household items. Forget expensive tiaras and elaborate costumes, a paper crown is the ultimate DIY accessory that sparks imagination and brings a smile to your face.
The beauty of making a paper crown lies in its accessibility and versatility. It’s a fantastic project for all ages, from tiny tots who love to get crafty to adults looking for a creative outlet. For children, it’s an instant ticket to a world of imaginative play. Suddenly, they’re not just playing; they’re leading a kingdom, defending a castle, or hosting a royal ball. For grown-ups, it can be a playful nod to a special occasion, a quirky addition to a themed event, or even a stress-relieving way to unwind. Plus, think of the photo opportunities! A homemade paper crown is guaranteed to add a whimsical and memorable touch to any gathering.
Beyond the sheer fun, there are some fantastic benefits to this papercraft endeavor. Firstly, it’s incredibly economical. You likely have all the materials you need right at home. A few sheets of paper, some scissors, and a bit of adhesive – that’s it! This makes it a perfect project for when you want to do something creative without breaking the bank. Secondly, it’s a wonderful way to encourage creativity and fine motor skills. Cutting, folding, and decorating the crown provides a hands-on experience that’s both engaging and beneficial, especially for younger crafters. It’s also a fantastic opportunity to teach basic shapes and patterns.
Must Read
Furthermore, making a paper crown is an exercise in personalization. No two crowns need to be alike! You can choose your paper, your colors, your embellishments, and your design. Want a classic king’s crown with sharp points? Or a delicate fairy queen’s tiara with flowing curves? The possibilities are endless. This ability to customize makes each paper crown a unique expression of the maker’s personality and vision. It’s a chance to experiment with patterns, textures, and colors, and to truly make something your own. It’s also a great way to use up scrap paper, giving a new life to old magazines, wrapping paper, or construction paper scraps.
The Grand Design: Simple Steps to Your Paper Kingdom
Now, let’s get to the exciting part: building your regal headwear! Don’t worry, this isn’t rocket science; it’s papercraft magic. We’ll walk through a straightforward method that’s easy to follow, allowing you to be crowned in glory in no time.

First things first, gather your royal supplies. You’ll need:
- A sheet (or two!) of sturdy paper. Cardstock or construction paper works beautifully for a more durable crown.
- Scissors – sharp ones will make cutting easier!
- Glue or tape. Glue sticks are great for kids, while clear tape can be a quick and easy option.
- Optional, but highly encouraged: Decorations! Think markers, crayons, glitter, stickers, jewels, feathers, or even bits of fabric.
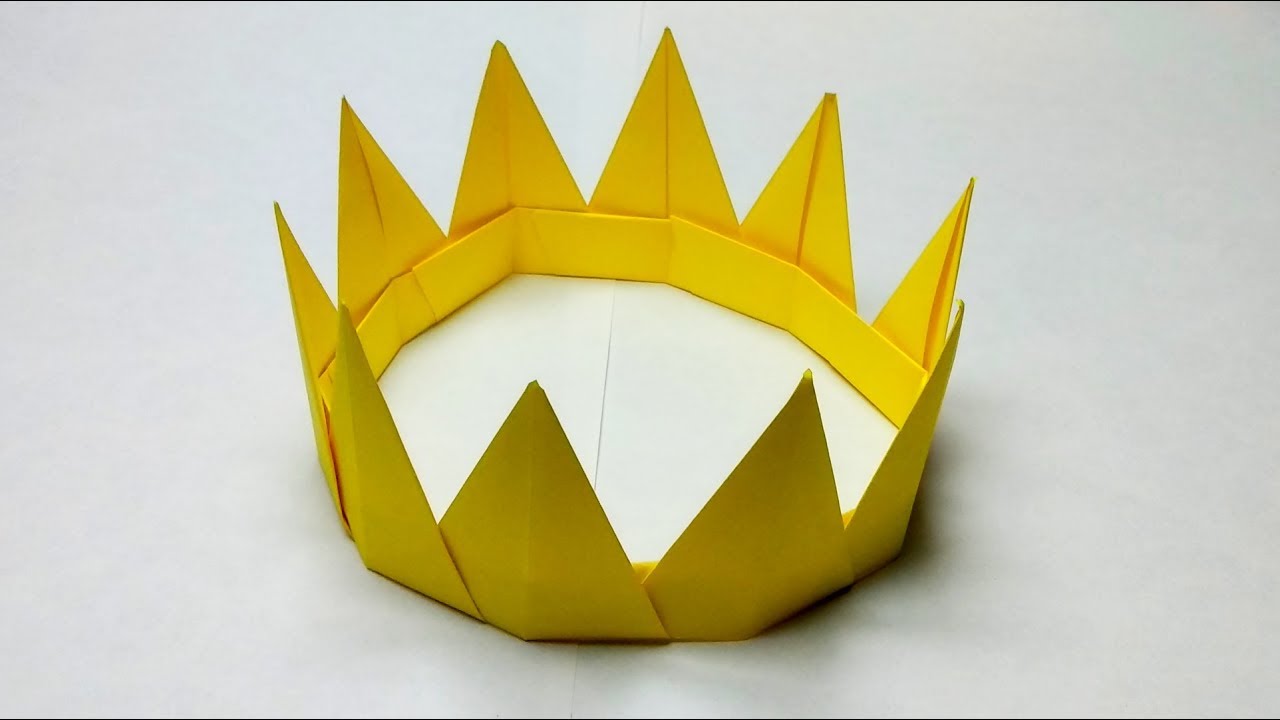
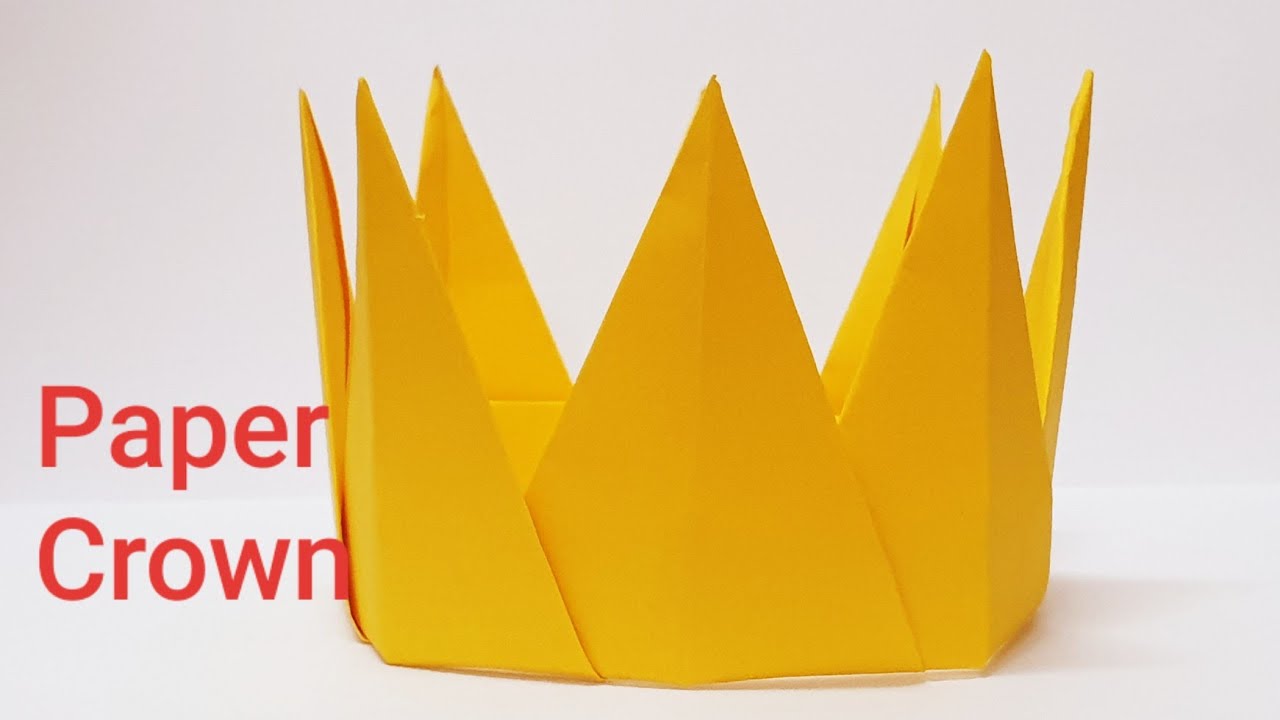
Let’s begin with the base of your crown. Take your sheet of paper and measure it around the head of the intended wearer. You want it to be snug but not too tight. You can also estimate by holding it up to their head. Once you have the right length, cut a strip of paper that’s wide enough to be the main band of your crown. The width will determine the height of your crown, so consider whether you want a tall, majestic piece or a more modest band. A good starting width might be around 3-4 inches.
Now, it’s time to shape your royal headpiece. You have a couple of options here. The simplest is to just use your rectangular strip as is, creating a sort of circlet. However, for that classic pointed crown look, you’ll want to create the signature peaks. One popular and easy method is to fold your paper strip in half lengthwise. Then, starting from one end, make a series of cuts at an angle towards the fold, creating triangular points. Don't cut all the way to the fold; leave a solid edge to maintain the integrity of the crown. You can also experiment with different shapes for your points – curved points, rounded tops, or even more elaborate cutouts. For a more advanced design, you can cut individual points and then glue them onto a base band.
Once your basic shape is cut, it’s time to assemble. If you’ve made a single strip, simply overlap the ends slightly and secure them with glue or tape to form a circle. Make sure the glue or tape is on the inside so it’s not visible from the outside. If you’ve cut individual points, you’ll glue these onto the top edge of your base band, spacing them evenly. Be patient as the glue dries, especially if you’re using liquid glue.
The Royal Embellishments: Adding Sparkle and Style
This is where the real magic happens! Your crown is now a blank canvas ready for your artistic touch. Unleash your inner designer and decorate away!
For a truly regal look, consider these ideas:
- Color and Pattern: Use markers, crayons, or colored pencils to add vibrant colors and intricate patterns. You can draw faux jewels, swirling designs, or even tiny royal crests.
- Sparkle and Shine: Glitter is a classic for a reason! Apply glue in lines or patterns and sprinkle glitter generously. Glitter glue is also a less messy option.
- Dimensional Details: Glue on actual craft jewels, sequins, or beads for a touch of sparkle that catches the light. Googly eyes can add a fun, whimsical touch if you’re going for a silly crown.
- Nature’s Touch: Attach small feathers, leaves, or even tiny pressed flowers for an enchanted forest queen vibe.
- Textural Treasures: Glue on pieces of ribbon, lace, or even small scraps of fabric to add interesting textures and layers.
Don’t be afraid to mix and match techniques. A crown with glitter accents, painted patterns, and a few strategically placed jewels can be truly spectacular. Remember to let any glue or paint dry completely before you put on your masterpiece.
So there you have it! With a little paper, some scissors, and a dash of imagination, you can create a crown that’s fit for any occasion. Whether you’re crowning yourself monarch of the living room or bestowing honors upon a little prince or princess, your homemade paper crown is sure to bring joy and a touch of enchantment. So, grab those supplies and let the royal crafting commence!