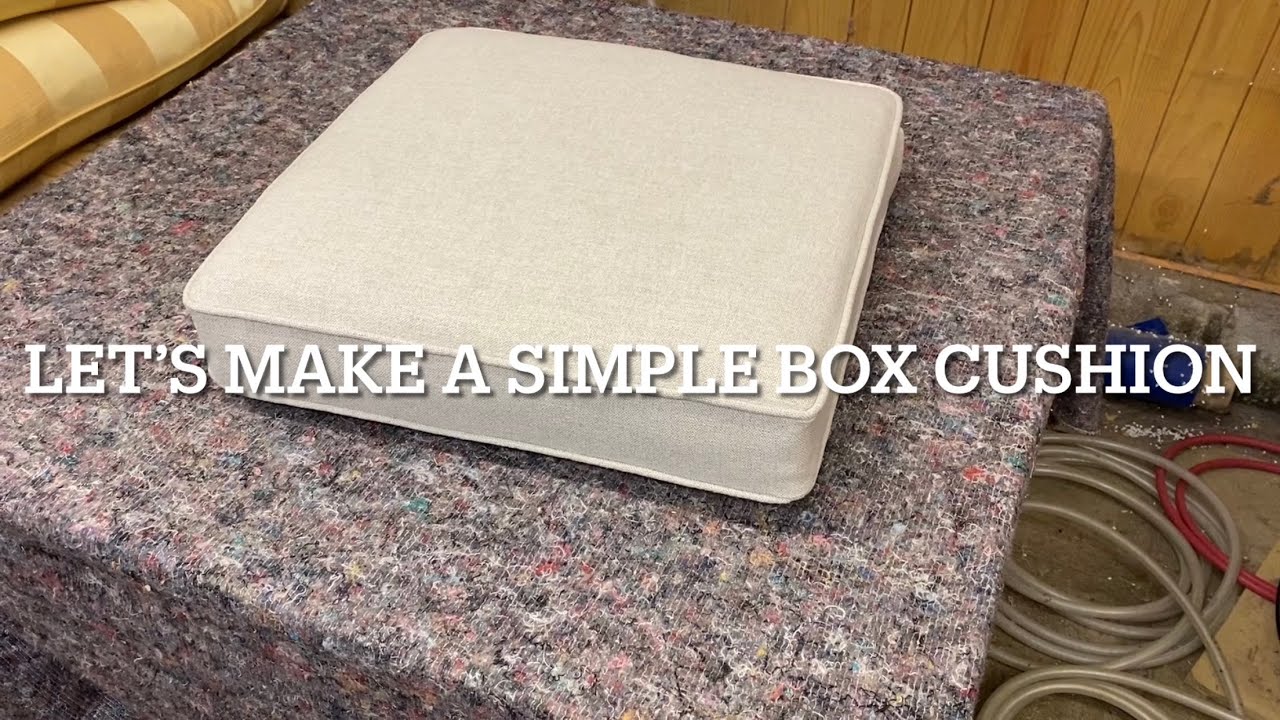
How To Make A Box Cushion Cover

I swear, the universe has a funny way of telling you what you really need. Just last week, I was staring at my living room sofa, a perfectly functional but frankly rather drab piece of furniture, and then BAM! A rogue squirrel, clearly having a mid-life crisis, decided my prized antique china teacup collection was the perfect place for a daring acrobatic display. Needless to say, a shattered teacup and a rather flustered squirrel later, I was left with a rather conspicuous chip on my favourite cushion. And that, my friends, is how I found myself embarking on a mission: to create a brand new, fabulous, and hopefully squirrel-proof cover for my sad, chipped box cushion.
You know those moments? When a small imperfection suddenly becomes the only thing you can see? That’s where I was. And while a professional upholsterer might have been the sensible route, where’s the fun in that? Plus, I’ve always been a bit of a “give it a go” kind of person. So, armed with a newfound determination and a suspiciously large pile of fabric samples I’d been hoarding for ages, I decided it was time to conquer the humble box cushion cover.
Now, before you click away thinking this is going to be a super complicated, sewing-machine-intensive ordeal that requires a degree in textile engineering, let me assure you: it doesn't have to be! We’re going for a “chic but achievable” vibe here. Think of it as a creative afternoon project that results in something genuinely useful and, dare I say, rather stylish.
Must Read
Let’s Talk Fabric: The Secret Weapon of Cushion Chic
First things first: fabric. This is where you can really let your personality shine. For a box cushion, you want something that’s got a bit of body to it. Think sturdy cottons, linens, even a bit of upholstery-grade velvet if you’re feeling fancy. Avoid anything too flimsy, like thin silks, unless you're going for a very specific, ephemeral look. But for a cushion that’s going to get sat on (or, you know, used as a launching pad by bushy-tailed intruders), you need durability.
I’m a sucker for a good geometric print. It’s classic, it’s modern, and it hides a multitude of sins – like the occasional rogue crumb or a faint tea stain. But don't be afraid to go bold! A vibrant floral, a sophisticated stripe, or even a textured plain can completely transform a tired cushion. Consider the existing décor of your room. Do you want something that pops, or something that blends seamlessly? This is your chance to play designer, so have fun with it!
Pro tip: If you're new to sewing, pre-washed cotton is your best friend. It's easy to work with, forgiving, and less likely to shrink unexpectedly after your masterpiece is complete. Nobody wants a cushion cover that looks like it’s been through a mini-shrink ray, right?
Gathering Your Arsenal: What You’ll Need
Okay, so you’ve picked your dream fabric. Excellent! Now let’s talk about the tools of the trade. Don't worry, it's not a daunting list.
- Your Cushion: Obviously! Measure it carefully. Width, length, and most importantly, the height (or depth). This is crucial for getting the dimensions right.
- Your Fabric: Enough to cover all sides, plus a bit extra for seams and finishing. I’ll walk you through the calculations in a sec.
- Matching Thread: Nothing too fancy needed here. Just a good quality polyester thread that matches your fabric.
- Sewing Machine: While hand-sewing is possible, a machine will make this project infinitely easier and faster. Trust me on this.
- Sharp Scissors: Fabric scissors are a must. Don’t even think about using your kitchen scissors on good fabric. They’ll thank you later.
- Measuring Tape or Ruler: For those all-important measurements.
- Fabric Marker or Chalk: To mark your cutting lines. A washable fabric marker is ideal.
- Pins: Lots of pins! They’re your best friend for holding everything in place before you sew.
- Iron and Ironing Board: For pressing seams. This step is non-negotiable for a professional finish. Seriously, don't skip the ironing. It makes such a difference.
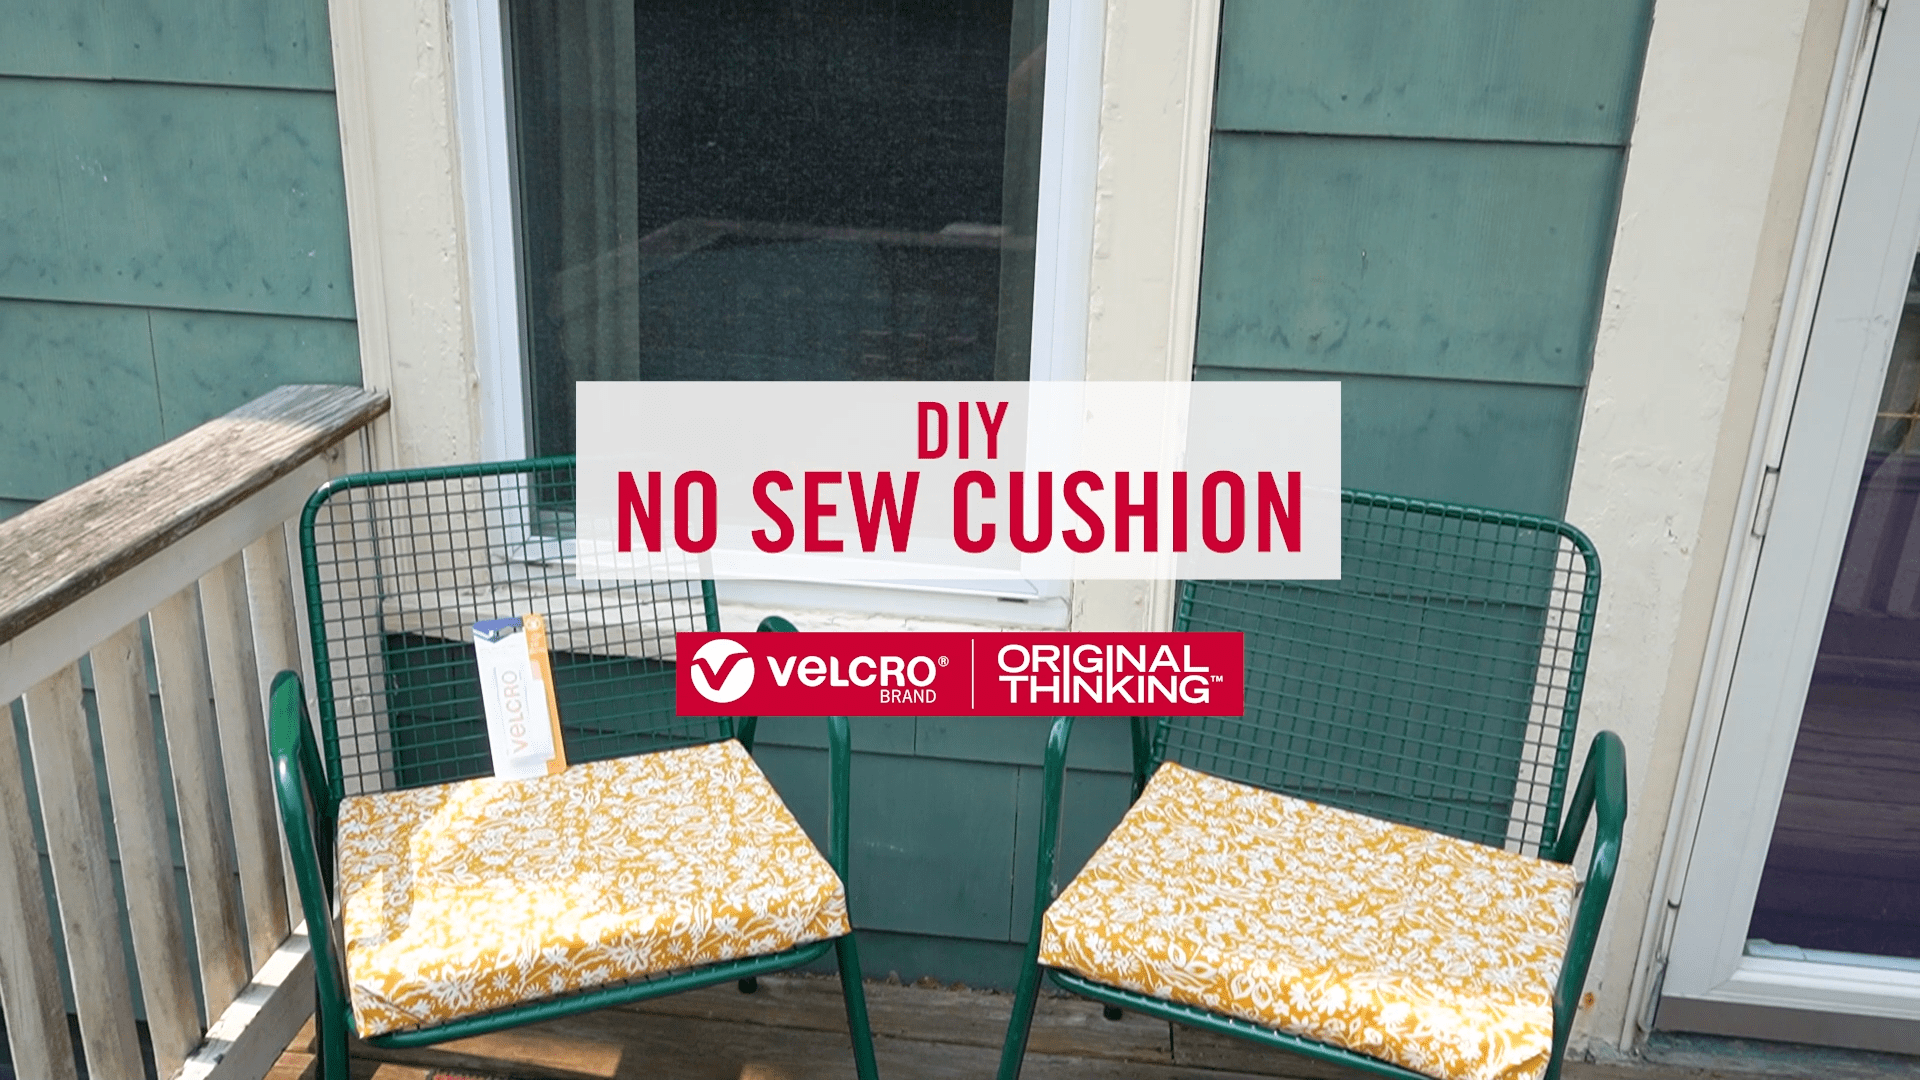
- Optional: Zipper or Buttons: If you want a removable cover that's easy to wash. I'm going to show you the envelope closure method, which is super simple and doesn't require a zipper.
The Nitty-Gritty: Measuring and Cutting
This is where precision is your pal. Grab that measuring tape and get ready to do some serious measuring. Let's break down your cushion into its components: the top, the bottom, and the four sides.
Top and Bottom Panels: These are simple squares or rectangles. Measure the width and length of your cushion. Add 1 inch to each measurement for seam allowance (this is half an inch on each side). So, if your cushion is 20 inches by 20 inches, you’ll cut two pieces that are 21 inches by 21 inches.
Side Panels: This is where the “box” part comes in. The width of each side panel will be the height of your cushion. Again, add 1 inch for seam allowance. So, if your cushion is 4 inches high, each side panel will be 5 inches wide. The length of these side panels will be the same as the width of your cushion, plus 1 inch for seam allowance. So, for a 20-inch wide cushion, each side panel will be 21 inches long.
The Envelope Closure (for a no-fuss closure): This is where we make one side panel a bit longer to create an overlap. Instead of cutting all four side panels the same length (21 inches in our example), you'll cut two panels at 21 inches. For the other two panels, you’ll add an extra 6 inches to the length to create the overlap. So, these two panels will be 27 inches long (21 inches + 6 inches overlap).
Confused? Let’s recap with our 20x20x4 inch cushion example:
- Top: 21 x 21 inches
- Bottom: 21 x 21 inches
- Sides (x2): 21 inches long x 5 inches wide (remember, the width is the cushion height + seam allowance)
- Sides (x2, for envelope): 27 inches long x 5 inches wide
Double-check your measurements before you cut! I always find it helpful to sketch it out on a piece of scrap paper. It's like drawing a treasure map, but for fabric.
Once you've measured, carefully lay your fabric flat and use your fabric marker and ruler to draw out all your pieces. Then, with your sharp fabric scissors, cut them out. Take your time. Jagged edges are not your friend here.
Sewing It All Together: The Magic Happens
Alright, the moment of truth! Time to bring these fabric pieces to life. If you're using a sewing machine, thread it with your matching thread and set it to a straight stitch. If you’re hand-sewing, a backstitch will be your most durable option. Remember to use a doubled thread for extra strength.
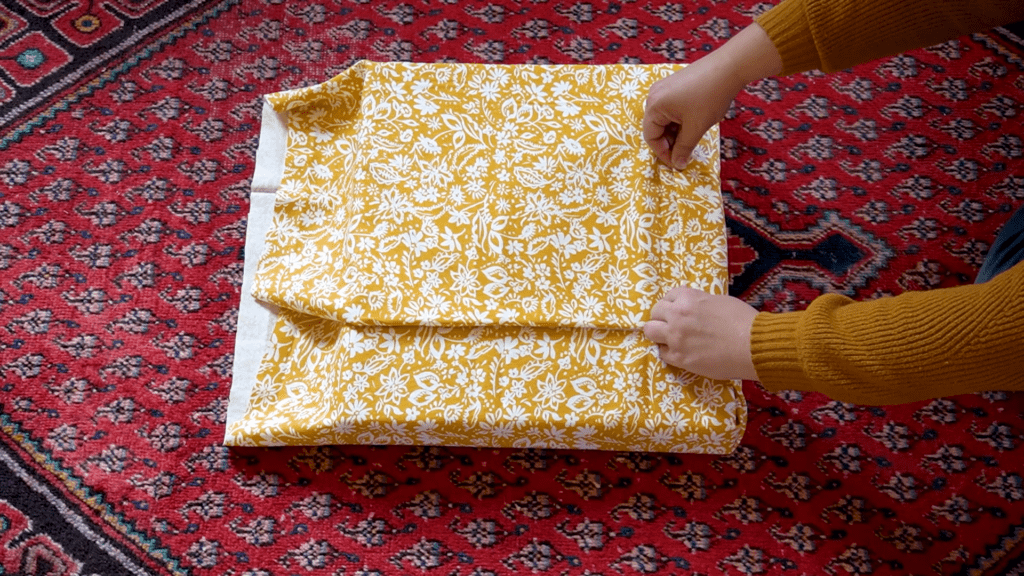
Step 1: Prepare the Envelope Panels
Take those two longer side panels (the 27-inch ones). On one of the long edges of each panel, fold over about half an inch of fabric towards the wrong side. Press it flat with your iron. Then, fold it over again by another half an inch, so the raw edge is completely enclosed. Press this double fold firmly. This creates a nice, clean hem for your envelope opening. Now, sew along the folded edge, close to the inner fold. Do this for both of these longer panels.
Step 2: Sew the Sides to the Bottom Panel
Lay your bottom panel flat, right side up. Take one of your shorter side panels (21 inches long). Align its raw edge with one of the raw edges of the bottom panel, right sides together. The folded hem of the side panel should be facing upwards. Pin them securely in place. Repeat this with the other two side panels (one short, two long with the hemmed edge at the top) around the remaining three edges of the bottom panel. You should now have a U-shape with the open top.
Now, sew along all the pinned edges with your chosen stitch, maintaining a 1/2 inch seam allowance. Use your iron to press these seams open (or to one side, if that’s easier). This is starting to look like something, isn't it?
Step 3: Attach the Top Panel

Take your top panel. Place it right side down onto the U-shaped structure you just created. Align the raw edges of the top panel with the raw edges of the side panels. Pin them securely all the way around. Make sure the corners are aligned nicely.
Now, this is where we sew up the final three sides. Sew along the pinned edges with your 1/2 inch seam allowance. However, on the two sides where your envelope overlap is, you only want to sew up to where the overlap starts. This will allow your envelope to open and close. Think of it as leaving a gap for the magic to happen!
When you get to the corners, it’s a good idea to reinforce them. You can do this by backstitching a few times at the corner, or by snipping a tiny triangle out of the seam allowance at each corner (but be careful not to cut into your stitching!). This helps to reduce bulk and make the corners lie flat.
Step 4: The Moment of Truth – Turning and Stuffing!
Carefully turn your cushion cover right side out. Poke out the corners gently with your finger or a blunt object (like the eraser end of a pencil). Give it a good press with your iron. You should now have a lovely, complete box cushion cover!
Now, grab your (slightly chipped, in my case) cushion insert. Carefully slide it into your new cover. Admire your handiwork. Doesn’t it look fabulous? You’ve done it!

Extra Touches and Troubleshooting
Zipper: If you’re feeling brave and want a zip closure, you’ll need to adapt the side panel measurements. You’ll also need a zipper that’s slightly longer than the width of your cushion. There are tons of tutorials online for inserting zippers into cushion covers – it’s a bit more fiddly, but the result is very professional.
Buttons: For a simpler button closure, you can create buttonholes on one of the envelope flaps and sew buttons onto the other. Again, tutorials are your friend here!
Piping: Want to add a touch of real luxury? Piping around the edges can elevate your cushion cover to something truly designer. This involves making or buying bias tape and sewing it into the seams. It’s a more advanced technique, but absolutely worth learning if you want that extra pizzazz.
Uneven Seams: If your seams are a bit wobbly, don't despair! A good press with the iron can often hide minor imperfections. For a truly wonky seam, you can always unpick and re-sew. It's all part of the learning process!
Fabric Shrinking: This is why pre-washing is so important! If you’ve forgotten and your cover feels a bit snug after washing, all is not lost. You might be able to gently stretch it out while it’s damp, or consider it a very snug, ‘fitted’ look.
Making a box cushion cover might seem a little daunting at first, but honestly, it’s one of the most rewarding DIY projects you can tackle. It’s practical, it’s creative, and it gives you an instant room refresh. So, next time you’re faced with a chipped teacup incident or a sudden urge to update your décor, remember this little guide. You’ve got this! Now go forth and sew!