How To Insert A Footer In Excel
Ever looked at a nicely printed spreadsheet and wondered how they got that cool information at the bottom of every single page? Well, wonder no more! Adding a footer to your Excel sheets is not just a fancy trick; it's a simple yet powerful way to make your documents look professional and incredibly helpful. Think of it as giving your spreadsheets a personal touch, a secret handshake that pops up on every page you print. It’s surprisingly easy, and once you know how, you'll find yourself using it all the time!
So, what exactly is a footer, and why should you care? In Excel, a footer is text or graphics that appears at the bottom margin of every printed page. It’s a fantastic tool for adding crucial details that you want to be consistently visible. For beginners, it's a great way to brand your work – maybe add your name or the company you're working for. For families using Excel for budgets or event planning, a footer could include the date it was last updated or a fun family motto. Hobbyists, like those tracking collections or planning projects, can use footers to note the version number of their spreadsheet or a reminder about the source of their data. It’s all about making your information clearer and easier to manage.
The beauty of Excel footers is their versatility. You can put almost anything in there! Imagine printing out a recipe collection; you could have "Page X of Y" at the bottom of each page, so you always know where you are in your culinary adventures. Or for your personal finance sheets, a footer could display the current date and time automatically, so you have a clear record of when you last reviewed your spending. You could even include a small company logo or a specific project code to keep things organized, especially if you're working with multiple files. It's like having a tiny, consistent assistant for your printouts!
Must Read
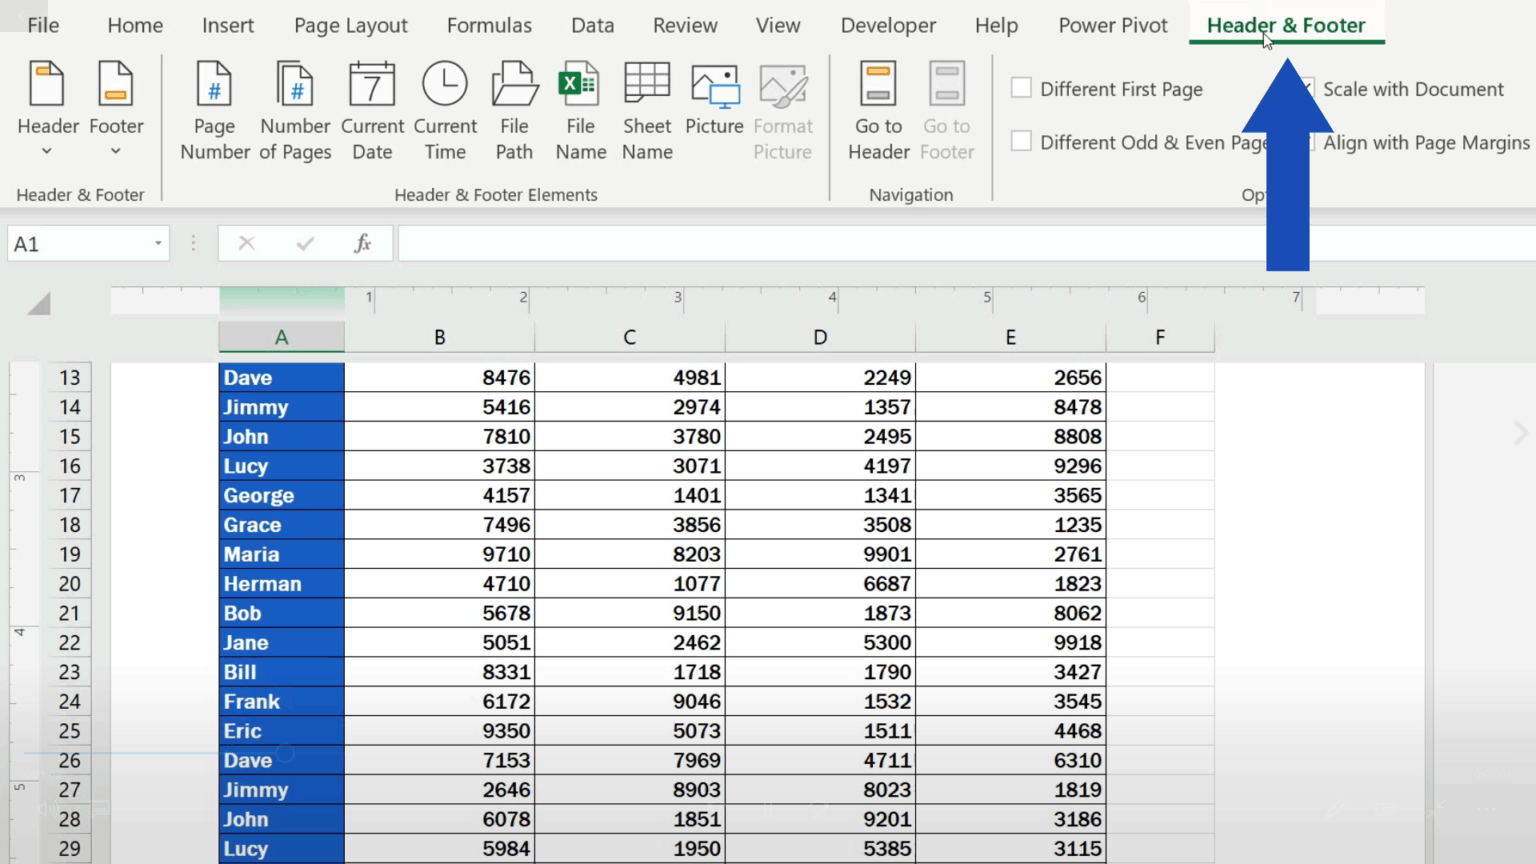
Getting started is a breeze. The most straightforward way is through the Page Layout tab. Simply click on the tab, and you'll see options for setting margins, orientation, and size. Look for the little arrow in the bottom right corner of the "Page Setup" group – click that! This opens up a larger dialog box. Navigate to the "Header/Footer" tab. Here, you'll see options for "Custom Footer." Click it, and you'll find a selection of common fields you can insert, like page numbers, dates, file names, and sheet names. You can also type in your own text. For instance, if you want "Confidential - Do Not Distribute" at the bottom, just type it into one of the left, center, or right section boxes. It’s that simple!

Don't be afraid to experiment with the different options. You can combine pre-set codes with your own text. For example, you could have "Page " followed by the page number code, and then " of [Total Pages]" to create a beautiful "Page X of Y" display. Remember to preview your print to see how your footer looks on the page. This is the best way to catch any alignment issues or typos. Taking a few extra minutes to set up a footer can significantly elevate the professionalism and usability of your Excel documents.
So, go ahead and give it a try! Adding a footer is a small step that makes a big difference. It’s a practical skill that adds a touch of polish and organization, making your spreadsheets not just functional, but also a pleasure to look at and use. Enjoy making your documents work a little harder for you!