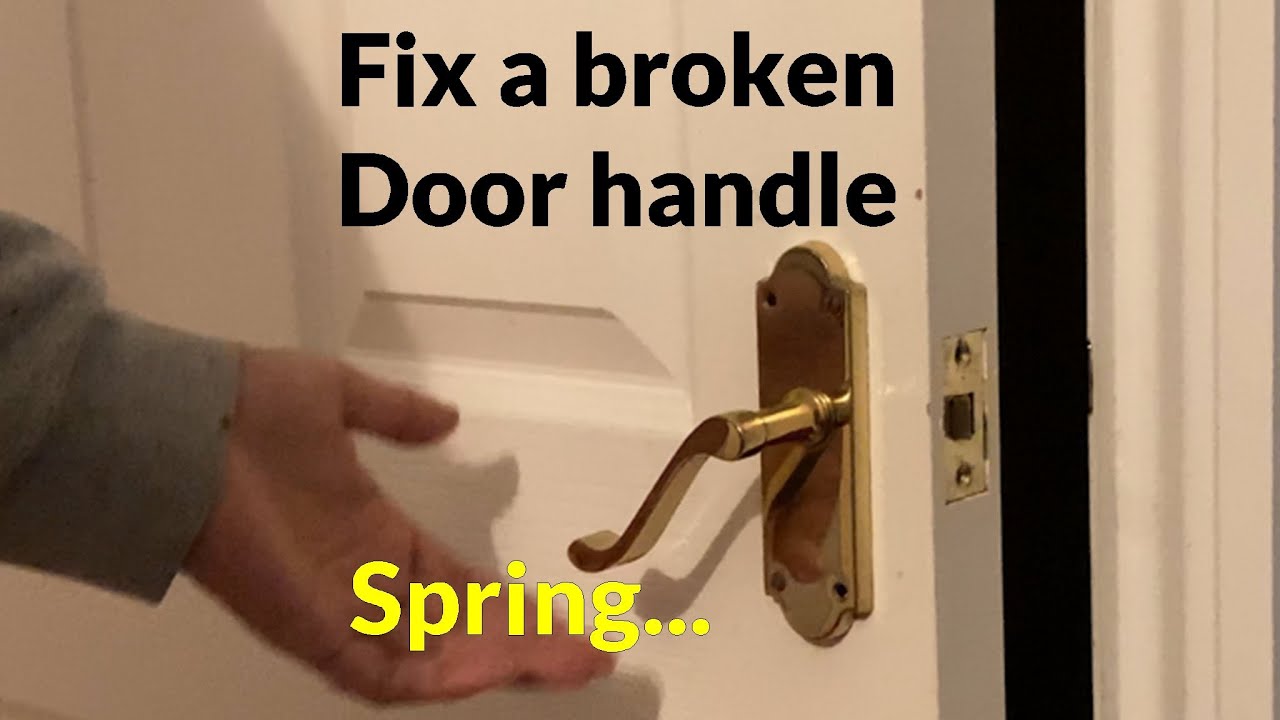
How To Fix A Door Handle Spring

So, your door handle’s acting all sorts of wonky, huh? You know, the kind where it’s all loosey-goosey, or maybe it just springs back with the enthusiasm of a sloth on vacation? Yeah, I’ve been there. It’s one of those little home annoyances that can really drive you up the wall. You’re fumbling for your keys, the handle just flops around, and you’re left thinking, “Seriously, universe? Is this my Tuesday?” Well, guess what? It’s probably just a sad, broken door handle spring. But hey, before you call in the cavalry or, you know, throw the whole door out the window (tempting, I know), let’s see if we can fix this little guy ourselves. It’s not as scary as it sounds, promise!
Think of your door handle spring like the unsung hero of your doorknob. It’s the invisible force that makes that satisfying thwack happen when you turn the handle, and the reason it snaps back into place, ready for its next heroic duty. Without it, your handle’s basically a limp noodle. And who wants a limp noodle door handle? Nobody, that’s who.
So, how do we even know it’s the spring? Good question! Usually, if the handle feels loose, wobbly, or just doesn’t return to its upright position after you’ve used it, that’s a big clue. Sometimes, it might even feel a little stiff, like it’s protesting your every turn. If your door is sticking or just feels generally... off, the spring is a prime suspect. It’s like a detective for your doorknob, and the spring is usually the guilty party.
Must Read
Now, before we dive headfirst into this DIY adventure, let’s talk tools. You don’t need a whole workshop, just a few basic bits and bobs. A screwdriver is your best friend here, usually a Phillips head, but sometimes a flathead might be lurking. You might also want a pair of pliers, because sometimes things are just stubborn and need a little gentle persuasion. And a small container to keep all those tiny screws and bits from vanishing into the abyss? Absolutely essential. Trust me, that lint monster under your couch is always hungry for small metal objects.
Step 1: The Great Deconstruction (Don't Worry, It's Not That Dramatic)
Alright, first things first. We need to get that handle off the door. Most door handles have a little trick to them. Look closely at your handle. See that tiny little hole on the side? Or maybe a small set screw hiding somewhere? That’s your ticket. Sometimes, you just need to push something small and pointy, like a thin nail or a paperclip, into that hole. It releases a little latch, and voila, the handle should slide right off. Easy peasy, lemon squeezy.
If you don’t see a hole, then you’re probably looking for a tiny set screw. This is where your screwdriver comes in handy. It’s usually on the underside of the handle, or sometimes on the neck of the handle where it meets the door. Give that screw a little turn counter-clockwise. You don’t need to take it all the way out, just loosen it enough so the handle can slide free. It’s like unlocking a secret code to your door.
Once the handle is loose, give it a gentle tug. It should slide off the spindle (that’s the metal rod that goes through the door). Now, you might have two handles, one on each side. You’ll probably need to take both off to get to the inner workings. Don’t be alarmed by the jumble of parts that might tumble out. It’s like a tiny mechanical puzzle.

Peeking Inside: What We're Looking For
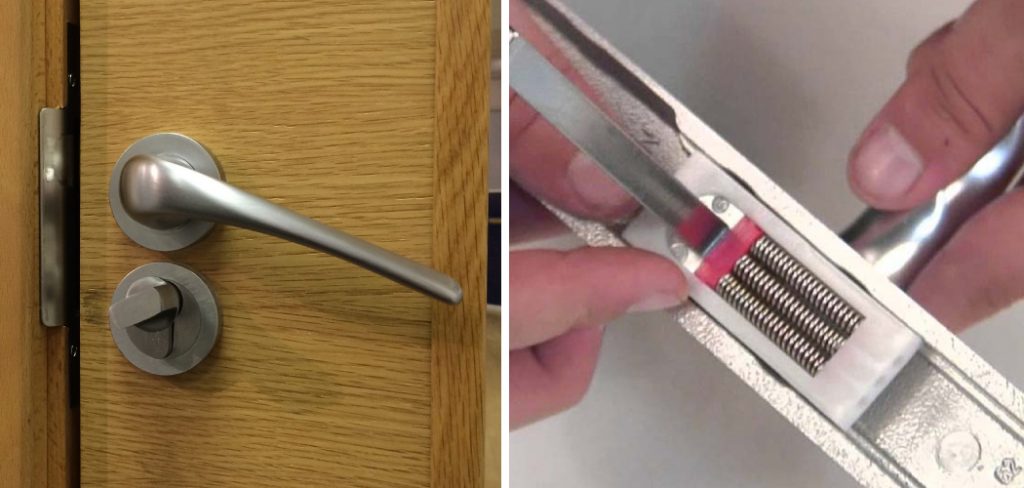
With the handles off, you’ll see the spindle and the latch mechanism (the part that slides in and out of the door frame). The spring is usually nestled in there, or sometimes it’s part of the handle assembly itself. It’s a coiled piece of metal, and it’s probably looking a bit sad and stretched out, or maybe it’s just come loose from its moorings. It's the silent culprit!
Sometimes, the spring is actually inside the handle. In that case, you’ll need to carefully detach the handle from the spindle, and then you might find a cap or a cover that needs to be pried off. Be gentle here, as these parts can be delicate. You don’t want to be wrestling with it like a greased pig; think more like a gentle, strategic dance.
Step 2: The Spring Sleuth Mission
Now for the fun part – identifying the problem. What’s wrong with our little spring friend? Is it broken? Snapped in half? Oh dear. If it’s broken, then you’re probably going to need to replace it. More on that later, don’t panic!
Is it stretched out? This is super common. Over time, springs can lose their tension, kind of like us after a long week. They just don’t have that oomph anymore. If it looks a bit saggy, that’s likely your issue.
Or, is it just loose? Sometimes, the spring is perfectly fine, it’s just popped off its perch. There are usually little hooks or grooves that the spring attaches to. If it’s not sitting securely in there, that’s an easy fix!
Step 3: Operation: Spring Revival (Or Replacement!)
So, you’ve identified the ailment. Let’s get to fixing it!
The "It Just Popped Off!" Fix
If your spring is just loose, this is the easiest win. Look at where the spring is supposed to go. There are usually little pegs or notches on the spindle or the handle mechanism. Carefully re-hook the ends of the spring onto these pegs. You might need your pliers for a little extra grip here. It’s like putting a tiny, very important elastic band back in place. Give the handle a few turns to make sure it snaps back nicely. Success! You’re a mechanical wizard!
The "It's a Bit Saggy" Fix (The Controversial One)
Okay, this one is a bit of a DIY hack, and it’s not always a permanent solution, but it can often work in a pinch. If your spring is just a little stretched out, you can try to gently re-tension it. This is where those pliers come in. Very carefully, and I mean very carefully, you can try to give the spring a little twist to tighten it up. Think of it as giving it a gentle hug to restore its shape. Do not overdo this. You’re not trying to turn it into a coiled viper; just a subtle tightening. If you go too far, you could break it, and then you’re back to square one (or worse!).
I’ve also heard of people using a bit of heat (like from a hairdryer on a low setting) to help a spring regain some of its temper, but honestly, I’m a bit iffy on that. I tend to stick to the gentle persuasion of pliers. It’s all about finding that sweet spot where it’s firm but not about to snap.
The "It's Broken!" Fix (The Real Deal)
If your spring is genuinely snapped, or if the "gentle hug" didn't do the trick, then it’s time for a replacement. This is where you might need to get a new part. Don’t despair! You don’t need to buy a whole new door handle set usually. Most hardware stores sell replacement spring kits for common door handle types.
The best way to do this is to take your old spring (or a good photo of it, along with your handle mechanism) to the hardware store. They can usually match it up. It’s like a little matchmaking service for mechanical parts. If you can’t find an exact match, you might have to buy a generic kit and hope for the best, or even just buy a new, inexpensive door handle set and salvage the spring from that. Sometimes, that’s the easiest route.
Once you have your new spring, installation is the reverse of removal. Carefully fit the new spring into its place, making sure it’s secured on all its little anchor points. It should feel snug and ready to do its job.
Step 4: The Reassembly Ritual
Now that your spring is fixed (or replaced!), it’s time to put everything back together. This is usually the easier part, as long as you remember which way things go. If you took pictures during disassembly (pro tip for future you!), now’s the time to consult them.
Slide the spindle back through the door and through the latch mechanism. Then, carefully slide the handle back onto the spindle. Make sure it’s oriented correctly – you don’t want your handle upside down, looking perpetually surprised.
If you loosened a set screw, now’s the time to tighten it back up. Again, you don’t need to crank it down like you’re trying to seal a submarine hatch; just make it snug. If you had a little hole and a pin, you might need to push that pin back in as you slide the handle on, or reinsert it afterwards to lock it in place.

Give your newly repaired handle a good test run. Turn it, push it, let it snap back. Does it feel firm? Does it return to its proper position with a satisfying click? If so, pat yourself on the back! You’ve conquered the wobbly door handle.
A Few Extra Tips from the Trenches
Sometimes, the problem isn’t just the spring. The latch itself might be sticking, or the screws holding the whole mechanism together might be loose. If your handle feels okay but the door still isn’t latching properly, check those screws first. They’re often the culprit for a generally “loose” feeling door. It’s amazing what a few turns of a screwdriver can fix!
Also, a little bit of lubricant can sometimes go a long way, especially if things are feeling a bit stiff. A quick spray of WD-40 (or a similar lubricant) on the latch mechanism and the spindle can make a world of difference. Just don’t overdo it, you don’t want your handle to feel greasy.
And hey, if you’ve tried all this and your door handle is still giving you grief, don’t beat yourself up. Sometimes, things are just beyond our DIY superpowers. In that case, it’s perfectly okay to call in a handyman. It’s not a sign of failure; it’s a sign of knowing your limits. Plus, they have all the fancy tools and probably a secret handshake with the spring gods.
But for most of you, with a little patience and a willingness to get your hands a little dirty, that floppy, uncooperative door handle will be as good as new. You’ll be able to enter and exit your rooms with confidence again, and that’s a pretty sweet victory, wouldn’t you say? Cheers to less annoying doors!

