How To Clean A Stick On Bra

Alright, my fabulous friend! Let's talk about something we all secretly wonder about but maybe don't ask out loud: how to keep those magical stick-on bras from turning into sad, crusty lumps. You know, the ones that give you that seamless look and free your shoulders from strap-induced torture? Yep, those. They're amazing, aren't they? Like a little bit of fashion wizardry. But like any good magic, they need a little TLC to keep working their charm. So, grab your favorite comfy beverage, settle in, and let's dive into the surprisingly simple art of cleaning these sticky sensations.
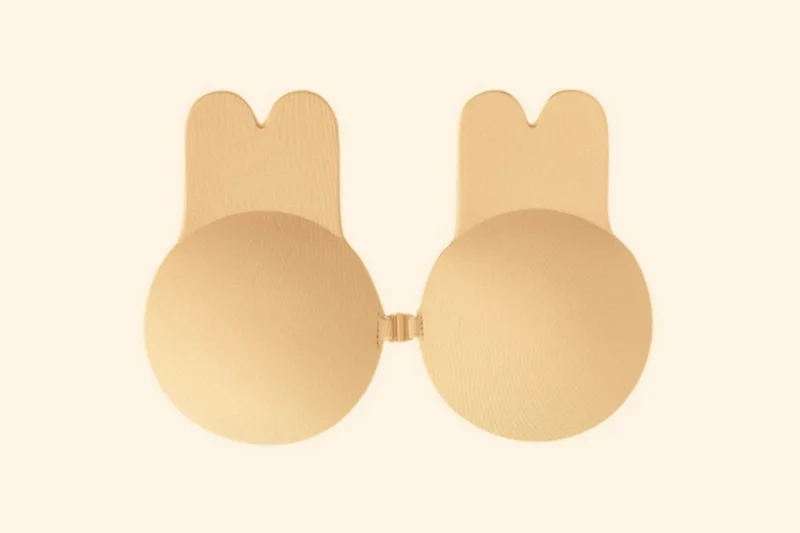
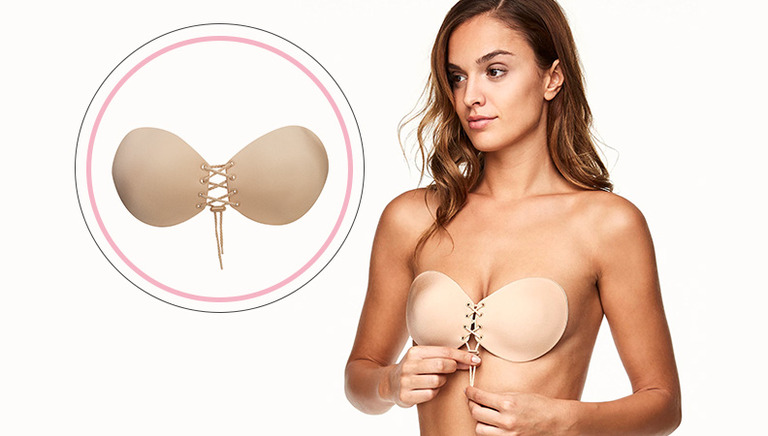
First things first, let's get one thing straight: these aren't your grandma's bras. We're not talking about delicate lace or intricate underwire here. Stick-on bras are usually made of silicone or a similar reusable adhesive material. This means they're way more forgiving than you might think. So, ditch that nervous feeling that you're going to ruin them with one wrong move. We're going to be gentle, but we're also going to be effective. Think of it as a spa day for your sticky bra!
The "Why Even Bother?" Section (Spoiler: It's Worth It!)
Okay, I know what you might be thinking. "Why bother cleaning it? I'll just buy a new one when it stops sticking." And hey, I get it. Convenience is king. But here’s the secret sauce: cleaning them actually extends their life. Yup! That sticky goo isn't magical; it's just really good at picking up… well, everything. Sweat, body oils, the faint hint of that amazing perfume you wore last night, maybe even a rogue crumb from that midnight snack. All of that gunk ends up on the adhesive side, and it’s that gunk that prevents them from sticking to your skin.
Must Read
Think of it this way: would you wear the same socks for a week without washing them? No way! Your sticky bra is no different. A clean adhesive means maximum stickability. And who doesn't want maximum stickability? It's the foundation of a worry-free outfit! Plus, keeping them clean is just plain hygienic. Nobody wants to stick something potentially… questionable… to their delicate skin.
The "Gather Your Arsenal" Step
Before we get our hands wet (literally!), let's make sure you have everything you need. This isn't rocket science, but having your tools ready makes the whole process smoother. You’ll be surprised at how simple this is.
Here's what you'll need:
- Lukewarm water: Not too hot, not too cold. Just right, like Goldilocks’ porridge.
- Mild soap: We're talking gentle here. Think baby soap, a very mild hand soap, or even a gentle facial cleanser. Absolutely no harsh detergents, no fabric softeners, and definitely no oily soaps. Those things are the enemy of adhesive!
- Your hands: That's right, your trusty digits are your best cleaning tools. No fancy brushes needed here.
- A lint-free surface for drying: This is crucial. Think a clean towel, a drying rack, or even just a very clean countertop.
See? Nothing complicated. You probably have most of this stuff lying around your bathroom already. It’s all about using the right ingredients for the job.

The "Deep Dive" (Okay, Not Really Deep, Just a Gentle Wash!)
Now for the main event! This is where the magic happens, and it’s surprisingly easy. You’ll be done in a few minutes, and your sticky bra will be ready for its next adventure.
Here’s the step-by-step breakdown:
Step 1: Rinse Away the Surface Grime
Start by gently rinsing the adhesive side of the bra under lukewarm running water. This is like an initial cleanse, getting rid of any loose dust or debris. Imagine it as giving your bra a refreshing little shower. Don't scrub yet, just let the water do its thing. This helps loosen up some of the stickier bits.
Step 2: The Gentle Lather
Now, it’s time for the soap. Put a tiny drop of your mild soap onto the adhesive side. We're not trying to create a mountain of suds here, just a nice, gentle lather. Using your fingertips, carefully and gently rub the soap into the adhesive. Think of it as a mini massage for your bra. You want to work the soap around to lift away all that stubborn body oil and residue. Avoid scrubbing too hard, as this can damage the delicate adhesive. It's more about a soft, circular motion.
Some people like to use their thumbs, others prefer their index fingers. Whatever feels most comfortable and allows you to be gentle is the way to go. Remember, we’re being kind to this little garment that works so hard for us!
Step 3: The Thorough Rinse
This is a super important step. You need to rinse off all the soap. Any residual soap left behind can affect its stickiness. Rinse the adhesive side thoroughly under lukewarm running water. Keep rinsing until you can no longer feel any slipperiness from the soap. You should feel the adhesive start to return to its smooth, slightly tacky state. Again, no harsh scrubbing here, just a good, steady rinse.
Step 4: Pat, Don't Rub!
Here’s where a lot of people go wrong. After rinsing, resist the urge to rub the bra dry with a towel. This can cause lint to stick to the adhesive, or even worse, damage the material. Instead, gently pat the bra dry with a clean, lint-free towel. You can also let it air dry completely, which is often the best option.
If you're patting it dry, use a soft towel and just lightly press it against the adhesive. Don't rub back and forth. Think of it like dabbing a delicate stain – you want to absorb the moisture without disturbing the surface.
Step 5: The Air Dry Symphony
This is the longest part, but it’s crucial for getting that perfect stick back. Once you've gently patted it dry, you need to let it air dry completely. Find a clean, flat surface and lay the bra down with the adhesive side facing up. You can also place it on a clean drying rack. Make sure it’s out of direct sunlight, as that can degrade the adhesive over time. Just let it be for a few hours, or even overnight. Patience, my friend, is a virtue, especially in the world of sticky bras!
You'll know it's dry when the adhesive feels smooth and no longer damp. Don't try to speed this up with a hairdryer on a hot setting – that’s a recipe for disaster. A cool setting might be okay if you’re in a pinch, but air drying is always the safest bet. Let nature do its thing!
The "Re-Sticking and Storing" Savvy
Once your bra is completely dry, it’s ready to be put back in its protective housing. Most stick-on bras come with a clear plastic backing or a silky pouch. Always store your bra on its original backing or in its designated pouch. This protects the adhesive from dust, lint, and anything else that might compromise its stickiness. Think of it as putting a fancy hat back in its box after a night out.
When you’re ready to wear it again, just peel off the backing and stick it on like usual. You should find that your cleaning efforts have paid off with impressive reusability. Hooray for stickiness!

The "Troubleshooting: When Things Get a Little... Unsticky"
Even with the best care, sometimes a sticky bra might start to lose its grip. Don't despair! Here are a few things you can try:
- Give it another wash: Sometimes, you just need to repeat the cleaning process. Maybe you missed a tiny bit of residue.
- Check the temperature: Are you in a super hot and humid environment? This can sometimes affect the adhesive.
- Skin prep is key: Make sure your skin is clean and dry before applying. No lotions, oils, or powders in the area where you plan to stick it. This is a biggie!
- Consider its age: Like all things, sticky bras have a lifespan. If it's really old and has been washed countless times, it might be time to invest in a fresh pair.
But honestly, most of the time, a good wash and dry is all it takes to bring them back to life. It's like a magic potion for your bra!
A Final, Uplifting Thought
So there you have it! Cleaning your stick-on bra is not some daunting, mysterious chore. It's a simple, effective way to make sure these little miracle workers keep doing their job, keeping you comfortable and confident. By taking just a few minutes to care for them, you’re extending their life, saving yourself money, and ensuring that you always have that perfectly smooth silhouette at your fingertips.
Think of it as a small act of self-care, not just for your bra, but for you! You deserve to feel fabulous and free, without the worry of a wardrobe malfunction. So go forth, embrace the stickiness, and enjoy the freedom of a perfectly supported, strap-free existence. You’ve got this, and your sticky bra will thank you for it!