How Do You Work A Selfie Stick
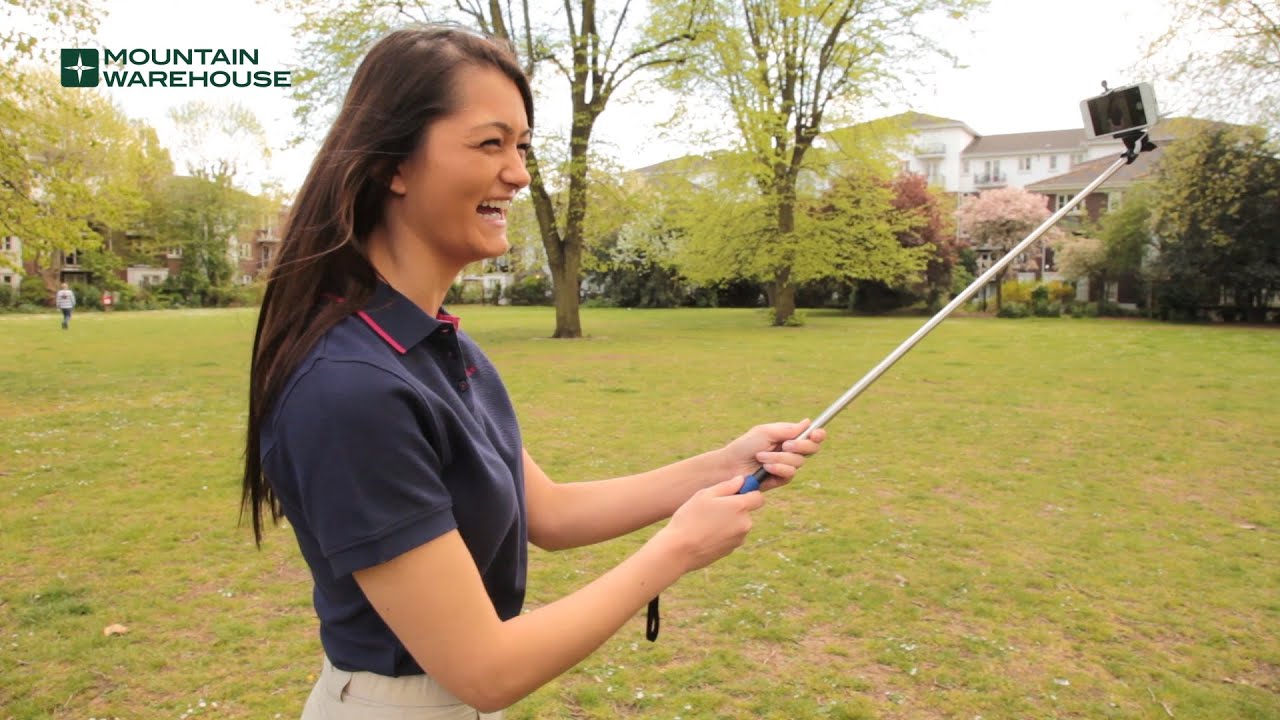
So, I remember this one time, a few years back, when I was on vacation with my family. We were at this spectacular viewpoint, overlooking this valley that looked like it was painted by a very enthusiastic toddler with too much green paint. Absolutely breathtaking. Everyone was pulling out their phones, trying to capture the moment. My dad, bless his technologically challenged heart, was wrestling with his phone, trying to get himself and the entire vista into the shot. He was contorting himself like a pretzel, muttering under his breath about "this infernal thing." It was a bit… chaotic, and honestly, the photos he ended up with were mostly his ear and a blurry hint of mountains. That’s when I saw it. A glorious, silver extension pole, already in use by a young woman who was effortlessly snapping perfect, wide-angle shots of herself and her equally photogenic travel companions. My dad, meanwhile, looked like he was trying to flag down a passing UFO. It was then that the humble selfie stick, the often-maligned, sometimes-seen-as-ridiculous, but undeniably useful gadget, truly entered my radar. And I thought, "Okay, maybe there's something to this."
Fast forward to today, and the selfie stick is practically as common as charging cables. You see them everywhere – at concerts, on hikes, even at the grocery store (though I'm still not sure why someone would need a selfie with a bulk pack of toilet paper, but hey, to each their own, right?). But despite their ubiquity, I still get the occasional bewildered look when I pull mine out. It’s like some people have never encountered one before, or perhaps they’re just pretending to be impressed. So, for all you out there who’ve eyed the selfie stick with a mixture of curiosity and mild suspicion, or for those who just haven't quite mastered its mystical powers, let’s break down this essential piece of modern-day photographic wizardry. Because, let's be honest, it's not rocket science, but a little guidance never hurt anyone, right?
The Anatomy of a Selfie Stick: More Than Just a Pole, It’s a Promise
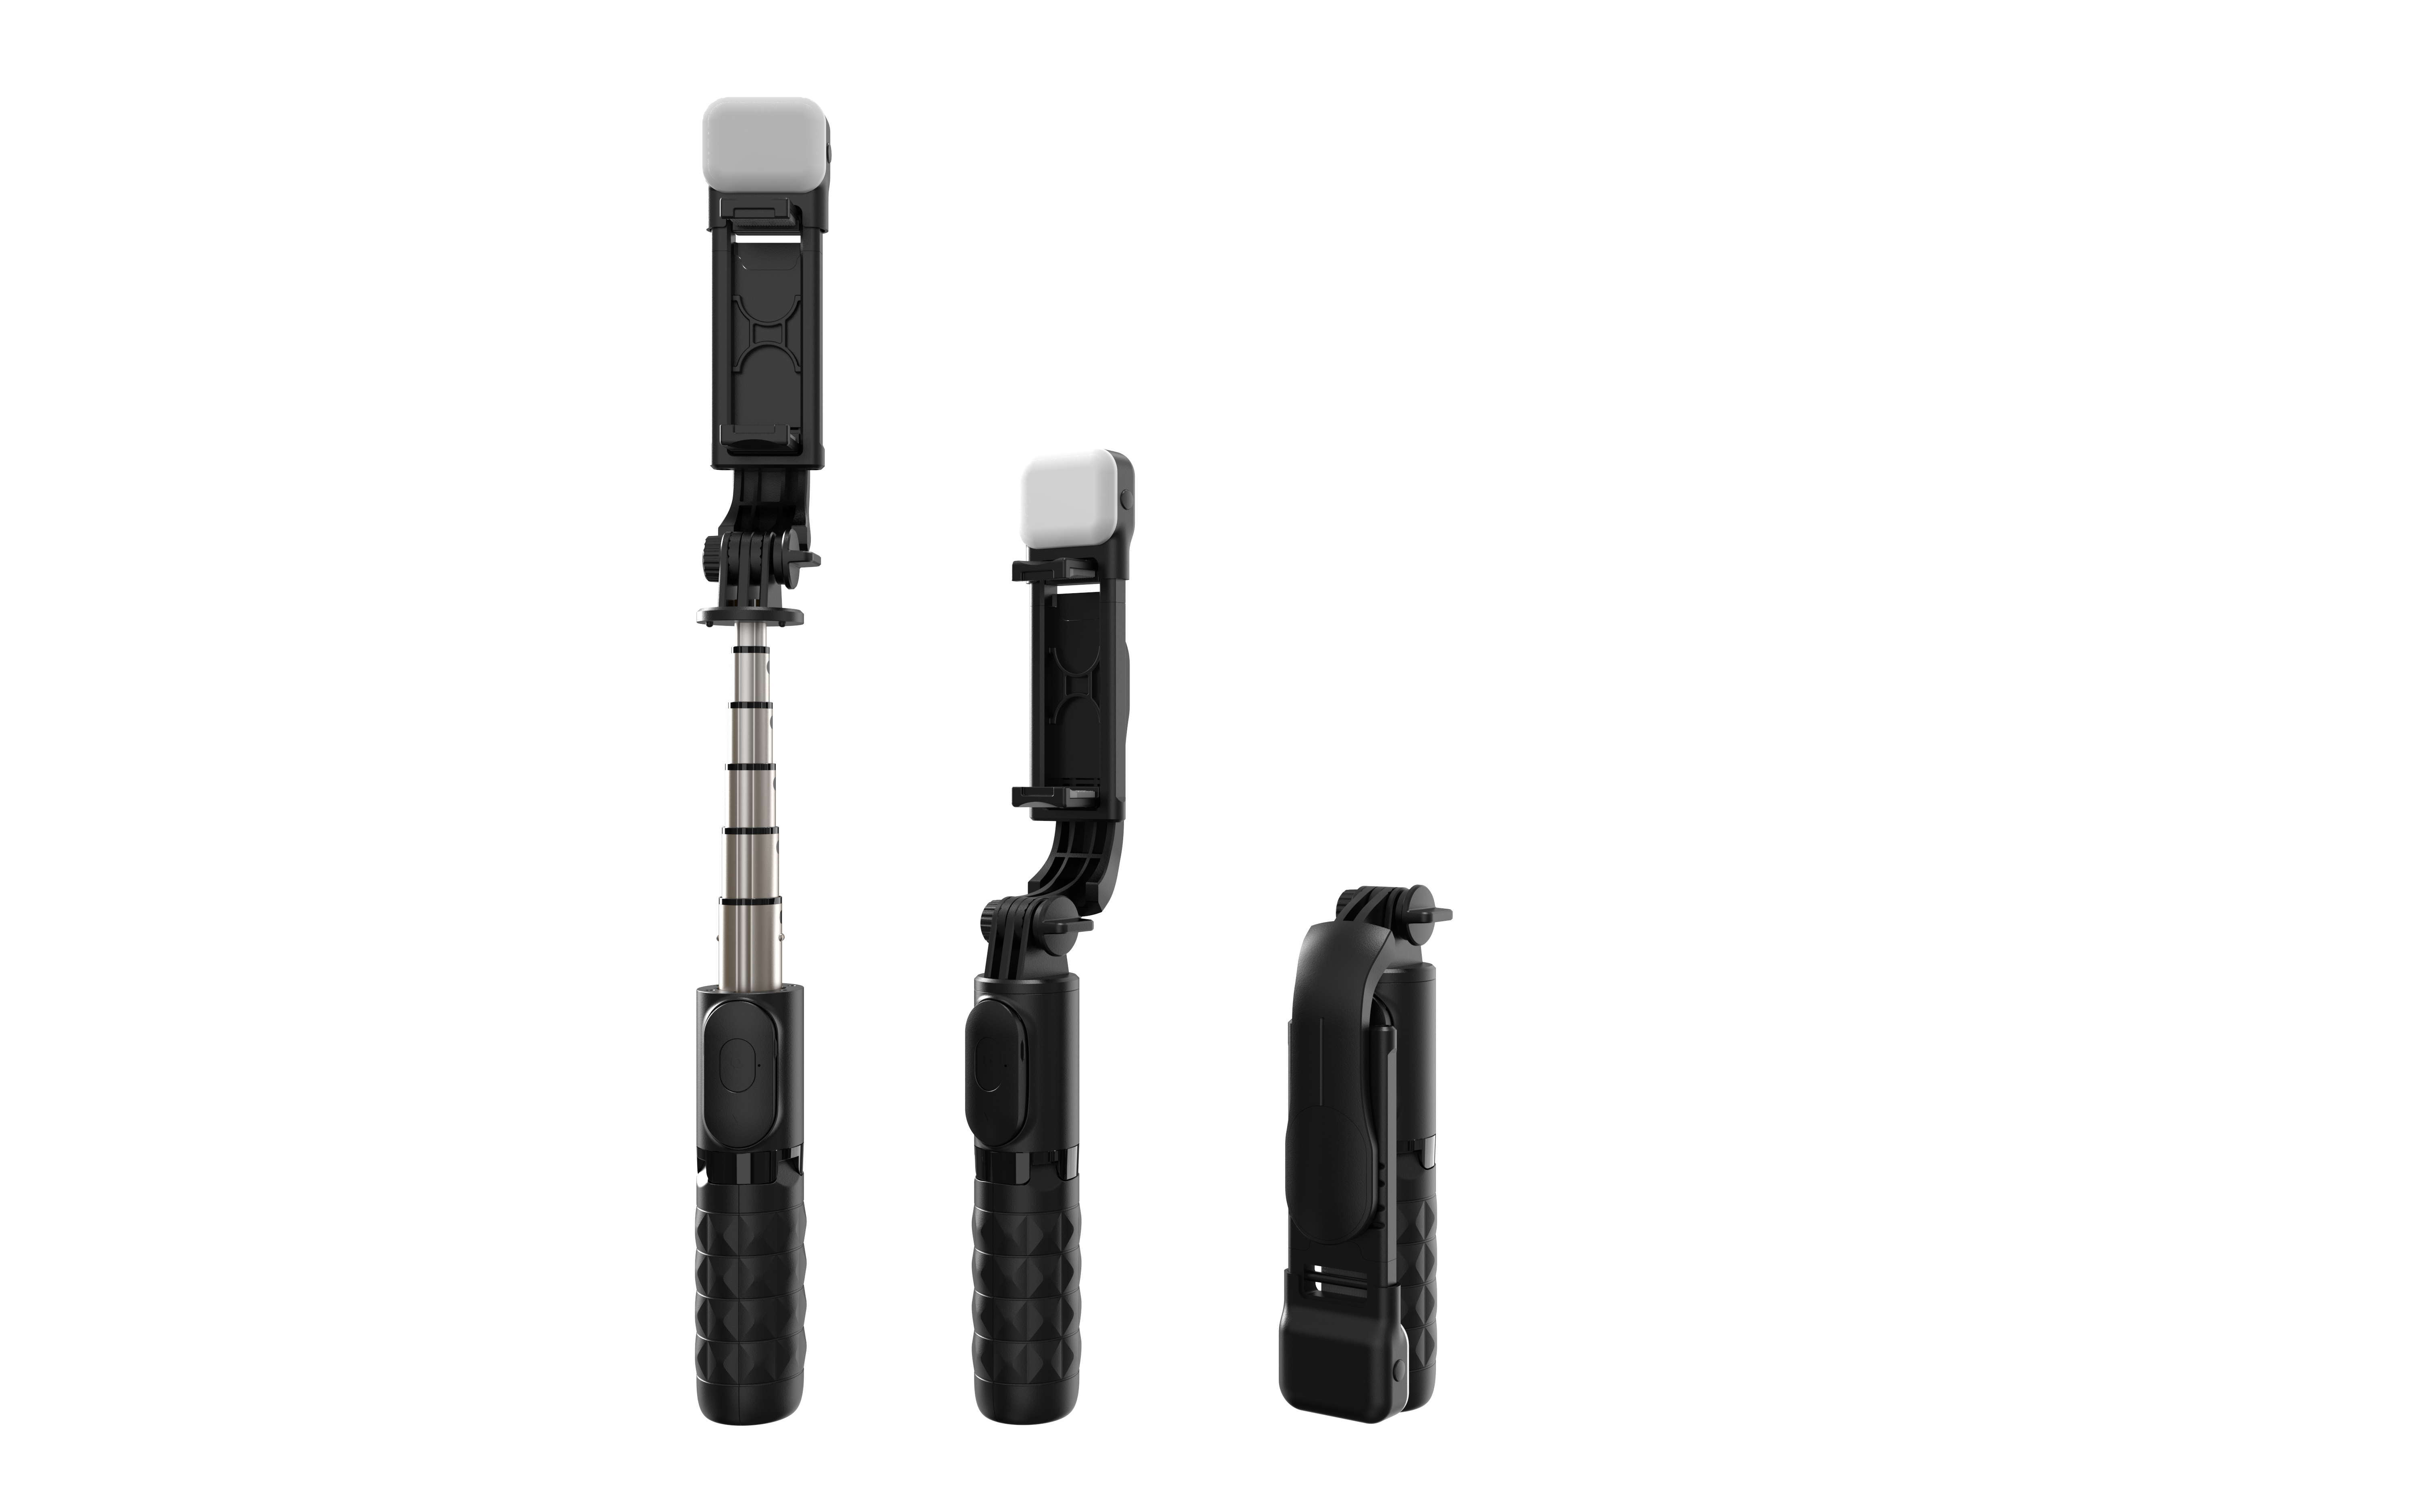
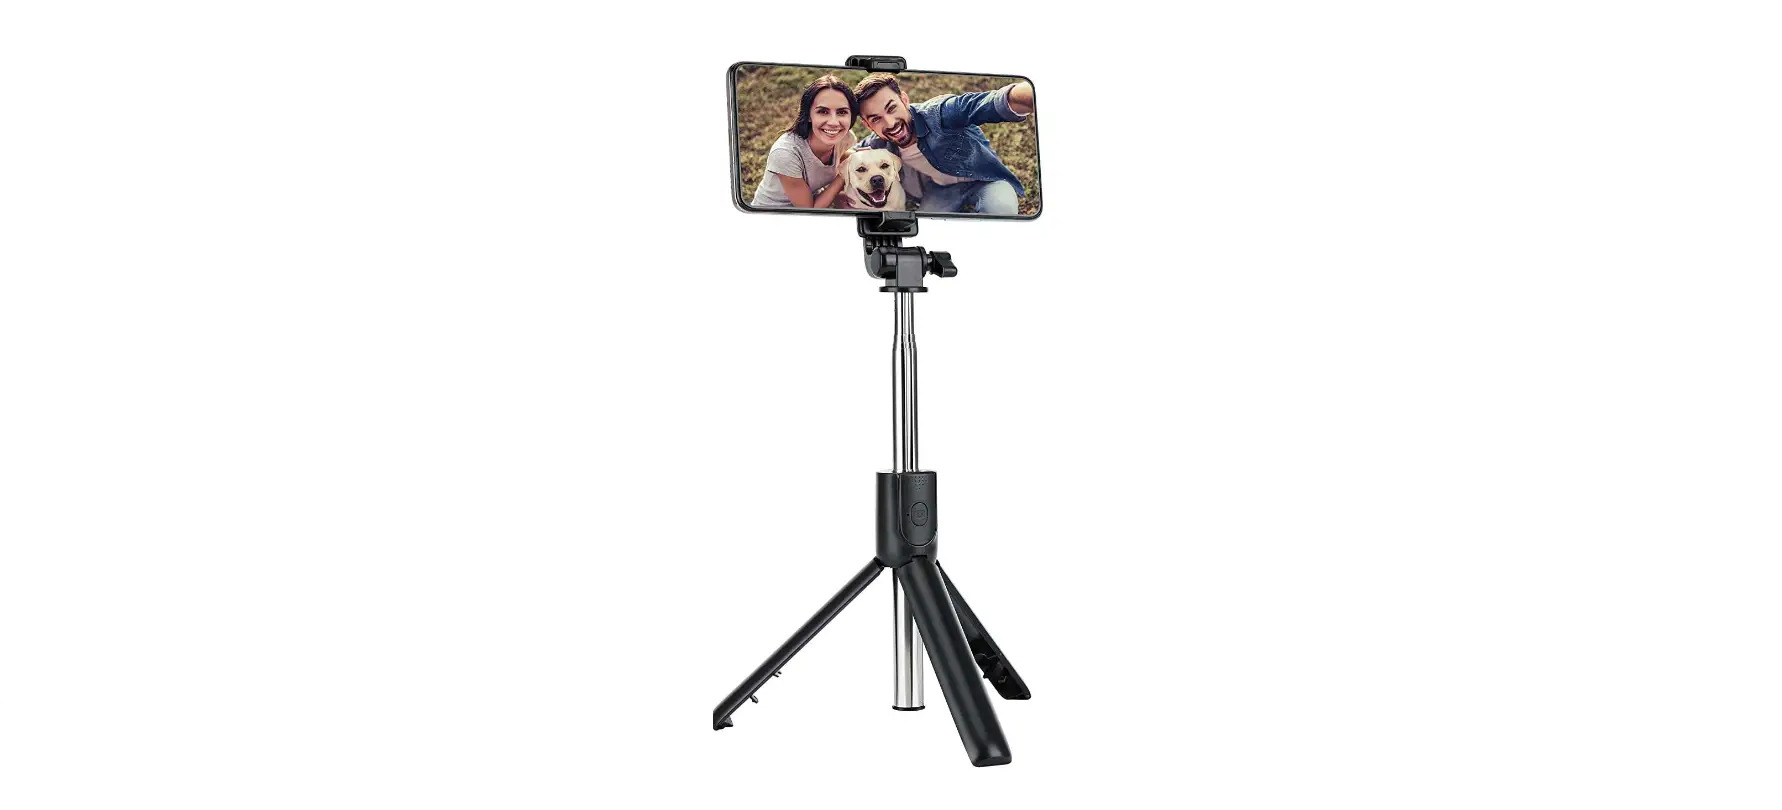
Okay, so before we get into the how, let's briefly touch on the what. What exactly are we dealing with here? At its core, a selfie stick is pretty darn simple. You've got your extendable pole – this is the part that gives you that extra reach, the magical ability to cram more of your glorious self and your stunning surroundings into one frame. Think of it as your personal periscope for the digital age.
Must Read
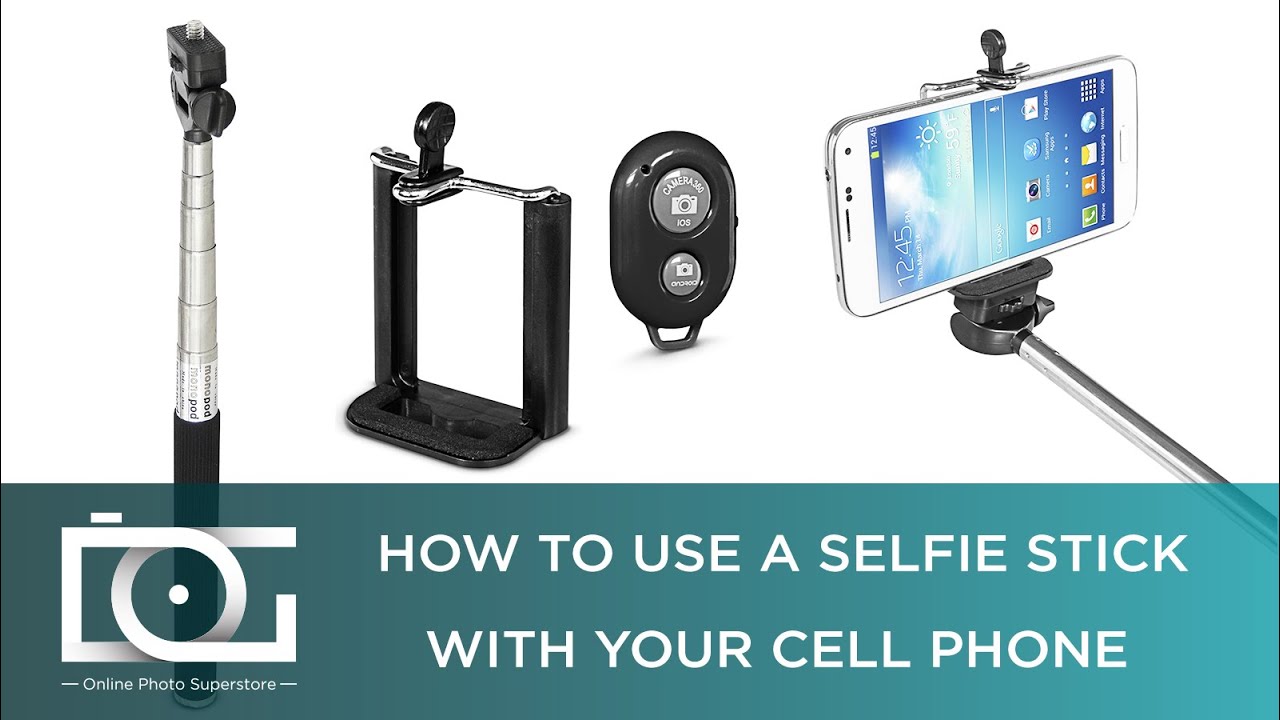
Then there’s the phone holder. This is usually a spring-loaded clamp that grips your smartphone nice and snug. You want to make sure it’s secure, obviously. Nobody wants their phone doing a swan dive from a significant height. Trust me, I’ve seen it. It’s not pretty. The good ones have a bit of padding to prevent scratches, which is always a plus. Little details matter, folks.
And finally, the trigger. This is where the magic happens. It can be a button on the handle that connects wirelessly to your phone via Bluetooth, or it might be a wired option that plugs into your headphone jack (remember those?). Some even have remotes that you can detach, which is super handy if you want to get a group shot and you're the designated photographer.
Step One: The Unboxing (and Initial Awkwardness)
Alright, so you’ve got your new selfie stick. Congratulations! You’ve officially joined the ranks of the selfie-savvy. Now, the first thing you’ll likely notice is that it’s probably folded up tighter than a contortionist at a yoga retreat. You need to gently, or sometimes not-so-gently, extend it. There are usually little locking mechanisms that you twist or slide to extend each segment of the pole. Take your time with this. Imagine you’re assembling a delicate piece of art, not a… well, not a weapon of mass selfie-taking.
Be aware that some sticks have a tendency to be a bit stiff at first. That’s normal! It just means they’re new and full of potential. Once you get the hang of the locking mechanisms, it becomes second nature. And if it feels too easy to extend, double-check that those locks are actually… locked. We don't want any accidental collapses mid-pose.
Step Two: The Phone Mount Tango
This is where things get a bit hands-on. You need to get your phone securely into the holder. Most holders are designed to be quite universal, accommodating a range of phone sizes. You just pull the sides of the clamp apart and wedge your phone in. Pro tip: Make sure your phone is facing the right way! Sounds obvious, I know, but in the excitement of capturing that perfect Instagram moment, it’s easy to get it backwards and end up with a selfie of the back of your phone. Been there, done that, bought the t-shirt (which was probably a selfie of me wearing the t-shirt).
Once your phone is in, give it a gentle tug. You want to be sure it’s not going anywhere. Some holders have little rubber grips for extra traction. If yours doesn’t, and you’re feeling a bit nervous, you can always add a thin rubber band around the phone for a bit of extra grip. It’s a DIY solution that’s surprisingly effective, and it makes you feel like a resourceful inventor. You’re practically MacGyver, but for selfies.
Step Three: The Wireless Waltz (or Wired Wonder)
This is the part that can sometimes cause a bit of confusion, especially if you’re not the most Bluetooth-inclined person. For wireless selfie sticks, you’ll need to pair it with your phone. Most sticks will have a small button on the handle. You press and hold this button until a light starts flashing. Then, on your phone, go to your Bluetooth settings and look for the selfie stick’s name. It’s usually something straightforward like "AB SHUTTER 100" or "SELFIE MONSTER 3000." Once you find it, tap on it to connect. You might get a little notification saying it's paired. Success! You’ve just bridged the gap between your hand and your phone’s shutter button.
If you have a wired selfie stick, it’s even simpler. You’ll have a little plug that goes into your phone’s headphone jack. Seriously, it’s that easy. Just plug it in, and the button on the handle should work as your shutter. However, be warned: this only works if your phone has a headphone jack. If you’re rocking one of those newer phones that ditched the jack in favor of… well, more sleekness, you’ll definitely need a Bluetooth option. The headphone jack: a dying breed, but still a hero to selfie stick users.

Important Note: Sometimes, even after pairing or plugging in, the shutter button won’t work. Don’t panic! This is usually a quick fix. On your phone’s camera app, go to the settings. Look for an option that allows you to use the volume buttons as a shutter. Most selfie stick triggers are designed to mimic these volume buttons. So, if your phone is set to use volume up or down as the shutter, your selfie stick will work perfectly. If this setting isn’t enabled, the button will just be… a button. And a rather useless one at that.
Step Four: The Art of Extension (and Composition)
Now for the fun part: extending the stick! This is where you go from "me and my phone" to "me, my phone, and a significant portion of the universe." Extend the pole to your desired length. This is entirely personal preference. Do you want to get everyone in the shot? Extend it all the way. Just want a slightly wider angle of your own fabulous face? A few inches might do the trick. Experimentation is key here. Don’t be afraid to play around.
As you extend, think about your composition. The selfie stick is your friend, but it can also be your enemy if you’re not careful. You don’t want your arm to be the most prominent thing in the photo. Try to position the stick so it’s less visible, or at least cleverly disguised. Sometimes tilting your head slightly or holding the stick at an angle can help minimize its appearance.
And importantly, don’t just extend it and point and shoot. Take a moment to frame your shot. Look at what’s in the background. Is it something you actually want to be in your photo? Or is it a rogue pigeon or a particularly unflattering dumpster? The selfie stick gives you the power to choose your backdrop, so use it wisely. Consider yourself the director of your own personal movie.

Step Five: The Pose and the Click
This is it. The moment of truth. You've got your phone set up, the stick extended, and your Bluetooth connection (hopefully) humming along. Now it’s time to strike a pose. This is where your personality can really shine. Are you going for a classic smile? A dramatic pout? A goofy grin? Whatever it is, own it!
Before you press that button, do a quick visual check. Is everyone in the frame? Are your eyes looking at the camera (or at least in the general direction of the camera)? Is there any stray food in your teeth? These are the crucial pre-click checks that separate the amateur selfie-taker from the seasoned pro.
Then, with a confident flourish, press that button. If it worked, you’ll hear a click (or see the on-screen shutter animation). If it didn’t, don’t despair. You’ve got plenty of battery, and the world is your oyster. Just repeat the process. It’s all part of the selfie-taking journey. Embrace the process.
Step Six: The Review and the Repeat (or the Delete)
Ah, the post-selfie ritual. You’ve taken the shot, and now you’re staring at your phone’s screen. This is the moment of judgment. Did you nail it? Is it a keeper? Or is it an instant candidate for the digital abyss?
Most of the time, you’ll take several shots before you get the one you really want. That’s perfectly normal! Nobody gets a perfect selfie on the first try. Look for good lighting, pleasant expressions, and a background that doesn’t detract from your awesomeness. Don’t be afraid to delete the duds. There’s no shame in a little digital spring cleaning.
If you’re feeling particularly ambitious, you can even try different angles, different extensions of the stick, or different poses. The selfie stick is your tool for creative exploration. Use it to your advantage. And when you finally get that shot, the one that makes you pause and think, "Wow, I actually look pretty good here," then you’ve truly mastered the art.
Common Selfie Stick Woes and How to Conquer Them
Now, even with the best intentions, selfie sticks can be a little… temperamental. Here are a few common issues you might encounter:
- The "It Won't Connect" Conundrum: If your Bluetooth won't pair, try turning both your phone’s Bluetooth and the selfie stick off and then on again. Sometimes a simple restart is all it needs. Also, ensure your selfie stick is charged! A dead battery will do you no good.
- The "Volume Button Isn't the Shutter" Syndrome: As mentioned earlier, double-check your phone’s camera settings to ensure the volume buttons are set to act as the shutter. This is the most common fix for this problem.
- The "My Arm Looks Like a Giant Noodle" Effect: This is all about composition and how you hold the stick. Try varying the angle, holding it closer to your body, or even looking for natural elements (like a tree branch or a railing) to obscure the stick.
- The "It Fell Out!" Fiasco: Always, always ensure your phone is securely clamped. If your holder feels loose, invest in a new one, or use the rubber band trick. Losing your phone is significantly less fun than a bad selfie.
The selfie stick, in its seemingly simple form, is a gateway to so many more photographic possibilities. It allows you to capture moments with your friends and family that would otherwise be impossible, or at least incredibly awkward and involving a lot of shouting "Can you hold my phone?" at strangers. It empowers you to be the architect of your own memories, to tell your story from your perspective. So, the next time you see someone with one, don’t scoff. They might just be a master of their own photographic domain, extending their reach and capturing life, one glorious, well-composed selfie at a time. Go forth and capture your awesomeness!