How Do You Make A Graph In Word
Ever stare at a wall of numbers and feel like you're trying to decipher ancient hieroglyphics? Yeah, me too. Sometimes, just a plain old list of data feels as exciting as watching paint dry, or perhaps even more so, because at least paint has a pretty color. You know, like when you're trying to explain to your family how much you spent on avocado toast last month, and you just list it all out: "January: $75.50, February: $82.10..." It's accurate, sure, but it lacks a certain oomph. It doesn't quite capture the sheer magnitude of your avocado obsession.
This is where the magical world of graphs comes in. Think of a graph as your data's personal stylist, giving it a fabulous makeover so it can strut its stuff and look its absolute best. Instead of a drab spreadsheet, you get a vibrant, easy-to-understand visual. It's like transforming a grocery list into a beautiful still-life painting. Suddenly, that $75.50 for avocado toast doesn't just sound like a lot; it looks like a towering monument to your dietary choices, and you can finally have that existential crisis with visual aids!
And guess what? You don't need a degree in graphic design or the patience of a saint to whip one up. If you've got Microsoft Word, you've pretty much got a secret weapon. Word, that trusty sidekick we all rely on for everything from composing our grocery lists (ironically) to writing epic novels (or at least, the first chapter of one before procrastination kicks in), also has this hidden superpower: it can make graphs. It's like finding out your slightly boring, beige minivan can actually do a triple backflip. Who knew?
Must Read
So, buckle up, buttercups, because we're about to embark on a journey into the land of visual storytelling, all within the cozy confines of your Word document. We're going to learn how to make graphs that are not only informative but also, dare I say it, fun. No more drowning in spreadsheets. No more glazing over when someone presents you with a table of statistics. We're going to equip you with the tools to make your data sing, dance, and maybe even do a little jig.
The Grand Unveiling: Getting Started with Graphs in Word
Alright, let's get down to business. The very first step, before you even think about colors or fancy fonts, is to actually find the graph-making tools. Think of it like finding the hidden compartment in your favorite armchair where they've stashed the extra snacks. It's usually hiding in plain sight!
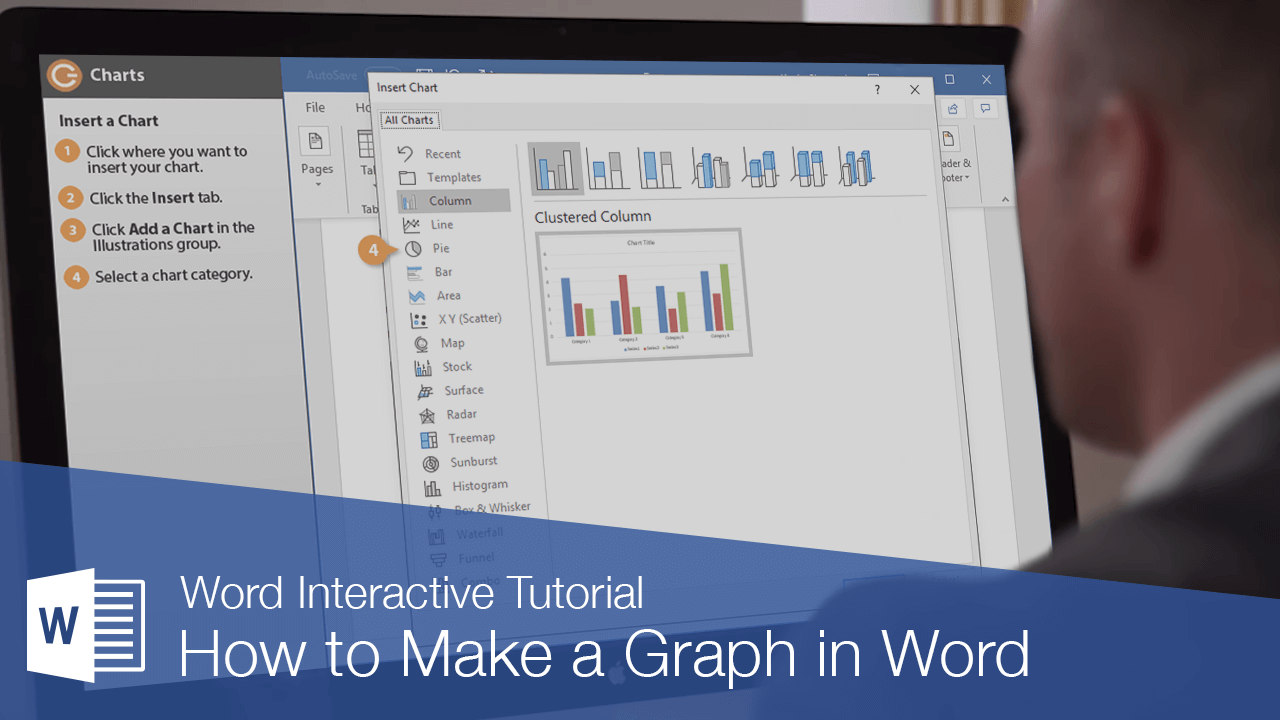
Open up your Word document. Now, cast your eyes upon the ribbon at the top. You know, that strip of icons that looks like a digital candy store? We're going to be focusing on the Insert tab. Give that a click. It's like pressing the "on" button for our graphing adventure.
Once you're in the Insert tab, scan through the options. You'll see things like Pictures, Shapes, SmartArt... and then, BAM! There it is: Chart. It's usually represented by a little bar graph icon. This is our golden ticket, folks. Click on it.
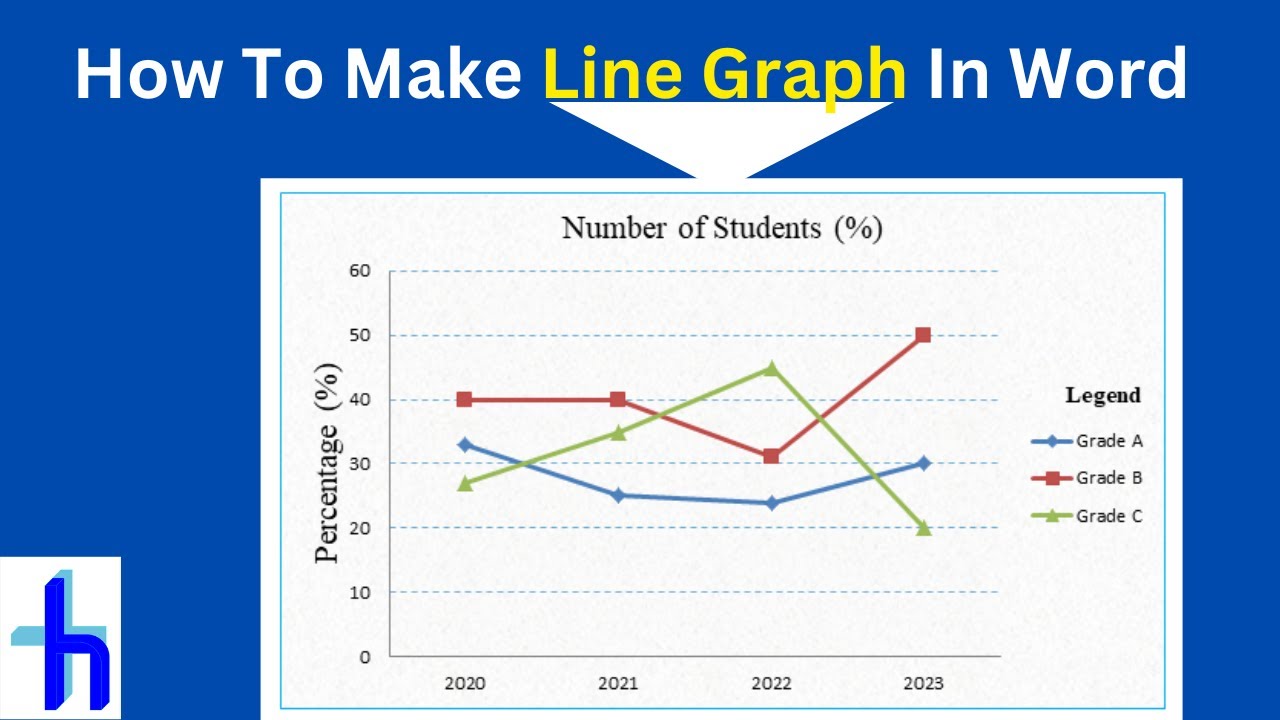
Now, Word, being the helpful little program it is, will present you with a delightful (and sometimes overwhelming) menu of chart types. We're talking Column, Line, Pie, Bar, Area, Scatter... it's like a buffet of data visualization. Don't panic! For most everyday situations, you'll probably find yourself reaching for the classics: Column charts (great for comparing things side-by-side, like how many cookies you ate each day of the week), Line charts (perfect for showing trends over time, like your caffeine intake throughout the semester), or Pie charts (ideal for showing parts of a whole, like the percentage of your income that goes towards, you guessed it, avocado toast).

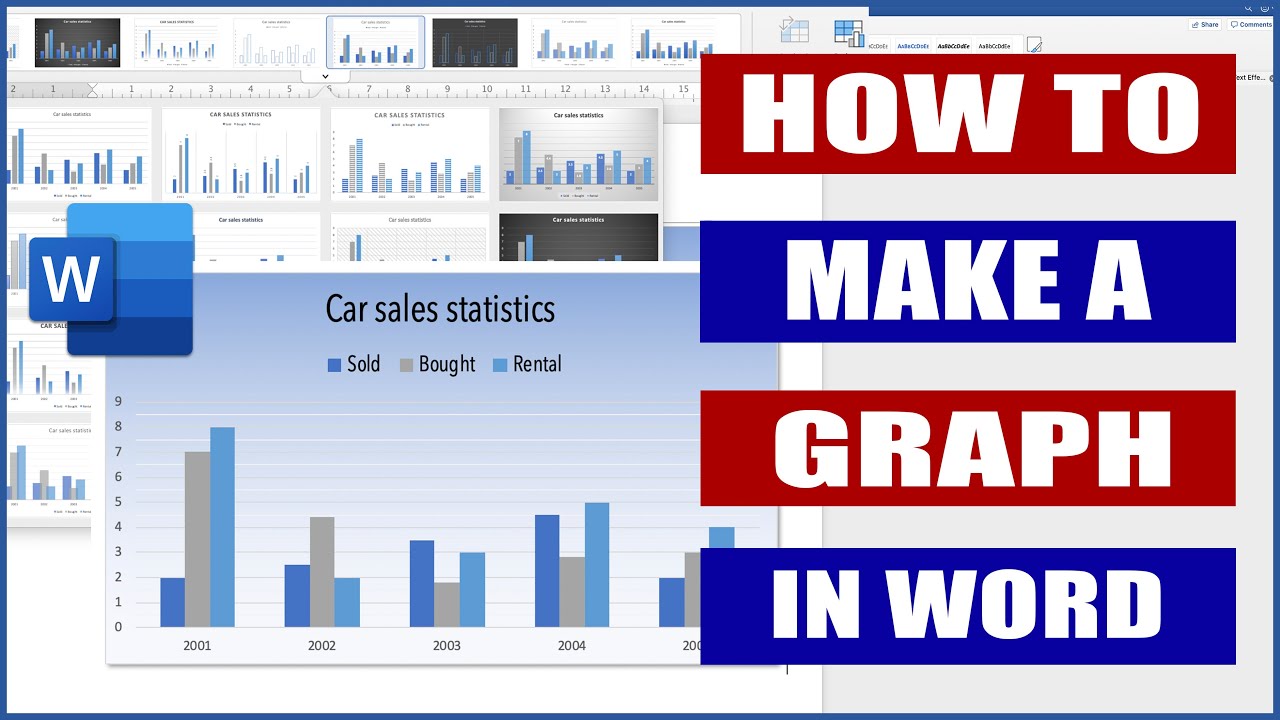
For our purposes today, let's say we want to compare something. Maybe we want to see who's the reigning champion of pizza consumption in our friend group. So, we'll select Column. Then, you'll see a few different variations of column charts. The most basic one, usually called "Clustered Column," is a fantastic place to start. Click on that and hit OK. It's like picking your favorite flavor of ice cream – simple and satisfying.
The Data Dance: Feeding Your Graph Some Numbers
Here's where the magic really begins. When you insert a chart, Word doesn't just magically conjure up pretty pictures out of thin air. Oh no. It needs data. And it usually provides you with a little spreadsheet-like window to input that data. Think of this as your graph's personal chef, meticulously preparing the ingredients for its grand debut.
This window will look suspiciously like a miniature Excel spreadsheet. You'll see columns labeled "Category 1," "Category 2," and so on, and rows with "Series 1," "Series 2." Your job is to replace these generic labels with your actual information. So, for our pizza-eating friends, "Category 1" might become "Alice," "Category 2" could be "Bob," and "Category 3" might be "Charlie." And the numbers in the rows? Those will be the number of pizzas each person has devoured in a single sitting (we're not judging, we're just reporting).
Let's say Alice ate 3 pizzas, Bob managed to put away a heroic 5, and Charlie, bless his cotton socks, only managed 2. You'd type "Alice" in the first cell under "Category 1," "Bob" in the second, and "Charlie" in the third. Then, in the first row under "Series 1" (which you can rename to something like "Pizzas Consumed"), you'd type 3 next to Alice's name, 5 next to Bob's, and 2 next to Charlie's. It's like filling out a really important form, but the stakes are much higher (pizza stakes, that is).
As you type, you'll notice something amazing happening in your Word document: the graph is updating in real-time! It's like having a tiny, hyperactive assistant who's constantly sketching out what you're telling it. If you make a mistake, like accidentally typing "30" pizzas for Charlie (which, let's be honest, might be possible after a few questionable life choices), the graph will reflect that dramatic surge. You can then go back, correct it, and watch the graph shrink back to a more plausible size. It's a beautiful, forgiving dance between data and visualization.
The Polish and Shine: Making Your Graph Look Like a Million Bucks (or at Least a Decent Smoothie)
Okay, so you've got your data in, and your graph is showing up. High five! But let's be real, that default chart might be looking a little... plain. Think of it like a freshly baked cake that hasn't been frosted yet. It's good, but it could be spectacular. This is where we add the sprinkles, the frosting, the edible glitter.
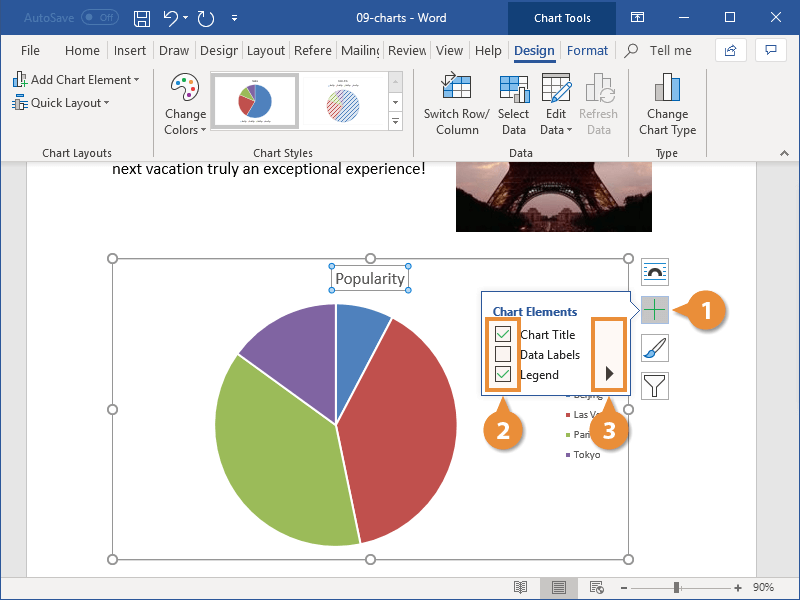
When you click on your graph, two new tabs should appear at the top of your Word window, usually called Chart Design and Format. These are your styling stations. Let's explore Chart Design first.
Under Chart Design, you'll find options like Add Chart Element. This is your best friend for making your graph instantly more informative. You can add things like:
- Axis Titles: So people know what your axes (the lines going up and across) actually represent. Is it "Number of Pizzas" or "Number of Life Choices We Regret"? Crucial distinction!
- Chart Title: Give your graph a name! Something catchy, like "The Great Pizza Duel of '23" or "Avocado Toast Expenditure: A Cautionary Tale."
- Data Labels: These are the little numbers that appear directly on top of each bar or slice. Super helpful for precise information without having to squint at the axis.
- Legend: If you have multiple series of data (e.g., Pizzas eaten vs. Garlic Bread consumed), the legend tells you what each color or pattern represents.
Then there's the Quick Layout option. This is like picking a pre-set outfit for your graph. Word gives you a few different arrangements of titles, labels, and legends to choose from. It's a great way to quickly see what looks good without having to manually add every single element.
And of course, there are the Chart Styles. These are pre-designed color schemes and formatting combinations. They're like trying on different outfits in a dressing room. Some will make your graph look sophisticated, some might be a bit too loud, and some will just feel right. Experiment! See what catches your eye. You can even hover over them to see a live preview.
Now, let's hop over to the Format tab. This is where you get down to the nitty-gritty details. You can:
- Change Colors: Select individual bars, slices, or text elements and change their colors. Feeling bold? Go for neon! Feeling understated? Stick to muted tones. This is your canvas.
- Adjust Text Formatting: Make your titles and labels bigger, smaller, change their font, make them bold. You can even add effects like shadows or reflections. (Use effects sparingly, unless you're going for a very specific, retro vibe.)
- Shape Styles: This lets you change the outline of your chart elements or add fills.
Don't be afraid to click around! Most of the time, if you mess something up, you can just undo it (Ctrl+Z is your best friend here, a true hero in the digital realm). Think of it like playing with digital play-doh. You can mold, shape, and reform it to your heart's content.
When to Use What: A Simple Guide to Chart Types
While we've focused on column charts, it's good to know what the other guys are good for. It’s like having a toolkit – you wouldn’t use a hammer to screw in a lightbulb, right?
Line Charts: Imagine you're tracking your progress in learning a new skill, say, juggling flaming torches. A line chart would be perfect for showing how your success rate (hopefully!) goes up over time. Or maybe you're monitoring the stock market, or how many times you've hit the snooze button in a week. For anything that shows a progression or trend over a period, line charts are your go-to.
Pie Charts: Remember that avocado toast budget we talked about? A pie chart is fantastic for showing how that budget breaks down. Like, what percentage goes to the avocado itself, what percentage is the bread, and what percentage is that sprinkle of chili flakes that you insist is essential. It's all about showing proportions and how each piece contributes to the whole. Just try not to make your pie chart have too many slices. Too many slices is like trying to eat a whole pizza by yourself – overwhelming and potentially messy.
:max_bytes(150000):strip_icc()/make-graph-in-word-windows-10-5b6db8c146e0fb0050f61c17.jpg)
Bar Charts: These are very similar to column charts, but they're horizontal. They're great for comparing items, especially if the item names are quite long. Imagine ranking your favorite ice cream flavors. If the flavors have names like "French Vanilla Bean with a hint of Lavender," a horizontal bar chart gives you more space to write out those fancy names without them getting squished.
Scatter Plots: These are a bit more advanced, but super useful for seeing if there's a relationship between two different sets of numbers. For example, are you more likely to eat more pizza on days when you've also had more coffee? A scatter plot can help you visualize that. Each dot represents a pair of data points. If the dots cluster in a certain way, it suggests a correlation. It’s like looking for patterns in the stars, but with numbers.
Area Charts: Think of these as a souped-up line chart. Instead of just a line showing the trend, the area below the line is filled in. This is good for showing how a quantity changes over time and how much of that quantity is represented. It’s like seeing not just how much you’ve been saving, but also visualizing the growing pile of cash!
The Final Word: Your Data, Your Story
Making a graph in Word isn't rocket science. It's more like assembling IKEA furniture – it might seem a bit daunting at first, but with a little patience and a clear set of instructions (which you now have!), you can end up with something functional and even quite attractive.
The most important thing is to use graphs to make your data understandable and engaging. Don't just slap a graph in your document for the sake of it. Think about what you're trying to communicate. Do you want to show a comparison? A trend? A proportion? Choose the chart type that best tells that story.
And remember, practice makes perfect. The more you create graphs, the more comfortable you'll become with the different options and the better you'll get at making them look sharp. So go forth and graph! Tell your data's story. Show the world the sheer magnitude of your avocado toast habit. You've got this!
:max_bytes(150000):strip_icc()/012-how-to-make-a-graph-in-microsoft-word-a793e5f4420a4c07b35180ec5b1a78c4.jpg)