How Do You Light A Charcoal Bbq

I remember my first charcoal BBQ. It was a sweltering summer afternoon, and my dad, bless his enthusiastic heart, had decided it was the perfect day to finally break out the fancy new grill. We’d spent ages setting the table, marinating chicken that was probably going to end up a little too charred (but hey, we were ambitious!), and then… we hit a snag. The charcoal. It just… sat there. Looking innocent. Mocking us, really. We poked it. We prodded it. We blew on it like a desperate birthday wish. Nothing. My dad was starting to sweat more than the ambient temperature warranted, and I swear I saw a tiny flicker of panic in his eyes. This was supposed to be a joyous occasion, a rite of passage into the hallowed world of smoky, delicious goodness, and we were defeated by… black briquettes. Eventually, after what felt like an eternity of fanning and frustrated sighs, a few brave embers glowed to life, and we managed a somewhat respectable cook. But that initial struggle? It’s seared into my memory. And it’s exactly why we’re having this chat today.
Because, let’s be honest, lighting a charcoal BBQ can sometimes feel like you’re trying to coax a dragon to breathe fire with sheer willpower. It’s not rocket science, but there’s definitely a knack to it, a few little tricks that can turn your potential BBQ blunders into barbecue brilliance. So, if you’ve ever found yourself in a similar charcoal-induced stupor, or if you’re just dipping your toes into the glorious world of live-fire cooking, stick around. We’re going to demystify this whole charcoal-lighting business, and by the end, you’ll be a bona fide fire-starter. Promise.
The Basics: What You'll Need (Besides Grit and Determination)
Before we even think about striking a match, let’s make sure you’re armed with the right gear. It’s like preparing for battle, but way more delicious. You don’t want to be halfway through the process and realize you’re missing a crucial component, right? That’s a recipe for more dad-sweat and potentially sad, undercooked burgers.
Must Read
The Grill Itself
Obvious, I know. But make sure it’s clean! A grill caked with the remnants of last year’s questionable hot dogs isn't going to do your new charcoal a favor. Give it a good scrub. A clean grill means better airflow and less chance of… well, last year’s flavors mingling with today’s masterpiece. Nobody wants that.
The Charcoal
This is where the magic (or the mild frustration) begins. You’ve got options, my friends. We’re generally talking about two main types:
- Lump Charcoal: This stuff is usually made from whole pieces of hardwood, meaning it burns hotter and faster. It’s the artisan's choice, if you will. It can leave a more natural, smoky flavor. Think of it as the free-range chicken of the charcoal world.
- Charcoal Briquettes: These are the uniform, pillow-shaped guys. They’re pressed together with binders. They tend to burn more evenly and for a longer time, which can be great for longer cooks. They’re reliable, like your trusty old sedan.
For beginners, briquettes are often a bit more forgiving. Lump charcoal can be a bit trickier to manage in terms of heat consistency. But experiment! Find what works for your grilling style and your taste buds.
The Ignition Source
This is where we separate the aspiring grill masters from the actual grill masters. There are a few popular ways to get this party started:
- The Chimney Starter: This is, in my humble opinion, the king of charcoal lighting. It's a metal cylinder with holes and a grate. You fill the bottom with crumpled newspaper (or firelighters), load the top with charcoal, light the newspaper from below, and voilà! In about 10-15 minutes, your coals will be glowing hot and ready to go. No weird chemicals, no excessive blowing. It’s clean, it’s efficient, and it’s a game-changer. If you don’t have one, seriously consider getting one. It’s a small investment for a massive reduction in BBQ stress.
- Lighter Fluid: The classic, controversial method. You soak your charcoal in this stuff, let it sit for a bit, and then light it. The smell… well, let’s just say it’s an acquired taste. And if you don’t let it burn off properly, your food can end up tasting like a petroleum product. Not ideal. While it’s effective, many purists (and people who dislike chemical smells) steer clear. If you use it, make sure it’s completely burned away before putting food on the grill. Seriously. Your taste buds will thank you.
- Electric Starters: These are basically coils that you stick into your charcoal and plug in. They heat up the coals directly. They’re a bit more involved, and you need an outdoor outlet nearby, but they’re generally effective and chemical-free.
- Firelighters: These come in various forms – cubes, gels, natural wood wool types. You place them amongst the charcoal, light them, and they’ll get the coals going. They’re a good alternative to lighter fluid if you don’t have a chimney starter. Just follow the product instructions.
And, of course, you’ll need a reliable way to light your chosen ignition source. Long BBQ lighters or waterproof matches are your friends here. Don’t be that person fumbling with a tiny Bic lighter near a pile of potential fire.

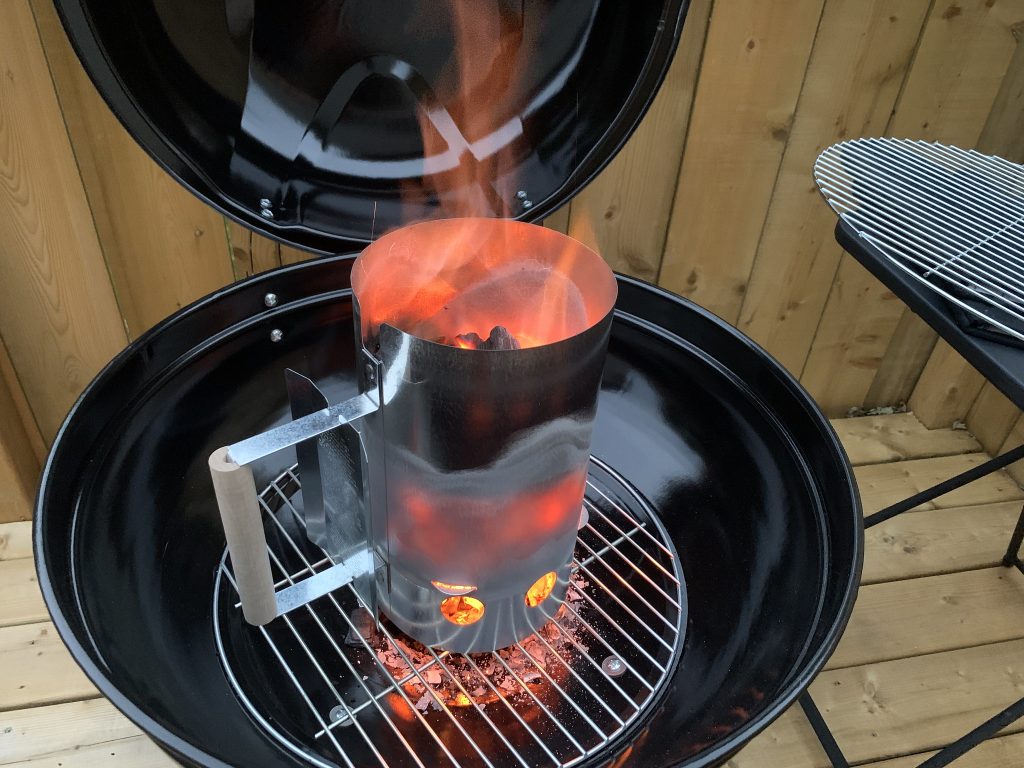
The Art of the Chimney Starter: Your New Best Friend
Okay, let’s dive deep into the chimney starter method, because, as I said, it's the bees' knees. It’s honestly the most foolproof way to get your charcoal going, and it eliminates a lot of the guesswork.
First things first, grab your chimney starter. Now, you’ll need some fuel for the fire. Crumpled newspaper is the classic choice. Old newspaper, junk mail – whatever you have that will catch a flame. Rip or crumple it into loose balls. You don't want to pack it too tightly, or the air won't be able to flow. Think of it as giving the flames room to breathe. How many sheets? About 2-3 sheets, loosely crumpled, should do the trick for a medium-sized chimney. If you’re using commercial firelighters, follow the package directions.
Next, place the crumpled newspaper (or firelighters) in the bottom chamber of the chimney starter. This is crucial. You want the flame to lick upwards and ignite the charcoal above it.
Now, for the main event: the charcoal. Fill the top chamber of your chimney starter with the amount of charcoal you’ll need for your cook. For a standard grilling session with burgers and hot dogs, you might fill it about halfway to two-thirds of the way full. If you’re doing a longer cook, like a brisket or ribs, you might need to fill it all the way up. Don't be shy with the charcoal, but don't overstuff it to the point where air can't get in.
Carefully place the filled chimney starter into your grill. You can do this directly on the charcoal grate. Just make sure it's sitting securely.

Now, for the ignition. Reach in with your long lighter or match and light the newspaper or firelighters from a few spots underneath the chimney starter. You want to get a good flame going.
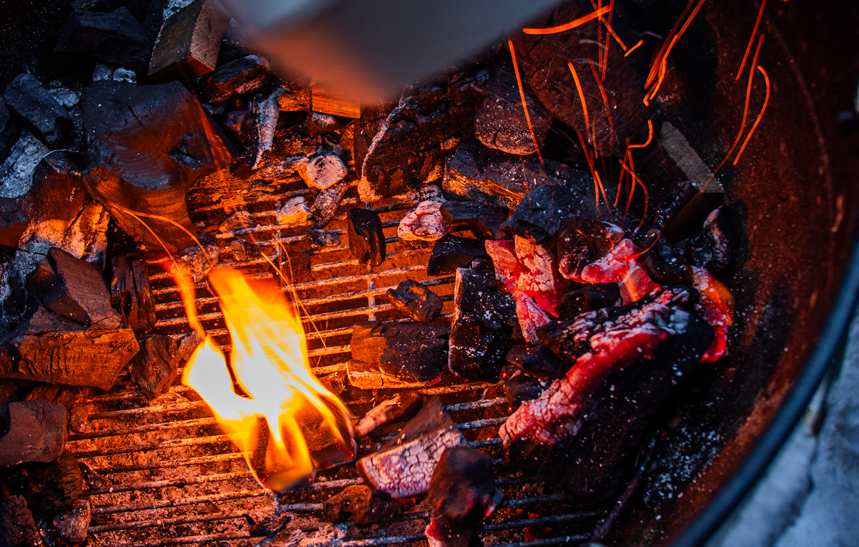
Here’s where the patience comes in, and it’s not a virtue you want to rush. You’ll see smoke initially, and then, as the fire catches, the flames will start to lick upwards. The magic happens when you see the coals at the top of the chimney starter starting to glow red. This usually takes about 10-15 minutes. You want to see a good amount of that bright red glow. This indicates that the coals are fully ignited and ready to be transferred to the grill.
Once they’re glowing beautifully, carefully use heat-resistant gloves (seriously, don’t skip these!) to grab the handles of the chimney starter. It’s hot. Like, really hot. Tilt it carefully and pour the glowing coals out onto the charcoal grate of your grill. Spread them out evenly with your tongs. You’re aiming for an even layer of heat.
At this point, you’re pretty much good to go! Place your grill grates back on, let them heat up for a few minutes, and you’re ready to start cooking.
The Lighter Fluid Tango (Proceed with Caution!)
Alright, if you’re feeling adventurous, or perhaps you’re on a budget and the chimney starter hasn’t made it into your toolkit yet, let’s talk about the lighter fluid method. It’s effective, but it requires a bit more… finesse. And vigilance.
:strip_icc()/lighted-charcoal-chimney-grill-9cd180b7-02cbbce319a34ef19a5510af88aff0c9.jpg)
Start by arranging your charcoal in a pyramid or a mound on the charcoal grate. This helps create a concentrated hot spot for ignition. You can use briquettes or lump charcoal here, though briquettes are often easier to saturate evenly.
Now, here’s the tricky part. Drizzle the lighter fluid over the pile of charcoal. Don't go overboard! You're aiming for a good saturation, not a charcoal swimming pool. The amount depends on the volume of charcoal, but a general guideline is about 1/4 to 1/2 cup for a standard load.
Here’s the crucial step that many people miss, and it’s where the dreaded lighter fluid taste comes from: let it soak in. Wait for at least a minute or two, or even longer if you have the time. This allows the fluid to penetrate the charcoal, ensuring a more even and complete burn. If you light it immediately, you'll just be burning the fluid off the surface, and the charcoal underneath won't be properly ignited.
Once you’ve let it soak, step back. Light the fluid at the base of the pile in a few different spots with your long lighter or match. Be prepared for a whoosh of flame. This is normal. Stay a safe distance away.
Now, and this is where the real patience comes in, you wait. You watch the flames. You wait until the flames have mostly died down, and you can see that most of the charcoal pieces are glowing red. This usually takes about 10-20 minutes, depending on the wind and the amount of fluid used. You are looking for that glowing ember stage. If you can still smell a strong chemical odor, or if you see large flames, it's not ready.
Once the charcoal is glowing, you can carefully spread it out with your tongs onto the grate. Again, let it heat up for a few minutes before adding your cooking grates. And remember, if you can still smell that chemical scent, your food will taste like it. This is the biggest drawback of this method.
Common Pitfalls and How to Avoid Them
Even with the best intentions, we can all stumble. Here are a few common charcoal-lighting blunders and how to sidestep them:
- Rushing the Process: This is probably the number one mistake. You’re hungry, the sun is shining, and you just want to get cooking. But if you don’t let the charcoal get properly hot, you’ll end up with undercooked food and a lot of frustration. Patience is a virtue, especially when it comes to fire.
- Using Too Much Lighter Fluid: We covered this, but it bears repeating. More fluid does not equal faster or better results. It equals a chemical-tasting disaster.
- Poor Airflow: Charcoal needs oxygen to burn. If your grill is choked with ash, or if the vents are all closed, your fire will struggle. Make sure your vents are open, especially when you’re starting. You can always close them down later to control the heat.
- Getting Too Close: Fire is hot. Obvious, right? But when you’re trying to light it, you might find yourself leaning in, trying to get that perfect angle. Use long lighters, long tongs, and heat-resistant gloves. Safety first, burgers second.
- Starting with Damp Charcoal: If your charcoal has been sitting out in the rain, or if it’s just generally damp, it’s going to be a nightmare to light. Store your charcoal in a dry place.
Controlling the Heat: Beyond Just Lighting
Once your charcoal is lit and glowing, the next step in the BBQ journey is heat management. This is a whole other topic, of course, but a brief mention is in order because how you arrange your coals directly impacts your cooking. You can create different heat zones:
- Direct Heat: Spread your coals evenly across the charcoal grate. This is for searing steaks, burgers, and anything you want to cook quickly with a good char.
- Indirect Heat: Pile your coals to one side of the charcoal grate, leaving the other side empty. This is for cooking larger cuts of meat, ribs, or anything that needs to cook through slowly without burning on the outside. You can then move food over the cool zone if it’s cooking too fast.
Mastering heat zones will elevate your BBQ game significantly. It’s about being in control, not just reacting to the flames.
The Verdict: Embrace the Flame!
So there you have it. Lighting a charcoal BBQ doesn’t have to be a daunting ordeal. The chimney starter is your best friend for a reason – it’s reliable, efficient, and minimizes the chance of chemical taint. But even if you’re going the lighter fluid route, understanding the principles of ignition and being patient will make all the difference. Remember that first time? It doesn't have to be your last frustrating experience.
With a little practice, a few key tools, and a healthy dose of patience, you’ll be conjuring glowing embers and delicious meals in no time. The smell of charcoal smoke is one of life's simple, wonderful pleasures. So go forth, embrace the flame, and get grilling! Your taste buds will thank you, and you’ll finally feel that sense of accomplishment that comes from mastering a good ol’ fashioned charcoal BBQ. Happy grilling!