How Do You Change A Plug Socket
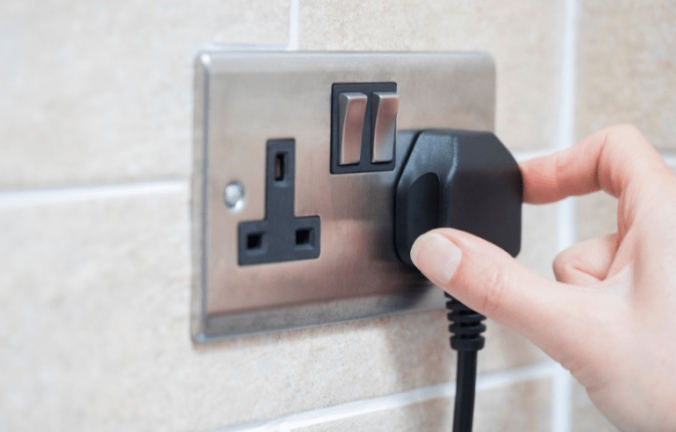
Ever had that moment? You know, the one where your trusty phone charger just won't stay in the wall socket? Or maybe that lamp you adore has suddenly gone dark, leaving your cozy reading nook feeling a bit… well, gloomy. It’s frustrating, right? It’s like your house is giving you a little electronic middle finger. But guess what? That little bit of frustration can often be solved by something surprisingly simple: changing a plug socket.
Now, before you picture yourself in a boiler suit, wielding screwdrivers like a superhero, let me tell you: this isn't about becoming a certified electrician overnight. It’s more like learning to change a tire or bake a decent cake. With a little guidance and a healthy dose of caution, you can totally do this. And honestly, it’s a pretty empowering feeling to fix something yourself instead of waiting for a pricey visit from the repair person. Think of it as unlocking a new level in your 'adulting' game.
Why should you even bother caring about this seemingly small electrical detail? Well, for starters, it’s about convenience. No more jiggling chargers or strategically placed extension cords. It’s about bringing a little bit of seamlessness back into your life. Plus, a faulty socket can be a bit of a sneaky hazard. Think of it like that loose floorboard you keep meaning to fix – it might not seem like a big deal now, but it’s better to address it before someone trips. Safety first, folks, always!
Must Read
The Magic Wand (Also Known as a Screwdriver)
So, where do we begin? First things first, safety is paramount. This isn’t the time for dramatic flair or rushing. We’re going to be dealing with electricity, which, while amazing for powering our Netflix binges, can also give you a rather unpleasant zap. So, before you even think about touching that socket, you need to turn off the power. This is non-negotiable. It’s like telling your pet cat to stay out of the kitchen while you’re chopping onions – essential for their well-being (and yours!).
Find your fuse box or consumer unit. It's usually in a cupboard, a garage, or a utility room. It might look a bit intimidating with all those switches, but don't worry. You're looking for the switch that controls the power to the specific area where your troublesome socket is. If you’re unsure, you can always turn off the main switch for the whole house. Better safe than sorry, right? It’s like putting on your seatbelt – a simple action that can prevent a lot of trouble.

Once the power is off, double-check. Seriously. Use a socket tester (they're inexpensive and can be found at most hardware stores) or a simple lamp you know works. Plug it into the socket. If it doesn't light up or turn on, you've successfully killed the power. Phew! You've passed the first, and most crucial, test. Now, you can breathe a sigh of relief and proceed.
Unscrewing the Old Guard
Now that the power is off and you’ve confirmed it, it’s time to get to the nitty-gritty. Grab your trusty screwdriver. Most standard sockets have two screws holding the faceplate on. These are usually on the top and bottom of the plate. Gently unscrew them. They should come out relatively easily. Don't force them; if they're stuck, a little bit of gentle wiggling might help, but again, no brute force.
Once the screws are out, the faceplate should lift off. You might need to gently pry it away from the wall. Underneath, you'll see the innards of the socket. It will look a bit like a tiny electrical spiderweb, with wires connected to terminals. Don't panic! It's usually not as complicated as it looks.

You’ll see a few different coloured wires. Typically, you'll have a brown wire (live), a blue wire (neutral), and a green/yellow wire (earth). Each of these wires will be attached to a terminal screw on the old socket. You’ll need to loosen these screws to free the wires. Again, your screwdriver is your best friend here. Just loosen them enough so the wires can slide out.
Introducing the New Kid on the Block
Now it’s time for the new socket. You can get these from any hardware store or DIY shop. They’re usually quite affordable. Make sure you’re getting a standard UK socket (or whatever type is used in your region!). They usually come in a little plastic bag with instructions, but we're going to walk through it.

Before you connect anything, take a moment to look at the new socket. You'll see the same terminal screws, usually marked with L (live), N (neutral), and the earth symbol (often a little wiggly line with three horizontal lines below it). This is where our coloured wires will go. It’s like matching puzzle pieces!
Now, let’s reconnect the wires. Start with the earth wire (green/yellow). This is your safety net. It should go into the terminal marked with the earth symbol. Screw it in securely. Then comes the neutral wire (blue). This one goes into the terminal marked 'N'. Finally, the live wire (brown) goes into the terminal marked 'L'. Make sure the wires are stripped back just enough to fit under the screw and that the screw is tightened firmly, but not so much that you damage the wire or the socket.
Think of it like feeding a plug into a socket – it needs to be secure and in the right place. If the wires are loose, it’s not going to work properly and could be a fire hazard. If you’re unsure about which wire goes where, stop and ask for help. It’s always better to be safe.

Putting It All Back Together
Once all the wires are connected to the correct terminals on the new socket, carefully push the socket back into its housing in the wall. You might need to tuck the wires in a bit to make them fit neatly. Then, put the faceplate back on and screw it into place. Again, don't overtighten those screws; just make them snug.
And then comes the moment of truth. Go back to your fuse box and switch the power back on. If all has gone according to plan, your newly fitted socket should be ready for action! Grab that charger, plug it in, and enjoy the sweet satisfaction of a device that’s actually powering up.
It’s a small victory, I know. But these little home improvements can make a surprising difference to your daily life. No more fiddling, no more frustration. Just a simple, working socket. It's like having a perfectly brewed cup of tea on a chilly morning – a small, consistent pleasure that just makes things a little bit better. So, next time you see a dodgy socket, don't just sigh. Consider giving it a little TLC. You might just surprise yourself with what you can achieve!

