How Do I Make Gluten Free Pasta

I remember the first time I tried to make gluten-free pasta from scratch. It was a dark and stormy night, and by "dark and stormy night" I mean I was trying to impress a date who’d recently gone gluten-free for, shall we say, reasons. I’d seen enough Pinterest boards and glossy magazine spreads to feel like an expert. "How hard can it be?" I’d scoffed to my reflection, armed with a bag of what felt suspiciously like really expensive sand and a vague sense of culinary bravado. Spoiler alert: it was very hard. The dough was either too sticky to handle or crumbly enough to build a tiny, inedible igloo. The boiling process resulted in a sad, amorphous blob that dissolved faster than a cheap chocolate bar in July. My date, bless their heart, ate it with a smile, but I could see the gentle pity in their eyes. Let’s just say the second date never materialized, and I learned a valuable lesson: gluten-free pasta is not a DIY project for the faint of heart, or the poorly informed. But fear not, my friends! After countless kitchen disasters, flour-covered countertops, and more than a few existential kitchen crises, I’ve finally cracked the code. And I’m here to share it with you, so you don’t have to go through the same doughy trauma.
So, you’ve decided to embark on the glorious quest of making your own gluten-free pasta. Maybe you have Celiac disease, maybe you’re avoiding gluten for other health reasons, or maybe you’re just one of those brave souls who likes to tinker in the kitchen. Whatever your motivation, welcome to the club! It's a club that often involves a bit of a learning curve, a touch of trial and error, and a healthy dose of patience. But oh, the rewards! Freshly made pasta, even gluten-free, is a game-changer. Forget those sad, pre-packaged options that taste like cardboard and regret. We're talking about real, delicious pasta that you can be proud of.
The Gluten-Free Flour Conundrum: It's Not Just One Flour, Is It?
This is where things get really interesting. Unlike traditional wheat flour, which has gluten (the magical protein that gives elasticity and structure), gluten-free flours are a whole different ballgame. They don't have that inherent "stick-together-ness." So, to replicate it, we need to get creative. Think of it like building a team. You can’t just have a whole team of strikers; you need midfielders, defenders, and a goalie. Your gluten-free flour blend is your team. You need a mix of different flours to achieve the right texture and binding properties.
Must Read
Most gluten-free pasta recipes will call for a blend of flours. This isn't just to add flavor (though that's a bonus!); it's crucial for texture. Here are some of the usual suspects you’ll encounter:
The Mighty GF Flours
- Rice Flour (White and Brown): This is your workhorse. White rice flour gives a neutral flavor and a slightly smoother texture. Brown rice flour adds a bit more nuttiness and fiber. They provide structure but can be a bit gritty on their own.
- Tapioca Starch/Flour: This is your binder and your secret weapon for chewiness. It’s what helps mimic that lovely elastic quality of gluten. Don’t confuse it with tapioca pearls, though!
- Potato Starch/Flour: Similar to tapioca, potato starch contributes to a lighter, softer texture and also helps with binding. It’s a great team player.
- Sorghum Flour: This one’s got a slightly sweet, mild flavor and a good texture. It’s becoming increasingly popular in GF baking for a reason.
- Almond Flour: While delicious in cakes, almond flour can make pasta a bit too dense and oily. Use it sparingly, if at all, in pasta blends. Think of it as a specialty player, not an everyday starter.
- Chickpea Flour (Gram Flour): This has a strong, distinct flavor and can make pasta a little gummy if not balanced correctly. It’s great for savory applications but might dominate a delicate pasta dish.
- Cornstarch: Another binder, similar in function to tapioca and potato starch.
The key is finding a good balance. A common starting point for a pasta blend might be something like 2 parts rice flour, 1 part tapioca starch, and 1 part potato starch. But this is where the magic (and the experimentation!) happens. Some people love adding a touch of sorghum or millet flour for added flavor and texture. You’ll find pre-made gluten-free flour blends at the store, but honestly, making your own is often more economical and gives you more control over the final product. Plus, you can tweak it to your heart's content.
The Binder: Holding It All Together
Since we don't have gluten, we need something else to act as the glue. You already have some of this in your starch component (tapioca, potato, cornstarch), but sometimes you need an extra boost. This is where things like:
- Xanthan Gum: This is the most common binder in gluten-free baking and is almost essential for GF pasta. It mimics gluten’s binding and thickening properties. A little goes a long way! Too much and your pasta can become… well, rubbery. And nobody wants rubbery pasta. Trust me on this.
- Psyllium Husk: This is a fantastic alternative to xanthan gum, especially if you have sensitivities. It absorbs a lot of water and creates a gel-like consistency, which is perfect for pasta dough. You'll often see it in whole husk or powder form.
When you’re looking at recipes, they'll usually specify the amount of binder needed. Pay close attention to this! It’s not a suggestion; it’s a vital ingredient. You can often find these at health food stores or in the baking aisle of larger supermarkets. If you’re new to GF baking, xanthan gum is usually the easiest to start with.
The Liquid Gold: Eggs and Water
Just like regular pasta, gluten-free pasta needs a liquid to come together. This is typically a combination of:
- Eggs: Eggs add richness, flavor, and color. They also contribute to binding and structure. If you're going vegan, you'll need to find egg replacers (more on that later!).
- Water: Sometimes, you might need a little extra liquid to get the dough to the right consistency. This is especially true with GF flours, as they can absorb liquid differently.
The exact ratio of flour to liquid will vary depending on the specific flours you use and even the humidity in your kitchen. This is why so many GF pasta recipes tell you to add the liquid gradually until the dough comes together. It's not just a vague instruction; it's a necessary step for success. Think of your dough like a needy toddler; it’ll tell you when it’s had enough or when it needs more attention (in the form of liquid).
The Process: Let's Get Our Hands Dirty (Literally!)
Alright, enough theory. It’s time for the action! Making gluten-free pasta is similar to making regular pasta, but with a few key differences to keep in mind.
Step 1: The Flour Blend Foundation
First, you'll want to weigh your flours and starches. Precision is your friend here. Mix them all together thoroughly in a large bowl. Make sure there are no clumps, and everything is evenly distributed. This is your dry base, your blank canvas.
Step 2: Adding the Wet Ingredients
In a separate bowl, whisk your eggs (if using). If your recipe calls for a bit of water, you can add it to the eggs. Now, create a well in the center of your dry ingredients. Pour the wet ingredients into the well.
Here’s where the magic (and the mess) begins. Gradually start incorporating the dry ingredients into the wet ingredients. You can use a fork, a spatula, or your hands. I’m a big fan of using my hands. There’s something incredibly satisfying about squishing and mixing the dough. It’s primal, it’s grounding, and it’s the best way to feel the texture develop. Just don't be surprised if you end up looking like a powdered donut.

Step 3: Kneading – The Gentle Approach
Now, this is where it differs significantly from traditional pasta. You do not want to overwork gluten-free dough. Gluten-free dough doesn't develop gluten strands, so over-kneading won't make it stronger; it might actually make it tougher or break down the binders. You’re not looking for elasticity in the same way you would with wheat pasta. You’re looking for a cohesive ball of dough that’s not too sticky and not too dry.
Gently bring the dough together. If it’s too dry and crumbly, add a tiny bit more water (like, a teaspoon at a time). If it’s too sticky, add a tiny bit more flour blend. You're aiming for a texture that's pliable but holds its shape. It might feel a bit softer than you expect, and that's okay. Think of it like playdough, but slightly less forgiving.
Once you have a cohesive ball, wrap it tightly in plastic wrap and let it rest. This is a crucial step! The resting period allows the flours to hydrate fully and the binders to work their magic. It makes the dough much easier to handle. At least 30 minutes is a good rule of thumb, but an hour is even better.
Step 4: Shaping Your Pasta Dreams
This is where your chosen pasta shape comes into play. You can use a pasta machine (which makes things so much easier, if you have one), or you can roll and cut by hand.
Using a Pasta Machine: Lightly flour your work surface and your pasta machine rollers. Start with the widest setting and pass the dough through. Fold the dough in half or in thirds, and pass it through again. Repeat this a few times. Then, gradually decrease the roller setting, passing the dough through each setting until you reach your desired thickness. If you’re making fettuccine or spaghetti, you’ll then use the cutting attachments. For ravioli or lasagna, you'll be cutting sheets.
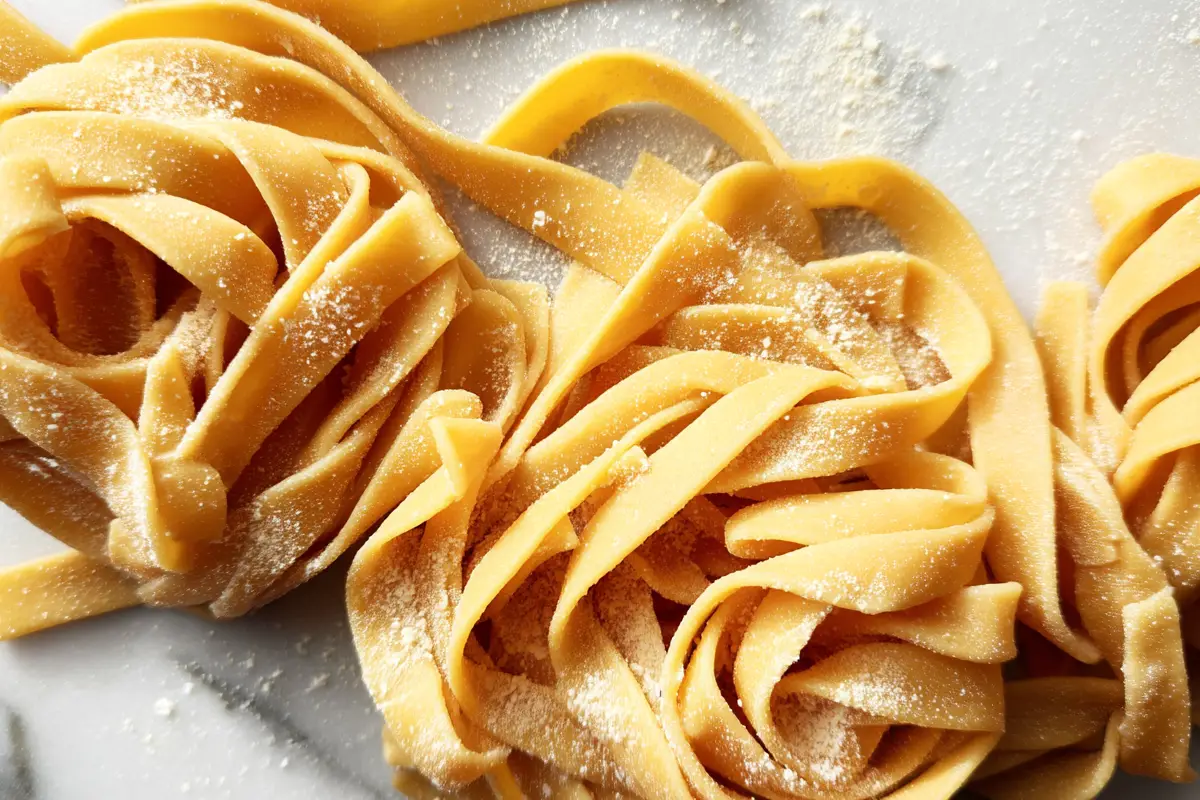
Rolling by Hand: Lightly flour your work surface. Take a portion of the dough and roll it out as thinly as you can. You’ll likely need to keep dusting your rolling pin and the dough with a little flour to prevent sticking. Aim for a uniform thickness. Once you have your sheet, you can cut it into strips for fettuccine or lay it flat for lasagna sheets. For shapes like orecchiette, you'll be pinching off small pieces and shaping them by hand. This takes a bit more practice but is incredibly rewarding.

Don't be discouraged if your first few attempts at rolling out the dough are a bit wonky. Gluten-free dough can be more delicate than wheat dough, so it might tear a bit. Just gently press it back together or cut out a different shape. No one will notice a slightly irregular ravioli, I promise.
Step 5: The Boil – Patience is a Virtue
Now for the moment of truth: the cooking! Bring a large pot of generously salted water to a rolling boil. Add your pasta gently, making sure not to overcrowd the pot. Gluten-free pasta can stick together more easily than regular pasta, so stirring it gently right after you add it is a good idea.
The cooking time for gluten-free pasta is usually shorter than for wheat pasta. It can range from 2 to 6 minutes, depending on the thickness and type of flour used. Taste a piece to check for doneness. You want it to be tender but still have a slight bite (al dente). Don't overcook it, or it will turn to mush.
Drain the pasta immediately and toss it with your favorite sauce. The sauce will help keep it from sticking together further.
Troubleshooting Your Gluten-Free Pasta Woes
Even with the best intentions, things can go awry. Here are some common issues and how to fix them:
- Dough is too sticky: Add a tiny bit more flour blend or a sprinkle of xanthan gum. Work it in gently.
- Dough is too dry and crumbly: Add a tiny bit more water or egg. Work it in gently.
- Pasta falls apart when boiling: This usually means you didn't use enough binder, or your flour blend wasn't balanced. Ensure you're using xanthan gum or psyllium husk as directed.
- Pasta is gummy: You might have used too much binder or a flour that’s too starchy without enough structure. Try adjusting your flour blend for the next batch.
- Pasta sticks together: Ensure you're using a large pot of boiling water and adding enough salt. Stir the pasta gently right after adding it to the water. Tossing with sauce immediately after draining also helps.
Don't get discouraged if your first batch isn't perfect. Every gluten-free flour blend is different, and every kitchen has its own quirks. The more you practice, the better you'll get at recognizing the right dough consistency and the perfect cooking time. Think of each attempt as a learning opportunity, a step closer to pasta perfection.
Vegan Gluten-Free Pasta? Yes, It’s Possible!
Going egg-free is also totally doable! You’ll need to replace the eggs with a binder and a little extra liquid. Some common egg replacers for pasta include:
- Flax Egg: 1 tablespoon ground flaxseed mixed with 3 tablespoons water, let sit for 5-10 minutes until gelled.
- Chia Egg: Similar to a flax egg, using chia seeds.
- Commercial Egg Replacer: Follow package instructions.
- Aquafaba: The liquid from a can of chickpeas. This can work wonders for binding and lightness.
When going vegan, you might need to adjust the liquid ratio slightly, as the egg replacers might absorb liquid differently than eggs do. Start with a smaller amount of liquid and add more as needed.
The Joy of Homemade GF Pasta
Making gluten-free pasta from scratch might seem daunting at first, but I promise you, it’s incredibly rewarding. The satisfaction of creating something so delicious from basic ingredients, all while navigating the complexities of gluten-free baking, is immense. Plus, you can experiment with different flour blends, add herbs and spices to the dough, and create unique shapes that you’ll never find in a store.
So, ditch those chalky boxed options and get ready to impress yourself (and maybe that date who never called back). Gather your flours, embrace the mess, and prepare to enjoy some of the best gluten-free pasta you’ve ever had. Your taste buds will thank you, and your kitchen counter might just forgive you for all the flour dust.
Happy pasta making!