How Do I Level A Concrete Floor

Ever looked at your basement floor and thought, "Man, that's a bit… lumpy?" Or maybe you're dreaming of that perfectly level spot for your new home gym, or a place where your washing machine doesn't do the samba every time it spins. Whatever the reason, dealing with an uneven concrete floor might sound like a DIY nightmare, but trust me, it's more achievable than you think. Think of it like this: if you can manage to assemble IKEA furniture without ending up with extra screws (we've all been there!), you can probably tackle this.
So, why should you even bother with a level concrete floor? Well, beyond aesthetics, there are some practical perks. For starters, a level surface means things sit properly. Your fridge won't wobble like it's on a seesaw. Your washing machine and dryer will hum along contentedly instead of vibrating their way across the room. If you're planning any kind of flooring on top – like tile, laminate, or even a fancy epoxy coating – a level base is absolutely crucial. Trying to lay tile on a bumpy floor is like trying to stack Jenga blocks after someone's given the table a good shake; it's just not going to end well.
And let's not forget about water. Even a slight slope can mean that puddles gather in one spot, which isn't great for anything you store there, or for the concrete itself over time. Think of it like a leaky faucet – a small drip might not seem like a big deal, but over months and years, it can cause real problems. A level floor helps prevent those little water collection points.
Must Read
So, What Exactly Are We Trying to Achieve?
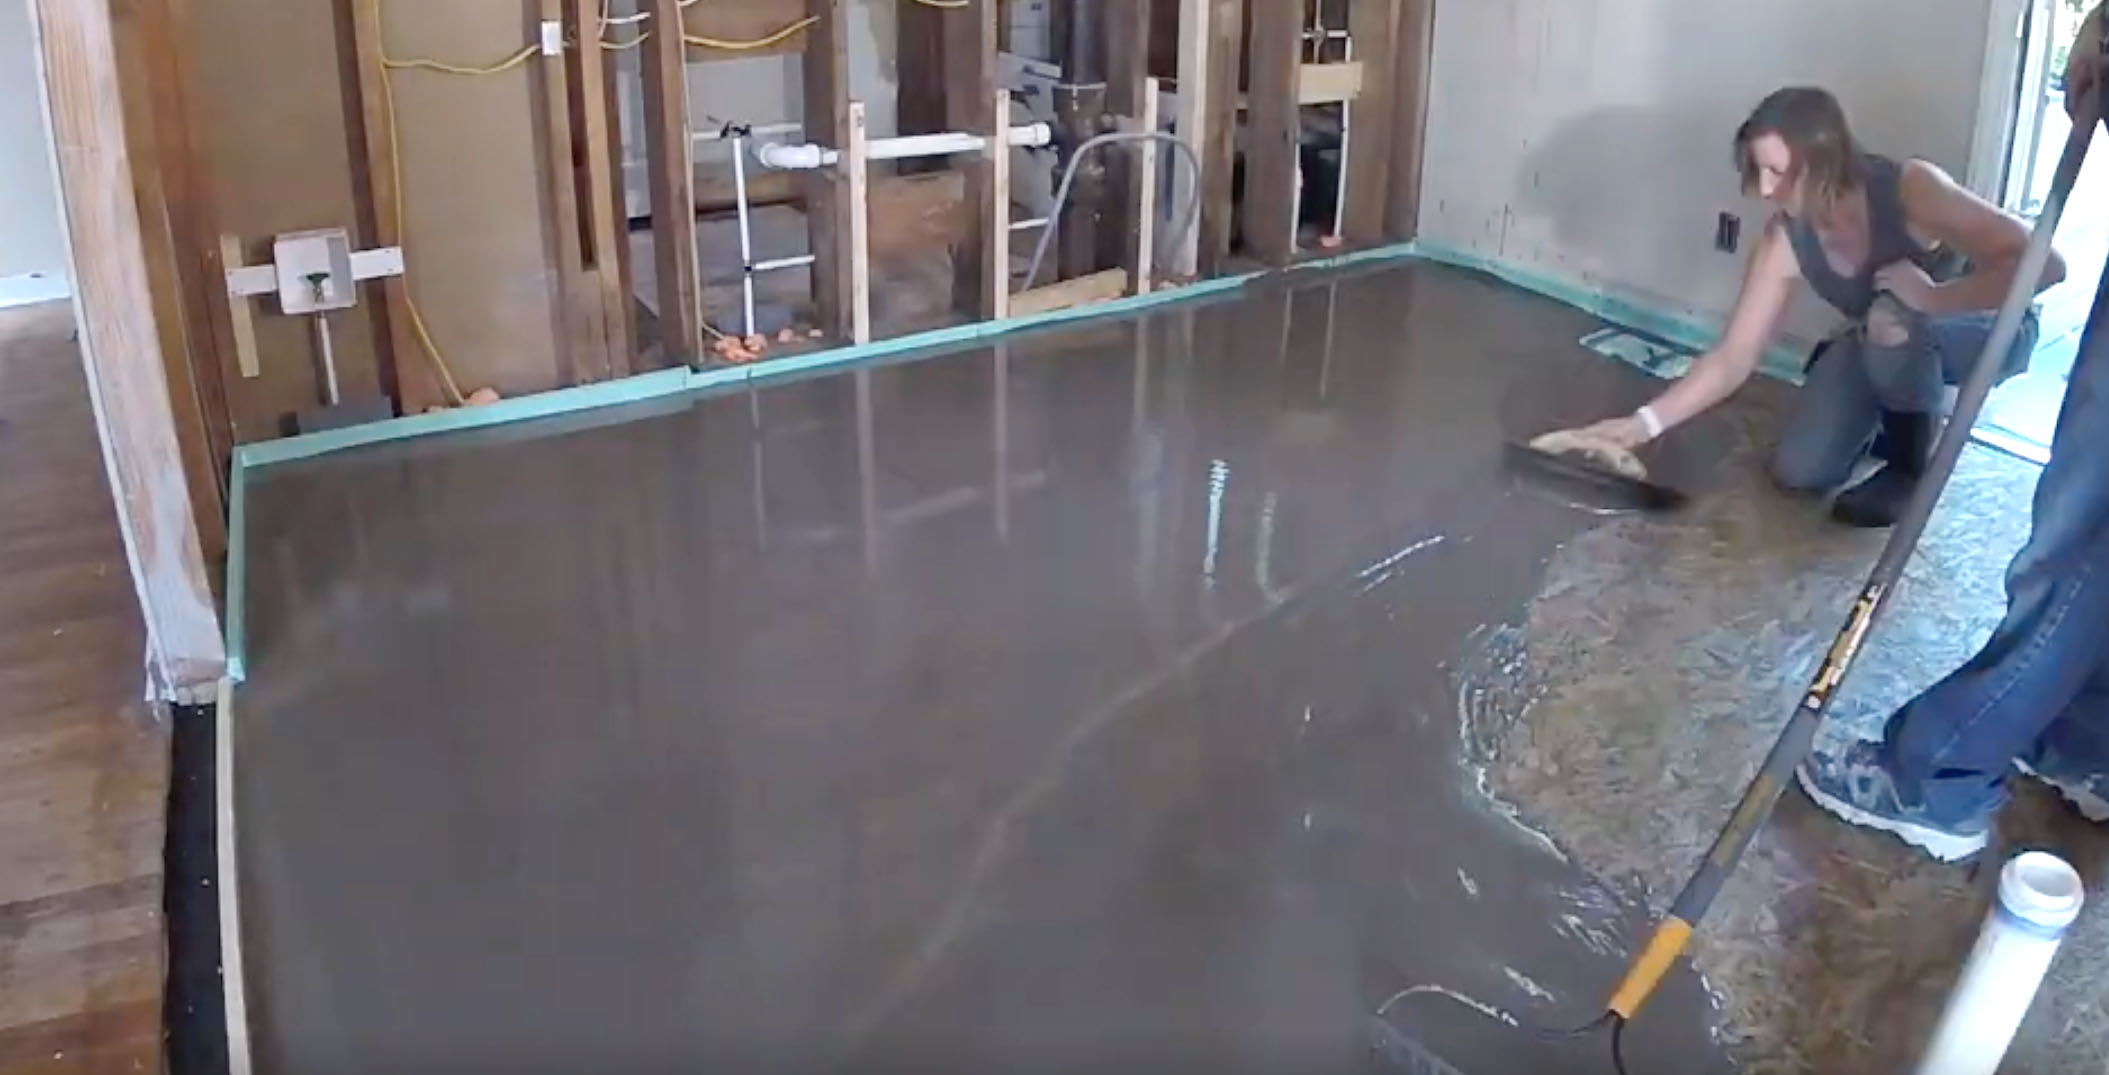
Basically, we want to smooth out the highs and lows. This usually means adding a bit of material to the low spots. We're not talking about ripping up the whole floor and repouring concrete (phew!). For most homeowners, we're looking at using a self-leveling compound. Imagine pouring a thick pancake batter – it naturally spreads out and finds its own level. That's kind of what this stuff does, but it's designed to stick to concrete and dry rock hard.
You might also encounter situations where a small area is way too high. In those cases, you might need to grind down the high spots. This sounds a bit more intimidating, like you'll be channeling your inner rock star with a grinder, but with the right tools and precautions, it’s manageable. It’s all about identifying the problem and choosing the right solution.
Step 1: The Great Detective Work – Assessing the Damage
Before you even think about buying any materials, you need to become a floor detective. Grab a long, straight edge – a level, a yardstick, or even a long piece of lumber will do. Start dragging it across your floor. See where the gaps are. This will show you the high spots (where the straight edge touches the floor) and the low spots (where there's a gap underneath).

You can also use a good old-fashioned measuring tape. Mark out a few grid lines on your floor and measure the height difference at various points. You're looking for dips or bumps that are more than a quarter of an inch, or so. Anything less, and you might be able to get away with just a really good cleaning and maybe some caulk. Anything more, and it's probably time for the leveling compound.
Don't forget to look for cracks. Small hairline cracks are usually okay, but wider ones might need to be filled before you level. You don't want your new level surface to have a giant crack running through it like a poorly drawn river on a map.
Step 2: Prep Work is Your Best Friend (Seriously!)
This is arguably the most important step. If you don't prep properly, your fancy new level floor might peel up like old wallpaper. Think of it like baking a cake: you need to grease and flour the pan, right? Otherwise, disaster!
First, clean, clean, clean. Sweep up all the dust and debris. Then, get out a shop vac and vacuum everything thoroughly. You want a surface that's as clean as your grandmother's china. If there are any oil stains, grease spots, or old paint, you’ll need to deal with those too. Degreasers can work wonders here. You want the concrete to be bare and ready to bond.
Next, you might need to score the concrete. This just means creating a slightly rougher surface for the leveling compound to grip onto. A wire brush or even a stiff broom can help with this. The goal is to create a surface that's more like sandpaper than a polished mirror.
If you have any significant cracks or holes, now's the time to patch them. Use a concrete patching compound. Again, you want a smooth, cohesive surface before you start adding more material.
Step 3: The Magic Potion – Mixing and Pouring the Self-Leveling Compound
This is where the magic happens! Self-leveling compounds come in bags, and you mix them with water according to the manufacturer's instructions. Read those instructions carefully! It's like following a recipe for grandma's secret cookies – you don't want to mess up the proportions.
You’ll need a large mixing bucket, a sturdy mixing paddle that attaches to a drill, and plenty of water. Mix it until it’s the consistency of thick cream or pancake batter. You’ll likely need to work relatively quickly, as these compounds start to set up pretty fast.

Here’s a little story: my neighbor, bless his heart, decided to try this on his own. He mixed up way too much at once, got distracted by his dog chasing a squirrel, and by the time he remembered, his bucket of leveling compound was a solid, unmovable brick. Let’s just say he learned a valuable lesson about working in batches and staying focused!
Pour the mixed compound into the lowest areas of your floor. It will start to spread out on its own, seeking its own level. You might need to use a squeegee or a smooth trowel to gently guide it into place and help it blend with the surrounding areas. Don't overwork it, though; remember, its magic is in its ability to flow!
Step 4: The Highs and Lows – Grinding and Patching
If you have a significant high spot, you’ll need to grind it down. This is where a concrete grinder comes in. You can rent these from tool rental shops. They’re heavy and can be dusty, so wear a dust mask and eye protection. It's like giving the concrete a very aggressive pedicure. You’re essentially shaving off the excess material until it’s closer to the surrounding level.
After grinding, you'll need to vacuum up all the dust thoroughly. Then, if you've ground away a lot, you might have created a new low spot that needs to be filled with your leveling compound. It’s a bit of a back-and-forth process sometimes, like a friendly game of Jenga where you're trying to level the tower.

Step 5: Patience is a Virtue (Especially for Concrete)
Once everything is poured, smoothed, and any grinding is done, you have to wait. Let it cure completely. This can take anywhere from 24 hours to several days, depending on the product and the thickness of the application. Resist the urge to walk on it or put heavy furniture on it too soon. Think of it like letting a fresh coat of paint dry – you don’t want to smudge it!
The manufacturer will give you specific drying times. Follow them like they’re gospel. A well-cured floor is a strong floor.
Step 6: The Grand Finale – The Level Check
Once it's fully cured, grab your level again and do the final check. You should see a nice, flat surface with no significant gaps. You’ve officially conquered the uneven concrete floor! Give yourself a pat on the back. You’ve made your home a little more stable, a little more practical, and a lot less likely to have appliance acrobatics.
It might not be the most glamorous DIY project, but the satisfaction of having a truly level floor is surprisingly great. It’s the foundation for so many other improvements, and it’s a reminder that with a little patience and the right approach, you can tackle just about anything. So, go forth and level your floors – your washing machine will thank you!

