How Do I Charge A Car Battery
So, your trusty steed, your four-wheeled companion, has decided to take a little siesta right when you’re about to embark on that spontaneous road trip or even just your daily commute. A dead car battery. It happens. More often than we’d like to admit, right? It’s one of those modern-day inconveniences that can throw a wrench in your perfectly curated, easy-going life. But fear not, fellow traveler on the asphalt jungle! Charging a car battery isn't some arcane wizardry reserved for mechanics in greasy overalls. It's totally within your reach, and dare I say, can even be a slightly… satisfying little DIY project.
Think of it like this: your car battery is the heart of your vehicle. It’s the little powerhouse that gets everything going – the ignition, the lights, the radio playing your epic playlist. When it conks out, it's like your own heart skipping a beat when you’re just trying to relax with a good book. We’ve all been there, right? That moment of panic, followed by the sinking feeling, and then the mental calculation of who can you call without sounding like a complete novice. Well, let’s banish that feeling. Today, we’re going to demystify the process, one easy step at a time.
The Art of the Jump Start: Your Speedy Solution
The most common scenario, and often the quickest fix, is a jump start. You know, when you see a friendly soul with jumper cables offering a helping hand? It’s practically a rite of passage in the automotive world, a modern-day act of neighborly kindness, akin to sharing a cup of sugar or offering a spare charger for your friend’s dying phone. This is where having a set of jumper cables stashed in your trunk becomes your superpower.
Must Read
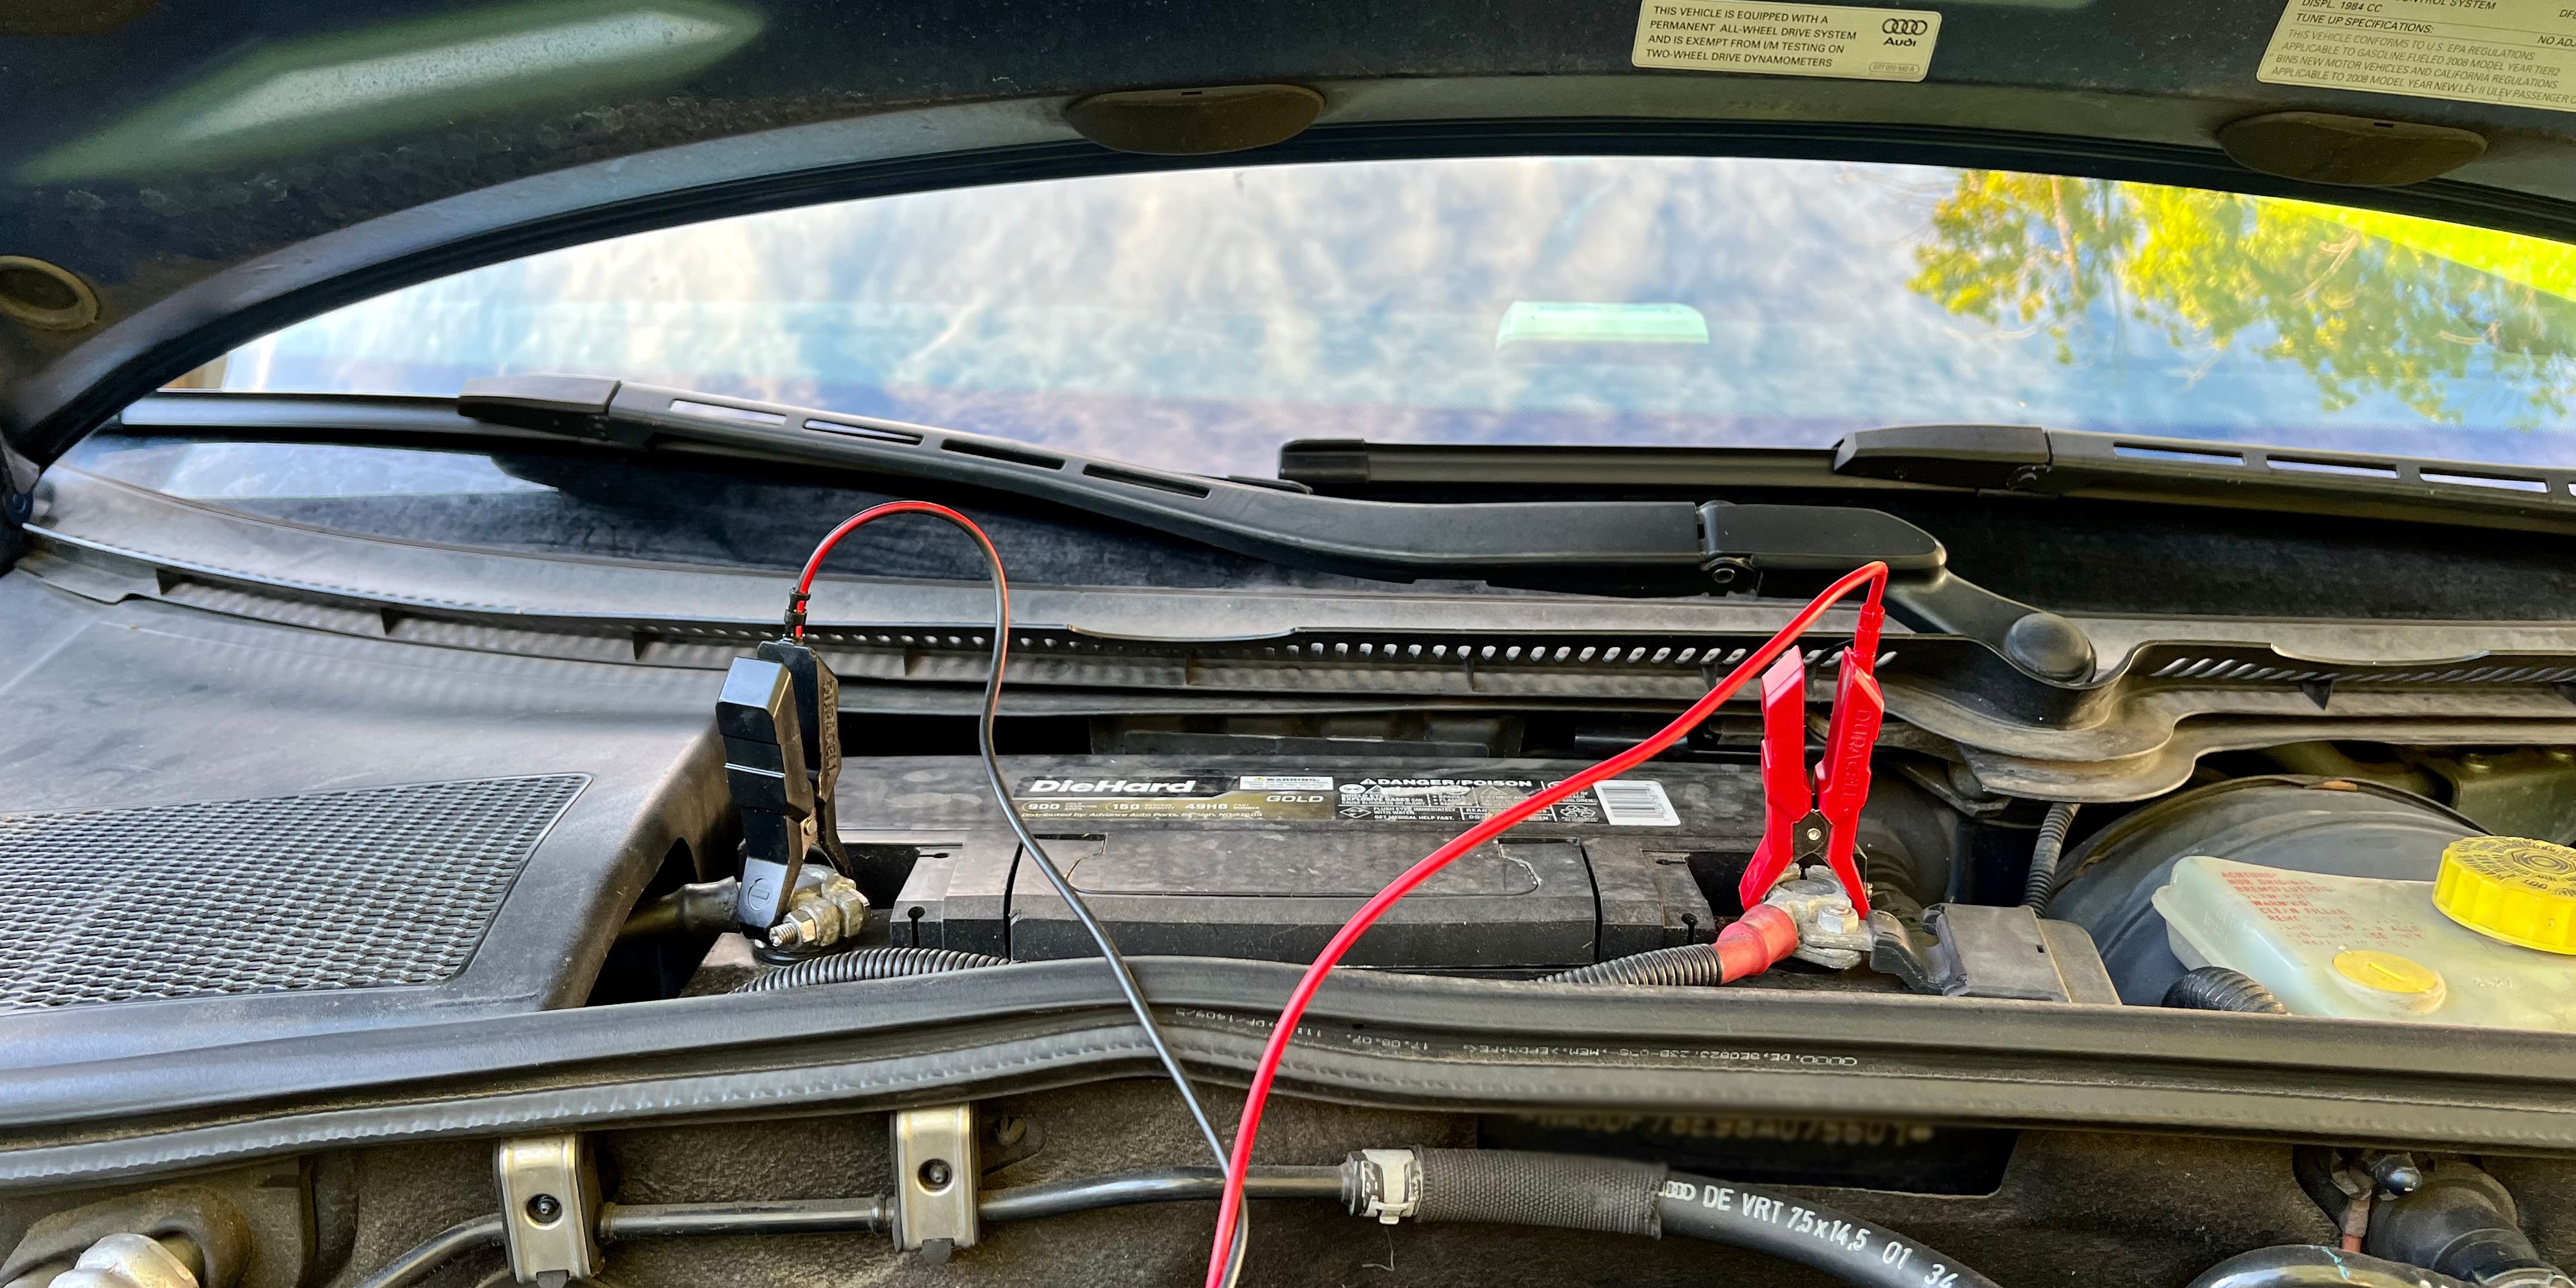
First things first: safety. Always make sure your cars are turned off and in park (or neutral for manual transmissions). Engaging the parking brake is also a non-negotiable. You don't want your car making a break for it while you're wrestling with cables. Imagine the headlines: "Woman's Car Escapes During Battery Charge, Causes Minor Commotion at Local Coffee Shop." We're aiming for a calm, collected, and successful charge here, not a viral news story.
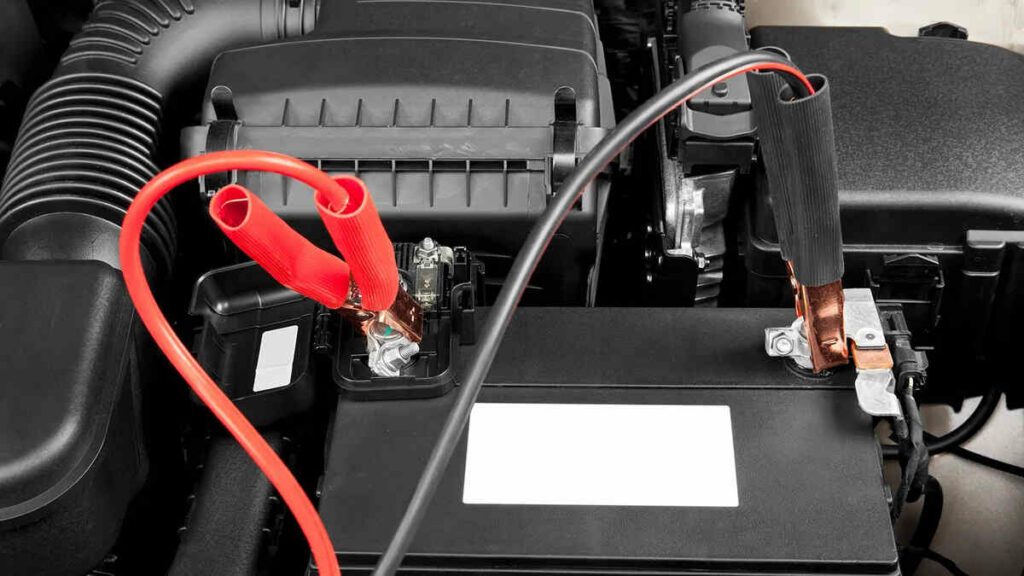
Now, for the star of the show: the jumper cables. They typically come in red and black. Think of them as your color-coded guide to electrical success. Red is for positive (the plus sign, +) and black is for negative (the minus sign, -). It’s like learning your ABCs, but for your car’s circulatory system. Easy peasy.
Connecting the Dots (Literally):
Here’s the dance you’ll perform with your helping vehicle:
1. Connect the positive (red) clamp to the positive terminal of the dead battery. Make sure it’s a firm connection. Give it a little wiggle. You want to feel that satisfying thunk of metal on metal.
2. Connect the other positive (red) clamp to the positive terminal of the donor battery. Again, a secure connection is key. This is the handshake between the two electrical systems.

3. Connect the negative (black) clamp to the negative terminal of the donor battery. Almost there! This is where things get a little more nuanced, and you want to be extra careful.
4. Connect the other negative (black) clamp to an unpainted metal surface on the engine block of the dead car. This is crucial. Do not connect it directly to the negative terminal of the dead battery. Why? A small spark could occur, and you don’t want that happening near the battery, which can release flammable gases. Think of it as creating a safe grounding point, like finding a solid anchor when you're sailing. An unpainted metal surface is your anchor.
A little fun fact: batteries can release hydrogen gas, which is highly flammable. That’s why avoiding sparks near the battery itself is so important. It's a small detail, but it makes a big difference in keeping things safe and sound.
Once all the connections are made, start the donor car and let it run for a few minutes. Then, try starting your car. If all goes well, she should purr to life! If not, give it a few more minutes and try again. Sometimes, the dead battery needs a bit more coaxing.
After your car is running, disconnect the cables in the reverse order: black from the engine block, black from the donor battery, red from the donor battery, and finally, red from your now-revived battery. This sequence helps prevent any last-minute electrical hiccups. Think of it as a graceful exit, a choreographed bow after a successful performance.
And the golden rule after a jump start? Drive your car for at least 30 minutes. This allows the alternator to do its job and recharge the battery properly. Don't just make a quick dash to the corner store; take it for a spin, maybe find a scenic route. Enjoy the freedom that a charged battery brings!
When the Jumper Cables Aren't an Option: The Battery Charger
Sometimes, a jump start isn’t feasible. Maybe you’re in a remote area, or you just prefer the solo approach. That’s where a dedicated battery charger comes in. These are fantastic little gadgets that you can keep at home and use when your battery needs a little pick-me-up. They’re like a personal trainer for your battery, giving it a focused workout to get it back in shape.
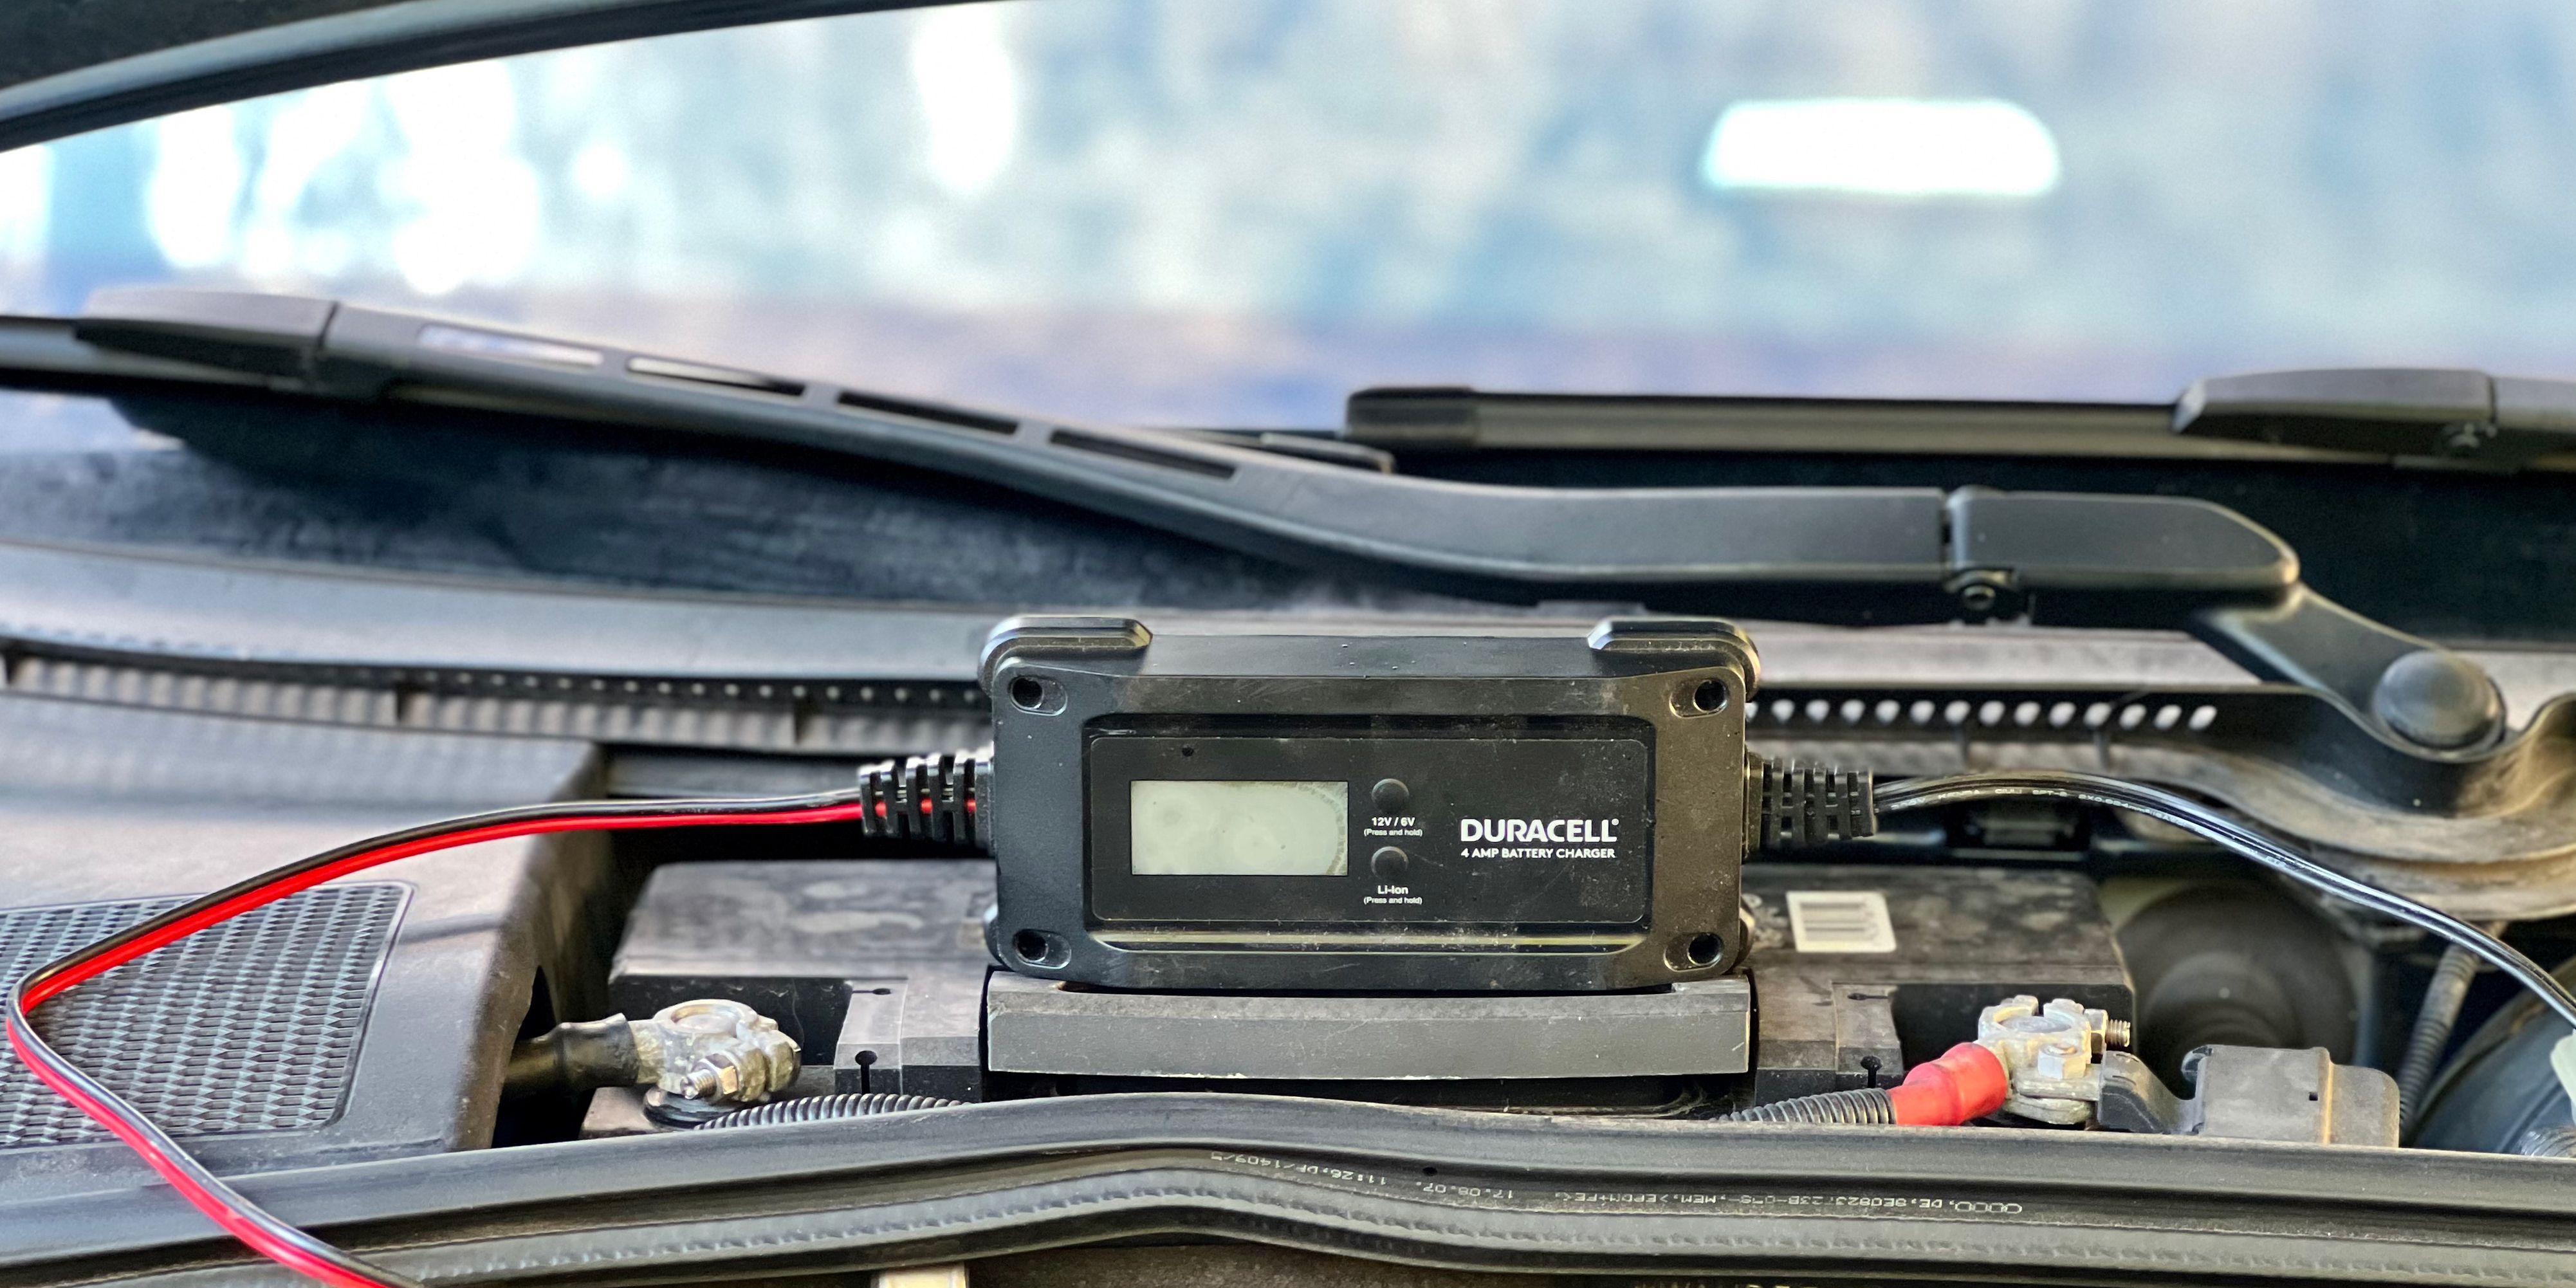
There are different types of chargers, from basic trickle chargers that provide a slow, steady charge to more advanced smart chargers that monitor the battery’s condition and adjust the charging rate accordingly. For the truly laid-back lifestyle, a smart charger is your best bet. It does the thinking for you, so you can focus on what matters – perhaps perfecting your sourdough starter or binge-watching that new series.
Using Your Battery Charger:
The process is generally quite straightforward:
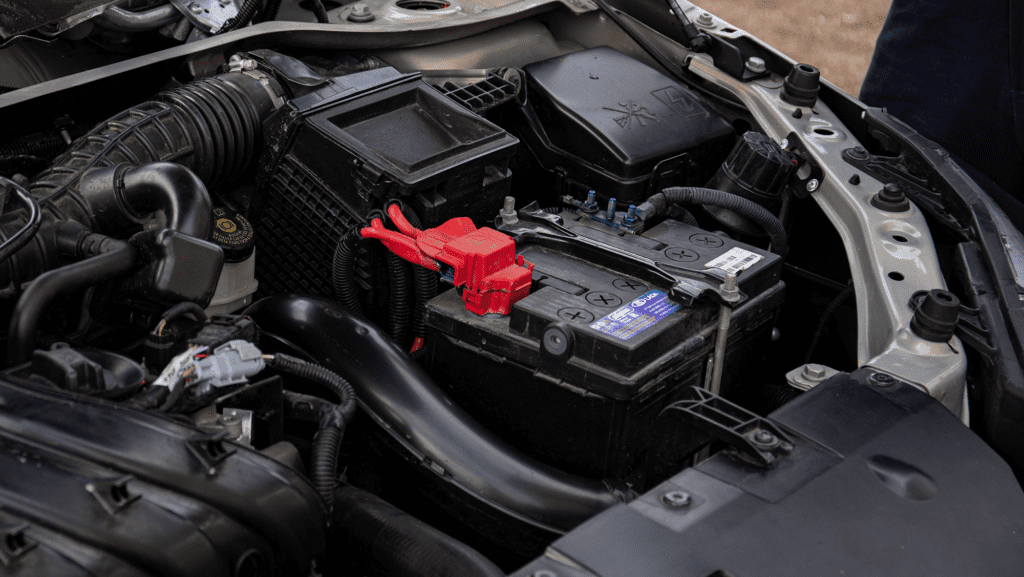
1. Locate your battery. Usually under the hood, but sometimes in the trunk. Consult your car's manual if you're unsure. It’s like finding your keys – a necessary first step!
2. Clean the battery terminals. A wire brush is your friend here. Remove any corrosion or debris to ensure a good connection. Think of it as prepping the stage before the main act.
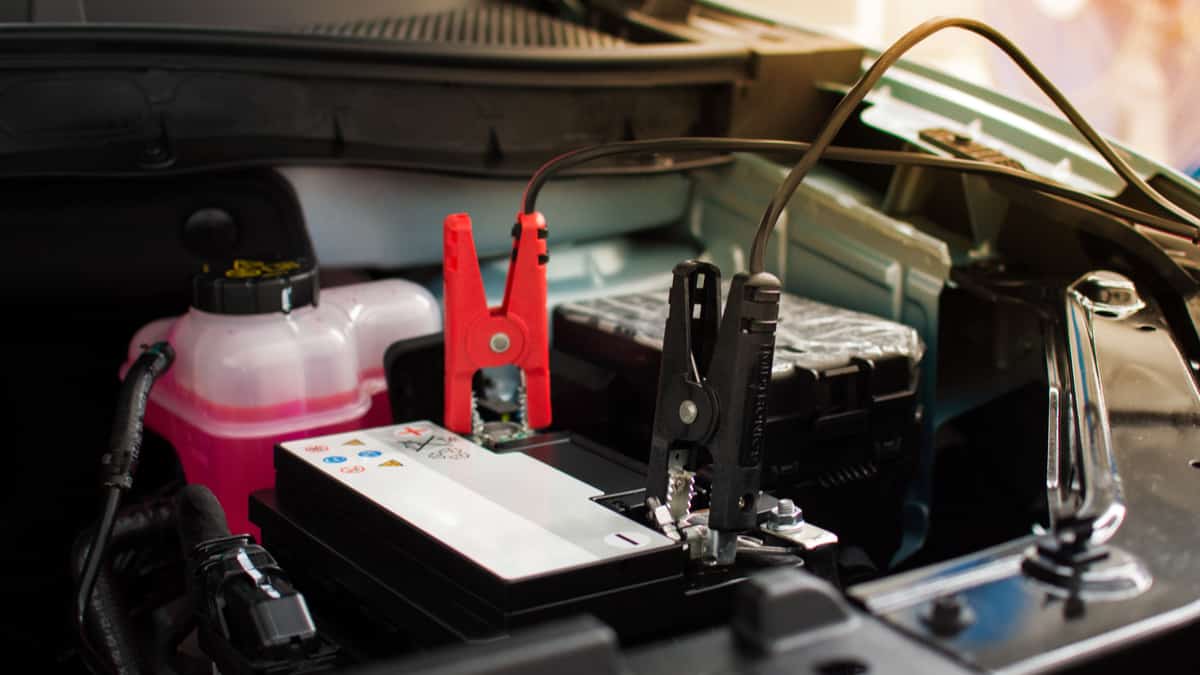
3. Connect the charger clamps to the battery terminals. Red to positive (+), black to negative (-). Just like with the jumper cables, but this time, the charger is your power source.
4. Plug in the charger and turn it on. Follow the charger’s specific instructions. Some have different modes for different battery types (lead-acid, AGM, etc.).
5. Let it charge. The charging time will vary depending on the battery’s condition and the charger’s power. Smart chargers will often indicate when the battery is fully charged. Patience is a virtue, especially when it comes to battery health. It’s not a race; it’s a marathon of restoration.
A handy tip: it’s generally a good idea to disconnect the negative battery cable before connecting the charger, especially if you’re using a non-smart charger. This adds an extra layer of safety. It’s all about minimizing risk and maximizing ease.
Preventing the Slump: Keeping Your Battery Happy
The best way to deal with a dead battery is, of course, to avoid it altogether. Think of battery maintenance as part of your car's wellness routine. Just like you might take a multivitamin or go for a brisk walk, your battery appreciates a little attention too.

Regular Checks: Get your battery tested periodically, especially if it's a few years old. Most auto parts stores offer free battery testing. It's like a quick check-up with your doctor – better to catch potential issues early.
Clean Terminals: As mentioned, keeping those terminals clean is vital for a good connection. A quick wipe-down every few months can make a world of difference.
Avoid Deep Discharges: Leaving lights on or the radio playing for extended periods when the engine is off can drain the battery significantly. This is like staying up all night playing video games when you have an early morning presentation – not ideal for performance!
Extreme Temperatures: Both extreme heat and cold can be tough on batteries. In the summer, heat accelerates the chemical reactions that degrade the battery. In the winter, cold slows down the chemical reactions, making it harder for the battery to deliver power. If you live in an area with extreme temperatures, be extra mindful of your battery’s age and health.
Modern Cars and Battery Drain: Newer cars have a lot more electronics that draw power even when the car is off. If your car sits for extended periods, a battery tender (a small, low-amperage charger) can be a lifesaver. It keeps the battery topped up without overcharging it, ensuring it's always ready to go.
A Little Reflection
So, there you have it. Charging a car battery, whether through a friendly jump start or the methodical approach of a charger, is a skill that empowers you. It’s a small act of self-sufficiency that can save you time, money, and a whole lot of frustration. It's about taking a moment from our busy lives, connecting with our machines, and ensuring they're ready to carry us forward. And honestly, there’s a quiet satisfaction in knowing you handled it yourself, a little nod to the maker in us all. It's a reminder that even the most complex systems rely on fundamental connections, a bit like our own relationships. When we're at our best, we're charged up, ready to connect, and able to keep moving. And isn't that what this easy-going life is all about?