How Do I Cast On In Knitting
Ever looked at a beautifully crafted scarf, a cozy sweater, or even just a simple, perfect swatch of fabric and wondered, "How did they do that?" Well, get ready to unlock a world of yarny magic, because today we're diving into the very first step of knitting: the cast on! It might sound like a mystical incantation, but trust me, it's the friendly handshake that gets your knitting adventure started. Think of it as the launchpad for all your creative projects, the moment where a loose strand of yarn transforms into the potential for something amazing.
Why is this seemingly simple step so important? Well, the cast on is essentially the foundation of your knitting. It creates the first row of stitches on your needle, giving you something to work with. A good cast on is like a solid base for a house – it needs to be sturdy enough to hold everything else, but also flexible enough to allow for movement and drape. Without it, there's no knitting, plain and simple! It's the gateway to creating everything from delicate lace shawls to chunky, squishy blankets. The beauty of learning to cast on is that it’s a fundamental skill that opens up a vast universe of possibilities in the world of fiber arts.
Imagine the joy of holding your own handmade creation, knowing that you, with your own two hands, brought it into existence, stitch by stitch. The cast on is your first proud step on that journey!
There are actually a few different ways to cast on, each with its own subtle charm and a slightly different feel to the edge it creates. But don't let that overwhelm you! For now, let's focus on one of the most popular and beginner-friendly methods: the long-tail cast on. It's like the trusty Swiss Army knife of cast-on methods – versatile, reliable, and it gives you a lovely, stretchy edge that works for most projects.
So, grab a ball of your favorite yarn – something smooth and not too dark to start with is a great idea – and a pair of knitting needles that feel comfortable in your hands. Don't worry too much about the exact size of the needles or the type of yarn for now; the goal is to get the hang of the movement. Think of it as learning to ride a bike – you might wobble a bit at first, but soon you'll be cruising!
![How to Cast On Knitting Stitches [7 Easy Methods]](https://knitting.com/wp-content/uploads/2022/07/F7FCA089-FE8D-4648-86BA-005A487E6326_adobe_express-1536x933.jpeg)
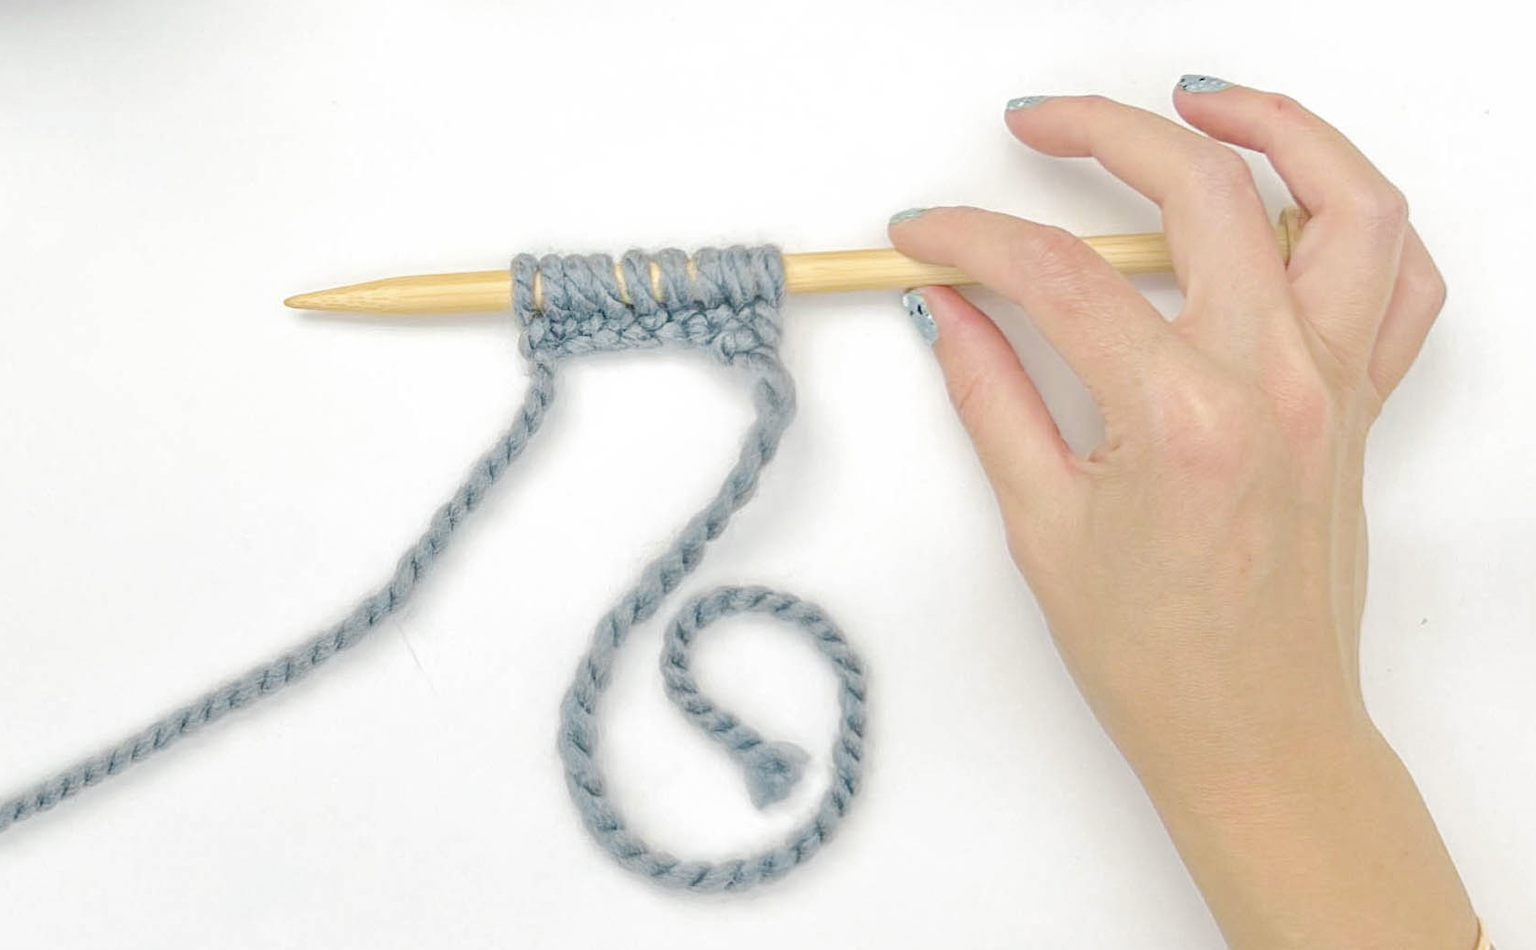
The Magic of the Long-Tail Cast On
This method is fantastic because it creates a wonderfully elastic edge. This means your knitted fabric will have a lovely bit of stretch, which is crucial for things like the brim of a hat or the edge of a sweater. It also looks neat and tidy, making your finished object look polished and professional. Plus, the name "long-tail" is a bit of a clue! You'll be using both ends of your yarn – the tail hanging from the skein and the initial tail you create to start – to form your stitches. It's a two-handed dance with yarn, and once you get the rhythm, it feels surprisingly intuitive.
Ready to try? Let’s break it down. First, you'll want to make a slip knot. This is your very first stitch, and it sits neatly on your needle. Think of it as the starting pistol for your knitting race. Then, you’ll need to estimate how much yarn you’ll need for your tail. This is where the "long-tail" comes in. A good rule of thumb is to wrap the yarn around your needle about ten times for every 20 stitches you plan to cast on. It might seem like a lot, but it’s better to have too much tail than not enough! You can always snip off any extra at the end.
![How to Cast On Knitting Stitches [7 Easy Methods]](https://knitting.com/wp-content/uploads/2022/09/Longtail-Cast-On.png)
Now, here’s where the magic happens. You’re going to hold your needle in your right hand (if you're right-handed) and position the yarn over your left thumb and index finger, creating a sort of slingshot shape. The working yarn (the one attached to your ball) will be coming from the index finger, and the tail will be coming from your thumb. This positioning is key! It allows you to scoop the yarn with your needle in a very specific way. It's a little like learning a secret handshake with your yarn!
The actual "casting on" part involves bringing your needle up and under the yarn on your thumb, then over the yarn on your index finger, and pulling a loop through. This new loop becomes your next stitch. You’ll repeat this process, scooping and pulling, scooping and pulling, until you have the desired number of stitches on your needle. Don’t worry if your tension is a little uneven at first. The goal is to understand the motion. Every knitter has been there!
One of the most rewarding aspects of learning to cast on is the immediate feedback. You can see your stitches forming right before your eyes! It’s a tangible representation of progress. And once you’ve mastered the long-tail cast on, you’ll find it’s suitable for a huge range of projects, from the simplest garter stitch scarf to the most intricate sweater patterns. It's a fundamental skill that will serve you well for years to come. So, embrace the wobble, enjoy the process, and get ready to cast on some serious fun!
![How to Cast On Knitting Stitches [7 Easy Methods]](https://knitting.com/wp-content/uploads/2023/05/IMG_2202-1536x751.jpg)
![How to Cast On Knitting Stitches [7 Easy Methods]](http://img.youtube.com/vi/iDXv8ZUOQaY/maxresdefault.jpg)
![How to Cast On Knitting Stitches [7 Easy Methods]](http://img.youtube.com/vi/a1WF-gkuTjg/maxresdefault.jpg)
![How to Cast On Knitting Stitches [7 Easy Methods]](http://img.youtube.com/vi/s4Bw8qO0qv4/maxresdefault.jpg)