How Do I Apply Stain To Wood

There’s something undeniably satisfying about transforming a plain piece of wood into a statement piece. Whether you’re breathing new life into an old coffee table, building a custom shelf that screams “you,” or even just assembling that flat-pack furniture with a little extra flair, the humble stain is your secret weapon. Forget intimidating carpentry jargon; we’re talking about the kind of project that feels more like a weekend treat than a chore. So, grab your favorite playlist, maybe a cup of something warm (or cold, depending on your vibe!), and let’s dive into the wonderfully mellow world of wood staining.
Think of staining wood like giving it a stylish outfit. Paint? That’s like a full-on ballgown – bold, but it completely covers the original texture. Stain? That’s more like a tailored blazer or a beautifully dyed linen shirt. It enhances the wood’s natural grain, adding depth and character without masking its inherent beauty. It’s about subtlety and enhancement, not concealment.
Gather Your Arsenal: The Essential Gear
Before we get our hands dirty (metaphorically, of course, if you’re doing this right!), let’s make sure you have everything you need. This isn't a military operation, just a chill DIY mission. Think of it as assembling your cozy creative toolkit.
Must Read
- The Stain: Duh! This is where the magic happens. Stains come in a dazzling array of colors, from classic oak and walnut to more adventurous tones like teal or even a dramatic ebony. Consider the mood you want to create. A light, natural tone can evoke Scandinavian minimalism, while a rich, dark stain might bring to mind a cozy, old-world library.
- Applicators: You’ve got options! Foam brushes are fantastic for beginners – they’re cheap, disposable, and give a pretty smooth finish. High-quality synthetic brushes offer more control and can be cleaned for reuse. Some folks even swear by lint-free cloths for a truly artisanal feel, sort of like those old-timey furniture makers you see in black and white movies.
- Sandpaper: Don’t skip this step! It’s your prep game. You’ll need a few grits – something coarser (like 100-150 grit) to smooth out any rough spots, and then something finer (220 grit or higher) for a silky-smooth finish. Think of it as exfoliating your wood.
- Rags: Lots of 'em. Lint-free rags are your best friend for wiping away excess stain. Old, clean cotton t-shirts work in a pinch, but be warned: they might leave tiny fluff particles behind.
- Gloves: Unless you’re aiming for a permanent manicure in a shade of mahogany, wear gloves. Seriously. Trust me on this one.
- Safety First (But Make It Chill): A well-ventilated area is key. Open those windows! If you’re really sensitive, a basic dust mask can make a big difference. This isn’t about fear; it’s about making your creative sanctuary a pleasant place to be.
- Optional, But Nice: Wood conditioner. This stuff is like a primer for your wood, helping it absorb the stain more evenly, especially for softer woods like pine. It’s like setting a good foundation for your makeup – it just makes everything look better.
Prep Like a Pro (Without the Pressure)
This is where the real artistry begins, and it’s less about Herculean effort and more about patient perfection. Rushing this stage is like trying to run a marathon in flip-flops – it’s just not going to end well.
The Sanding Serenade
So, you’ve got your piece of wood. Is it smooth enough to nap on? Probably not. Start with your coarser grit sandpaper. Work with the grain of the wood, not against it. Imagine you’re gently stroking a beloved pet. Apply even pressure. You want to remove any imperfections, splinters, or old finishes. Once you’ve gone over the whole piece, switch to your finer grit sandpaper. This is where you achieve that luxurious, touchable feel. Give it another gentle pass, always following the grain.
The goal here is a surface that feels like silk. After you’re done sanding, wipe away all the dust with a tack cloth or a slightly damp rag. You can’t see it, but dust is the enemy of a smooth stain job. It’s like glitter – it gets everywhere and is notoriously hard to remove. A clean surface is a happy surface.
Conditioning: The Wood’s Spa Day
If you’re using wood conditioner, now’s the time. Apply it according to the product’s instructions, usually with a brush or a lint-free cloth. Let it soak in for a bit – typically 15-30 minutes. This step is particularly important for woods like pine, which can be a bit unpredictable and drink stain unevenly, leading to blotchy results. Think of it as a buffer, ensuring your stain goes on like a dream, not a disaster.
The Shake-Up: Getting Your Stain Ready
Most stains need a good stir before you use them. Don't just shake the can vigorously; you'll end up with a foamy mess. Open the can and use a stir stick (a paint stir stick works perfectly) to gently but thoroughly mix the stain. Make sure you scrape the bottom and sides to incorporate all the pigments. You want a nice, uniform color. Imagine you’re making a really fancy, artisanal latte. Even distribution is key.
The Application: Where the Magic Happens
Okay, deep breaths. This is the moment. It’s not rocket science, but it does require a little mindfulness. Put on those gloves, open up your space, and let’s get staining!
First Coat: The Gentle Touch
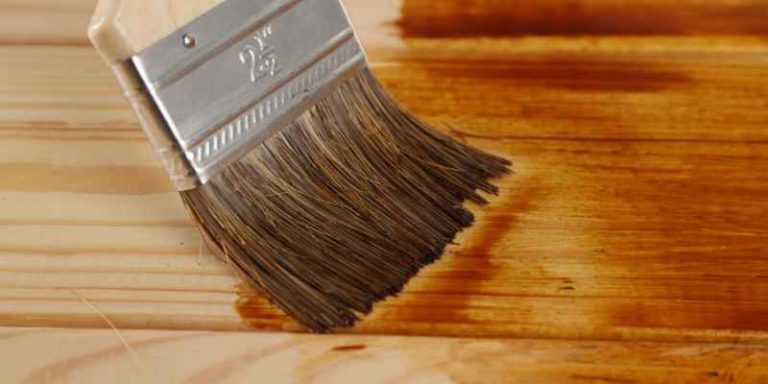
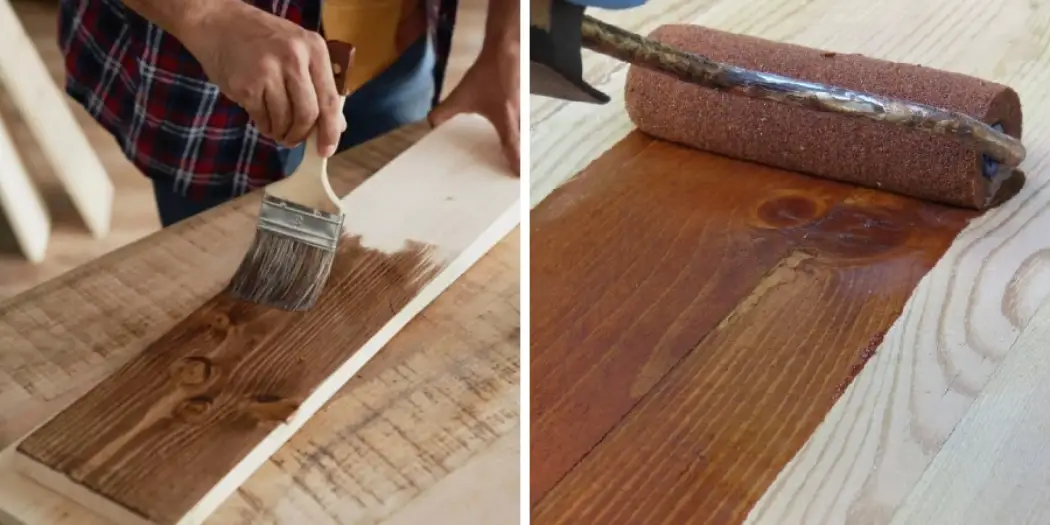
Start in an inconspicuous area if you're nervous. Dip your applicator (brush, cloth, or foam brush) into the stain. You don't need to drown it; just get a good, even coating. Begin applying the stain to your wood, working in long, smooth strokes with the grain. Don’t press too hard; let the applicator do the work.
Think of it like painting a watercolor. You’re guiding the color, not forcing it. If you’re using a cloth, dab and wipe rather than scrubbing. For larger surfaces, it helps to work in sections. Don’t let the stain dry on the surface before you’ve worked your way across the section.
The Wipe-Off Waltz
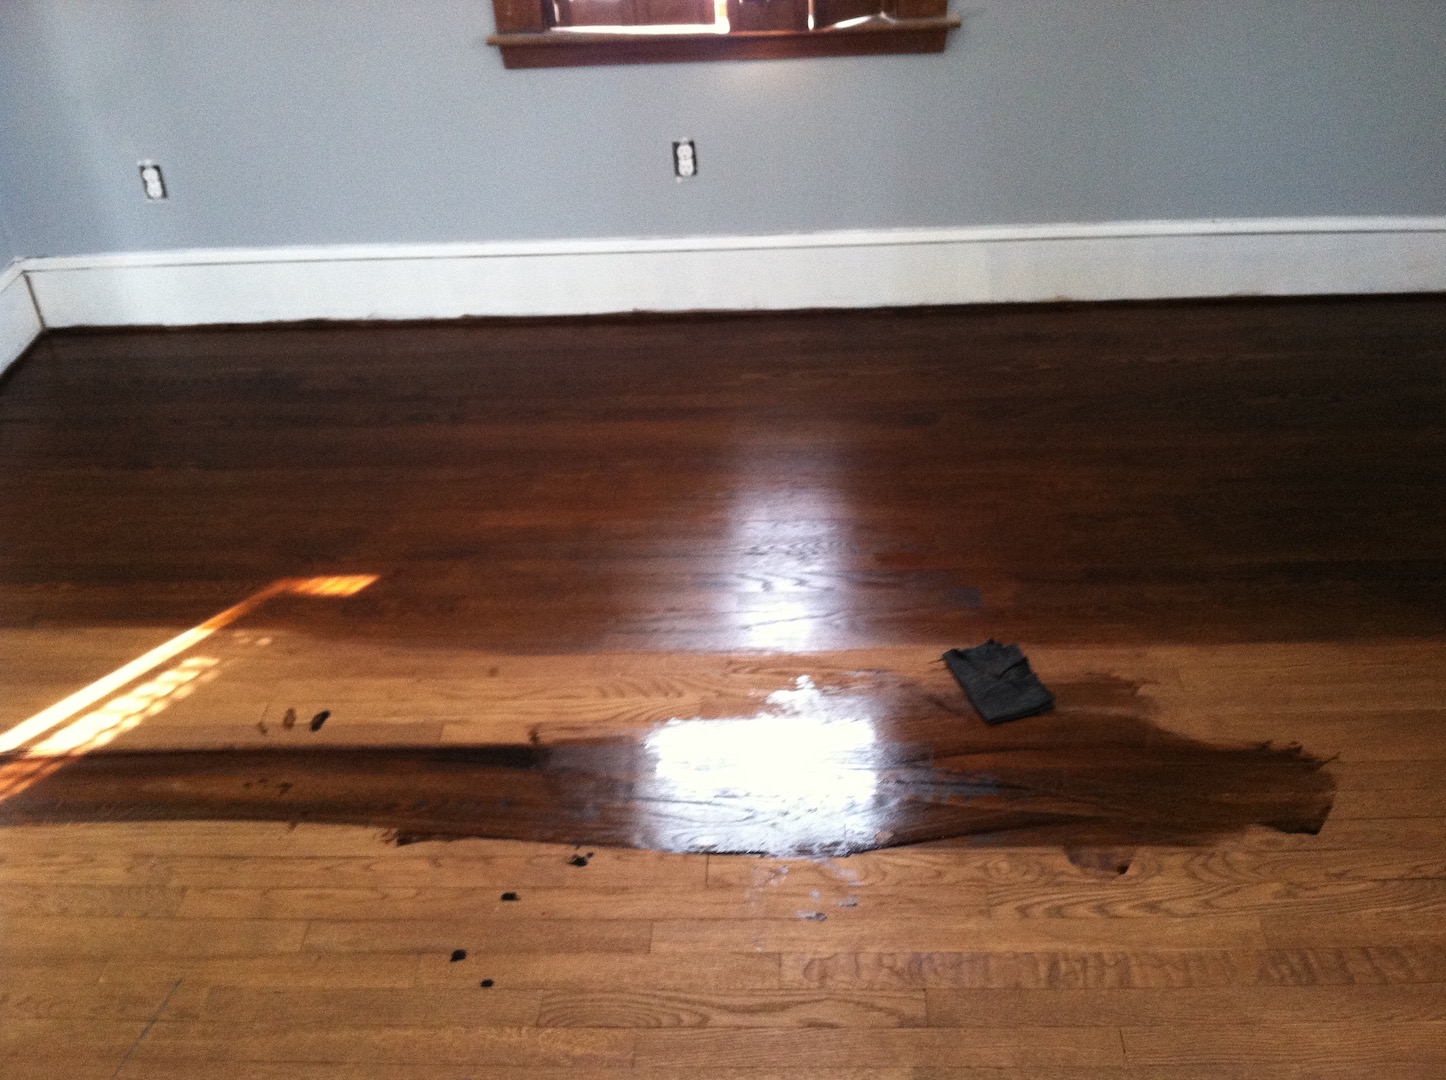
This is crucial. Once you’ve applied the stain to a section, let it sit for a few minutes (check your stain's instructions, but typically 5-15 minutes is a good window). Then, take a clean, lint-free rag and gently wipe away the excess stain, again, always following the grain. This is what reveals the beautiful wood grain and prevents the stain from becoming too dark or clumpy.
The longer you let the stain sit before wiping, the darker the color will be. It's like leaving tea to steep – the longer it steeps, the stronger the flavor. Experiment on a scrap piece first if you’re unsure. This is your chance to control the depth of color.
Building Layers: The Art of Patience
One coat might be enough, but often, you’ll want to apply a second or even a third coat to achieve your desired depth of color. Let the previous coat dry completely according to the manufacturer's instructions before applying the next. This usually takes a few hours, but overnight is often best for a truly deep, rich finish.
Rushing this stage is the fastest way to a blotchy, uneven mess. Think of it like layering a delicious cake; each layer needs to set before you add the next. Patience here will be rewarded with a stunning, professional-looking finish.
The Finishing Touch: Protecting Your Masterpiece
You’ve done it! Your wood is beautifully stained. But it’s not quite ready for its close-up just yet. It needs protection. A clear topcoat, or finish, will seal in the stain, protect the wood from moisture and wear, and give it that final polish. This is like putting a protective shield on your beautiful artwork.
Topcoat Choices: The Guardian Angels of Wood
The most common finishes are polyurethane, polycrylic, and lacquer. Polyurethane is durable and water-resistant, available in oil-based and water-based formulas. Water-based is generally easier to clean up and has less odor. Polycrylic is water-based and dries to a crystal-clear finish, which is great if you want to maintain the truest color of your stain. Lacquer dries very quickly but is often best applied with a spray gun.
For a more natural, matte look, you might consider wax or an oil finish. These require reapplication over time but offer a beautiful, tactile finish that feels very organic. Think of it as the difference between a high-gloss car finish and a soft, matte velvet.

Applying the Protective Hug
Just like staining, application is key. Use a clean, high-quality brush or applicator. Apply thin, even coats, working with the grain. Most finishes require multiple coats, with light sanding between each coat using a very fine-grit sandpaper (320 or higher). This might sound tedious, but it’s what creates that super-smooth, professional feel.
Again, let each coat dry completely before applying the next. Follow the product’s instructions closely. The final coat is your masterpiece’s protective embrace, ready to face the world.
Fun Little Tidbits to Impress Your Friends (or Just Yourself)
- The History of Stain: Did you know that the earliest forms of wood stain were often made from natural materials like berries, roots, and even soot? Imagine foraging for your furniture's color!
- Wood’s Personalities: Different woods take stain differently. Pine, as mentioned, is a bit of a drama queen, absorbing stain unevenly. Oak, on the other hand, has a lovely open grain that takes stain beautifully and evenly. Cherry can be tricky, sometimes looking a bit pinkish if stained too heavily.
- The Smell of Success: Some oil-based stains and finishes have a distinct smell. Opening windows and using fans is not just for ventilation; it’s about making your space smell like progress, not petroleum.
And there you have it! You’ve taken a plain piece of wood and transformed it into something special. It’s a process that’s surprisingly meditative. You’re focused, you’re creating, and you’re bringing a little bit of beauty into your everyday life.
It’s funny, isn’t it? How a simple act of applying a color can feel so profound. In a world that often feels chaotic and rushed, taking the time to deliberately add a layer of beauty, to nurture a material, to craft something with your own hands – it’s incredibly grounding. It’s a small act of defiance against the disposable culture, a quiet assertion of permanence and care. And honestly? That feeling, the quiet satisfaction of a job well done, with your own unique touch – that’s a feeling that stays with you, long after the stain has dried.