How Can I Glue Metal To Metal

Ever found yourself staring at a broken metal contraption, a beloved heirloom, or maybe just a really cool piece of art that’s decided to go its separate ways? You know, that moment of mild panic followed by a flicker of “Can I fix this?” Well, my friend, get ready to unleash your inner MacGyver, because we’re about to dive into the wonderfully wacky world of gluing metal to metal!
Now, before you picture yourself wrestling with industrial-strength epoxies and needing a hazmat suit, let's take a deep breath. Gluing metal might sound a bit… daunting. Like trying to convince two magnets to repel each other, right? But honestly, it’s way more accessible than you think, and it can seriously upgrade your DIY game. Think of all the possibilities! That wobbly chair? That quirky lamp you found at a thrift store that’s missing a crucial bit? That cool metal sculpture you’re almost finished building? Suddenly, these aren’t insurmountable challenges anymore. They’re opportunities for a little bit of magic.
So, How Do You Glue Metal To Metal? The Not-So-Secret Secrets!
Alright, let’s get down to brass tacks, or rather, metal tacks. The key to a successful metal-to-metal bond isn't just slapping some goo on it and hoping for the best. Nope! It’s all about understanding the type of metal you’re working with and choosing the right adhesive for the job. Think of them as dance partners – they need to be compatible to really make things sparkle!
Must Read
Step 1: Know Thy Metal!
This is where a little detective work comes in. Is it shiny stainless steel? Is it a rusty old piece of cast iron? Is it lightweight aluminum? Different metals have different surface properties. Some are naturally a bit greasy (looking at you, stainless steel!), while others are porous. Knowing this helps you pick an adhesive that will actually stick.
Don't worry if you're not a metallurgist. Usually, the item itself will give you clues. If it's a kitchen gadget, it's probably stainless steel. If it's an old garden gnome, it might be cast iron. If you're really unsure, a quick internet search for the item's typical material can be your best friend. Or, you know, a friendly chat with the person who gave it to you!
Step 2: Prep Your Surfaces (The Unsung Hero of Gluing!)
This is HUGE, folks. You wouldn't try to paint a dirty wall and expect a masterpiece, right? Same goes for gluing. You need to get those metal surfaces squeaky clean and a little bit roughed up. This is where the magic really begins to happen.
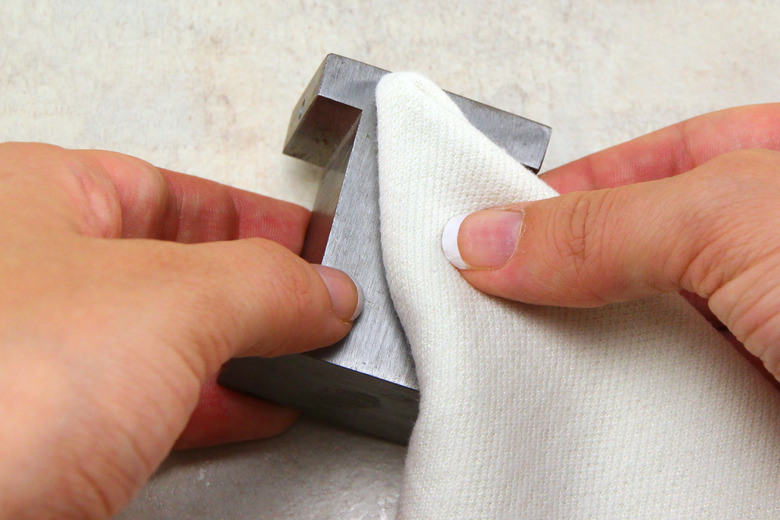
First, cleanliness is king. Grab some rubbing alcohol (isopropyl alcohol is your go-to here) and a lint-free cloth. Give both metal surfaces a good wipe-down. This removes any grease, oil, or grime that might be preventing a strong bond. Think of it as giving your metal pieces a spa treatment before their big date!
Next, a little bit of "tooth". For most strong adhesives, you want a slightly rough surface for them to grip onto. This doesn't mean you need to go at it with a power sander! For smaller projects, a bit of fine-grit sandpaper (like 220 grit or higher) is usually all you need. Just a light scuffing in a crosshatch pattern on both surfaces is enough to create tiny imperfections for the glue to cling to. It’s like giving the glue little handholds! Be gentle, though; we’re not trying to remove material, just create a better surface.
Step 3: Choose Your Adhesive Adventure!
Now for the fun part – picking your weapon of choice! The world of adhesives for metal is surprisingly diverse, and thankfully, many are super user-friendly. Here are a few of the most popular and effective options:
Super Glue (Cyanoacrylate): The Speedy Gonzales
Ah, super glue. The hero of quick fixes and accidental finger-sticking incidents. For small, non-structural repairs where you need a fast bond, super glue is fantastic. It works best on smooth, clean surfaces and is great for things like jewelry repair or reattaching small decorative metal bits. Just remember, it’s brittle, so it's not ideal for items that will experience a lot of stress or flexing.
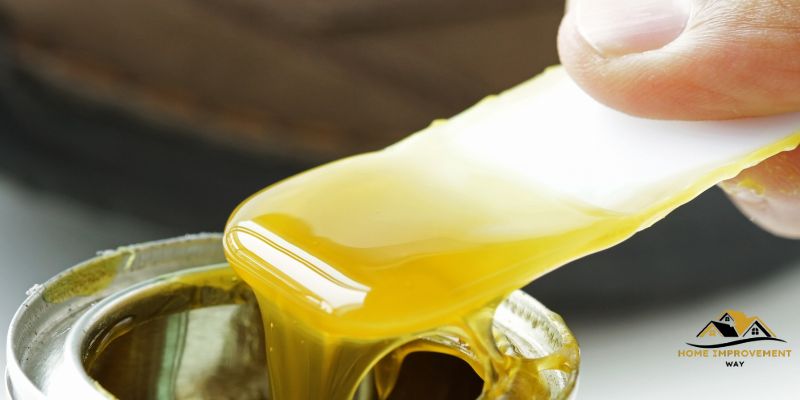
Epoxy: The Power Couple
Epoxy is where things get serious (in a good way!). Usually a two-part system (a resin and a hardener), epoxy creates a super strong and durable bond. You mix them together, and then you have a working time before it sets. This is your go-to for more substantial repairs, like fixing a broken metal tool handle or assembling a metal structure. It fills gaps well and is incredibly tough once cured. There are different types of epoxy, some specifically formulated for metals, so check the packaging!
Metal Adhesives/Bonding Agents: The Specialists
There are also a whole range of adhesives marketed specifically for bonding metal. These often come in handy tubes or cartridges and are designed to provide a strong, flexible, and sometimes even weatherproof bond. They can be a great all-around choice for many DIY projects. They often offer a good balance of strength and ease of use.
Contact Cement: The Two-Sided Hug
This one is a bit different. You apply it to both surfaces, let it dry until it's tacky, and then press them together. The bond is instant and very strong, but you don't get much repositioning time. It's great for applying metal sheeting or decorative metal accents where precise placement is key.

Step 4: The Gluing Ritual!
Once you’ve got your metal prepped and your adhesive chosen, it’s time for the actual gluing. Always, and I mean ALWAYS, read the manufacturer’s instructions on the adhesive packaging. They know their stuff!
Generally, you'll apply a thin, even layer of adhesive to one or both surfaces (depending on the type). Then, carefully align your metal pieces and press them together firmly. For many adhesives, applying some pressure for a specific amount of time is crucial. You might need to clamp the pieces together while the glue cures. A rubber band, a C-clamp, or even a heavy book can work wonders here!
And patience, my friends. Oh, the patience! Let the adhesive cure completely before you stress-test your newly bonded masterpiece. This is the hardest part, but it’s the difference between a lasting fix and a frustrating redo.

Why This Stuff Makes Life More Fun
Okay, so you might be thinking, "Glue? Fun?" And I get it. But honestly, learning these simple skills is incredibly empowering! It’s about taking something broken and giving it new life. It’s about the satisfaction of knowing you fixed it. It’s about the pride you’ll feel when you show off your repaired treasure.
Think about it: you can bring back to life that vintage metal toy your kid loves. You can create unique, personalized metal art. You can even save a little money by fixing things instead of replacing them! It opens up a world of creative possibilities, making you less of a consumer and more of a creator. Plus, the sheer relief of successfully fixing something yourself? Priceless!
Go Forth and Bond!
So, there you have it! Gluing metal to metal isn't some arcane art reserved for rocket scientists. It’s a practical, achievable skill that can bring a little extra joy and capability into your life. Don't be afraid to experiment (safely, of course!). Start with small, low-stakes projects, and you’ll be amazed at what you can accomplish.
The next time you see something metal that needs a little loving attention, don't despair. Grab some supplies, channel your inner fixer, and get ready to make something whole again. You’ve got this! The world of DIY metal repair is waiting for you, and it’s full of exciting discoveries. Happy bonding!